Table of Contents
Advertisement
Advertisement
Table of Contents

Related Manuals for Dish TV T1000


Summary of Contents for Dish TV T1000
-
Page 1: User Manual
User Manual - 1 -... -
Page 2: Table Of Contents
CONTENTS Important Safety Instructions Precautions Identify Your Set Top Box Remote Control 1. Initial Installing 2. Main Menu 2.1 Installation 2.1.1 Channel Filter 2.1.2 Auto search 2.1.3 Manual Search 2.2 Channel 2.2.1 Channel manager 2.2.2 Favorite list 2.3 Preference 2.4 Setting 2.4.1 Timers 2.4.2 Parental Lock 2.4.3 Date time... -
Page 3: Important Safety Instructions
Important Safety Instructions 1. Read, follow and keep these instructions. 2. Do not use this unit near water. 3. Clean only with a damp cloth. Please unplug power prior to cleaning. 4. Do not block any of the ventilation openings. Install in accordance with the manufacturer’s instructions. 5. - Page 4 Precautions Please read these precautions before operating this unit. 1. Power cord protection To avoid any malfunctions of the unit, and to protect against electric shock, fire or personal injury, please observe the following. Hold the plug firmly when connecting or disconnecting the AC power cord. ...
-
Page 5: Identify Your Set Top Box
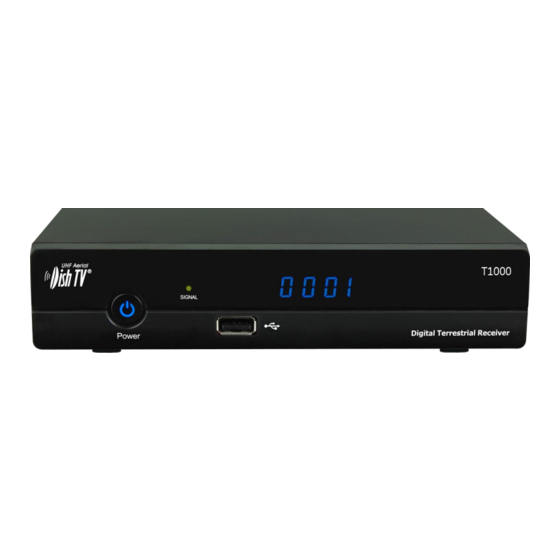
IDENTIFY YOUR SET TOP BOX Front Panel: Rear Panel: - 5 -... -
Page 6: Remote Control
Remote control: 1. POWER: Turn on / off 2. Number Key: <0-9> 3. RECORD: TV Program recording 4. EPG: Electronic Program Guide 5. MENU: Enter main menu 6. Direction keys: Up/down/left/right OK: Confirm selection on operating menu Or hot-key of “QUICK SELECT” in full-screen playing 7. -
Page 7: Initial Installing
CONNECTION TO ANTENNA AND TV 1. Connect aerial cable to the ANT IN interface of your receiver. 2. Connect the receiver to the TV with an AV cable or HDMI cable. 1. Initial Installing Follow the On-Screen instructions to install channels. 1. -
Page 8: Channel Filter
window. 2.1.1 Channel Filter Menu> Installation> Channel Filter Here you have the option to filter out channels. 2.1.2 Country Menu> Installation> Country Change the country option to match the country the user is located 2.1.3 LCN Menu> Installation> LCN (or Logical Channel Numbering) This option turned on or off the logical channel numbering according to the user's preference 2.1.4. -
Page 9: Channel
2.2 Channel Menu> Channel> 2.2.1 Channel Manager Menu> Channel> Channel Manager Four functions are available for setting channels: Lock, delete, skip, rename Lock: Press <Up/Down> to select channel, press “red” key to set lock status. (Default password is 0000). User will need to enter the correct password before watching locked channels. -
Page 10: Preference
2.3 Preference Menu> Preference> OSD Language: Set on-screen language that will be displayed OSD Timeout: Set the length of time banners are displayed (Range between 1-6 Seconds) Time On OSD: Option to turn on or off a permanent clock on screen ... -
Page 11: Timers
2.4.1 Timers Menu> Setting> Timers This option is used for multi-timer recordings and setting a channel to be displayed at certain time and timer standby etc. Recording with this unit will require an external USB hard drive to be connected ... -
Page 12: Parental Lock
2.4.2 Parental Lock Menu> Setting> Parental Lock When entering this option you will be prompted for the password .The default password is 0000 Parental Rating: The default is UNDEF (undefined); this means there is no parental lock. If there is a program with the rating selected (G,PG or AO) you will have to enter the password before the program will be able to be viewed ... -
Page 13: Factory Reset
2.4.4 Factory reset Menu> Setting> Factory Reset This will delete all settings and restore the unit back to the factory default parameter When entering this option you will be prompted for the password .The default password is 0000 ... -
Page 14: Game
2.5 AV Menu> AV> In this menu, you can set the desired audio and video setting of your unit Contrast: select the desired contrast Brightness: select the desired brightness Saturation: select the desired saturation HUE: select the desired hue option ... -
Page 15: Media
3. MEDIA Eight items are included in the media option: Movie, ISO, Music, Photo, Native32/NES Games, Ebook, Record manager and Disk Manager. Note: This option requires an external USB hard drive to be connected. When navigating through the media menu please remember these commands: ... -
Page 16: Photo
3.4 Photo In full picture view, press <up/down/right/left> to turn over picture. Press the <NEXT> or <PREV> keys to view the next or previous picture. Press the <recall> key to stop viewing the pictures and go back to the previous window. 3.5 Record Manager, Games, Disk Manager, Ebook ... -
Page 17: Updated Media
4.2 Updated Media After the network connection succeeds, a "Network" item will be added in the Media function. 4.2.1 Network Once entering into the interface four functions will be available. They are N32, Photo, Google Map and Weather. 4.2.1.1 N32 More game functions are supported after network connection has been successful. -
Page 18: Google Maps
4.2.1.3 Google Maps There are four different parameters to search google maps: State, Country, Province and City. The user can also input a key word of the place in the "search box" to search the map information directly, and then the related map information will be showed on the right of the screen. -
Page 19: Convenient Functions
5. Convenient Functions 5.1 Ways of selecting Program STB provides four ways to select channels. Press <Up/Down> key to change to the next or previous channel Press <OK> to select channel in program list. Press <EPG> to select the channel from the Electronic Program Guide. ... -
Page 20: Media"
5.7 Recording Recording with this unit will require an external USB hard drive to be connected Set to record live TV program. Insert a USB device into USB socket, select a channel the user would like to record and press the <REC>... -
Page 21: Troubleshooting
When recording 1 channel cannot go to another channel Because the T1000 only has 1 tuner this means you can only look at 1 channel group at a time so while you are recording 1 channel you can only watch other channels in the same group. (More details below) - Page 22 Warranty Please keep your receipt as proof of purchase. This product is warranted for any defect in materials or workmanship for one year after the original date of purchase. This product is for normal domestic use only. This warranty does not cover damage from misuse or neglect, accidental damage, vermin infestation, excessive voltages such us lightning or power surges or any alteration that affects the performance or reliability of the product.
Need help?
Do you have a question about the T1000 and is the answer not in the manual?
Questions and answers