Table of Contents
Advertisement
Advertisement
Table of Contents

Subscribe to Our Youtube Channel
Related Manuals for Raymarine SR6


Summary of Contents for Raymarine SR6
- Page 3 , SeaTalk and Sportpilot are registered trademarks of Raymarine UK Limited. RayTalk, Seahawk, Smartpilot, Pathfinder and Raymarine are registered trademarks of Raymarine Holdings Limited. All other product names are trademarks or registered trademarks of their respective owners. Fair Use Statement You may print no more than three copies of this manual for your own use.
-
Page 5: Table Of Contents
3.1 General cabling guidance .......... 16 3.2 Typical system ............17 3.3 SR6 hub — SeaTalk network ........18 3.4 SR6 connection overview .......... 20 3.5 Power connection ............. 21 Chapter 4 Installation ..........23 4.1 Location requirement for Sirius receiver...... 24 4.2 Installation procedure .......... - Page 6 SR6 Sirius Receiver...
-
Page 7: Chapter 1 Introduction
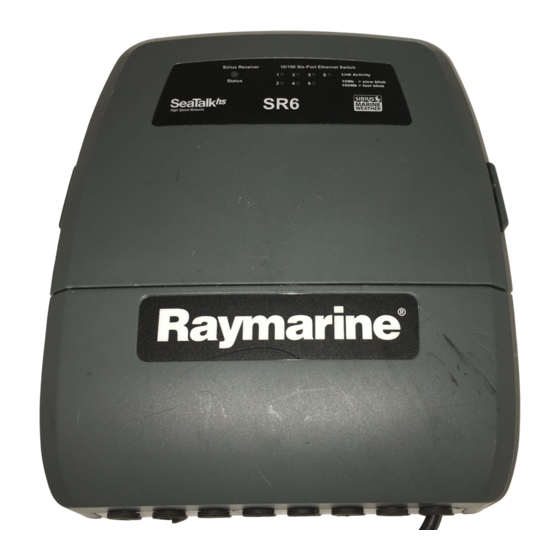
Chapter 1: Introduction SR6 Receiver The Raymarine SR6 is a combined 6 port SeaTalk hub and Sirius weather / audio service receiver. Handbook information This guide provides information for installation of your Raymarine SR6 Sirius receiver and network hub. The key functions of the SR6 are: •... -
Page 8: Important Information
Sirius unless instructed in this document. Satellite Radio Inc., WSI, Navcast Incorporated, and Raymarine with regard to this service. Warning: Potential ignition source... -
Page 9: Emc Installation Guidelines
7 ft (2 m). equipment. Whilst the WEEE Directive does not apply to some Raymarine products, we support its policy and ask you to be aware – More than 2 m (7 ft) from the path of a radar beam. A radar of how to dispose of this product. -
Page 10: Cleaning
Note: Do NOT use abrasive, or acid or ammonia based products. Warranty registration To register your Raymarine product ownership, please take a few minutes to fill out the warranty registration card found in the box, or visit www.raymarine.com... -
Page 11: Chapter 2 Parts And Accessories
Chapter 2: Parts and accessories Chapter contents • 2.1 Parts supplied on page 12 • 2.2 Tools Required on page 13 Parts and accessories... -
Page 12: Parts Supplied
Raymarine multifunction display. D11915-1 SR6 Sirius receiver (with 2 m (6.6 ft) power cable attached) 2 x #10 stainless steel 3/4 inch self-tapping screws 16 x cable entry grommets (see separate table below) 2 x 2 m (6.6 ft) audio cable (terminated with 3.5 mm stereo jack... -
Page 13: Tools Required
2.2 Tools Required D11908-1 Drill 7/64” Drill bit Phillips screwdriver Parts and accessories... - Page 14 SR6 Sirius Receiver...
-
Page 15: Chapter 3 Cables And Connections
3.1 General cabling guidance on page 16 • 3.2 Typical system on page 17 • 3.3 SR6 hub — SeaTalk network on page 18 • 3.4 SR6 connection overview on page 20 • 3.5 Power connection on page 21 Cables and connections... -
Page 16: General Cabling Guidance
• Unless otherwise stated use only standard cables of the correct type, supplied by Raymarine. Strain relief • Ensure that any non-Raymarine cables are of the correct quality Ensure adequate strain relief is provided. Protect connectors from and gauge. For example, longer power cable runs may require strain and ensure they will not pull out under extreme sea conditions. -
Page 17: Typical System
3.2 Typical system D11916-1 Compatible multifunction display. (Connected using SeaTalk Antenna (not supplied with the SR6) SR6 Sirius Receiver Ship’s audio amplifier (Connected using the supplied audio cable) Power Supply (Connected with the supplied flying lead) Cables and connections... -
Page 18: Sr6 Hub - Seatalk
(e.g. SR6) 3. Digital sounder (DSM) 4. Digital radar scanner • Use a SeaTalk network cables to connect the SR6 to your • Use SeaTalk patch cables for connections to equipment without multifunction display. These have a waterproof connector at one a waterproof connector. - Page 19 SeaTalk network cables Cable Part number 1.5 m (4.9 ft) SeaTalk network cable E55049 5 m (16.4 ft) SeaTalk network cable E55050 10 m (32.8 ft) SeaTalk network cable E55051 20 m (65.6 ft) SeaTalk network cable E55052 SeaTalk patch cables Cable Part number 1.5 m (4.9 ft) SeaTalk...
-
Page 20: Sr6 Connection Overview
3.4 SR6 connection overview • Connections can only be made with the unit unmounted. The bottom cover is secured with screws into the rear of the unit. The connectors are located by removing the bottom cover. • Connections must be made through the appropriate grommets. -
Page 21: Power Connection
If a bonded ground system is not possible, a non-bonded RF ground may be used. The SR6 can be connected to a DC power supply of 12 or 24 V. Bonded ground system (preferred) There is no power switch on the SR6 Sirius weather receiver, it automatically turns on when the system is powered. - Page 22 In any grounding system, always keep the length of connecting braid or wires as short as possible. Important: Do NOT connect this product to a positively-grounded power system. References • ISO10133/13297 • BMEA code of practice • NMEA 0400 SR6 Sirius Receiver...
-
Page 23: Chapter 4 Installation
Chapter 4: Installation Chapter contents • 4.1 Location requirement for Sirius receiver on page 24 • 4.2 Installation procedure on page 24 • 4.3 Activate the Sirius receiver on page 26 Installation... -
Page 24: Location Requirement For Sirius Receiver
• Allow a minimum 30 cm (6 in) space below the unit to ensure adequate space for cable bends and connections. D11912-1 2. Remove the bottom cover. This is secured with 3 screws at the rear of the unit. SR6 Sirius Receiver... - Page 25 4. Connect the unit to the power supply using the hard wired lead. 5. Replace the bottom panel, taking care with the rubber seal, and replace the three screws. 6. Secure the SR6 unit in place using the 2 self tapping screws provided. D11913-1 After installation you will need to activate your Sirius receiver for use with the Sirius subscription service.
-
Page 26: Activate The Sirius Receiver
• on the carton in which the unit was packed, • on your multifunction display, via the weather application setup menu. Contact Sirius with this ID to activate your system. Sirius support • Sirius marine weather website: www.sirius.com/marineweather • Telephone: 1–800–869–5480 SR6 Sirius Receiver... -
Page 27: Chapter 5 Troubleshooting And Support
Chapter 5: Troubleshooting and support Chapter contents • 5.1 Status LED on page 28 • 5.2 Raymarine technical support on page 28 Troubleshooting and support... -
Page 28: Raymarine Technical Support
No Sirius signal / Antenna disconnected www.raymarine.com This contains Frequently Asked Questions, servicing information, 3X flashing red Antenna short circuit fault e-mail access to the Raymarine Technical Support Department and Other flashing red Receiver failure details of worldwide Raymarine agents. Telephone support... -
Page 29: Appendix A Technical Specification
Appendix A Technical specification Nominal supply voltage 12 or 24 Vdc Operating voltage range +9 to 32 Vdc Power / Current • Power: 8 W • Typ. current: 0.62 A @ 12 V Environmental Installation environment • Operating temperature: –15 °C to 55 °C (5 °F to 131 °F) •... - Page 30 SR6 Sirius Receiver...
- Page 32 www.ra ym a rin e .c o m...
Need help?
Do you have a question about the SR6 and is the answer not in the manual?
Questions and answers