
Subscribe to Our Youtube Channel
Related Manuals for KYMCO Sento 50


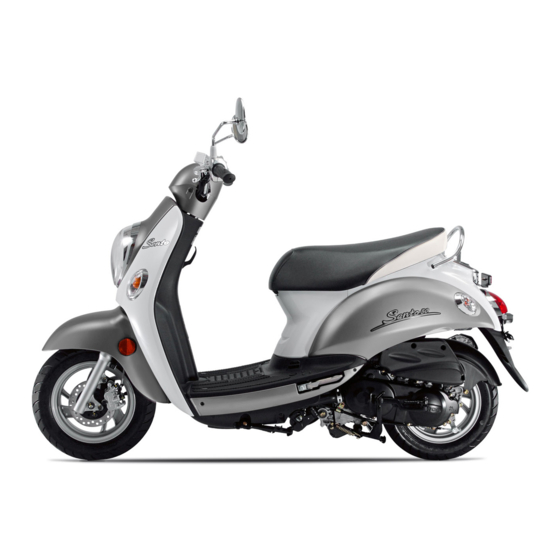
Summary of Contents for KYMCO Sento 50
- Page 1 Do not remove this Owner’s Manual from the vehicle. Read this manual carefully before operating the vehicle as it contains important safety information.
- Page 2 Read this manual carefully. This Owner’s Manual contains important information on safety, operation and maintenance of your KYMCO Sento scooter. Any one who operates your scooter should carefully read and understand the contents of this manual before riding the scooter.
-
Page 3: Table Of Contents
Specifications ....................49 Break-in Recommendations ............... 16 Emission Information & EP A Warranty ............50 Tire Break-in ....................17 KYMCO Limited Scooter W arranty ............51 Pre-ride Inspection ................18 -25 Engine Oil Inspection ................. 19 Index ......................52 Brake Inspection .................. 19 - 20... -
Page 4: Section 1 - Safety
Due to improvements or other changes, there may be information in this manual that differs slightly from your vehicle. KYMCO reserves the right to make product and publication changes at any time, without notice, and without incurring any obligation. -
Page 5: Scooter Safety
Y ou will find many helpful recommendations throughout this approved by KYMCO for this scooter . manual. Here are some very important safety tips: Inspect your scooter before riding... -
Page 6: Scooter Safety ......................................................................................... 3
SCOOTER SAFETY PROTECTIVE APPAREL 3 3 3 3 3 For your safety, always wear an approved motorcycle or scooter 2 2 2 2 2 helmet, eye protection, boots, gloves, long pants, and a long- sleeved shirt or jacket whenever you ride your scooter . 1 1 1 1 1 4 4 4 4 4 Helmets and protection... -
Page 7: Load Limits & Guidelines
LOAD LIMITS & LOADING GUIDELINES These general guidelines may help you decide how to add accessories to your scooter and how to load it properly . Load limits These specifications are the load limits for your Sento scooter. Overloading the scooter will affect its stability and handling, be sure to stay within the limits given below: Maximum weight capacity (Includes the weight of the rider, passenger, cargo and accessories): .. -
Page 8: Accessories & Modifications
ACCESSORIES & MODIFICATION There is a large variety of accessories available to KYMCO scooter owners. KYMCO cannot have direct control over the quality or suitability of accessories you may wish to purchase. The addition of unsuitable accessories to your scooter can lead to unsafe operating conditions. -
Page 9: Section 2 - Controls & Features
SECTION 2 - CONTROLS & FEATURES Location of parts & controls 4 4 4 4 4 3 3 3 3 3 AT AT AT AT AT 9 9 9 9 9 2 2 2 2 2 5 5 5 5 5 8 8 8 8 8 AK AK AK AK AK 6 6 6 6 6... -
Page 10: Keys
CONTROLS & FEATURES Ignition switch Keys Your Sento scooter is supplied with two identical ignition switch keys 1. The ignition key operates the ignition switch, the steer- ing lock, and the fuel filler cap, and is used to open the seat to gain access to the center compartment. -
Page 11: Right-Hand Handlebar Switch
CONTROLS & FEATURES Right handlebar switch " "Position: To lock the steering, turn the handlebar all the way to the left, push 1 1 1 1 1 down and turn the key to the " " position and remove the key. All electrical circuits are off and the key can be removed. -
Page 12: Left-Hand Handlebar Switch
CONTROLS & FEATURES Left handlebar switch 3 3 3 3 3 4 4 4 4 4 6 6 6 6 6 7 7 7 7 7 5 5 5 5 5 8 8 8 8 8 9 9 9 9 9 Dimmer switch -UP 3 3 3 3 3 : Turn signal switch: "... -
Page 13: Turn Signals
North American market models Your Sento scooter is equipped with an under-seat storage com- In most markets the Sento 50’s turn signals are mounted di- rectly to the scooter’s body panels. However, the turn signals partment that permits you to secure your helmet or other items. -
Page 14: Helmet Posts
CONTROLS & FEATURES Main stand (center stand) Helmet posts Your Sento scooter has two helmet posts AT so you can secure Your Sento scooter is equipped with a main (center) stand. your helmet(s) outside of the under-seat storage compartment. AT AT AT AT AT With the seat up, put the helmet’s retaining ring onto the helmet post. -
Page 15: Instruments
CONTROLS & FEATURES Instruments 3 3 3 3 3 Odometer: Indicates the total riding mileage of the scooter. (U.S. market) 4 4 4 4 4 High Beam Indicator Light: This light is illuminated when 3 3 3 3 3 the headlight high beam is on. 2 2 2 2 2 5 5 5 5 5 Turn Signal Indicator Light: Flashes when either turn signal is being used. -
Page 16: Security Combination Lock
1. Record the security combination code in this manual. If you fail to document the code, only your KYMCO au- NOTE: This unique combination code is not stamped on the thorized dealer will be able to replace the security de- scooter and is not recorded in the vehicle's basic documen- vice (it cannot be reprogrammed). -
Page 17: Passenger Pegs
CONTROLS & FEATURES Passenger foot pegs Your Sento scooter is equipped with additional pegs for use when you are carrying a passenger. Riding with a passenger will change the handling char- acteristics of your scooter. Allow for extra braking dis- tance and use extra care when riding in traffic. -
Page 18: Section 3 - Operation
SECTION 3 - OPERATION Break-in recommendations The first 600 miles (1,000 km) of riding are the most important on these components during break-in to ensure this mating in the life of your scooter. Proper break-in operation during process. Do not, however, apply excessive load on the scooter's this time will help ensure maximum life and performance from drive line. -
Page 19: Tire Break-In
Unless you have formal training as a service techni- cian and have access to KYMCO technical reference materials, it is strongly suggested that you have the initial service performed by a KYMCO dealer. -
Page 20: Pre-Ride Inspection
If you detect any problem, be sure to address it im- 8. Chassis: Check for overall proper function (page25). mediately, or have it corrected by your KYMCO dealer. Improperly maintaining your scooter or failing to cor- rect a problem before riding can cause a crash in which Performing pre-ride inspections does not take the place you can be seriously hurt or killed. -
Page 21: Engine Oil Inspection
OPERATION PRI - Engine oil level inspection NOTE: Park your scooter on the main stand, on level ground. Use extreme caution when performing the oil level in- 1 1 1 1 1 spection or any other checks if the scooter’s engine has been recently run. - Page 22 For appropriate brake action, make sure the groove of the The brakes will wear quickly if the lever is continually ap- adjusting nut is aligned with the pin in the brake arm. plied during riding (dragging the brake). Consult your KYMCO dealer for braking system service.
-
Page 23: Tire Inspe Ction
OPERATION PRI - Tire inspection The condition of your scooter’s tires is vital for operational ef- ficiency and your safety. Check the tires’ inflation pressure, the tread depth, and for damage before each ride. 1 1 1 1 1 2. Inspect the tires for nails, screws and other objects 1 that may be imbedded into the rubber. -
Page 24: Fuel Level / Filler Cap
Use unleaded gasoline with a research octane number of 91 safety. or higher. Unleaded gasoline will extend spark plug life. Consult your KYMCO dealer for replacement tire service. PRI - Fuel level inspection / Refilling Do not overfill the tank. There should be no fuel in the When the fuel level gauge needle approaches “E”... -
Page 25: Steering & Handlebar Inspection
2. Do the indicator lights (turn signal, for example) function? 3. Does the speedometer needle move as the scooter moves? NOTE: Contact your KYMCO dealer for repair of your scooter’s instruments if they are not functioning prop- 1. Visually inspect the handlebars 1 for any damage. -
Page 26: Horn & Lights Inspection
The turn signals indicate your turning intentions. Because all of these systems are vital safety items, con- tact your KYMCO dealer for replacement bulbs or elec- trical system service or repair should there be any mal- functions. -
Page 27: Chassis Inspection
OPERATION PRI - Chassis inspection Front suspension & rear shock absorber: Check the op- Complete the pre-ride inspection of your scooter by checking eration of the suspension by pressing down on the handlebars items on its chassis. and seat. Make sure the suspension returns in a smooth fash- ion. -
Page 28: Starting The Engine (Electric Start)
OPERATION Starting the engine (electric start) To start your scooter using the electric starting motor, follow The brake must be adjusted and functioning properly this procedure: to lock the rear wheel during starting or the scooter NOTE: Before starting, check could accelerate away when the engine starts. -
Page 29: Starting The Engine (Kick Start)
If the scooter does not start, contact your KYMCO dealer as your scoooter may need to have its fuel 4. While squeezing the rear brake lever, kick down on the system cleaned and adjusted. -
Page 30: Riding Your Scooter
OPERATION Riding your scooter NOTE: After starting, allow the engine oil to circulate be- fore riding your scooter. Allow sufficient idling time after warm or cold engine start-up before applying load or rev- ving the engine. This allows time for the lubricating oil to reach all the critical engine components. - Page 31 OPERATION Use the scooter’s turn signals to signal your intention to merge into traffic. Always scan around you and in the rear view mirrors so you are aware of other traffic. Use caution as you merge into traffic, keeping to the right until you match the pace of the traffic.
- Page 32 OPERATION 7. When riding and turning the scooter, use smooth move- ments. NOTE: At certain speeds your scooter will turn more effectivly from leaning your body, rather than pressure on the handlebars. Practice steering in an open area free of traffic until you are familr with the handling charteristics of your scooter.
- Page 33 OPERATION 9. When you stop the scooter, press the center of the turn signal indicator switch to cancel the signal flashing. Turn the ignition switch to the “ “ position to stop the engine and turn off the scooter’s electrical system. Reduce your speed when riding your scooter in the rain.
-
Page 34: Parking Your Scooter
OPERATION Parking your scooter Use the following procedure and suggestions when parking The scooter may fall over if it is not parked on level your scooter. ground. Make sure flammable materials such as dry grass or leaves do not come in contact with the exhaust system when parking your scooter. -
Page 35: Section 4 - Maintenance
If your scooter tips over or becomes involved in a crash, nomical and trouble-free riding. It will also help reduce air pol- be sure your KYMCO dealer inspects all major parts, lution and maximize fuel economy . even if you are able to make some repairs. -
Page 36: Maintenance Schedule
* Should be serviced by your KYMCO dealer , unless you have the proper tools, service data and are technically qualified. * * In the interest of safety , we recommend these items be serviced only by your KYMCO dealer . KYMCO USA recommends that your KYMCO dealer road test your scooter after each periodic maintenance service is completed. - Page 37 MAINTEN ANCE Maintenance schedule - Sento 50 MILEAGE 200 mi 600 mi 1850 mi 3100 mi 4300 mi 5500 mi 7000 mi Pre-ride inspection page 300 km 1000 km 3000 km 5000 km 7000 km 9000 km 11000 km ITEM...
-
Page 38: Tires
MAINTEN ANCE Tires NOTE: Check the tire inflation pressure and tire tread con- dition at the periods listed in the periodic maintenance Failure to follow these warnings may result in an acci- schedule. For maximum safety and good tire life, the tire dent due to tire failure. -
Page 39: Air Filter Maintenance
1 1 1 1 1 1 1 1 1 1 2 2 2 2 2 6. Install the cleaned or new air cleaner element. Use the KYMCO 1 1 1 1 1 genuine air cleaner element or an equivalent air cleaner ele-... -
Page 40: Fuel Hoses
Replace any fuel system component that are leaking fuel. ously injure you. Wear protective clothing and a face Contact your KYMCO dealer for fuel system service and shield, or have a qualified technician perform the bat- repairs. -
Page 41: Fuses
Serious damage to the electrical system or a fire circuit or an overload in the electrical system. hazard may result, causing a dangerous loss of lights or engine power. NOTE: See your KYMCO dealer for electrical system diagnosis and repair. -
Page 42: Engine Oil
MAINTEN ANCE Engine oil Engine oil recommendation Use a premium quality 4-stroke engine oil to ensure longer The engine and related components can become very hot. service life of your scooter. Only use oils that have a SJ rating Use care when inspecting or adjusting the oil level to avoid per the API service classification. - Page 43 MAINTEN ANCE 3. Replace the drain bolt 1. Tighten it to the specified torque. Oil drain plug torque: 18 lb-ft (25 N-m) 4. Add engine oil through the oil filler/dipstick hole. Engine oil capacity: 0.85 qt (0.8 L) Engine oil viscosity: SAE 15W-40 1 1 1 1 1 Do not overfill the engine with oil.
-
Page 44: Transmission Fluid Inspection & Change
MAINTEN ANCE Transmission f luid change 1. Place the scooter on its main stand. 3. After the fluid has drained out, reinstall the drain bolt with a new sealing washer and tighten it to the specified torque. Transmission fluid drain bolt torque: 15 lb-ft (20 N-m) 4. -
Page 45: Spark Plug
(usually a higher der cap. Remove the cap. number; consult with your KYMCO dealer when 2. Add the specified type of brake fluid to bring the level up to selecting an alternate spark plug). -
Page 46: Cleaning Your Scooter
MAINTEN ANCE Cleaning Washing your scooter Clean your scooter regularly to protect the surface finishes 1. Rinse the scooter thoroughly with cool water to remove any and inspect for damage, wear , and oil, coolant or brake fluid loose dirt. leakage. - Page 47 MAINTEN ANCE Removing r oad salt 4. After cleaning, rinse the scooter thoroughly with plenty of The salt used in some communities to prevent road icing can clean water. This rinsing is required to remove detergent residue which can corrode alloy parts. become very corrosive to your scooter .
-
Page 48: Storage
MAINTEN ANCE STORAGE GUIDE 3. To prevent rusting in the cylinder , perform the following: Extended storage, such as for the winter months, requires that Remove the spark plug cap from the spark plug, and use tape you take certain steps to reduce the ef fects of deterioration or string to secure the cap to any convenient plastic body part from the non-use of your scooter. - Page 49 Removal fr om stor age 1. Uncover and clean the scooter . 2. Change the engine oil if more than 1 month has passed since the start of storage. 3. Charge the battery as required (use a quality charger de- signed for use on a maintenance-free type battery).
-
Page 50: Maintenance Record
MAINTEN ANCE RECORD DATE MILEAGE S ERVICE PERFORMED & NO TES... -
Page 51: Specifications
SPECIFICATIONS - SENT O 50 Dimensions Chassis Overall length ..........67 in (1700 mm) Tire size, front ............90/90-10 Overall width ..........28 in (710 mm) Tire size, rear............90/90-10 Overall height ..........41 in (1050 mm) Chassis material ............Steel Wheel base .......... -
Page 52: Emission Information & Ep A Warranty
Do not modify the engine ,intake or exhaust components, as doing so will affect compliance these noise level requirements. Please do not modify or change any KYMCO-designed components that may alter the sound or emission level from your Sento scooter. -
Page 53: Kymco Limited Scooter W Arranty
KYMCO LIMITED WARRANTY... -
Page 54: Index
Spark Plug ............. 43 Keys ................. 8 Chassis Inspection ..........25 Specifications ............49 KYMCO Limited Scooter W arranty ...... 51 Cleaning Your Scooter ........44 - 45 Starting the Engine (electric start) ....26 - 27 Left-hand Handlebar Switch ......... 10 Electric Start Button .......... -
Page 55: Identification Numbers Record
The ignition switch key identification code is stamped on tab 1 supplied with the key. If you require a replacement key, you will need this code to obtain a new key from your authorized KYMCO dealer. Record the key number in the box above. - Page 56 5 Stan Perkins Road Spartanburg, SC 29307 Telephone: (888) 235-3417 FAX: (864) 327-4745 Prepared: July 2008 T300-SD10RA-US-5...
Need help?
Do you have a question about the Sento 50 and is the answer not in the manual?
Questions and answers