JVC TH-R1 Instructions Manual
Jvc dvd digital cinema system instructions
Hide thumbs
Also See for TH-R1:
- Instructions manual (100 pages) ,
- Service manual (73 pages) ,
- Schematic diagrams (26 pages)
Table of Contents
Advertisement
Advertisement
Table of Contents

Related Manuals for JVC TH-R1


Summary of Contents for JVC TH-R1
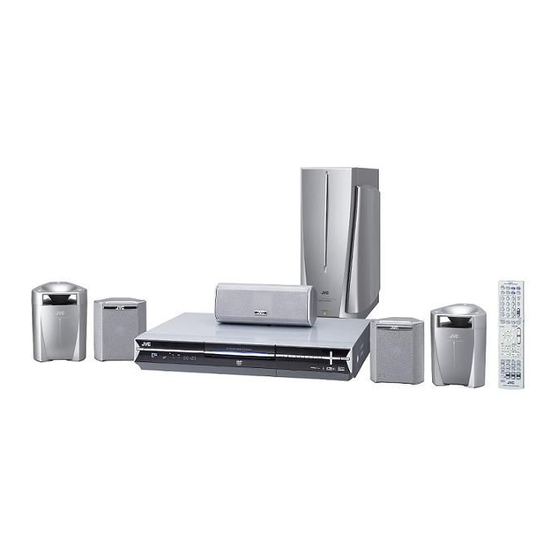
- Page 1 DVD DIGITAL CINEMA SYSTEM TH-R1 Consists of XV-THR1, SP-PWR1, SP-THS55F, SP-THS55C and SP-THS55S TH-R3 Consists of XV-THR3, SP-PWR3, SP-THS66F, SP-THS66C and SP-THS66S INSTRUCTIONS ENTER SOURCE ENTER SOURCE LVT1352-003A [EK]...
-
Page 2: Safety Precautions
SAFETY FIRST Safety Precautions The rating plate and the safety caution are on the rear of the unit. WARNING: DANGEROUS VOLTAGE INSIDE WARNING: TO PREVENT FIRE OR SHOCK HAZARD, DO NOT EXPOSE THIS UNIT TO RAIN OR MOISTURE. CAUTION: A UNIT IS A CLASS 1 LASER PRODUCT. HOWEVER THIS UNIT USES A VISIBLE LASER BEAM WHICH COULD CAUSE HAZARDOUS RADIATION EXPOSURE IF DIRECTED. - Page 3 DISCLAIMER OF LIABILITY JVC shall not be liable for any loss relating to the unit’s failure to properly record, store or playback any content (video, audio or otherwise) for any reason whatsoever. Any applicable warranties shall only cover replacement or repair of the effected unit, and shall not apply to recovery or replacement of lost content.
-
Page 4: Some Do's And Don'ts On The Safe Use Of Equipment
SAFETY FIRST CAUTION: Proper Ventilation To avoid risk of electric shock and fire and to protect from damage, place the apparatus on a level surface. The minimal clearances are shown below: Wall or XV-THR1/ obstructions XV-THR3 3 cm Wall or SP-PWR1/ obstructions SP-PWR3... -
Page 5: Table Of Contents
DISC INFORMATION About Discs ...2 INDEX INSTALLING YOUR NEW UNIT Connecting The TV And TV Antenna...13 Connecting The FM And AM Antennas...14 Assembling The Front And Surround Speakers...15 Connecting The Satellite (Front, Center, Surround) Speakers ...16 Connecting The Powered Subwoofer ...17 Connecting To A Digital Component...17 Connecting The Power Cord...17 Speaker Layout ...17... -
Page 6: Disc Information
● Recording and playback may not be performed depending on the characteristics and condition of the disc used, leading to unsatisfactory results. Using discs manufactured by JVC is recommended since they have been tested to be compatible with this unit. - Page 7 Discs For Playback Only You can use discs with the following logos for playback only. DVD VIDEO Video CD/Super Video CD (example of region code indications) Audio CD CD-DA files CD-RW CD-DA/JPEG/ MP3 files ● Playback may not be performed depending on the characteristics and condition of the disc used.
-
Page 8: Recording Medium And Format
DISC INFORMATION Recording Medium And Format DVD-RAM ● Recording and erasing can be performed as many times as possible on a disc. ● Editing can be performed after recording, such as deleting unwanted parts. ● While recording, it is possible not only to start playback of a programme currently being recorded, but also to watch another programme previously recorded. - Page 9 DVD VIDEO Marks Sometimes marks are printed on a DVD disc and/or on its packaging to indicate information regarding the contents and functions of the disc. Check the marks indicating the contents and functions of the disc. Note, however, that in some cases a disc may not include a mark even for a function it supports.
- Page 10 DISC INFORMATION Care And Handling Of Discs How to handle discs When handling a disc, do not touch the surface of the disc. Since discs are made of plastic, they are easily damaged. If a disc gets dirty, dusty, scratched or warped, the images and sound will not be picked up correctly, and such a disc may cause the unit to malfunction.
-
Page 11: Front View
Front View A Standby/On Button (A) B Disc tray C Eject Button (M) A pg. 5 D Play Button (I) A pg. 24 E Stop Button (o) A pg. 24 F Record Button (R) A pg. 38 G Enter Button (ENTER) A pg. 27 H Volume Button (VOL +/–) A pg. - Page 12 INDEX Front Display Panel TV DIRECT VPS/PDC R SW RESUME RS LFE 96/24 DSP A TV DIRECT Indicator A pg. 30 B Source signal indicators, etc. Light to indicate the incoming signals. : Lights when the left channel signal is detected. : Lights when the center channel signal is detected.
-
Page 13: Remote Control
Remote Control OPEN/ CLOSE TV/VIDEO FM/AM PQRS WXYZ CANCEL MEMORY MARK SHOWVIEW/ VIDEO Plus+ SATj SETTING SURROUND NAVIGATION TOP MENU PTY SEARCH ENTER MENU RETURN RDS DISPLAY STOP/ CLEAR PLAY TA/NEWS/INFO TUNING DISPLAY ON SCREEN REC MODE/ REMAIN AUDIO SUBTITLE PROGRESSIVE FM MODE TEST TONE... -
Page 14: Center Unit
INDEX Check Contents CHECK ALL THE CONTENTS SHOWN BELOW Center Unit RF Cable 21-pin SCART Cable AM Loop Antenna DVD Video Recorder (XV-THR1/XV-THR3) ENTER RAM/RW AAAB Batteries (x 2) FM Antenna System Cord OPEN/ CLOSE TV/VIDEO FM/AM PQRS WXYZ SOURCE CANCEL MEMORY PULL-OPEN... -
Page 15: Speaker Unit
CHECK ALL THE CONTENTS SHOWN BELOW Speaker Unit TH-R1 SP-THS55S Surround Speaker ( TH-R3 Front Speaker SP-THS66F ) X 2 Speaker Cord 10 m X 2 4 m X 3 Subwoofer SP-PWR1 SP-PWR3 ) X 2 SP-THS55F Front Speaker (... -
Page 16: On-Screen Display
INDEX On-Screen Display When ON SCREEN on the remote control is pressed, various operational indicators appear on the TV screen. To clear the operational indicators, press ON SCREEN twice. When playing back a recorded title DVD-VIDEO LPCM 2ch TITLE1 A Disc type B Audio mode C Current status (playback) D Playback title number... -
Page 17: Installing Your New Unit
Connecting The TV And TV Antenna To [TV ANTENNA IN] Back of unit To [L-1 INPUT/ OUTPUT] To [TV ANTENNA [COMPONENT OUT] VIDEO OUT (Y/P Component video cable (not supplied) RF cable (supplied) To 75 ohm terminal It’s essential that your unit be properly connected. ATTENTION: ●... -
Page 18: Connecting The Fm And Am Antennas
INSTALLING YOUR NEW UNIT Connecting The FM And AM Antennas 8 AM loop antenna Setting up supplied AM loop antenna If the antenna cord is covered with the insulation coat, twist and pull off the insulation coat to remove. Connecting AM loop antenna Center unit Antenna cord White... -
Page 19: Assembling The Front And Surround Speakers
This page is for TH-R3 Assembling The Front And Surround Speakers The following procedure explains the front speaker assembly. The assembly of both the front and surround speakers are done in the same manner. Front speaker Surround speaker (x2) (x2) Before assembling^ ●... -
Page 20: Connecting The Satellite (Front, Center, Surround) Speakers
INSTALLING YOUR NEW UNIT Connecting The Satellite (Front, Center, Surround) Speakers Before connecting the speaker cords; Twist and pull the insulation coat off and remove. TH-R1 Front speakers SP-THS55F Powered subwoofer SP-PWR1 Center speaker SP-THS55C The satellite speakers are equipped with their speaker cords attached directly to their speaker unit instead of having speaker terminals on their cabinet. -
Page 21: Connecting The Powered Subwoofer
Connecting The Powered Subwoofer Center unit System cord (supplied) Align the J marks. NOTE: The way of connecting the system cord varies depending on the type of the powered subwoofer. Connecting To A Digital Component You can enjoy the sound of a digital component. Digital coaxial cord (not supplied) To digital coaxial... -
Page 22: Initial Settings
INITIAL SETTINGS Auto Set Up Auto Channel Set/Auto Clock Set/Auto Guide Programme Number Set After the A button on the unit (or AUDIO A on the remote control) is pressed for the first time to turn on the unit, the Auto Set Up function sets the tuner channels, clock and Guide Programme numbers automatically. -
Page 23: Preset Download
Preset Download Auto Channel Set by Downloading from TV/Auto Clock Set/Auto Guide Programme Number Set ATTENTION: You can use this function only with a TV offering T-V Link, etc.* Be sure to use a fully-wired 21-pin SCART cable. * Compatible with TVs offering T-V Link, EasyLink, Megalogic, SMARTLINK, Q-Link or DATA LOGIC via a fully-wired 21-pin SCART cable. - Page 24 PDC signal. If you want to take advantage of this function, simply set AJUST CLOCKB to AONB. (A pg. 81) If you have any difficulty with the above procedures call the JVC Customer Service Hot Line on 0870 330 5000. T-V Link Functions When you connect the unit to your TV via a fully-wired 21-pin SCART cable (A pg.
-
Page 25: Language
Language ● Turn on the unit. ● Turn on the TV and select an input mode such as EXT1. ● Set the remote control selector switch to AUDIO. ● Press DVD on the remote control. Menu/Audio/Subtitle Language Set Some DVD discs contain the DVD menu display, audio and subtitles in multiple languages. -
Page 26: Speaker Set
INITIAL SETTINGS Speaker Set To obtain superior sound effects, you need to perform the speaker and subwoofer setting after all connections have been completed. ● Turn on the unit. ● Set the remote control selector switch to AUDIO. ● Press DVD on the remote control. SMART S.SET UP Smart Surround Setup The distance from the listening position to the speakers is one of... - Page 27 ● Turn on the unit. ● Turn on the TV and select an input mode such as EXT1. ● Set the remote control selector switch to AUDIO. ● Press DVD on the remote control. There is a time limit when performing the following setting. If the time is up before completing the setting, re-perform from the beginning.
-
Page 28: Basic Operations On Dvd Deck
BASIC OPERATIONS ON DVD DECK Basic Playback ● Turn on the unit. ● Turn on the TV and select an input mode such as EXT1. ● Set the remote control selector switch to AUDIO. ● Press DVD on the remote control. Selection Keys (FGDE) ENTER... -
Page 29: Adjusting The Volume
Adjusting The Volume ● Turn on the unit. ● Turn on the TV and select an input mode such as EXT1. ● Set the remote control selector switch to AUDIO. ● Press DVD on the remote control. SHIFT There is a time limit when performing the following setting. If the time is up before completing the setting, re-perform from the beginning. -
Page 30: Setting Auto Surround And Virtual Surround Back
BASIC OPERATIONS ON DVD DECK Setting Auto Surround And Virtual Surround Back ● Turn on the unit. ● Turn on the TV and select an input mode such as EXT1. ● Set the remote control selector switch to AUDIO. ● Press DVD on the remote control. -
Page 31: Playback Features
Playback Features ● Turn on the unit. ● Turn on the TV and select an input mode such as EXT1. ● Set the remote control selector switch to AUDIO. ● Press DVD on the remote control. MARK TOP MENU MENU REMAIN Locating A Desired Scene Using The DVD Menu DVD VIDEO discs may have top menu and disc menu. - Page 32 BASIC OPERATIONS ON DVD DECK MARK TOP MENU MENU REMAIN Slow Motion Press W to pause during playback. Press SLOW – (O) or SLOW + (N). ● Each press of SLOW – (O) or SLOW + (N) increases the slow motion speed for each direction. ●...
-
Page 33: Subtitle Selection
Marking Positions To Play Back Again Later It is possible to mark positions (up to 999 points) where you want to play back once again later, and start playback from a marked position. To mark positions: During playback, press MARK at positions you want to mark. - Page 34 BASIC OPERATIONS ON DVD DECK TOP MENU MENU S/PREVIOUS T/NEXT AUDIO Audio Channel Selection When watching bilingual programmes or playing discs on which you recorded bilingual or stereo programmes, you can choose the desired audio channel. ● When ASUPERIMPOSEB is set to AAUTOB, you can confirm on the TV screen the audio channel you have chosen.
-
Page 35: Live Memory Playback
Live Memory Playback You can watch a recorded portion of a programme even before recording ends (Live Memory Playback), or watch other programmes (Simultaneous Recording and Playback) while continuing to record onto the DVD-RAM disc. (Recording screen) To stop recording, press Recording stops Current playback point... -
Page 36: Simultaneous Recording And Playback
BASIC OPERATIONS ON DVD DECK ● Turn on the unit. ● Turn on the TV and select an input mode such as EXT1. ● Set the remote control selector switch to AUDIO. ● Press DVD on the remote control. AUDIO NAVIGATION Press NAVIGATION to display the Library Database Navigation screen to select a... - Page 37 Buttons To Be Used During Live Memory Playback D S/PREVIOUS E T/NEXT A NAVIGATION Displays Library Database Navigation menu. You can choose a title to play back. Pressing during pause mode reverses the still picture frame by frame. Pressing during pause mode advances the still picture frame by frame.
-
Page 38: Using The On-Screen Bar
BASIC OPERATIONS ON DVD DECK Using The On-screen Bar The on-screen bar allows you to control various playback functions. Some of the functions operated on Navigation Menu can be controlled on the On-screen bar. Be sure to clear Library Database Navigation screen by pressing NAVIGATION. - Page 39 DVD-RAM/RW/R Repeat playback is not performed. ALL REPEAT The whole disc is played back repeatedly. TITLE REPEAT The current title is played back repeatedly. DVD VIDEO Repeat playback is not performed. TITLE REPEAT The current title is played back repeatedly. CHAPTER REPEAT The current chapter is played back repeatedly.
- Page 40 BASIC OPERATIONS ON DVD DECK 0 – 9 CANCEL CLEAR (o) Time Search You can play back a disc from the desired point by specifying the elapsed playing time from the beginning of a programme (DVD-RAM, DVD-R, DVD-RW and DVD VIDEO) or a disc (Video CD/SVCD and Audio CD).
- Page 41 FILM Suitable for playing back a progressive scanned film source disc. VIDEO Suitable for playing back a video source disc. The outlines on the played back pictures will be soft. To clear the on-screen bar Press ON SCREEN. Programme Playback You can programme up to 30 tracks (Video CD/SVCD or Audio CD) to play back in the desired order.
-
Page 42: Basic Recording
BASIC OPERATIONS ON DVD DECK Basic Recording ● Turn on the unit. ● Turn on the TV and select an input mode such as EXT1. ● Set the remote control selector switch to AUDIO. ● Press DVD on the remote control. ATTENTION: It is not possible to record programmes on a DVD-R/RW disc which has already been finalised. -
Page 43: Recording Features
Recording Features ● Turn on the unit. ● Turn on the TV and select an input mode such as EXT1. ● Set the remote control selector switch to AUDIO. ● Press DVD on the remote control. Instant Timer Recording (ITR) It is possible to set the recording time during recording. - Page 44 BASIC OPERATIONS ON DVD DECK Free Rate Function To record the entire programme, the unit automatically sets the appropriate recording mode depending on the combination of the total time of the programme to be recorded and either the remaining disc space or the specified recording time (from 60 minutes to 480 minutes when using 4.7 GB blank media disc).
-
Page 45: Surround Mode
Surround Mode Reproducing Theatrical Atmosphere In movie theatres, a number of speakers are located on the wall to reproduce realistic sensation by means of calculated sound effects, enabling sounds to be heard from all directions. By locating a number of speakers encircling the audience seats, localisation of sound and dynamism are remarkably improved. - Page 46 BASIC OPERATIONS ON DVD DECK Activating The Surround Mode Automatically The Surround mode is automatically activated when Auto Surround mode has been set (A pg. 26). Auto Surround mode reproduces sounds in the form as recorded without any conversion (down mixing, simulation or others). For example, multi-channel recorded software is automatically played back with multi-channel audio.
-
Page 47: Receiving Radio Broadcasts
Receiving Radio Broadcasts You can enjoy radio broadcasts by browsing through all the stations or using the preset memory function. ● Turn on the unit. ● Set the remote control selector switch to AUDIO. ● Press FM/AM on the remote control. FM/AM MEMORY ENTER... -
Page 48: Using The Rds (Radio Data System) When Receiving Fm Stations
BASIC OPERATIONS ON DVD DECK Using The RDS (Radio Data System) When Receiving FM Stations Radio data system allows FM stations to send an additional signal along with their regular programme signals. For example, the stations send their station names, as well as information about what type of programme they broadcast, such as sports or music, etc. - Page 49 Searching For A Programme By Programme Type Codes One of the advantages of the radio data system service is that you can locate a particular kind of programme from the preset channels (A pg. 43) by specifying the programme type codes. Before you start operation;...
- Page 50 BASIC OPERATIONS ON DVD DECK ● Turn on the unit. ● Set the remote control selector switch to AUDIO. ● Press FM/AM on the remote control. FM/AM TA/NEWS/INFO Switching To Broadcast Programme Of Your Choice Temporarily Another convenient radio data system service is called AEnhanced Other NetworkB.
- Page 51 When an emergency broadcast (ALARM signal) is sent from an FM station The system automatically tunes in to the station and AALARMB appears on the front display panel while the system is receiving the emergency broadcast. Note that an emergency broadcast cannot be received in the following cases;...
-
Page 52: Timer Recording
TIMER RECORDING VIDEO Plus+ Timer Programming You can programme this unit to timer record as many as 8 programmes. With the VIDEO Plus+ system, timer programming is greatly simplified because each TV programme has a corresponding code number which your unit is able to recognise. You can use the remote control to enter the PlusCode number. -
Page 53: Manual Timer Programming
Manual Timer Programming You can programme this unit to timer record as many as 8 programmes up to 30 days in advance. If you do not know the PlusCode number for the programme you wish to record, use the following procedure to set your unit to timer record the programme. ●... -
Page 54: On-Disc Timer Programming
TIMER RECORDING On-Disc Timer Programming On-Disc Timer Programming is a function used with discs that are especially intended for a specific programme. The disc is then programmed for a programme you always watch every day or every week. Since older programmes are automatically overwritten, a single disc can be used without worrying about how much recording capacity remains. - Page 55 To Timer Record The Programme With The Programmed Disc Load a programmed disc. Press AUDIO A to turn off the power. ● appears on the front display panel, and the unit enters into timer standby mode. ● To disengage the timer mode, press AUDIO A again. NOTES: ●...
-
Page 56: Check, Cancel And Change Programmes
TIMER RECORDING Check, Cancel And Change Programmes PROG CANCEL SHOWVIEW/ VIDEO Plus+ Disengage the timer mode. ● When lights up on the front display panel, press AUDIO ● When j lights up on the front display panel, press TIMERj, and press AUDIO A after j lights off. When ASAT jB lights up on the front display panel, press ●... -
Page 57: Automatic Satellite Programme Recording
Automatic Satellite Programme Recording This function allows you to automatically record a satellite programme which is timer programmed on your external satellite receiver. Connect a satellite receiver to the unit’s [L-2 INPUT/ DECODER] connector and programme the timer on the satellite receiver. -
Page 58: Navigation
NAVIGATION Library Database Navigation The Library Database Navigation enables you to search and select the desired titles recorded very easily. You can record up to 99 titles on a disc. Each time a title is recorded, the information of the title is registered for the Library Database Navigation automatically. -
Page 59: Basic Operation Of Original Information
Basic Operation Of Original Information You can scan the beginning of the title easily and play back with the Library Database Navigation. ● Turn on the TV and select an input mode such as EXT1. ● Set the remote control selector switch to AUDIO. ●... - Page 60 NAVIGATION Delete Unwanted Part Of The Title (DVD-RAM & DVD-RW (VR mode) only) You can delete unwanted part of a title. Press NAVIGATION to ORIGINAL display the Library 0001 Database Navigation screen. Press selection keys to DANCE select AORIGINALB, then DANCE CURNIV press ENTER.
-
Page 61: Edit Original Information
Edit Original Information ● Turn on the TV and select an input mode such as EXT1. ● Set the remote control selector switch to AUDIO. ● Press DVD on the remote control. ● Load a DVD disc to modify. ATTENTION: ●... -
Page 62: Basic Operation Of Play List Information
NAVIGATION Basic Operation Of Play List Information Play List It is a collection of the scenes. A play list can be freely edited and played back without ever changing any original recording data. Using the random access of a disc (which allows video data to be instantly read no matter where it is on the disc), a play list includes information such as the timer counter for the playback start point and end point, indexes for checking the contents of recorded data,... -
Page 63: Edit Play List Information
Edit Play List Information ATTENTION: It is not possible to modify discs recorded on DVD units from other manufacturers. Modify Index Press NAVIGATION to display the Library Database Navigation screen. Press selection keys to select APLAY LISTB, then press ENTER. Press selection keys to select a play list you want to modify, then press G. -
Page 64: Delete Scenes
NAVIGATION Delete Scenes Press NAVIGATION to display the Library Database Navigation screen. AUDIO Press selection keys to select APLAY LISTB, then press ENTER. Press selection keys to NAVIGATION select a play list from which you wish to delete Selection Keys unwanted scenes, then press G. -
Page 65: Move Scenes
Move Scenes Press NAVIGATION to ORIGINAL display the Library 0001 Database Navigation screen. Press selection keys to DANCE select APLAY LISTB, then DANCE CURNIV press ENTER. 28/07/03 MON 10:00 - 11:00 PR. 7CH SP MODIFY Press selection keys to select a play list which SELECT you wish to move a scene, then press G. -
Page 66: Edit Library Information
It is not possible to register discs used for On-Disc Timer Programming. (A pg. 50) ● It is not possible to register discs formatted on devices other than JVC’s DVD recorders. ● It is not possible to register discs recorded on devices other than NAVIGATION JVC’s DVD recorders. -
Page 67: Playback With Mp3/Jpeg Navigation
Playback With MP3/JPEG Navigation This unit can play back discs that MP3 sound files and JPEG image files taken with digital still cameras or other devices are recorded. The MP3/JPEG Navigation enables you to search and select the desired files recorded on CD-R/RW or CD-ROM discs very easily. ●... -
Page 68: Editing
EDITING DV Dubbing You can dub programmes from a camcorder or DV equipment connected to the unit with a DV cable. The unit’s remote control allows you the limited control of the connected camcorder or DV equipment functions during dubbing. NOTES: ●... - Page 69 ● Only DV format video can be dubbed. It is not possible to dub MPEG2 format video. When you dub from DV equipment other than a camcorder A Perform steps 1 - 3. B Locate the point from where you want to start dubbing, then stop on the DV equipment.
-
Page 70: Edit From A Camcorder
EDITING Edit From A Camcorder You can use a camcorder as the source player and your unit as the recording deck. A If the camcorder has no S-VIDEO output connector: Recorder To [VIDEO/AUDIO (L(MONO)/R)] input Audio/video cable (not supplied) Player AUDIO/VIDEO OUT B If the camcorder has an S-VIDEO output connector: Recorder... -
Page 71: Edit To Or From Another Recorder
Edit To Or From Another Recorder You can use your unit as the source player or as the recording deck. NOTE: When using another recorder as the recording deck, refer to its instruction manual. A When using your unit as the source player Player TV receiver 21-pin SCART cable... -
Page 72: Output/Input Set
EDITING Output/Input Set ● Turn on the unit. ● Turn on the TV and select an input mode such as EXT1. ● Set the remote control selector switch to AUDIO. ● Press DVD on the remote control. L-1 Output And L-1 Input Setting The [L-1 INPUT/OUTPUT] connector accepts and delivers either a composite signal (regular video signal) or a Y/C signal (a signal in which the luminance and chrominance signals are separated). - Page 73 NOTE: Digital audio from [L-1/L-2 DIGITAL INPUT (COAXIAL/OPTICAL)] cannot be recorded. Use the analogue audio input from the 21-pin SCART connectors during recording. L-2 Select Setting Set AL-2 SELECTB to the appropriate mode depending on the type of appliance connected to the unit’s [L-2 INPUT/DECODER] connector.
-
Page 74: System Connections
Remote Control Functions Remote Control 1/2/3/4 Code Switching The remote control is capable of controlling four JVC video units independently. Each of the units can respond to one of the four codes (1, 2, 3 or 4). The remote control is preset to send code 3 signals because your unit is initially set to respond to code 3 signals. -
Page 75: Tv Multi-Brand Remote Control
TV Multi-Brand Remote Control Your Remote can operate the basic functions of your TV set. In addition to JVC TVs, other manufacturer’s TVs can also be controlled. ● Slide the AUDIO/TV/SAT switch to TV. TV/VIDEO VOL +/– ENTER IMPORTANT: Although the supplied Remote unit is compatible with JVC televi- sions, as well as many other models, it may not work with your TV, or in some instances, may have limited function capability. -
Page 76: Satellite Receiver Multi-Brand Remote Control
Slide the AUDIO/TV/SAT switch to SAT. ENTER IMPORTANT: Although the supplied Remote unit is compatible with JVC satellite receivers, as well as many other models, it may not work with your satellite receiver, or in some instances, may have limited function capability. -
Page 77: Mode Set
Mode Set ● Turn on the unit. ● Turn on the TV and select an input mode such as EXT1. ● Set the remote control selector switch to AUDIO. ● Press DVD on the remote control. Various modes of this unit are categorised into menus nested in 2 levels shown in the following table. - Page 78 SUBSIDIARY SETTINGS RECORDING SET SAVE AS LIBRARY OFF / When this function is set to AONB, the recording information is automatically stored in the library. For details, refer to AEdit Library InformationB (A pg. 62). XP MODE REC AUDIO DOLBY DIGITAL You can select the audio format when you record a title in XP mode.
- Page 79 OTHERS AUTO TIMER / ON This is the setting for engaging timer recording standby mode. Press TIMERj to engage timer recording standby mode. Timer recording standby mode is automatically engaged when the unit is turned off. RESUME OFF / / DISC RESUME When this function is set to AONB or ADISC RESUMEB, you can use the resume function.
-
Page 80: Scan Mode Set
SUBSIDIARY SETTINGS Scan Mode Set If you connect the unit and TV with Component Video Connection (A pg. 7), you can select the scan mode from two modes: Interlaced scan mode which is used in the conventional TV system, and Progressive scan mode which enables reproduction of higher quality images. -
Page 81: Video Plus+ System Setup
VIDEO Plus+ System Setup IMPORTANT: Normally, Auto Set Up (A pg. 18), Preset Download (A pg. 19) or Auto Channel Set (A pg. 78) sets the Guide Programme numbers automatically. You need to set the Guide Programme numbers manually only in the following cases. ●... -
Page 82: Tv Tuner Set
SUBSIDIARY SETTINGS TV Tuner Set Your unit needs to memorise all necessary stations in channel positions in order to record TV programmes. Auto Channel Set automatically assigns all receivable stations in your area to call them up by using the PR +/– buttons without going through any vacant channels. -
Page 83: Manual Channel Set
Manual Channel Set Store channels that were not stored during Auto Set Up (A pg. 18), Preset Download (A pg. 19) or Auto Channel Set (A pg. 78). Press SET UP to access the Main Menu screen. Press selection keys to select AINITIAL SET UPB, then press ENTER for confirmation. - Page 84 SUBSIDIARY SETTINGS Set Stations (A) Set station names that are registered in your unit. Perform steps 1 - 3 of AManual Channel SetB (A pg. 79). Press selection keys to select the channel you want to modify, then press ENTER twice. The setting screen appears. Press selection keys to select AIDB, then press ENTER for confirmation.
-
Page 85: Clock Set
Clock Set IMPORTANT: If you performed Auto Set Up (A pg. 18) or Preset Download (A pg. 19), without ever having set the clock previously, the unit’s built-in clock is also set automatically. Perform the following steps only if ^ ^ Auto Clock Set has not been performed correctly by Auto Set Up or Preset Download. -
Page 86: Format A Disc
SUBSIDIARY SETTINGS Format A Disc Some DVD-RAM/RW discs are unformatted. Format the disc when you use an unformatted disc or you want to delete all recordings and data on the disc. ATTENTION: ● When a disc is formatted, all recordings and data are erased. It is impossible to restore them. -
Page 87: Finalise A Disc
● Although DVD-R/RW discs finalised on this unit become playable on DVD players compatible with DVD-R/RW discs, some discs still may not play, for which JVC cannot take responsibility. ● Marked points marked before finalising will be deleted, and titles will be divided automatically into AchaptersB approximately every 5 minutes. -
Page 88: Adjusting The Center Tone
SUBSIDIARY SETTINGS Adjusting The Center Tone ● Turn on the unit. ● Turn on the TV and select an input mode such as EXT1. ● Set the remote control selector switch to AUDIO. ● Press DVD on the remote control. TEST TONE There is a time limit when performing the following setting. -
Page 89: Troubleshooting
● The setting of the remote control code is inappropriate. ] To operate the unit using a JVC TV remote control, set the remote control code of the unit to A1B. (Default: A3B) (A pg. 70) The channel cannot be changed. - Page 90 TROUBLESHOOTING Timer Recording Timer programming cannot be made. ● Date and time is not correct. ] Set date and time correctly. (A pg. 20, 81) ● Timer recording is in progress. ] Timer programming can’t be performed while a timer recording is in progress.
-
Page 91: Other Problems
Other Problems The image of the TV broadcast appears distorted on the TV screen. ] Press PROGRESSIVE SCAN for 3 or more seconds so that the Video output indicator (q) lights off on the front display panel. Whistling or howling is heard from the TV during camcorder recording. -
Page 92: On-Screen Message
ON-SCREEN MESSAGE On-screen Message DISC NOT REGISTERED IN THE LIBRARY REGISTER DISC? ● A disc that is not registered in the library has been inserted. Register the disc as necessary. (A pg. 62) INSERT DISC #XXXX ● Appears when a title that has been selected in the library is not contained in the loaded disc. -
Page 93: Appendix
Language Code List Afar Abkhazian Afrikaans Ameharic Arabic Assamese Aymara Azerbaijani Bashkir Byelorussian Bulgarian Bihari Bislama Bengali, Bangla Tibetan Breton Catalan Corsican Czech Welsh Bhutani Greek Esperanto Estonian Basque Persian Fiji Faroese Frisian Irish Scots Gaelic Galician Guarani Gujarati Hausa Hindi Croatian Hungarian... - Page 94 APPENDIX TV Station And ID List The AIDB abbreviation is what is shown on-screen in lieu of the station name. The AIDB abbreviation is listed in the Confirmation screen and is displayed on the TV screen when the unit is tuned to a different station. STATION NAME ANGL Anglia TV...
- Page 95 TV Station Channel Number Guide Only the main stations are listed. There are in addition many relay stations, and full lists are available from the BBC and ITV. BBC1 BBC2 London & South-East Bluebell Hill ... 40 Crystal Palace... 26 Dover ...
-
Page 96: Specifications
SPECIFICATIONS XV-THR1/XV-THR3 GENERAL Power requirement AC 230 VH, 50 Hz Power consumption Power on: 40 W Power off: 6 W Temperature Operating: 5 °C to 35 °C (41 °F to 104 °F) Storage: -20 °C to 60 °C (-4 °F to 140 °F) Operating position Horizontal only Dimensions (WxHxD) - Page 97 0 W (in standby mode) Dimensions (W x H x D) : 170 mm x 411 mm x 459 mm Mass : 11.7 kg Satellite Speakers (TH-R1) Front speakers (SP-THS55F) Speaker unit : 8.0 cm Bass-reflex, Magnetically Shielded Power Handling Capacity...
-
Page 98: List Of Terms
LIST OF TERMS ... 35 A-B Repeat Playback ... 36 Adjusting The Picture Quality ... 29 Angle Selection ... 30 Audio Channel Selection Audio Language/Sound Selection ... 78 Auto Channel Set ... 26 Auto Surround Automatic Satellite Programme Recording ... 24 Basic Playback ... - Page 99 MEMO...
- Page 100 0305SKMSANJSC © 2005 Victor Company of Japan, Limited...
Need help?
Do you have a question about the TH-R1 and is the answer not in the manual?
Questions and answers