Vitamix The Quiet One Use And Care Manual
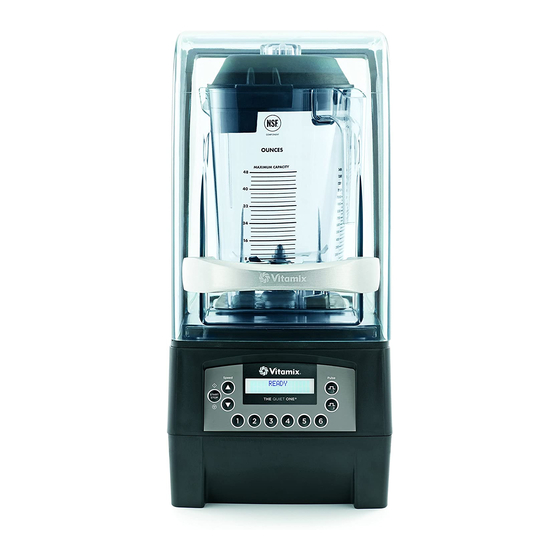
Blending station on-counter/in-counter
Hide thumbs
Also See for The Quiet One:
- Use and care manual (47 pages) ,
- Use and care manual (92 pages)

Related Manuals for Vitamix The Quiet One


Summary of Contents for Vitamix The Quiet One
- Page 1 The Quiet One ™ Blending station all mOdels Use and Care Manual Read and save these instructions Speed Pulse START STOP Speed Pulse START STOP On-cOunTer in-cOunTer...
-
Page 3: Table Of Contents
cO n T e n Ts Important Safeguards ..................4 General Instructions ..................6 Pre-Set Program Buttons Blending Tips Maintenance Tips Control Panel ......................8 Custom Programming ................... 10 Programming Pre-Set Buttons Programming Custom Chip Resetting Pre-Set Buttons Recipe Options Machine Assembly .................... -
Page 4: Important Safeguards
3. Close adult supervision is necessary when machine is used by or near children. 4. Unplug the power cord from the wall outlet when the Vitamix® machine is not in use, before disassembling, when putting on or taking off parts, and before cleaning, other than washing the container. -
Page 5: Important Notes
Shut OFF power switch at night or whenever machine will be left unattended. Save These Safety Instructions • The Vitamix blender’s U.S.A. power cord comes equipped with a three-prong (grounding) plug which mates with a standard three-prong wall outlet (Figure A). -
Page 6: General Instructions
T i O n s Instructions for using the Pre-Set Program Buttons The following is the basic settings of the six Pre-Set buttons for The Quiet One™. These programs, numbered 1 through 6, are blending cycles designed for the most commonly made drinks. -
Page 7: Maintenance Tips
Motor,” for complete instructions. When the thermal protector shuts the motor off, review your processing techniques and your instructions. Your recipes may be too thick or have too much material in them. Consider adding more liquid and consult Vitamix® Customer Service or your local Vitamix Distributor for further assistance. -
Page 8: Control Panel
cO n T r O l pa n e l Speed Pulse START STOP Speed Control Pre-Set Programs High/Low Pulse On/Off Power Switch: Located on the back of the motor base, the On/Off switch controls the power to the machine. While plugged in, switch to ON to ready the machine for blending. - Page 9 Display Window: This area, depending on which button is pressed, displays a variety of operation messages. A “Ready” message appears when there is power to the machine. Owner Controls: The owner control panel is accessible by activating the Power Switch located on the back of the motor base while depressing button 2. •...
-
Page 10: Custom Programming
O g r a m m i n g The Quiet One™ is pre-programmed with an Advance® program which is optimized for the Advance® container. The program can be customized by using the control panel, or a programming chip or programmer software kit available from Vitamix®. -
Page 11: Factory Settings
Resetting the Pre-Set Buttons to the original factory settings 1. Access the OWNER CONTROLS by activating the power switch located on the back of the motor base while depressing button 2. 2. Once the unit powers up, it will cycle through three screens then stop on the motor status screen. -
Page 12: Recipe Options
c u sTO m p r O g r a m m i n g Recipe Options Arranged by recipe number (#) and drink type: DRINK TYPE DESCRIPTION TIME General Purpose/ Ramps up to 60% for 18 seconds Smoothie Ramps up to MED (45%) for 6 seconds, then (58%) for Double Smoothie 8 seconds, then HIGH (85%) for 4 seconds Ramps up to LOW (25%) for 4 seconds then to MED (60%) - Page 13 Ramps up to LOW (25%), gradually ramps up to MED (50%), Multiple Coffees 2 then up to HIGH (100%) Small Coffee Gradually ramps up to MED-HIGH (75%) 1-2 Drink Cocktail Ramps up to HIGH (90%) 3-4 Drink Cocktail Ramps up to MED (45%), then ramps up to HIGH (100%) Starts at MED (55%), then decreases to LOW (7%), Kids Cup then to HIGH (100%)
-
Page 14: Machine Assembly
Containers: • The Quiet One™ machines are optimized for use with the Vitamix® 48 oz. / 1.4 L Advance® container (3 sided container). The 64 oz. / 2.0 L standard container will not fit in the compact cover used on the The Quiet One™. Contact Vitamix customer service at 800-886-5235 or contact your distributor for more information. - Page 15 Back Cover: For enhanced sound reduction, the sound enclosure for the The Quiet One™ is secured to the base using a patented magnetic system. Aside from the advantages of reducing blending noise over that of mechanically attached door systems, the magnetically attached system allows for fast and easy removal for cleaning.
-
Page 16: Blade Assembly
m ac h i n e ass e m B ly Two-Piece Lid 48 oz. / 1.4 L Advance® The two-piece lid is easy to clean and easy to put on, take off and seal. • To remove a fully latched lid, lift the two tabs an pull upward and off. •... - Page 17 Blade Agitator Assembly: The blade assembly includes a precision-hardened stainless steel blade with enclosed double sealed steel ball bearings for maximum durability. The rugged blade assembly literally explodes molecules of food and ice in the container, helping every batch to homogenize more effectively.
-
Page 18: Installation
• The In-Counter unit also requires a gasket (provided in the machine’s original package) to be placed between the machine and the counter. • Refer to The Quiet One™ In-Counter template (provided in the machine’s original package) for detailed installation guidelines and a template. - Page 19 On-Counter and In-Counter Blending Station Electrical Requirements: • 120 V • 50/60 Hz • 15 amps Uses a U.S.A. three-prong grounded cord. 20 amp outlet per machine is recommended. Do not use extension cords with machine. • 220 – 240 V • 50/60 Hz • 1300 – 1550 Watts •...
-
Page 20: Caring For Your Machine
c a r i n g fO r yO u r m ac h i n e Cleaning Products Suppliers in U.S.A. Ecolab, Inc., St. Paul, MN Solid Supra, Solid Power, 800-352-5326 guardian Acclaim, Solid guardian Plus, Solid Super Impact, Solid Insure www.ecolab.com Diverpak Diversey, Livonia, MI... - Page 21 * Be sure to wring excess water out of cloth or sponge when cleaning around the controls or any electrical part. ** To prolong polycarbonate container life, Vitamix recommends using soaps with a low PH balance, such as a liquid dishwashing detergent (Ivory Liquid®). Due to the nature of polycarbonates, automatic dishwashing is not recommended.
-
Page 22: Troubleshooting
• Display window reads “MOTOR Let the machine cool for an hour, restart. LOCKED PROgRAM TERMINATED” Call Vitamix technical support if the machine does not work after sitting at room temperature for 24 hours. a. Turn the machine off and on again to •... - Page 23 If you cannot fix your machine with these suggestions, technical help is available by calling Vitamix® technical support at 800-886-5235. If you purchased your equipment outside the U.S.A., contact your local Vitamix Distributor or telephone the Vitamix International Division at +1.440.782.2450 or email international@vitamix.com...
-
Page 24: Warranty
Wa r r a n T y LIMITED WARRANTY In order to maximize the life and keep your Vitamix® product in good working order, it is important that you follow a few simple maintenance tips: 1. Periodically inspect the drive socket for visible wear and tear, cracks, or brakes to the socket. - Page 25 USA, contact your authorized Vita-Mix distributor, or call the Vita-Mix International Division at +1.440.782.2450 or email international@vitamix.com for a distributor near you. In the event your Vita-Mix blender needs service or repair covered by the terms of this warranty, please call the Vita-Mix Corporation for warranty assistance.
-
Page 26: Parts List
• Outside the United States and Canada, your machine may come with a different container configuration. Contact your local Vitamix Distributor for item numbers. • Other than the drive socket, blade assembly and retainer nut, this unit is... - Page 27 Items Sold Separately: #15985 #15986 #15606 Software Kit - USB Version #15978 #15980 #15644 Extra Programming Chip #15979 for Software Kit #15990 #15585 #15989 One-Piece Lid #891 #15579 #15596 Retainer Nut Wrench #015107 #015081 #015082 #015080 #015083...
- Page 28 • 23.0 in. / 58,4 cm high with lid open • Depth: 10.7 in. / 27,2 cm with handle • Width: 8.5 in. / 21,6 cm • Depth below counter: 1.2 in. / 3,0 cm When applicable: To see the complete line of Vitamix products, ® visit vitamix.com/foodservice Vita-Mix Corporation ®...
Need help?
Do you have a question about the The Quiet One and is the answer not in the manual?
Questions and answers