Table of Contents

Subscribe to Our Youtube Channel
Related Manuals for Vitamix The Quiet One VM50031


Summary of Contents for Vitamix The Quiet One VM50031
- Page 1 The Quiet One ® Blending Station ALL MODELS Use and Care Manual Read and save these instructions Speed Pulse Speed Pulse START START STOP STOP ON-COUNTER IN-COUNTER E N G L I S H E S PA Ñ O L F R A N Ç...
-
Page 3: Table Of Contents
CO N T E N TS English ..........................Español ........................Français ........................Important Safeguards ..................General Instructions ..................Control Panel ......................Programming ......................Programming Pre-Set Buttons Programming Custom Chip Resetting Pre-Set Buttons Recipe Options Machine Assembly .................... Compact Cover Blade Assembly Installation ........................ -
Page 4: Important Safeguards
12. WARNING: Blades are sharp. Handle carefully. • Never try to remove the blades while container is sitting on the motor base. • Do not operate with loose, nicked or damaged blades – replace immediately. • To reduce the risk of personal injury, never place blade assembly on motor base without the Vitamix container properly attached. 13. The maximum capacity is equivalent to the ounces (liters) listed on the container, i.e., 48 oz. / 1,4 L, and is substantially less with thick mixtures. 14. Always operate the Vitamix machine with the lid in place and securely attached. 15. Display window area will scratch when contacted with a scouring pad or sharp object. Use a soft cloth to wipe the control panel area clean. 16. The machine cannot be cleaned with a water jet. 17. I t is recommended that for a 120 V installation, you have at least one 20 amp outlet per machine, available within 6 ft. / 1,8 m of the Vitamix. 220 V and 100 V units require a dedicated line. Consult an electrician for proper electrical needs. - Page 5 Save These Safety Instructions • T he Vitamix blender’s U.S.A. power cord comes equipped with a three-prong (grounding) plug which mates with a standard three-prong wall outlet (Figure A). This cord will vary for countries outside the United States of America. • Adapters (Figure B) are available for two-prong outlets. Do not cut or remove the third (ground) prong from the plug or power cord. • C onsult your electrician if you are not sure if the wall outlet is grounded through the building wiring. With a properly grounded two-prong wall outlet, ground the machine by attaching the tab on the adapter to the wall outlet cover by means of the screw in the center of the cover (Figure B). WARNINGS! Three-prong adapters are not to be used in Canada.
-
Page 6: General Instructions
G E N E R A L I N ST R U C T I O N S Instructions for using the Pre-Set Program Buttons The following is the basic settings of the six Pre-Set buttons for The Quiet One®. These programs, numbered 1 through 6, are blending cycles designed for the most commonly made drinks. Depending on the viscosity of the drink you are creating, selecting one of the Pre-Set programs will run the machine for a full cycle. The machine will stop by itself when the cycle is complete. A cycle varies in speed and length. Your machine’s Pre-Set options may differ due to program revisions or due to the difference of recipes, your results may also vary. BUTTON 1: G eneral Purpose / Smoothie – blends smoothies and thin drinks consisting of juice and ice to a creamy consistency. (:18) BUTTON 2: D ouble Smoothie – blends similar drinks to that of button 1 but at larger volumes. (:18) BUTTON 3: F rozen Coffee and Juices – blends light coffee drinks to a... - Page 7 • Never remove the container before the machine has come to a complete stop. • Never start the motor before the container is in place. WARNINGS! • Turn power off or unplug the machine before touching movable parts. Shut off power switch at night or whenever machine will be left unattended. • I f you detect a change in the sound of the machine or if a hard or foreign object comes into contact with the blades, do not serve the drink. Inspect your blade assembly for loose, nicked or missing parts. If parts are loose, missing, or nicked, replace with new blade assembly. (See page 17.) IMPORTANT NOTES! • Check your blades daily for loose, nicked or missing parts. If you find something is loose, nicked or missing, replace the blade assembly before use (see page 17). Do not tighten hex-headed screw (on top of blade assembly). If loose, replace blade assembly immediately. • The instructions appearing in this Use and Care Manual cannot cover every possible condition and situation that may occur. Common sense and caution must be practiced when operating and maintaining any appliance. • O n all units, the built-in thermal protector keeps track of how hot the motor gets and will warn the user and eventually shut down the motor if the motor is overheating. When overheated, the display will instruct the user to remove the container and run the machine until cool. This takes about two minutes. See page 23, “Cooling the Motor,” for complete instructions. When the thermal protector shuts the motor off, review your processing techniques and your instructions. Your recipes may be too thick or have too much material in them. Consider adding more liquid and consult Vitamix® Customer Service or your local Vitamix Distributor for further assistance.
-
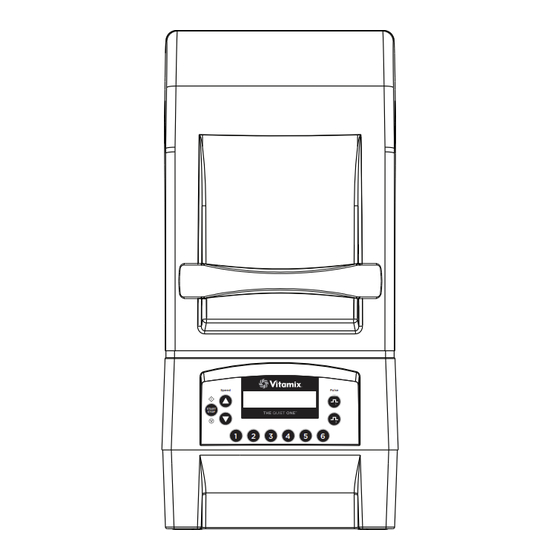
Page 8: Control Panel
CO N T R O L PA N E L Speed Pulse START STOP Speed Control Pre-Set Programs High/Low Pulse On/Off Power Switch: Located on the back of the motor base, the On/Off switch controls the power to the machine. While plugged in, switch to on to ready the machine for blending. Shut off the power switch at night or whenever the machine will be left unattended. Start /Stop Button: Pressing Start( )/Stop ( ) once starts and runs the machine and turns the blade. Press Start/Stop button again to stop the machine and the blade. Speed Buttons: Press the button to gradually increase the speed of the blade in increments of 1%, up to 100%. Press the button to gradually decrease the speed of the blade in increments of 1%, down to 7%. Speed is used to set the blending speed of the Pulse buttons (see Instructions, page 9) and the Start/Stop button. Pre-Set Program Buttons: These buttons, numbered 1 through 6, are pre-programmed blending cycles designed for the most commonly made drinks. Depending on the viscosity of the drink you are creating, pressing one of the six Pre-Set program buttons will run the machine for a full cycle. The machine... - Page 9 Display Window: This area, depending on which button is pressed, displays a variety of operation messages. A “Ready” message appears when there is power to the machine. Owner Controls: The owner control panel is accessible by activating the Power Switch located on the back of the motor base while depressing button 2. • O nce the unit powers up, the display will cycle through VITA-MIX CORP three screens. The first indicates the current program VERSION #201 version. The second indicates which program is running on the machine. The third will indicate the motor temperature TEMP COUNT TOTAL NORM (NORM, WARM, HOT), and the total hours of operation, including production and testing. This time can not be cleared. TIMER HR: MIN: SS Once this screen is reached, button 2 can be released. 10: 33 • D epress button 2 within 12 seconds to scroll through VITA-MIX ADVANCE the menu settings. PROGRAM #201 • T he first press will reveal the timer. Total operation is recorded in hours, minutes and seconds; including 1 TO OVERWRITE CURRENT PROGRAM...
-
Page 10: Programming
P R O G R A M M I N G The Quiet One® is pre-programmed with an Advance® program which is optimized for the Advance® container. The program can be customized by using the control panel, or a programming chip or programmer software kit available from Vitamix®. Call your distributor or customer service for more information. Programming Pre-Set Buttons 1. A ccess the 34 stored programs by activating the power switch located on the back of the motor base while depressing the High Pulse button. The display will say “BUTTON SET UP” 2. Press the Speed or buttons to scroll through the “Recipe” numbers until you reach the one you want. (For a description of each recipe, see page 12.) 3. Press the Pre-Set button that you want to program for the recipe selected. For Example: If you wanted to program BUTTON SET UP... -
Page 11: Resetting Pre-Set Buttons
Resetting the Pre-Set Buttons to the original factory settings 1. Access the Owner Controls by activating the power switch located on the back of the motor base while depressing button 2. 2. Once the unit powers up, it will cycle through three screens then stop on the motor status screen. Depress button 2 again, within 12 seconds, to scroll through the menu settings. 3. Scroll using button 2. The screen will display “1 TO OVERWRITE CURRENT PROGRAM”. Depress button 1 to reset to the original factory settings. IMPORTANT NOTES! Programming Chip: If the above programming steps are taken and the custom programming does not appear with the first blend cycle, turn the chip 180˚ (side-to-side) and try again. -
Page 12: Recipe Options
P R O G R A M M I N G Recipe Options Arranged by recipe number (#) and drink type: DRINK TYPE DESCRIPTION TIME General Purpose/ Ramps up to 60% for 18 seconds Smoothie Ramps up to MED (45%) for 6 seconds, then (58%) Double Smoothie for 8 seconds, then HIGH (85%) for 4 seconds Ramps up to LOW (25%) for 4 seconds then to MED (60%) Frozen Coffee &... - Page 13 Ramps up to LOW (25%), gradually ramps up to MED (50%), Multiple Coffees 2 then up to HIGH (100%) Gradually ramps up to MED-HIGH (75%) Small Coffee 1-2 Drink Cocktail Ramps up to HIGH (90%) Ramps up to MED (45%), then ramps up to HIGH (100%) 3-4 Drink Cocktail Starts at MED (55%), then decreases to LOW (7%), Kids Cup...
-
Page 14: Machine Assembly
M AC H I N E ASS E M B LY Compact Cover Cover Door: 1. The cover door can be removed by opening it until the door is horizontal. Then, gently spread the sides of the door over the round hinges and remove. 2. To reinstall the cover door, gently spread the sides of the door and place the door hinge cutouts over the round hinges. FIGURE A IMPORTANT NOTES! Containers: • T he Quiet One® machines are optimized for use with the Vitamix® 48 oz. / 1,4 L Advance® container (3 sided container). The 64 oz. / 2,0 L standard container will not fit in the compact cover used on the The Quiet One®. Contact Vitamix customer service at 800-886-5235 or contact your distributor for more information. • Outside the United States and Canada, your machine may come with a different container configuration. - Page 15 Back Cover: For enhanced sound reduction, the sound enclosure for the The Quiet One® is secured to the base using a patented magnetic system. Aside from the advantages of reducing blending noise over that of mechanically attached door systems, the magnetically attached system allows for fast and easy removal for cleaning. To remove the sound enclosure: • First ensure that the container has been removed from the unit. • Grasp the enclosure with both hands. • Tilt slightly back and pull the enclosure straight up (See Figure B). To replace the sound enclosure: • Start with the back cover detached from the cover door • Align the opening in the base plate of the back cover (See Figure C) • Start on one side of the centering pad and slowly lay the back cover into position ensuring that the sound dampening pad is not pinched by any portion of the base plate (Figure D) FIGURE D FIGURE B FIGURE C...
- Page 16 M AC H I N E ASS E M B LY Two-Piece Lid (Figure A) 48 oz. / 1,4 L Advance® Container The two-piece lid is easy to clean and easy to put on, take off and seal. • To remove a fully latched lid, lift the two tabs and pull upward and off. • Twist the center lid plug to fasten or remove.
-
Page 17: Blade Assembly
Blade Assembly Blade Agitator Assembly: The blade assembly includes a precision-hardened stainless steel blade with enclosed double sealed steel ball bearings for maximum durability. The rugged blade assembly literally explodes molecules of food and ice in the container, helping every batch to homogenize more effectively. The blades do not need to be removed for normal cleaning. (Refer to the information below to remove or replace.) Drive Spline: Inserts into drive socket on the motor base to turn the blade. Note: Removing and replacing your container while the coupling is still rotating will strip the drive spline “teeth.” (This part is NOT removable.) Retainer Nut: Must be snug. Order the available Retainer Nut Wrench for best results. (Refer to the information below to remove or replace.) Blade Assembly Removal Retainer Nut Wrench At times, it may be necessary to give your blades additional cleaning. An easy-to-use blade assembly removal wrench (Item #15596) may be purchased. Turn the container upside down and grip firmly. Insert retainer nut wrench in groove of retainer nut and rotate counterclockwise to loosen. Then grip blades with a cloth and remove retainer nut by hand. Replacing Blade Assembly: With the container upside down, grip blades with cloth, insert into the container bottom and align with flat sides of... -
Page 18: Installation
I N STA L L AT I O N In-Counter Machine Preparing the counter Area: • Before cutting holes, make sure that there is adequate clearance under the counter for the motor. The motor will extend about 3.0 in. / 7,6 cm below the counter but it is best to allow at least 10.0 in. / 25,4 cm from the under-counter to shelves or any other equipment under the counter. Also, when using the removable cover design, the back of the hole must be at least 4.3 in. / 10,8 cm from any wall to allow for cover door clearance. • An extra 4.0 in. / 10,2 cm of open space above the top of the cover will be needed for placement and removal of the In-Counter machine. • I f installing unit into a cabinet with doors, including cabinets with a curtain or extended skirt, a 4.0 in. / 10,2 cm diameter flexible duct (dryer hose) must be used to vent exhaust. Attach the duct to the bottom exhaust by forcing the end of the hose over the exhaust baffle of the unit. Run the duct out of the cabinet for proper ventilation. Multiple units should not vent to a common manifold unit but to separate places with separate vent ducts. • W hen cutting holes for placement of multiple In-Counter units, position the edge of the machines at least 12.0 in. / 30,5 cm apart to ensure quick cleaning and proper venting between machines. • It is recommended that for a 120 V unit In-Counter installation, you have at least one 20 amp outlet per machine under the counter, available within 6 ft. / 1,8 m of the machine. 220 V and 100 V units require a dedicated line. Consult an electrician for proper electrical needs. - Page 19 On-Counter and In-Counter Blending Station Electrical Requirements: • 120 V, 50/60 Hz, 15 amps • Uses a U.S.A. three-prong grounded cord. • 20 amp outlet per machine is recommended. Do not use extension cords with machine. • 220 – 240 V, 50/60 Hz, 1300 – 1550 Watts • 100 V (Japan), 50/60 Hz, 1000 Watts On-Counter Dimensions: • 18.0 in. / 45,7 cm high with lid closed • 24.5 in. / 62,2 cm high with lid open • Depth: 10.7 in. / 27,2 cm with handle • Width: 8.5 in. / 21,6 cm In-Counter Dimensions: • 16.5 in. / 41,9 cm high with lid closed • 23.0 in. / 58,4 cm high with lid open • Depth: 10.7 in. / 27,2 cm with handle • Width: 8.5 in. / 21,6 cm • Depth below counter: 1.2 in. / 3,0 cm...
-
Page 20: Caring For Your Machine
C A R I N G FO R YO U R M AC H I N E IMPORTANT NOTES! Cleaning Products: Do not use abrasive cleaning agents or concentrated bleach when cleaning. Do not use any cleaners containing quanitary sanitizers on polycarbonate components (i.e., Advance® containers, covers). Do not use any of the following cleaning products: automatic dishwashing detergents, oven cleaners, steel wool or other abrasive pads. Cover: Do not wash cover door, handle or back cover in dishwasher. It is recommended that the handle not be disassembled during cleaning. However, if you choose to disassemble the handle from the cover, make sure to not over-tighten it when reattaching it to the cover. Doing so will cause damage. Container: Do not let mixtures, liquids or food products dry in the container. Rinse after use. Dry product may lock around the blade and weaken/tear the bearings seal when restarted. Do not place containers in the freezer. Extremely low temperature combined with hot ingredients and/or the immediate rapid action of the blade may crack the container. Microwaving and automatic dishwashing are not recommended. - Page 21 Reassemble before use. To reinstall the sound dampening gasket, simply lay it on the base making sure that it fits snuggly against the centering pad. Replace the sound enclosure as directed on page 15. Make sure the gasket is seated properly against the blender and the centering pad. The gasket and the centering pad should be flat on the motor base. Container: The Advance® container has been designed to be chemical resistant. However, for maximum container life, hand washing is recommended. To Clean: Wash all container parts in warm soapy water. Rinse and drain. Do not soak the blade agitator assembly.** To Sanitize: After all solid residue is removed, fill container 3/4 full with a sanitizing solution mix.*** Return container to motor base and firmly position the two-piece lid. Run machine on a high speed for 30 seconds. Turn machine off and allow mixture to stand in the container for an additional 1 1/2 minutes. Pour out bleach mixture. Return container to motor base and run machine empty for an additional 5 seconds. Do not rinse after sanitizing. Allow container to air dry. IMPORTANT NOTES! Sound Dampening Gasket: Do not wash in the dishwasher. High temperatures and chemicals may cause the pad to swell. Do not soak. The gasket may absorb water and swell. It can take 24-48 hours of air drying before it returns to its original size. Blade Assembly: Do not soak the blade agitator assembly. * B e sure to wring excess water out of cloth or sponge when cleaning around the controls or any electrical part. ** T o prolong polycarbonate container life, Vitamix recommends using soaps with a low PH balance, such as a liquid dishwashing detergent (Ivory Liquid®). Due to the nature of polycarbonates, automatic dishwashing is not recommended. *** R ecommended sanitizing solution: 1.5 tsp. / 7,4 ml institutional or household bleach in 2 qt. / 1,9 L water.
-
Page 22: Troubleshooting
T R O U B L E S H O OT I N G Problems: Possible Actions: • L oud noise from blender a. B roken or worn drive socket. Replace (Item container blade area #891). Instructions are included with part. b. C heck blade assembly for loose, damaged • Container blades do not spin or nicked components and replace. • Increased vibration c. Tighten retainer nut with the retainer nut • Leaking from bottom of container wrench moving clockwise until it is snug. - Page 23 Problems: Possible Actions: • Display window reads Turn the machine off and on “CORRUPT DATA” again to reset the programming. • D isplay window reads “THERMAL SENSOR FAILURE” Call Vitamix technical support. • M achine stops in the middle a. P lug the machine into its own of its blend cycle and resets; power supply. display window reads b. M ake sure the machine is not running “VITAMIX GENERAL PROGRAM” on a long extension cord. then “READY” • I f the machine has overheated: Remove the container, shut the cover The motor will stop and door and press the Start/Stop button the message “MOTOR HAS and run the machine for two minutes.
-
Page 24: Warranty
WA R R A N T Y LIMITED WARRANTY In order to maximize the life and keep your Vitamix® product in good working order, it is important that you follow a few simple maintenance tips: 1. Periodically inspect the drive socket for visible wear and tear, cracks, or brakes to the socket. If damage is found, replace the drive socket with the extra drive socket enclosed with your blender. To purchase additional replacement drive sockets contact Vitamix at 1-800-437-4654 (1-800-4DRINK4) for a dealer near you. For customers outside the U.S.A., contact your authorized Vitamix Distributor, or call the Vitamix International Division at +1.440.782.2450 or email international@vitamix.com for a distributor near you. 2. Manually rotate the blade bearing assembly to make sure it turns without hesitation or doesn’t spin too freely. If the blade hesitates or spins too freely, contact Vitamix at 1-800-437-4654 (1-800-4DRINK4) for warranty information or a dealer near you. For customers outside the U.S.A., contact your authorized Vitamix Distributor, or call the Vitamix International Division at +1.440.782.2450 or email international@vitamix.com for a distributor near you. 3. Never run the machine without the centering pad properly placed on the base. Vita-Mix® Corporation (hereinafter “Vita-Mix”) warrants to the original end-user (proof of purchase required) purchased in the U.S.A., that this commercial Vita-Mix blender (hereinafter the “Equipment”) is free from defects in material and workmanship for the warranty periods applicable to the Equipment as described herein and subject to the conditions set forth below. Motor Base Vita-Mix warrants to the original end-user that: • If the motor base fails within thirty (30) days from the date of purchase, Vita-Mix will replace the motor base without charge. • If the motor base fails after thirty (30) days but within one year from the date of purchase, due to a defect in materials or workmanship, Vita-Mix will assume the cost of all parts and labor necessary to repair the motor base. - Page 25 • If applicable, improper installation or ventilation in the case of the in-counter model of the Equipment, or placing the Equipment in a sound enclosure not manufactured by Vita-Mix will void this warranty. • This warranty is void in the event that repairs to the Equipment are performed by someone other than Vita-Mix or an authorized Vita-Mix Service Center. Vita-Mix will not be responsible for the cost of any unauthorized repairs. • The sole obligation of Vita-Mix under this warranty is to repair or replace the warranted part or parts as determined exclusively by Vita-Mix. In no event, whether based on contract, indemnity, warranty, tort (including negligence), strict liability or otherwise, shall Vita-Mix be liable for any special, indirect, incidental or consequential damages whatsoever including, without limitation, loss of profit or revenue.
-
Page 26: Parts List
PA RTS L I ST The Quiet One® #15092 Splash lid for 48 oz. / 1,4 L Advance® container #15986 Lid only (no plug) for 48 oz. / 1,4 L Advance® container #15985 Two-part lid assembly for 48 oz. / 1,4 L Advance® container #15978 48 oz. / 1,4 L Advance® container, blade assembly & lid assembly #15980 48 oz. / 1,4 L Advance® container only #15979 48 oz. / 1,4 L Advance® container, blade assembly, no lid assembly #15990 Advance® blade agitator assembly #15585 Retainer nut #891 Drive socket #15579 Sound-reducing centering pad #15080 Compact back cover and cover door with removable hinge design #15081 Compact cover door #15082 Compact back cover #15107 Isolation Gasket #15083 In-Counter gasket IMPORTANT NOTES! • Outside the U.S.A. and Canada, your machine may come with a different container configuration. Contact your local Vitamix Distributor for item numbers. • Other than the drive socket, blade assembly and retainer nut, this unit is not user serviceable. - Page 27 Items Sold Separately: #15985 #15986 #15606 Software Kit - USB Version #15978 #15980 #15644 Extra Programming Chip #15979 for Software Kit #15990 #15988 #15585 One-Piece Lid #891 #15579 #15596 Retainer Nut Wrench #15107 #15081 #15082 #15080 #15083...
-
Page 28: Product Specifications
• Depth: 10.7 in. / 27,2 cm with handle • Width: 8.5 in. / 21,6 cm In-Counter Dimensions: • 16.5 in. / 41,9 cm high with lid closed • 23.0 in. / 58,4 cm high with lid open • Depth: 10.7 in. / 27,2 cm with handle • Width: 8.5 in. / 21,6 cm • Depth below counter: 1.2 in. / 3,0 cm When applicable: To see the complete line of Vitamix products, ® visit vitamix.com/foodservice Vita-Mix Corporation ® Commercial Division 8615 Usher Road, Cleveland, Ohio 44138 U.S.A.
Need help?
Do you have a question about the The Quiet One VM50031 and is the answer not in the manual?
Questions and answers