Table of Contents
Advertisement
Advertisement
Table of Contents
Troubleshooting

Related Manuals for Leica Rugby 320 SG


Summary of Contents for Leica Rugby 320 SG
- Page 1 Leica Rugby 320 SG User Manual Version 1.0 English...
- Page 2 The model and the serial number of your product are indicated on the tion type plate. Enter the model and serial number in your manual and always refer to this information when you need to contact your agency or Leica Geosys- tems authorized service workshop. Type-Serial No.: 320-_______________...
-
Page 3: Table Of Contents
8.3 Cleaning and Drying Safety Directions 9.1 General 9.2 Intended Use 9.3 Limits of Use 9.4 Warranty 9.5 Responsibilities 9.6 Hazards of Use 9.7 Laser Classification 9.8 Electromagnetic Compatibility (EMC) 9.9 FCC Statement, Applicable in U.S. Technical Data Rugby 320 SG... -
Page 4: Introduction
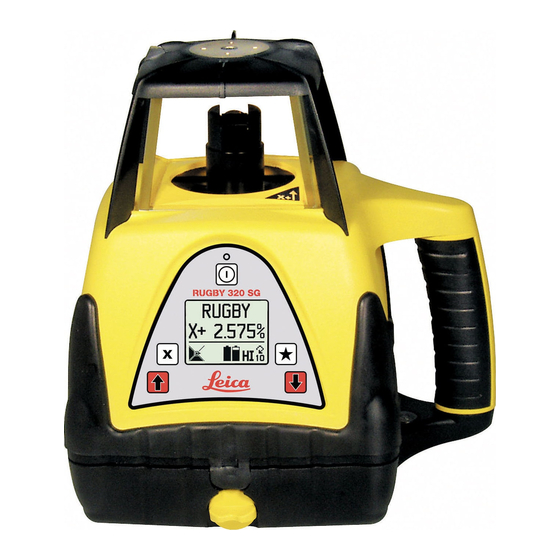
The Rugby Grade lasers are rugged, accurate and fully electronic with an operating range up to 3000 feet (900 meters) diameter. The Rugby 320 SG is a single grade laser and is capable of producing an accurate plane of laser light for applications that are level (1) or having a single grade (2). -
Page 5: Features And Functions
Raised alignment sights and mounting plate for the optional sighting scope. k) Easy grip handle for carrying and setup. Tripod mount for attachment to a 5/8”-11 tripod. Features and Functions Rugby 320 SG... -
Page 6: Operation
Grade Capability The Rugby 320 SG can have up to 25.000% grade in the X-axis. The Y-axis does not have grade capabilitiy, and is a “level only” axis. If no button is pressed, the display will revert to the main display after ten seconds. - Page 7 Move the grade rod to a point on the slope that is too be matched. Then, dial grade into the laser until the Rod-Eye indicates an on-grade reading. The percent of grade in the display is now equal to the grade being matched. Operation Rugby 320 SG...
-
Page 8: Identification Of The Axes
As shown, the direction of the X-axis is seen from the front of the Rugby, sighting over the top of the Rugby. Rotate the Rugby slightly until the sights are aligned with your second control point. Once aligned, work can begin. Rugby 320 SG Operation... -
Page 9: Precise Alignment Of The Axes
Rugby clockwise (to the right) until the two readings are the same. • If the second reading is less than the first reading, rotate the Rugby counter-clockwise (to the left) until the two readings are the same. Operation Rugby 320 SG... -
Page 10: Setup
This places the locking mechanism also into the wind, and will provide better stability. Setup Options The Rugby has several setup options that are easily accessed and changed in the first setup screen. From the main operating screen, Press STAR to access the setup screen. Rugby 320 SG Setup... - Page 11 20 rps. (300, 600, 900, 1200 rpm) Select the head speed that provides the best performance for your appli- cation. The selected head speed is shown on the bottom, right corner of the main display screen. Setup Rugby 320 SG...
- Page 12 In manual mode the self-leveling function is turned off. The display screen will show the following: The X-axis slope can be changed using the X and arrow buttons, but the amount of change is not shown in the display. Rugby 320 SG Setup...
- Page 13 Rugby. This selection is made in the second setup screen. The settings for beam masking are normally not saved when the Rugby is turned off. The Rugby can be made to save the mask settings in the second setup screen. Setup Rugby 320 SG...
-
Page 14: Additional Setup Options
Select the EXIT window, then press the STAR button to exit and return to the main display. If no button is pressed, the display will revert to the main display after ten seconds. Rugby 320 SG Setup... -
Page 15: Checking Level Accuracy
X-axis (Position 2). Mark the position half-way between the two marks. The X-axis is within its accuracy specification if the two marks are within ± 1/16” (± 1.5 mm) from center. Checking Level Accuracy Rugby 320 SG... -
Page 16: Adjusting Level Accuracy
± 20 arc seconds. Pressing the power button at any time before completing the procedure will revert the accuracy to previously saved information. Rugby 320 SG Checking Level Accuracy... -
Page 17: Accessories
+20°C) if possible. • It is normal for the battery to become warm during charging. Using the chargers recommended by Leica Geosystems, it is not possible to charge the battery if the temperature is too high. • For new batteries or batteries that have been stored for a long time (>... -
Page 18: The Sighting Scope
The scope is roughly aligned at the factory. If a more precise alignment is desired, first align the Rugby to a second control point using the proce- dure for Precise Alignment of the Axes found in this manual. A = Vertical crosshair alignment Rugby 320 SG Accessories... -
Page 19: Troubleshooting
Unit is too hot or cold to operate properly. • Shade unit if too hot. • Warm unit before continuing if too cold. Negative Grade Disabled • The ability to enter negative grade has been disabled in the second setup screen. Troubleshooting Rugby 320 SG... -
Page 20: Troubleshooting Suggestions
Beam masking not • Set up this preference in the second set-up saved when laser is screen. turned off If none of the above suggestions results in a solution, contact your local dealer or nearest authorized service center. Rugby 320 SG Troubleshooting... -
Page 21: Care And Transport
Shipping When transporting the product by rail, air or sea, always use the complete original Leica Geosystems packaging transport container and cardboard box, or its equivalent, to protect against shock and vibration. Shipping, trans- When transporting or shipping batteries, the person in charge of the... -
Page 22: Cleaning And Drying
Keep plugs clean and dry. • Blow away any dirt lodged in the plugs of the connecting cables Connectors with • Wet connectors must be completely dry before attaching the dust Dust Cap cap. Rugby 320 SG Care and Transport... -
Page 23: Safety Directions
• Use of products with obviously recognizable damages or defects. • Use with accessories from other manufacturers without the prior explicit approval of Leica Geosystems. • Inadequate safeguards at the construction site (e.g. when using on or near roads). •... -
Page 24: Warranty
Leica Geosystems product. Person in charge of The person in charge of the instrument has the following duties: the product •... - Page 25 When transporting or shipping batteries, the person in charge of the product must ensure that the applicable national and international rules and regulations are observed. Before transportation or shipping contact your local passenger or freight transport company. Safety Directions Rugby 320 SG...
- Page 26 • Using the product after incorrect attempts were made to carry out repairs. Precautions: Do not open the product. Only Leica Geosystems authorized service workshops are entitled to repair these products. Inserting and Removing the Batteries: Warning Batteries not recomended by Leica Geosystems may be damaged if charged or discharged.
-
Page 27: Laser Classification
Only Leica Geosystems authorized service workshops are entitled to repair these products. Warning Using a battery charger not recommended by Leica Geosystems can destroy the batteries. This can cause fire or explosions. Precautions: Only use chargers recommended by Leica Geosystems to charge the batteries. - Page 28 Products classified as laser class 2 or 3R may cause dazzle, flash-blind- ness and afterimages, particularly under low ambient light conditions. Rugby 320 SG The rotating laser produces a visible red laser beam which emerges from the rotating head. The laser product described in this section, is classified as laser class 2 in accordance with: •...
-
Page 29: Electromagnetic Compatibility (Emc)
Warning Electromagnetic radiation can cause disturbances in other equipment. Although the product meets the strict regulations and standards which are in force in this respect, Leica Geosystems cannot completely exclude the possibility that other equipment may be disturbed. Caution There is a risk that disturbances may be caused in other equipment if the... - Page 30 Consult the dealer or an experienced radio/TV technician for help. Labeling Rugby 320 SG Conformity to Hereby, Leica Geosystems AG, declares that the product Rugby 320 SG National Regula- is in compliance with the essential requirements and other relevant tions provisions of the applicable Europe Directive.
-
Page 31: Technical Data
Technical Data The Rugby 320 SG Operating range 1500 ft (450 meter) radius Self-leveling accuracy* ±1/16” at 100’ (1.5 mm at 30 meters) Self-leveling range ± 5° Grade Capability -5% to +25% Head Speeds 5, 10, 15, 20 RPS Laser Diode Type... - Page 32 International Standards of Quality Management and Quality Systems (ISO standard 9001) and Environmental Management Systems (ISO standard 14001). Ask your local Leica Geosystems dealer for more information about our TQM program. Leica Geosystems AG Heinrich-Wild-Strasse...
Need help?
Do you have a question about the Rugby 320 SG and is the answer not in the manual?
Questions and answers