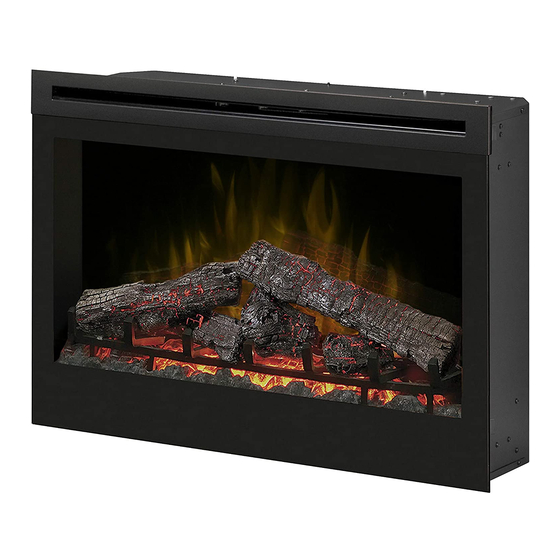
Dimplex DF3033ST Owner's Manual
Electric fireplace
Hide thumbs
Also See for DF3033ST:
- Owner's manual (19 pages) ,
- Service manual (14 pages) ,
- User manual (14 pages)
Advertisement
Table of Contents
- 1 Table of Contents
- 2 Welcome & Congratulations
- 3 Important Safety Instructions
- 4 Save These Instructions
- 5 Quick Reference Guide
- 6 Site Selection and Preparation
- 7 Fireplace Installation
- 8 New Wall Construction
- 9 Operation
- 10 Maintenance
- 11 Glass Cleaning
- 12 Warranty
- 13 Replacement Parts List
- Download this manual
IMPORTANT SAFETY INFORMATION: Always read this manual first
before attempting to install or use this fireplace. For your safety, always
comply with all warnings and safety instructions contained in this manual
to prevent personal injury or property damage.
To view the full line of Dimplex products, please visit
www.dimplex.com
Owner's Manual
Model
DF3033ST
7209120100rev02
Advertisement
Table of Contents

Related Manuals for Dimplex DF3033ST


Summary of Contents for Dimplex DF3033ST
- Page 1 For your safety, always comply with all warnings and safety instructions contained in this manual to prevent personal injury or property damage. To view the full line of Dimplex products, please visit www.dimplex.com 7209120100rev02...
-
Page 2: Table Of Contents
CAUTION: Procedures and techniques which, if not carefully followed, will result in damage to the equipment. W ARNINg: Procedures and techniques which, if not carefully followed, will expose the user to the risk of fire, serious injury, or death. www.dimplex.com... -
Page 3: Welcome & Congratulations
Welcome & Congratulations Thank you and congratulations for choosing to purchase an electric NO NEED TO RETURN fireplace from Dimplex, the world TO THE STORE leader in electric fireplaces. Questions With the Assembly? Please carefully read and save these instructions. -
Page 4: Important Safety Instructions
Do not use in areas where mechanical adjustment, or repair. gasoline, paint, or flammable liquids are used or stored or ⑥ Do not use outdoors. where the unit will be exposed to ⑦ The electric fireplace is not flammable vapors. www.dimplex.com... -
Page 5: Save These Instructions
IMPORTANT SAFETY INSTRUCTIONS ⑬ ⑰ Do not modify the electric Always use a certified fireplace. Use it only as described electrician should new circuits or in this manual. Any other use not outlets be required. recommended by the ⑱ Always use properly manufacturer may cause fire, grounded, fused and polarized electric shock or injury to persons. -
Page 6: Quick Reference Guide
To reduce the risk of fire, electric WARNINg: Ensure the power shock or injury to persons, cord is not installed so that it always use a licensed is pinched or against a sharp electrician. edge and ensure that the www.dimplex.com... -
Page 7: Fireplace Installation
(refer to NOTE 1). preparing the site to install the ③ Store the fireplace in a safe fireplace into your Dimplex mantel dry and dust free location. surround. ① Select a suitable location that NOTE: The dimensions of is not susceptible to moisture and the fireplace are 31 ½... -
Page 8: New Wall Construction
31 ¾ inches (807 mm) electrical codes for rated wide x 22 ¾ inches (578 mm) power consumption. high x 9 ½ inches (241 mm) deep. ② Remove the outer jacket and www.dimplex.com... - Page 9 Fireplace Installation Figure 3 strip the individual conductor from the end. ③ Loosen the screw securing the junction box cover and remove the cover. ④ Take the cables out from the junction box, loosen the two wire twist nuts and remove the cord set (Figure 2).
-
Page 10: Operation
Flame (center position): The flame effect is turned on. Flame & Heat (right position): The flame effect and heater are turned on simultaneously. When the manual control is in the Flame & Heat position the heater does www.dimplex.com... -
Page 11: Remote Control
CAUTION: If you need to continuously reset the Child Lock heater, unplug the unit and call Dimplex North America ② Install two (2) AAA batteries Limited at 1-888-346-7539 into the remote control (included). for technical support. Please have your model and serial ③... - Page 12 ④ Press and hold the Speed Down” button. Initialization Button on the unit ④ Press the Initialization Button (Figure 4C). on the unit (Figure 4C). ⑤ While holding the Initialization ⑤ Press the Flame/Heat On/Off Button, press the Flame/Heat www.dimplex.com...
- Page 13 Operation Your remote will now have a Button button on the remote. different frequency communicating with the fireplace. Remote Control Functions (Figure 6) Figure 6 A. Room Temperature H. Temperature Up B. Set Temperature Dimmer Down C. Dimmer Dimmer Up D.
- Page 14 F. Flame & Heat On/Off Button the flame. Press the F. Flame & Heat On/ Press the K. Flame Speed Down Off button to turn the Flame/ to decrease the speed of the Heat function on. When B. Set flame. www.dimplex.com...
- Page 15 Operation Temperature is higher then ① Depress tab on the battery A. Room Temperature the heat cover on the back of the remote will come on. To turn the heat off, transmitter and remove the lower the B. Set Temperature battery cover (Figure 5).
-
Page 16: Maintenance
Group replacement will reduce NOTE: Log set fits tightly into the number of times you need firebox, some force may be to open the unit to replace light necessary to remove. www.dimplex.com... - Page 17 Maintenance ③ Figure 10 Set log set in front of fireplace. Back ④ Ledge Disconnect the log set LED Ember Bed wire harness from unit. ⑤ Gently pull the flicker rod to the right as far as possible into the rubber bushing on the flicker Rear motor shaft (Figure 9).
-
Page 18: Glass Cleaning
⑤ Insert new bulbs. ⑥ Re-install upper light bracket. Fireplace Surface Cleaning ⑦ Replace glass assembly. Use a cloth dampened with warm water only to clean painted surfaces of the electric fireplace. Do not use abrasive cleaners. www.dimplex.com... -
Page 19: Warranty
What this limited warranty covers and the following model of your newly for how long purchased Dimplex electric fireplace DF3033ST and to newly purchased Products, other than fireplace Dimplex fireplace surrounds (mantels) surrounds (mantels) and trims, and trims. This limited warranty... - Page 20 (mantels) and trims and the limited 1 year warranty period What Dimplex will do in the event of for fireplace surrounds (mantels) a defect and trims also applies to any implied...
- Page 21 Dimplex may, in lieu of repair or midnight on the fifth anniversary replacement, choose to refund of the date of first purchase,...
- Page 22 Warranty is responsible for all expenses PRODUCT, EVEN IF DIMPLEX OR incurred for repair or replacement ITS DIRECTORS, OFFICERS, OR of such product or part including, AGENTS HAVE BEEN ADVISED without limitation, all shipping OF THE POSSIBILITY OF SUCH costs and transportation costs to LOSSES, COSTS OR DAMAGES, and from the authorized dealer’s...
-
Page 23: Replacement Parts List
14. Flicker Rod ........5901250100RP Dimplex North America Limited 1367 Industrial Road Cambridge ON Canada N1R 7G8 © 2009 Dimplex North America Limited...
Need help?
Do you have a question about the DF3033ST and is the answer not in the manual?
Questions and answers