Milwaukee 6065 Operating Instructions
Heavy-duty sanders & grinders
Hide thumbs
Also See for 6065:
- Operator's manual (33 pages) ,
- Operator's manual (33 pages) ,
- Operator's manual (7 pages)
Advertisement
Quick Links
Download this manual
See also:
Operator's Manual
ACCESSORY SELECTION
WARNING!
To reduce the risk of injury, always unplug tool
before attaching or removing accessories. Use
only specifically recommended accessories.
Others may be hazardous.
Sanding Disc and Grinding Wheel Selection
Use sanding discs and grinding wheels that are:
• correct size as written on tool's nameplate.
• correct wheel type and grit for the job.
• rated at or above the RPM on the tool's nameplate.
Use backing pads, adapters, and other accessories that are:
• correct size for tool and for sanding disc or grinding
wheel.
• rated at or above the RPM listed in the "WARNING"
section on the tool's nameplate.
• the proper accessory for the job.
WARNING!
To reduce the risk of personal injury and damage to the
tool, use ONLY accessories rated at or above the RPM list-
ed on the "WARNING" section of the tool's nameplate.
Grit selection
The lower the grit number, the coarser the sanding disc or
grinding wheel is. Coarser sanding discs and grinding wheels
should be used for rough sanding and grinding and finer
sanding discs and grinding wheels should be used for finish-
ing sanding and grinding.
Coarse grit sanding discs (grits of 60 and under) should be
used only on welds and hammer marks. Sanding discs of
RenTrain INC
Milwaukee Tool
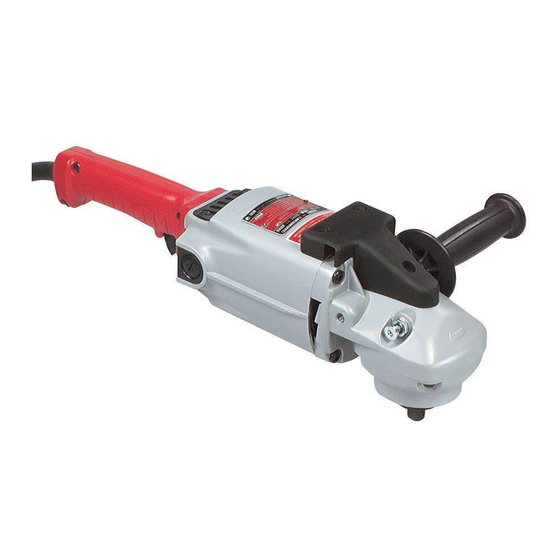
Heavy-Duty Sanders & Grinders
Model Numbers: 6065, 6066, 6067, 6068, 6069, 6070,
6095, 6096, 6098
Operating Instructions
80-grit should produce a suitable finish on most steel.
Sanding Disc and Grinding Wheel Material
Sanding discs and grinding wheels are made of various
materials and are designed for different jobs. Be sure that
you choose the proper sanding disc or grinding wheel for
the job you plan to do.
Care of Grinding Wheels
Grinding wheels should be protected from:
• wetness and extreme humidity.
• any type of solvent.
• extreme changes in temperature.
• dropping and bumping.
Grinding wheels should be stored:
• in an organized way so wheels can be removed with
out disturbing or damaging other wheels.
• with their safety information.
Grinding wheels should NOT be:
• dropped.
• rolled.
• bumped.
If any wheel is dropped, rolled, bumped, subjected to
extreme changes in temperature, or has come into contact
with solvents or wetness, discard wheel immediately.
Grinding Wheel Types
American National Standards Institute (ANSI) has devel-
oped a system of grinding wheel types. Each of these types
has its own guard style that should be used with the wheel.
Descriptions of the types that fit the MILWAUKEE grinders
follow below.
To reduce the risk of injury, the operator should be
instructed in the use, care and protection of grinding
wheels.
Page 1
WARNING!
RenTrain INC
Advertisement

Related Manuals for Milwaukee 6065


Summary of Contents for Milwaukee 6065
-
Page 1: Operating Instructions
Milwaukee Tool Heavy-Duty Sanders & Grinders Model Numbers: 6065, 6066, 6067, 6068, 6069, 6070, 6095, 6096, 6098 Operating Instructions 80-grit should produce a suitable finish on most steel. ACCESSORY SELECTION Sanding Disc and Grinding Wheel Material Sanding discs and grinding wheels are made of various WARNING! materials and are designed for different jobs. - Page 2 Operating Instructions (continued) Grinding Wheel Types (Continued) Fig. 2 Type 27 grinding wheels are made with flat grinding surfaces and are designed for side grinding (when held at a slight angle to workpiece) as well as edge grinding (such as small cutting-off or notching operations).
- Page 3 Operating Instructions (continued) Thread nylon washer onto the spindle. Installing Wire Cup Brushes (Fig. 4) 1. Unplug the tool and lay it on its tool rest. WARNING! 2. Slip flange over spindle with flat side up. Make sure that it slides all the way down over the squared-off edges of the To reduce the risk of injury, guards should be in good spindle.
-
Page 4: Operation
Operating Instructions (continued) Using DC With Controlled Start and Line Lockout OPERATION Before using your tool on 120 volts DC, you must set up tool for DC use. Using the Trigger Lock Mechanism The trigger lock button is on each tool in this manual. The Setting Up Tool for DC Use lock button holds the trigger in the ON position for continu- ous full speed use. -
Page 5: Wire Brushing
Operating Instructions (continued) General Sanding Grinding Sweep sander faster on curved surfaces where contact area is smaller and pressure is greater. WARNING! Reduce pressure at the ends of the side to side strokes to avoid excessive sanding at end areas. To reduce the risk of injury: Use a stiffer backing pad when sanding over low spots.