Advertisement
Table of Contents
- 1 Table of Contents
- 2 Section 1. Safety and General Information
- 3 Section 3. Troubleshooting
- 4 Section 4. Air Cleaner and Air Intake System
- 5 Section 5A. LPG Fuel Systems
- 6 Section 7. Retractable Starter
- 7 Section 9. Disassembly
- 8 Section 10. Inspection and Reconditioning
- 9 Section 11. Reassembly
- 10 Section 12. Clutch
- 11 Section 12 Clutch
- Download this manual
See also:
Owner's Manual
Advertisement
Table of Contents

Subscribe to Our Youtube Channel
Related Manuals for Kohler CH18-CH26


Summary of Contents for Kohler CH18-CH26
-
Page 3: Table Of Contents
Contents Section 1. Safety and General Information ................Section 2. Tools & Aids ......................Section 3. Troubleshooting ..................... Section 4. Air Cleaner and Air Intake System ................ Section 5. Fuel System and Governor ..................Section 5A. LPG Fuel Systems ....................Section 5B. -
Page 15: Section 1. Safety And General Information
Section 1 Safety and General Information Crankshaft cont. Crankshaft T.I.R. PTO End, Crank in Engine ................0.279 mm (0.0110 in.) Entire Crank, in V-Blocks................0.10 mm (0.0039 in.) Cylinder Bore Cylinder Bore I.D. CH18/CH620,CH20/CH640,CH22 (624 cc) ...........77.000/77.025 mm (3.0315/3.0325 in.) CH22/CH670,CH23/CH680 (674 cc) ..............80.000/80.025 mm (3.1496/3.1506 in.) CH25,CH26/CH735,CH730,CH740,CH745,CH750 ........82.988/83.013 mm (3.2672/3.2682 in.) Max. - Page 17 Section 1 Safety and General Information Piston, Piston Rings, and Piston Pin cont. Top and Center Compression Ring End Gap New Bore CH18/CH620,CH20/CH640,CH22 (624 cc) ...........0.25/0.45 mm (0.0098/0.0177 in.) CH22/CH670,CH23/CH680 (674 cc) ..............0.18/0.46 mm (0.0071/0.0181 in.) CH25,CH26/CH735,CH730,CH740,CH745 ..........0.25/0.56 mm (0.0100/0.0224 in.) Used Bore (Max) CH18/CH620,CH20/CH640,CH22 (624 cc) ...........0.77 mm (0.030 in.) CH22/CH670,CH23/CH680 (674 cc) ..............0.80 mm (0.0315 in.)
- Page 21 Section 2 Tools & Aids Section 2 Tools & Aids Certain quality tools are designed to help you perform specific disassembly, repair, and reassembly procedures. By using tools designed for the job, you can properly service engines easier, faster, and safer! In addition, you’ll increase your service capabilities and customer satisfaction by decreasing engine downtime.
- Page 22 Section 2 Tools & Aids ) . t . l a t f i l l a c i l f i l . s r i t i & . s t l i o i f i i f i i f i .
- Page 23 Section 2 Tools & Aids - l e ) t f i l i ® e t i . r e l i o s i s , s t s i l ® e t i s i r c i t e t i ®...
- Page 24 Section 2 Tools & Aids Special Tools You Can Make 2. Remove the studs of a Posi-Lock rod or grind off the aligning steps of a Command rod, so the joint surface is flat. Flywheel Holding Tool A flywheel holding tool can be made out of an old 3.
-
Page 25: Section 3. Troubleshooting
Section 3 Troubleshooting Section 3 Troubleshooting Troubleshooting Guide 10. Diode in wiring harness failed in open circuit mode. When troubles occur, be sure to check the simple causes which, at first, may seem too obvious to be Engine Starts Hard considered. - Page 26 Section 3 Troubleshooting Engine Will Not Idle Engine Uses Excessive Amount of Oil 1. Dirt or water in the fuel system. 1. Incorrect oil viscosity/type. 2. Stale fuel and/or gum in carburetor. 2. Clogged or improperly assembled breather. 3. Faulty spark plugs. 3.
- Page 27 Section 3 Troubleshooting To test the crankcase vacuum with the manometer: • Check the condition of the oil. Drain the oil into a container - the oil should flow freely. Check for metal chips and other foreign particles. 1. Insert the stopper/hose into the oil fill hole. Leave the other tube of manometer open to atmosphere.
- Page 28 Section 3 Troubleshooting No Crankcase Vacuum/Pressure in Crankcase Solution Possible Cause 1. Disassemble breather, clean parts thoroughly, 1. Crankcase breather clogged or inoperative. check sealing surfaces for flatness, reassemble, and recheck pressure. 2. Replace all worn or damaged seals and gaskets. 2.
- Page 29 Section 3 Troubleshooting Leakdown Test Results Air escaping from crankcase breather ............Defective rings or worn cylinder. Air escaping from exhaust system .............. Defective exhaust valve/improper seating. Air escaping from carburetor ............... Defective intake valve/improper seating. Gauge reading in “low” (green) zone ............Piston rings and cylinder in good condition.
- Page 30 Section 3 Troubleshooting...
-
Page 31: Section 4. Air Cleaner And Air Intake System
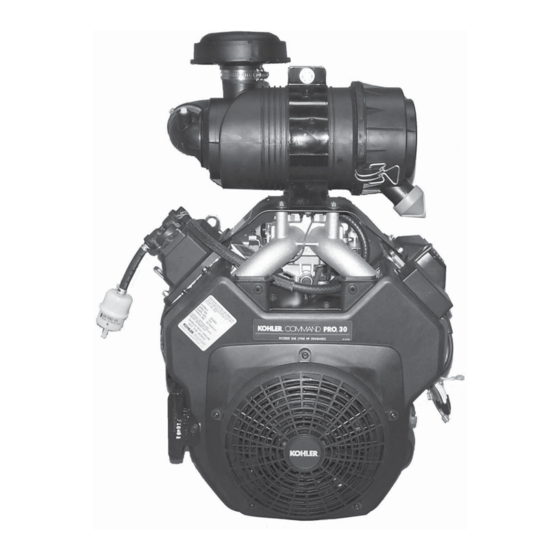
Section 4 Air Cleaner and Air Intake System Air Cleaners General Most engines are equipped with a replaceable, high- density paper air cleaner element, surrounded by an oiled foam precleaner, and housed under a flat outer cover. This is typically referred to as the standard air cleaner assembly. - Page 32 Section 4 Air Cleaner and Air Intake System 3. Wash the precleaner in warm water with detergent. Rinse the precleaner thoroughly until all traces of detergent are eliminated. Squeeze out excess water (do not wring). Allow the precleaner to air dry. 4.
- Page 33 Section 4 Air Cleaner and Air Intake System 5. Check the seal for any damage or deterioration. 7. Reinstall the air cleaner cover and secure with the Replace as necessary. See Figure 4-7. latches or the retaining knob. 6. Reinstall the seal, paper element, precleaner, NOTE: Make sure the correct depth air cleaner element cover, and wing nut.
- Page 34 Section 4 Air Cleaner and Air Intake System Air Cleaner Element Cover and Seal - Make sure element cover is not bent or damaged. Make sure the wing nut and seal are in place to ensure the element is sealed against leakage. Air Cleaner Base - Make sure the base is secured tightly to the carburetor and not cracked or damaged.
- Page 35 Section 4 Air Cleaner and Air Intake System 4. Do not wash the paper element and inner element or use compressed air, this will damage the elements. Replace dirty, bent or damaged elements with new genuine Kohler elements as required. Handle the new elements carefully; do not use if the sealing surfaces are bent or damaged.
- Page 36 Section 4 Air Cleaner and Air Intake System *Cleanout kits, Kohler Part No. 25 755 20-S (black) or 25 755 21-S (gold), are recommended to aid inspection and cleanout of the cooling fins. See Figure 4-15. NOTE: Operating the engine with a blocked grass screen, dirty or plugged cooling fins, and/or cooling shrouds removed, will cause engine damage due to overheating.
-
Page 61: Section 5A. Lpg Fuel Systems
Section 5A LPG Fuel Systems Section 5A LPG Fuel Systems WARNING: Explosive Fuel! LPG is extremely flammable, is heavier than air, and tends to settle in low areas where a spark or flame could ignite the gas. Do not start or operate this engine in a poorly ventilated area where leaking gas could accumulate and endanger the safety of persons in the area. - Page 62 Section 5A LPG Fuel Systems Operation 4. Insufficient vacuum signal, regulator not opening. a. Vacuum line between carburetor and In a liquid withdrawal system, the Liquefied regulator cracked, leaking, kinked, or pinched. Petroleum Gas (LPG) is released from the bottom of b.
- Page 63 Section 5A LPG Fuel Systems LPG Carburetor Adjustments Engine stalls during operation 1. No fuel. 2. Faulty lock-off or blocked filter. General 3. Improper governor setting. The LPG carburetor and regulator are designed to 4. Damaged diaphragms within regulator. deliver the correct fuel-to-air mixture to the engine 5.
- Page 64 Section 5A LPG Fuel Systems High Altitude Operation Impco Carburetor The standard carburetor calibrations will provide 1. Turn off fuel supply at tank. proper operation up to altitudes of 1500 m (5000 ft.). 2. Remove the air cleaner, breather hose, fuel line, No internal changes are necessary or available for either carburetor.
- Page 65 Section 5A LPG Fuel Systems 4. Inspect the overall condition of the fuel Nikki Carburetor enrichment hose attached to the carburetor. It 1. Turn off fuel supply at tank. must be free of cracks, deterioration, and damage. Disconnect the fuel enrichment hose from the 2.
- Page 66 Section 5A LPG Fuel Systems LPG Carburetor - Reassembly Idle Speed Clamp Bracket Position 1. Counting the number of turns, back the idle speed adjustment screw off (counterclockwise), Impco Carburetor 1. Slide the venturi into the carburetor body, so only 1 to 1 1/2 of the threads are visible. See aligning the position mark made prior to Figure 5A-8.
- Page 67 Section 5A LPG Fuel Systems 3. Insert a 0.025 mm (0.001 in.) feeler gauge between the side of the stop collar and the carburetor housing, then check or set the position of the stop collar. The head of the mounting screw must be in contact with the carburetor boss from the back (hose/fitting) side, preventing any further rotation over center.
- Page 68 Section 5A LPG Fuel Systems 2. Manually move the governor lever, with the 6. Check to be sure all system connections are tight. throttle linkage connected, toward the carburetor as far as it will go. Hold it in this position. 7.
- Page 69 Section 5A LPG Fuel Systems Vaporizer Assembly The outer surface of the vaporizer should be kept free of dirt and debris accumulation, which will cause a loss of vaporization efficiency. Visual inspection and necessary cleaning should be performed on a regular basis, more frequently under dusty or dirty conditions.
- Page 70 Section 5A LPG Fuel Systems Impco (Beam) Regulator (See Figure 5A-20) LPG vapor enters at point (A), then passes into primary area (B) at point (28), where pressure is reduced from up to 250 psi at the tank to 4.5 psi in area (B).
- Page 71 Section 5A LPG Fuel Systems Nikki Regulator Primary Chamber Nikki Regulator Secondary Chamber (See Figure 5A-21) (See Figure 5A-22) The primary chamber reduces the high pressure fuel The secondary chamber further reduces the fuel flow from the tank and vaporizer down to pressure from the 29 kPa (4 psi) of the primary approximately 4 psi.
- Page 72 Section 5A LPG Fuel Systems Preventative Maintenance Regulator Service The regulator is preset at the factory and generally Every 1500 hours it is recommended that requires no further adjustment. No periodic service is disassembly, cleaning, and resetting of the regulator required.
-
Page 125: Section 7. Retractable Starter
Section 7 Retractable Starter WARNING: Spring Under Tension! Retractable starters contain a powerful, recoil spring that is under tension. Always wear safety goggles when servicing retractable starters and carefully follow instructions in this section for relieving spring tension. To Remove Starter Starter Housing 1. - Page 126 Section 7 Retractable Starter Keep Pulley Rope Slipknot Handle from Rotating Guide Bushing Rope Hole Knot in Pulley Rope Retainer Figure 7-3. Installing Rope. Figure 7-2. Removing Starter Handle. 10. Tie a slipknot approximately 12 in. from the free 3. Remove the rope retainer from inside the starter end of rope.
- Page 127 Section 7 Retractable Starter Disassembly Brake Spring and WARNING: Spring Under Tension! Brake Washer Do not remove the center screw from the starter until the spring tension is released. Removing the center screw before releasing spring tension, or improper starter disassembly, can cause the sudden and potentially dangerous release of the spring.
- Page 128 Section 7 Retractable Starter 8. Note the position of the spring and keeper Reassembly assembly in the pulley. See Figure 7-7. 1. Make sure the spring is well lubricated with grease. Place the spring and keeper assembly Remove the spring and keeper assembly from the inside the pulley (with spring towards pulley).
- Page 129 Section 7 Retractable Starter 4. Place the brake washer in the recess in starter 7. Tension the spring and install the rope and pulley; over the center shaft. handle as instructed in steps 6 through 12 under “Rope Replacement” on page 7.2. 5.
- Page 130 Section 7 Retractable Starter...
-
Page 177: Section 9. Disassembly
Section 9 Disassembly Section 9 Disassembly WARNING: Accidental Starts! Disabling engine. Accidental starting can cause severe injury or death. Before working on the engine or equipment, disable the engine as follows: 1) Disconnect the spark plug lead(s). 2) Disconnect negative (-) battery cable from battery. General 20. - Page 178 Section 9 Disassembly 3. Remove and discard the oil filter. See Figure 9-5. Figure 9-2. Removing Dipstick from Tube. Figure 9-5. Removing Oil Filter. Figure 9-3. Removing Oil Fill Cap from Cover. Figure 9-4. Removing Oil Drain Plug. Figure 9-6. Removing Oil Filter Adapter Nipple. 2.
- Page 179 Section 9 Disassembly 4. Remove the hex flange screws securing the bracket and base. See Figure 9-8. Two additional rear screws must be removed if the engine contains a rear air cleaner support bracket. See Figure 9-9. Figure 9-8. Removing Air Cleaner Base Retainer. Figure 9-7.
- Page 180 Section 9 Disassembly Mounting Screws Figure 9-11. Removing Tube from Breather Cover. Figure 9-13. Air Cleaner Bracket Mounting Screws (Two-Barrel Model Pictured). 6. Remove the rubber breather tube from the breather cover. See Figure 9-11. 4. Remove the heavy-duty air cleaner as an assembly from the engine.
- Page 181 Section 9 Disassembly 3. Remove the two hex flange screws securing the fuel pump to the bracket or to the blower housing. See Figure 9-18. The fuel pump body may be metal or plastic. Figure 9-15. Disconnecting Fuel Inlet Line at Carburetor.
- Page 182 Section 9 Disassembly Figure 9-20. Mechanical Fuel Pump. Figure 9-22. Rear Air Cleaner Bracket (Some Models). Remove Control Panel (If So Equipped) 2. Mark the spring hole locations and disconnect 1. Disconnect the Oil Sentry™ Indicator Light the spring from the governor lever. See Figure wires.
- Page 183 Section 9 Disassembly Remove External Governor Controls 2. One-Barrel Carburetor Models Only: Remove the two carburetor mounting screws. See Figure 1. Loosen the hex flange nut and remove the 9-27. governor lever from the cross shaft. See Figure 9-25. Leave lever attached to the throttle linkage Two-Barrel Carburetor Models Only: If required and lay assembly on the top of the crankcase.
- Page 184 Section 9 Disassembly 5. If necessary, the carburetor, throttle linkage and Remove Outer Baffles and Blower governor lever can be separated. Reattach the Housing bushings to the linkage following separation to 1. Disconnect the plug from the rectifier-regulator avoid losing them. on the blower housing.
- Page 185 Section 9 Disassembly Figure 9-35. Removing Outer Baffles. 5. Remove the outer baffles on both sides. See Figure 9-35. 6. On engines equipped with a metal grass screen, remove the screen before removing the blower housing. See Figure 9-36. Plastic grass screens can be removed after the blower housing is removed.
- Page 186 Section 9 Disassembly Debris Shield Mounting Screws Figure 9-39. Removing Fasteners Holding Baffle Figure 9-37. Debris Shield Details (Two-Barrel and Breather Cover. Carburetor Model Shown). 2. Remove both inner baffles. See Figure 9-40. 9. Remove the remaining hex flange screws and detach the blower housing.
- Page 187 Section 9 Disassembly 7. Remove the hex flange screw, breather reed retainer and breather reed. See Figure 9-44. Figure 9-41. Breaking Breather Cover Seal. 5. Remove the breather cover and gasket (if used). Figure 9-44. Removing Breather Reed. See Figure 9-42. Remove Valve Covers Three valve cover designs have been used.
- Page 188 Section 9 Disassembly Remove Ignition Modules 3. Leave the wiring harness attached to the manifold. 1. Disconnect the lead(s)* from each ignition module. See Figure 9-46. *Modules for non- Aluminum SMART-SPARK ignition systems have only one ™ Intake kill lead. Manifold Plastic Intake Manifold...
- Page 189 Section 9 Disassembly Hex Flange Screw Figure 9-49. Bolt Wiring Harness Detail. Hex Flange Nut and Washer Remove Spark Plugs 1. Remove the spark plug from each cylinder head. Figure 9-51. Removing Cylinder Head Fasteners. 2. Mark the position of the push rods as either intake or exhaust and cylinder 1 or 2.
- Page 190 Section 9 Disassembly Hex Flange Screw Style Mounting Figure 9-53. Removing Hydraulic Lifter. Stud and Hex Flange Nut Style Mounting Figure 9-52. Removing Cylinder Head Assembly. Figure 9-54. Mark Position of Hydraulic Lifters. 4. Remove the lifters from the lifter bores. Use a Hydraulic Lifter Tool.
- Page 191 Section 9 Disassembly Disassemble Cylinder Heads 3. Once the valve spring is compressed, remove the following items. See Figures 9-58 and 9-59. 1. Remove the two hex flange screws, rocker arm pivots and rocker arms from the cylinder head. • Valve spring keepers See Figure 9-56.
- Page 192 Section 9 Disassembly Figure 9-60. Removing Plastic Type Grass Screen. Figure 9-62. Removing Flywheel Fastener Using Strap Wrench. 2. Remove the four hex flange screws and fan. See Figure 9-61. 2. Remove the hex flange screw and washer. 3. Use a puller to remove the flywheel from the crankshaft.
- Page 193 Section 9 Disassembly 2. Locate the three splitting tabs that are cast into the perimeter of the closure plate. Insert the drive end of a 1/2" breaker bar between the top splitting tab and the crankcase. Hold the handle horizontal and pull toward you to break the RTV seal.
- Page 194 Section 9 Disassembly Remove Camshaft 1. Remove the camshaft and shim. See Figure 9-69. Camshaft Shim Figure 9-71. Mark End Cap with Cylinder Number Before Removal. Figure 9-69. Removing Camshaft (Note Shim). NOTE: The cylinders are numbered on the crankcase. Use the numbers to mark each Remove Connecting Rods with Pistons end cap, connecting rod and piston for reassembly.
- Page 195 Section 9 Disassembly Remove Crankshaft 1. Carefully pull the crankshaft from the crankcase. See Figure 9-73. Note thrust washers and shims if used. Figure 9-75. Removing Governor Cross Shaft Retainer (8 mm Shaft Design). 2. Pull the cross shaft with small washer out through the inside of the crankcase.
- Page 196 Section 9 Disassembly 9.20...
-
Page 197: Section 10. Inspection And Reconditioning
Section 10 Inspection and Reconditioning Section 10 Inspection and Reconditioning This section covers the operation, inspection, and Automatic Compression Release (ACR) repair/reconditioning of major internal engine Some engines are equipped with the optional components. The following components are not Automatic Compression Release (ACR) mechanism. covered in this section. - Page 198 Section 10 Inspection and Reconditioning Inspect the crankshaft bearing surfaces for scoring, Procedure to Remove Crankshaft Plug: grooving, etc. Some engines have bearing inserts in 1. Drill a 3/16" hole through the plug in the the crankshaft bore of the closure plate and/or crankshaft.
- Page 199 Section 10 Inspection and Reconditioning NOTE: Kohler pistons are custom-machined to Check the cylinder bore wall for scoring. In severe exacting tolerances. When oversizing a cases, unburned fuel can cause scuffing and scoring of cylinder, it should be machined exactly the cylinder wall.
- Page 200 Section 10 Inspection and Reconditioning The final cleaning operation should always be a 3. Piston-to-bore clearance is the difference thorough scrubbing with a brush and hot, soapy between the bore diameter and the piston water. Use a strong detergent that is capable of diameter (step 2 minus step 1).
- Page 201 Section 10 Inspection and Reconditioning EXHAUST INTAKE VALVE VALVE EXHAUST INSERT INTAKE INSERT Dimension Intake Exhaust 89° Seat Angle 89° 36.987/37.013 mm (1.4562/1.4572 in.) Insert O.D. 32.987/33.013 mm (1.2987/1.2997 in.) 4 mm (0.1575 in.) Guide Depth 6.5 mm (0.2559 in.) Guide I.D.
- Page 202 Section 10 Inspection and Reconditioning Normal: Even after long hours of operation a valve Leakage: A poor grind on face or seat of valve will can be reconditioned and reused if the face and allow leakage resulting in a burned valve on one side margin are in good shape.
- Page 203 Section 10 Inspection and Reconditioning Stem Corrosion: Moisture in fuel or from Excessive Combustion Temperatures: The white condensation are the most common causes of valve deposits seen here indicate very high combustion stem corrosion. Condensation occurs from improper temperatures, usually due to a lean fuel mixture. preservation during storage and when engine is repeatedly stopped before it has a chance to reach normal operating temperatures.
- Page 204 Section 10 Inspection and Reconditioning Valve Guides If a valve guide is worn beyond specifications, it will not guide the valve in a straight line. This may result in burnt valve faces or seats, loss of compression, and Valve Seat Cutter excessive oil consumption.
- Page 205 Section 10 Inspection and Reconditioning Ring failure is usually indicated by excessive oil Detonation damage occurs when a portion of the fuel consumption and blue exhaust smoke. When rings charge ignites spontaneously from heat and pressure fail, oil is allowed to enter the combustion chamber shortly after ignition.
- Page 206 Section 10 Inspection and Reconditioning Replacement pistons are available in STD bore size, and in 0.25 mm (0.010 in.), and 0.50 mm (0.020 in.) oversize. Replacement pistons include new piston ring sets and new piston pins. Replacement ring sets are also available separately for STD, 0.25 mm (0.010 in.), and 0.50 mm (0.020 in.) oversize pistons.
- Page 207 Section 10 Inspection and Reconditioning Service replacement connecting rods are available in Piston Ring STD crankpin size and 0.25 mm (0.010 in.) undersize. The 0.25 mm (0.010 in.) undersized rod can be Dykem identified by the drilled hole located in the lower end Stripe of the rod shank.
-
Page 208: Section 11. Reassembly
Section 10 Inspection and Reconditioning Reassembly Disassembly 1. Install the locking tab thrust washer on the The governor gear must be replaced once it is governor gear shaft with the tab down. removed from the closure plate. 2. Position the regulating pin within the governor NOTE: The governor gear is held onto the shaft by gear/flyweight assembly and slide both onto the small molded tabs in the gear. - Page 209 Section 10 Inspection and Reconditioning 3. Install the rotor. 4. Install the oil pump body to the closure plate and secure with the two hex flange screws. Torque the hex flange screws as follows: a. Install fastener into location No. 1 and lightly tighten to position pump.
- Page 210 Section 10 Inspection and Reconditioning Governor Cross Shaft Oil Seal If the governor cross shaft seal is damaged and/or leaks, replace it using the following procedure. Remove the oil seal from the crankcase and replace it with a new one. Install the new seal to the depth shown in Figure 10-18 using a seal installer.
-
Page 243: Section 12. Clutch
Section 12 Clutch Section 12 Clutch Clutch General Some engines are equipped with a “wet” disc type clutch. See Figure 12-1 for exploded view of clutch. Nameplate Shifting Lever Gasket Clutch Yoke Housing Seal Shaft (Yoke) Roll Pin Adjusting Oil Seal Ring Power Driven... -
Page 244: Section 12 Clutch
Section 12 Clutch Service 2. After adjustment is made, engage clutch and On this type, an oil “splash” type lubrication system is check to make sure rollers go over center to lock used. The proper oil level must be maintained to the unit in engaged position and prevent provide efficient lubrication.
Need help?
Do you have a question about the CH18-CH26 and is the answer not in the manual?
Questions and answers