Table of Contents
Advertisement
Quick Links
Advertisement
Table of Contents

Related Manuals for Ferguson ARIVA 200


Summary of Contents for Ferguson ARIVA 200
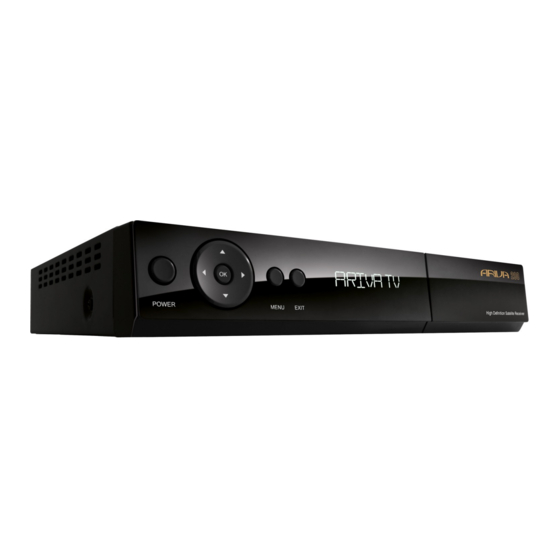
- Page 1 User manual ARIVA 200 English...
- Page 2 WARNING !!! Ferguson satellite receivers support recording on external hard disk drives (HDDs) and flash memories (pendrives). In all instances, the correct operation of the recording function depends on the type of connected memory! You must read the following limitations.
-
Page 3: Table Of Contents
Table of contents SAFETY MEASURES........................5 DOWNLOADABLE SOFTWARE......................5 ABOUT THE INSTRUCTION MANUAL....................6 MARKINGS AND SIGNS APPLIED TO THE RECEIVER................6 BASIC INFORMATION ABOUT THE RECEIVER..................7 1. Main features........................7 2. Contents of box........................7 3. Important instructions concerning handling of the receiver............7 4. Remote control........................8 4.1 Installation of batteries....................9 5. - Page 4 Music...........................32 Photos..........................32 Video...........................33 Recordings........................33 15.5 Safe removal of a USB device..................33 16. Edit channels........................34 16.1 TV channels list......................34 How do I move a channel?....................34 How do I delete a channel?....................35 How do I add to the group of favourites?................35 How do I change a channel name?..................36 16.2 Radio channel list......................37 16.3 Delete all........................37 16.4 Favorite........................37...
-
Page 5: Safety Measures
• DOWNLOADABLE SOFTWARE Ferguson has taken every effort to provide users with software updates in order to ensure that the parameters of the satellite television receiver are up to date. Ferguson reserves itself the right to amend, change or modify the software used in the satellite television receiver as it shall choose and without prior notification. -
Page 6: About The Instruction Manual
Ferguson has made every effort to provide the most current information about its products. Ferguson does not grant any guarantee as to the contents of the present instruction manual and disclaims any implied guarantees concerning market value or suitability for specific purposes. -
Page 7: Basic Information About The Receiver
BASIC INFORMATION ABOUT THE RECEIVER 1. Main features Reception of high definition channels ✔ Scaling of PAL signals to a resolution of 720p or 1080i ✔ Availability of 32 programmable timers ✔ Separate lists of favourite, TV and Radio channels ✔... -
Page 8: Remote Control
4. Remote control Due to the standardization of Ferguson equipment, the majority of these devices use the same remote control unit, i.e. RCU640. This means that not all keys are used by this equipment model!! The universal 4-in-1 RCU640 remote control unit can be used to operate any television set (TV), Ferguson satellite receivers (STB), the Ferguson AV-770 amplituner (AMP), and Ferguson DVD players (DVD). -
Page 9: Installation Of Batteries
4.1 Installation of batteries Remove the cover of the battery compartment on the rear panel of the remote control unit; slide it downwards and put it aside. Insert two AAA (R03) batteries into the compartment, observing the indicated polarity. Do not mix old and new batteries, or batteries of different types. -
Page 10: Cam Module And Subscriber's Card
5.1. CAM module and subscriber's card Inserting the module and subscriber's card The conditional access module resembles a PC card (known as the PCMCIA) for laptop computers. There are different types of CI modules, suitable for various encoding systems. 1. First, turn off the receiver. 2. -
Page 11: Connecting The Satellite Antenna
Ferguson receiver. In order to connect an antenna system to a USALS positioner, you should connect the positioner out to the LNB IN of the Ferguson receiver. The role of the positioner installed between the mast and the antenna is to turn the bowl in such a way as to ensure that it is directed to various satellite positions. - Page 12 The USALS function considerably simplifies configuration of the antenna. The Ferguson receiver requires that you enter the geographical coordinates of the antenna in order to automatically calculate the angle of revolution of the motor for individual satellites. The receiver activates the positioner automatically and turns the antenna to the selected satellite.
-
Page 13: Connecting The Satellite Receiver
9. Connecting the satellite receiver The following illustrations show cable connections for a television and other devices connected with the receiver. If you require any assistance in connecting individual devices, contact your local technician. Before connecting or altering cabling, disconnect the receiver from the mains !!! 9.1 Connection by means of an HDMI cable (recommended) 1. -
Page 14: Connection By Means Of The Yprpb (Component) Sockets
9.2 Connection by means of the YPrPb (component) sockets 1. Connect the antenna to the LNB IN socket of the receiver. 2.Connect the video and audio by means of five cinch cables to the television set. Three cables, coloured green, blue and red, are used to send the three colour components. -
Page 15: Connection Of An Audio System
If you have a DVD recorder, video recorder, DVD or other devices - connect them in a cascade with the VCR port. Remember that the TV/STB button on the remote control unit is used to change the source of image from the SCART cascade. 9.4 Connection of an audio system 1. -
Page 16: Connection Of An External Memory
9.5 Connection of an external memory 1. The receiver supports all types of hard disk drives in housings that are equipped with an independent power supply. The sole condition is that the hard disk has to have a single basic partition that is formatted in the NTSF (recommended) or FAT32 system. 2.We recommend that you regularly archive data on your PC computer. -
Page 17: Connection To The Lan Local Network
9.7 Connection to the LAN local network In order to connect the receiver to a local network, use an RJ45 cable. We recommend that you restart the receiver whenever the network settings are changed. 9.8 Connection to the computer by means of an RS232 Null Modem cable For connection to a computer, use a Null Modem cable. -
Page 18: First Steps
FIRST STEPS 1. Insert the plug of the receiver and other additional devices to a wall socket. 2. Select AV signal source of your television set. 3. The satellite receiver is supplied with reinstalled television channels. In order to watch other, i.e. -
Page 19: Main Menu
10. Main menu Press the MENU button on the remote control in order to display the following main menu, which contains six items: 1. editing channel lists 2. installation 3. system settings 4. tools 5. games 6. recording settings 11. Installation The installation menu is used to set antenna installation parameters and to search for channels on a satellite. -
Page 20: Antenna Setup
11.3 Antenna setup This menu is used to set detailed operating parameters for previously selected satellites, depending on your antenna system. Select a satellite by pressing the left/right arrow keys. Only satellites marked on the list of satellites will be available. Now select the converter type (usually, you do not have to change this option and may leave it set to "universal"). -
Page 21: Single Satellite Search
11.4 Single satellite search In this menu you can search for channels from one selected satellite. To this end, select a satellite by pressing the left/right arrow keys. Only satellites marked on the list of satellites will be available. Next, select whether you want to search only for uuencoded channels or for all channels, or for radio channels, television channels, or all channels. -
Page 22: List Of Transponders
11.6 List of transponders Channels on satellites are located in "sets". Such a "set" of channels comprises a transponder. A list of transponders is a list of frequencies available on a given satellite. In this menu you can edit, add and remove individual frequencies. Select a satellite by pressing the left/right arrow keys, and the desired frequency using the up/down arrow keys. -
Page 23: System Settings
12. System settings 12.1 Language This menu is used to define the language in which the receiver's menu is displayed. The preferred and second language options refer to audio soundtracks. If a given channel supports more than one audio soundtrack, the receiver will by default search for soundtracks in the selected languages in this order. -
Page 24: Display Setting
12.3 Display setting This menu is used to adjust the image displayed by the receiver. You can change the brightness, contrast and colour saturation. By default, all of these values are set to 50. 12.4 Local time settings This menu is used to set the time and date. The receiver can automatically download the time and date from the satellite (recommended), or you may set the time and date manually. -
Page 25: Parental Lock
12.5 Parental lock In this menu you may specify whether the receiver is to use a parental block or not. In addition, you can turn on or off the password protection function for selected menu options and change the default password. The default password is four zeros: 0000. 12.6 OSD settings In this menu you can define the basic parameters of the on-screen menu (OSD). -
Page 26: Other
12.8 Other In this menu you can change the remaining options, such as the power supply of the converter, select the types of channels played, and how the receiver is to behave when switching channels. -
Page 27: Tools
13. Tools 13.1 Information In this menu you can obtain detailed information about your software version. The software structure is divided into a number of independent databases. The most important of these from the point of view of the user is the userdb, which archives current settings and channel lists. The receiver's software version is a symbol placed next to maincode. -
Page 28: Common Interface
13.4 Common interface In this menu you can obtain additional information about your CAM conditional access module. This option is active only when the module is in the CI socket and has been correctly recognized by the receiver. Detailed information about the module depends on the module's software and is not connected with the software and operation of the receiver. -
Page 29: Local Network Settings
13.7 Local network settings This menu serves to configure addresses and DNS servers. These options concern the Ethernet port, which enables the exchange of data over the network. 13.8 Upgrade by network The receiver allows you to update software over the Internet. Detailed information about current connection parameters can be found on the manufacturer's website. -
Page 30: Games
14. Games The receiver has three factory-installed games: Tetris (classic arranging of successive levels using blocks of various shapes). • Othello (a logical game, which consists in the placement of your colour on a board and • changing your opponent's colour; the person whose colour dominates, wins). Sudoku (the game consists in completing diagrams with numbers from 1 to 9 in such a •... -
Page 31: Dvr Configuration
15.2 DVR configuration In this menu you can adapt preferences concerning recording to an external USB memory device. In the first option you decide whether you want to use the time shift option. This mode makes it possible to stop the current transmission at any moment by pressing the PAUSE button and resume it after a break by pressing the PLAY button. -
Page 32: Media Player
Select the event that you want to programme and press OK. Set the timer activation frequency. Select the channel (press OK to display the simplified channel list). Next set the date, start time and duration. Select ‘record’ to return to the events list. A new item has been added. 15.4 Media Player The receiver is equipped with a simple multimedia player. -
Page 33: Video
Video In this tab, you can play back files in MPG format. High resolution MPG files can also be played back. Recordings This tab is used to play back recordings made using the receiver. Each recording may be blocked by a password, deleted, or its name changed. -
Page 34: Edit Channels
16. Edit channels 16.1 TV channels list In this menu you can edit the list of television channels. Editing is effected by means of the coloured buttons on the remote control unit. The raised colour function is active - select OK on the selected channel in order to use it. -
Page 35: How Do I Delete A Channel
How do I delete a channel? Proceed to the editing of channel lists. Select a channel and press OK in order to see a preview in a small window. Press the blue button in order to pass to the channel edition menu. Press the blue button in order to switch on the channel delete function and OK on the channel that you want to remove. -
Page 36: How Do I Change A Channel Name
How do I change a channel name? Proceed to the editing of channel lists. Select a channel and press OK in order to see a preview in a small window. Press the blue button in order to pass to the channel edition menu. Press the green button in order to switch on the channel name change function. -
Page 37: Radio Channel List
16.2 Radio channel list In this menu you can edit the list of radio channels. Editing is effected by means of the coloured buttons on the remote control unit. The raised colour function is active - select OK on the selected channel in order to use it. -
Page 38: Basic Functions Supported By The Remote Control
In order to change a name, select the favourites group and press OK. Next use the numerical and coloured buttons to input the name. Confirm the changes by pressing the yellow button on the remote control. 17. Basic functions supported by the remote control 17.1 EPG This function displays a programme guide. -
Page 39: Txt - Teletext
17.3 TXT - teletext This function displays the teletext, provided that it is broadcast by the selected television station. Keep in mind that correct code page (diacritical marks) displayed depending on the language settings made in the language settings menu! 17.4 AUDIO The green audio button displays a window with available audio soundtracks. -
Page 40: Rec - Recording
17.6 REC - recording This function is available only when an external USB memory device is correctly connected!!! ● 1. Select a channel and press the REC button. The present channel will now be recorded. 2. If you press the REC button again, a list of options will be displayed, where you can determine the duration of the recording (by default, this is 2 hours). -
Page 41: Pause - Time Shift
From the moment you switch on the time shift mode, the Ferguson receiver will constantly record the signal from the satellite in a buffer. The buffer is created automatically on the external USB memory device. -
Page 42: Info
Recording the time shift buffer 1. This option is available only if previously switched on in the receiver's menu. 2. Switch on the time shift mode by pressing PAUSE. 3. Press REC in order to record the existing buffer and continue recording the channel. -
Page 43: Attachment A - Glossary Of Terms
ATTACHMENT A - GLOSSARY OF TERMS Pay-TV – Pay-per-view digital television, to CA - Conditional Access – a coding system which only subscribers have access. The used in order to protect transmitted data service is provided by satellite, cable, over the against unauthorised access. -
Page 44: Attachment B - Using The Universal Rcu-640 Remote Control
ATTACHMENT B – Using the universal RCU-640 remote control Programming the television set by means of a brand code 1. Switch on the television set with which you want to use the remote control. 2. Find the brand of your television set on the attached list (e.g. LG 0075; 0082; 0083; …). 3. - Page 45 Manual programming of the television set 1. Switch on the television set with which you want to use the remote control. 2. Direct the remote control towards the television set. Press and hold the TV button for 3 seconds. 3. The POWER button on the remote control will light up. This means that the RCU640 is in programming mode.
-
Page 46: Tv Brands Code
1440; 1469; 1559; 1578; 1587; 1588; AWATRON 0359 BROTHER 0322; 0513 1638; 1639; 1666; 1711 AXXWNT 0513 BROWN 1317 TV brands code ANAM 0540; 0513 BAIRD 0375; 0378; 0539 BRUNS 0262; 0540; 0242; 0359; ANEX 1639; 0513 BANG & 0336; 1611; ANGLO 0322;... - Page 47 0418; 0447; 0472; 0544; 0556; 0557; DE GRAAF 0513 0359; FERGUSON 0051; 0217; 0229; 0237; 0513; 1009; 0141; 1368; 1422; 0540 DECCA 0065; 0067; 0111; 1637; 1009; 1639; 0230 0242; 0254; COMET 0540; 0556; 0536; 0262; 0513 0246; 0254; ELECTRO 0302;...
- Page 48 SONTO GTRONIC 0495; 0513 1672; 1705 0557; 0062; 0083; 0162; 0178; 0203; 0204; GTT 0359; 0424; 1638; 0374; 0513 HORNYPHON 0540; 0513 1423; 1608; 0467; 0351 0251; 0252; 0431; 0539; 0052; 1654; GUTTA 0495 HOSHAI 0097; 0424; 0262; 0513 JEJA 0006 0222;...
- Page 49 KIOTA 0359; 0322; 0544; 0415; 1082 LME 0025; 0067; 0114; 0204; 0237; MAXELL 0329; 0424; 0359; 0025 0114; 0513; KITON 0540; 0513 0435; MAXIMAL 0230 1637; 0133; 0077; 0540; 1126; 0083 KITT 0067; 0322; 0513 0230 MAXON 0359 MTC 0336; 1296; 0083; 1657; 1637; KITTEN 0513;...
- Page 50 0322; 0390; OTAKE 0300; 0195 PLAYDOR 0322 SANDRA 0431; 0539; 0556; 0558; 0591; 1423; OTF 0230; 0111 PLAYSONIC 0067; 0237; 0024; 0513 COLOR 0222 OTHER 5013; 5023 POLYTRON 0513 0025; 0067 NORDING 0077; 0131 OTHER LINE 0067; 0025; 0435; 0513 POP 0322;...
- Page 51 0108; 0111; 0067; 0125; 0136; 0137; TAKARA 0513 1657; 1658; 1661; 1669; 0539 SIREL 0025 0148; 0149; 0157; 0162; 0164; 0167; TALENT 1085 SEAWAY 0513 SKANTIC 0052; 0075; 0082; 0083; 1637; 0195; 0196; 0197; 0230; 0242; TALITA 0024; 0025; 0096; 0111; SEDIP 0025;...
- Page 52 STERLING 0540; 0513 5023 XONYCS 0513 VIDECON 0111 STERN 0062; 0080; 0108; 0153; THORN 0051; 0217; 0229; 0237; XRIPTON 0513; 1638; 0374; 0540 VIDEOLOGIC 0262; 0067; 0322 0052; 0197; 0242; 0254; YAMISHI 0424; 0359; 0540; 0544 VIDEOMAC 0067; 0322 0242; 0295; 0390; 0428; 0429; 0435; 0302;...
-
Page 53: Attachment C - Using The Universal Rcu-640 Version 2 Remote Control
ATTACHMENT C – Using the universal RCU-640 version 2 remote control Setup TV via brand name search 1. Switch on the TV for which you wish to use the remote control. 2. Point the remote control at the TV. Press and hold down the TV and POWER button for three seconds. Then release buttons. - Page 54 function correctly, restart the search (see steps 3 to 4) to find a suitable code. If the majority of the buttons function correctly, set up has been successful. Re-press the TV button to save the code and to terminate the set-up mode. NOTE: Entering the auto searching mode, it will search forward from the current code.
-
Page 55: Learning Function
NOTE: Sometime, remote control does not work properly just because Manual search does not stop in time. In this case, just enter into Manual search again, and press Vol – button approx. every 1.5 seconds to search backward the code. NOTE: The Manual Search is automatically terminated if no entry occurs during a 10 second period. - Page 56 Display TV Code You can call up the TV code which you have set in your new remote control as follows: 1. Press and hold down the TV button simultaneously press number button 1 to display the thousands of the 4-digit code. Count how often the POWER button flashes.
-
Page 57: Tv Brand Codes Rcu-640 Version 2
0000 0007 DAYTON 0746 0169 0245 0009 FENNER ALKOS 0026 DAYTRON 0009 0115 0164 0245 FERGUSON ALLORGAN 0011 0050 0052 0079 0100 0111 0127 0163 0026 0157 BUSH 0042 0169 ALLSTAR 0009 0011 0024 0027 0028 0051 0062 DE GRAAF FIDELITY... - Page 58 0009 0031 0143 MANDOR 0031 0141 0011 0002 NORDMENDE GRANADA 0009 0086 0169 0245 MANESTH 0000 0024 0045 0046 0051 0111 0126 0004 0006 0016 0027 0031 0040 0043 JACKTOP 0002 0028 0051 0169 0127 0139 0719 0051 0054 0064 0123 0127 0169 0073 MARANTZ NORDVISION...
- Page 59 PROSONIC 0164 0105 0111 0126 0127 0139 0163 0190 YORX 0015 0042 0068 0107 0169 0245 SHARP TELETECH 0011 PROTECH 0001 0027 0029 0065 0099 0141 0187 0009 0113 0169 ZANUSSI 0002 0009 0014 0051 0113 0169 SHORAI TELETON 0157 PROVIEW 0026 0157...
-
Page 60: Specification
SPECIFICATION Main Features STB Type DVBS/S2 Receiver Main Chipset ALI 3602 Special Features Encrypt ASIC Type TUNER Type HALF NIM Tuner Demodulator Type ALI3501 SMPS Type Separate SMPS Mechanical Dimension W:26.0 cm D:21.3 cm H:4.5 cm Net Weight 1.5 kg Main Chip Sets CPU frequency 333MHz...
Need help?
Do you have a question about the ARIVA 200 and is the answer not in the manual?
Questions and answers