
Related Manuals for handi quilter HQ 24 Fusion


Summary of Contents for handi quilter HQ 24 Fusion
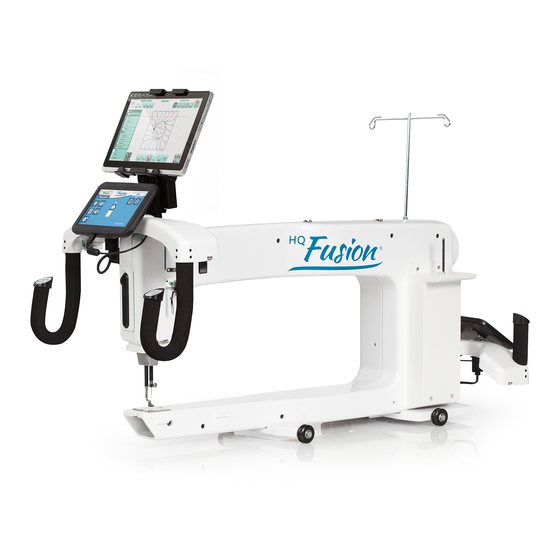
- Page 1 USER MANUAL Designed by a Quilter, for Quilters. ® 04/14/09 © 2009 Handi Quilter, Inc.
-
Page 2: Safety Section
Automatic Needle Positioning Up and down, full stitch and half stitch Disclaimer Handi Quilter and its Representatives are in no way legally responsible or liable for ™ damage to the HQ Fusion when used improperly or not in accordance with the guidelines stated in this manual or when used on Machine Quilting Frames not recommended by Handi Quilter. - Page 3 HQ Fusion Package 1 Contents Please keep your original box and packaging. Contents of Package 1 Optional Accessories Available 1. Bobbins (5 pieces) 1. Micro Handles 2. Needle (135x5) size 16 2. Ruler Base 3. Needle (135x5) size 18 3. Laser Stylus and Clamp 4.
- Page 4 40. Micro Handle Removable Plug 41. Bobbin Assembly Note: A Handi Quilter “Welcome” DVD is included with your HQ Fusion™ Machine. Review the DVD and these instructions to better understand how to set up and use the HQ Fusion™. Page 3...
-
Page 5: Installation
Installation Place the carriage on the table rails ensuring that the Carriage Encoder Assembly will be toward the back of the machine (the power cord side of the machine).The back side of the carriage has an encoder assembly attached to the rear cross-piece. Be sure to place the carriage on the frame correctly (see Photo 1). -
Page 6: Installing Front Handles
Insert the cord into the top power connector on the rear of the machine. Plug the three-prong end into a power source (see Photo 3). The lower power connector is for powering other attachments developed by Handi Quilter. Page 5 HQ Fusion™ User Manual 1.0 Photo 3... -
Page 7: Inserting (Or Changing) The Needle
Inserting (or changing) the Needle Check that all power is turned off. Move the needle bar to the highest position by turning the front or rear hand wheel or pressing the needle up/down control on the handles (prior to turning the power off). Loosen the needle-bar-clamp thumb-screw (see Photo 4). -
Page 8: Installing The Laser Stylus
Installing the Laser Stylus Begin by locating the laser stylus guide post, the laser holder and the laser stylus. To attach the laser stylus to the top of the machine: Locate the threaded hole on top of the machine near the front (see diagram B, #20). -
Page 9: Laser Stylus Safety And Use Guidelines
Laser Stylus Safety and Use Guidelines Theory of Operation The laser stylus projects a straight laser beam visible as a dot on surfaces it hits. The laser dot is used as a guide or stylus allowing you to stitch the same pattern onto a quilt that is being traced with the laser dot. -
Page 10: Threading The Machine
Threading the Machine Place a cone or spool of thread on the spool pin. Pass the thread through the thread mast eyelet from back to front, continuing to thread guides A and B. Continue to three-hole thread guide C. Wrap all three holes from back to front, back hand wheel side to needle side (see Detail 1 below). - Page 11 Bring the thread back up through the take up lever from back to front, and then down through thread guide F. Pull the thread down to the needle thread guide and thread through the hole. Make sure the thread is following the groove down the front of the needle and threads from front to back.
-
Page 12: Bobbin And Thread Tension Adjustments
Bobbin and Thread Tension Adjustments Inserting the Bobbin Place the bobbin in the bobbin case so that the thread pulls off clockwise when viewing the open side (Photo 9). Slide the thread through the slot and under the tension spring leaving 5-6 inches of thread hanging loose (Photos 10 and 11). -
Page 13: Maintenance
Top Tension Puckering, gathers and thread breakage occur when the top tension is too tight. Loops and thread nests occur on the back when the top thread tension is too loose. Tension may need to be adjusted depending on the fabric, thread or batting you are using on each project. Important: Top tension should be adjusted after the bobbin case foundation tension adjustment is made. -
Page 14: Using The Displays On The Handles
If necessary, diluted mild dishwasher soap may be used on the soft rag to remove grease marks. Machine and Handlebar Menus Note: Review the Handi Quilter “Welcome” DVD for interactive instruction on the HQ Fusion™ menu functions. The HQ Fusion™ has touch-screen displays on the front and rear handles. Settings may be changed at either of these locations. -
Page 15: Manual Mode Screen
Manual Mode Screen Button Functions: Pressing the ―R e gulated‖ button while in the Manual Mode Screen will toggle to the Regulated Mode Screen. The white button indicates which mode the system is currently in. Different options are available depending upon which mode the system is in. - Page 16 Regulated Mode Screen Button Functions Pressing the ―+‖ or ―-― b uttons will increase or decrease the stitches per inch (SPI) setting and is reflected in the yellow indicator box at the stop of the screen. This value can be adjusted between 4 and 24 stitches per inch.
- Page 17 “More” Screen Button Functions Accesses the system’s video player feature. Videos must be saved onto an SD memory card and inserted into the memory card slot on the right-hand side of the touch screen device. Videos should be in MPEG-1, MP4, WMV, AVI, ASF, or 3GP format. Audio files may be played using the Audio feature.
- Page 18 UV lighting can be very useful when trying to view white thread or white chalk on white fabric. The best contrast is achieved when viewed in a dark or dimly lit room. Although Handi Quilter has chosen to use UV lights which emit a light wavelength at the lowest end of the UV spectrum to minimize eye strain and damage, constant or direct exposure to any UV lighting can cause eye strain and may lead to permanent eye damage.
-
Page 19: System Information
System Information Information contained in the yellow boxes identifies the electronics board revision number as well as the firmware revision number of the HQ Fusion. The serial number of the HQ Fusion is listed at the bottom, just under the Lifetime and Projet stitch counters. -
Page 20: Diagnostics Screen
― beep.‖ If you get a constant solid ― beep‖ or no ―b eep‖ at all, this indicates a failed test and the machine should be inspected by a qualified Handi Quilter repair technician. - Page 21 Updates Handi Quilter may release updates on occasion that can be downloaded from the Internet and saved to the included SD memory card. The memory card should then be plugged into the slot on the right-hand side of the touch screen display as shown. Press it all the way in until it clicks into position and does not spring back out.
-
Page 22: Using The Handle Buttons
Using the Handle Buttons The following functions take effect by pressing and then quickly releasing the button: Selection Type Function Needle Up/Needle Down Allows the user to manually move the needle one half stitch or one full stitch at a time. The machine will make slow stitches when Needle Up/Down is pressed and held. -
Page 23: Hq Stitch Regulator Operation
HQ Stitch Regulator Operation To use regulation mode, the button must be active (white). If it is blue, simply press button on the touch screen to switch from ―Manu al‖ mode to ―R e gulated‖ mode. Important Notes: Please read before operating Starting and Stopping the Machine You can stop the machine at any time by pushing the START/STOP key. -
Page 24: To Begin Quilting
To Begin Quilting Thread Requirements Choose high quality threads for your valuable heirloom quilts. Most machine quilting threads on the market today are acceptable for use with the HQ Fusion. Threads may weaken with time, so keep your thread collection fresh. Needle Requirements For general quilting, a size 16/100 needle will accommodate most threads and fabrics. -
Page 25: Using The Memory Card
USB adapter to be used on a home computer or the SD adapter to be plugged into the Pro-Stitcher touch screen display. How to Use the Memory Card Files (including updates from Handi Quilter, audio files and video files) may be added to your memory card from your home computer by using the USB adapter. - Page 26 The stylus is stored on the bottom, right-hand corner of the touch screen display. For easiest access to the stylus, tilt the touch-screen display until it is completely flat (screen facing upward). You may then access audio or video files using the Audio and Video players found within the ―...
-
Page 27: Troubleshooting
Troubleshooting Stitches are Skipping Corrective Measure The needle is damaged, dull, Replace the needle often, normally once or twice per day for continuous quilting or at least once bent, or installed improperly per quilt. Use HQ Fusion recommended needles. Always change the needle if the needle has struck any hard object such as a straight pin, etc. - Page 28 bowed or bent inserted completely together with the push pin engaged so bowing won’t occur. Leaders are stretched/worn If fabric is beginning to stretch or fray, contact Handi Quilter for replacement leaders. Needle Thread Breaks Corrective Measure...
- Page 29 Wrong type of needle Use needles recommended by Handi Quilter. Using the wrong needle with a smaller shank diameter causes many problems. For example, a system 1738 or 287WH needle with a shank diameter of 1.64mm will fit loosely into the needle bar clamp. This condition allows the needles to fit into the clamp at an angle which may cause problems including skipped stitches and the needle positioned too far away from the hook point.
- Page 30 Designed by a Quilter, for Quilters. ® Handi Quilter, Inc 445 N. 700 W. North Salt Lake, UT 84054 1-877-697-8458 www.handiquilter.com © 2009 Handi Quilter, Inc. All rights reserved. Printed in the USA. 04/14/09...
Need help?
Do you have a question about the HQ 24 Fusion and is the answer not in the manual?
Questions and answers