
Related Manuals for handi quilter HQSixteen


Summary of Contents for handi quilter HQSixteen
- Page 1 User Manual Copyright© 2007 “All Rights Reserved” No part of this manual may be reproduced in whole or part without express written consent from Handi Quilter, LLC (v. 1.6)
-
Page 2: Table Of Contents
Contents Safety Section and Quick Facts...…………………………………………………..1 Package Contents and Machine Components……………………………...…….2-3 Stitch Regulator Installation………………………………………………………..4-5 Installation Procedures……………………………………………………………….6-9 Laser Style Safety and Use Guidelines.…………………………..……………..…...9 Threading the Machine.………………………………………………………….……10 Bobbin and Thread Tension Adjustments……………………………..……………12 Maintenance……………………………………………………………………………13 Using the Handles and Menu Screens…………………………….………………..14 Stitch Regulator Operation……………………………………………………………17 Thread and Quilting Recommendations…………..........18 Troubleshooting..……………………………………………………………..……19-21... -
Page 3: Safety Section And Quick Facts
Automatic Needle Positioning Up and down, full stitch and half stitch Disclaimer Handi Quilter LLC and its Representatives are in no way legally responsible or liable for ™ damage to the HQ Sixteen when used improperly or not in accordance with the guidelines stated in this manual or when used on Home Machine Quilting Frames not recommended by Handi Quilter LLC. -
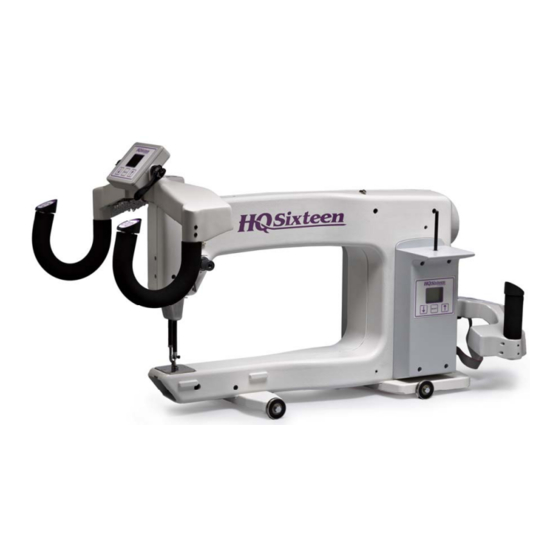
Page 4: Package Contents And Machine Components
Package Contents Please keep your original box and packaging Contents of Package Optional Accessories 1. Bobbins (5 pieces) 1. Front Handles 2. Needle (135x5) size 16 2. Rear Handles 3. Needle (135x5) size 18 3. Laser Stylus and Clamp 4. Bobbin Case 4. - Page 5 Back Side Diagram B 15. Hopping Foot 16. Needle Bar 17. Presser Bar 18. Back Casing/Frame 19. Front Handle Serial Port Connector 20. Top Laser Stylus Post Hole 21. Front Threaded Handle Holes 22. Bobbin Assembly 23. Needle Plate 24. Front Wheel Base 25.
-
Page 6: Stitch Regulator Installation
Note: A Handi Quilter “Welcome” DVD is included with your HQ Sixteen™ Machine. Review the DVD and these instructions to better understand how to setup and use the HQ Sixteen™. HQ Sixteen™ Stitch Regulator Installation—For Stitch Regulated Machines Only (Skip to page 6 for non-stitch regulated machines.) Directional Conventions: Orient yourself to the machine as if you were standing behind the machine facing the Hand Wheel;... - Page 7 Place the machine on the carriage. Plug the Ribbon cable into the Front Encoder Assembly. The ribbon cable has a red colored wire which goes on top. The remaining length of cable comes back under the machine from the Rear Encoder Assembly, in front of the rear base, up and over the rear base, under the protruding display pod and connects into the 9 pin serial port of the machine (see Photo 3).
-
Page 8: Installation Procedures
Installing Optional Front Handles Caution: Unplug the HQ Sixteen™ from the electrical outlet All power to the machine must be turned off when installing the front handles. Failure to do so can result in damage to the machine. Important note: Care must be taken to not pinch the ribbon cable under the handle bar when it is tightened to the machine. -
Page 9: Installing The Power Cord
FOR TRADITIONAL SIT-DOWN QUILTING MACHINES ONLY Installing the Foot Controller HQ foot control: Insert the foot control plug into the 9 pin serial connector on the side of the electronic control pod (see Diagram D). Diagram D Installing the Power Cord Power Connector Insert the cord into power connector on the rear of the machine. -
Page 10: Installing The Thread Mast
Carefully tighten the needle bar clamp screw. Over tightening the needle clamp screw will result in damaged threads stripping the hole. Stripped holes are not covered under warranty. Another side effect of damaged threads from over tightening is the needle may be very tight when inserted up into the needle bar. -
Page 11: Laser Stylus Safety And Use Guidelines
Be sure the laser stylus is inserted into the laser clamp. Slide the laser clamp over the post to the desired height. Plug the laser into the top port on the side of the front electronic control pod (see diagram C, #29). To attach the laser stylus to the side of the machine: 1. -
Page 12: Threading The Machine
Threading the Machine Place cone or spool of thread on spool pin. Pass the thread through the thread mast eyelet from back to front, continuing to thread guide A. Continue to three-hole thread guide B. Wrap all three holes from back to front, handwheel side to needle side (see Detail 1 below). - Page 13 Bring the thread back up through the take up lever from back to front, and then down through thread guide E. Pull the thread down to the needle thread guide and thread through the hole. Make sure the thread is following the groove down the front of the needle and threads from front to back.
-
Page 14: Bobbin And Thread Tension Adjustments
Bobbin and Thread Tension Adjustments Inserting the Bobbin Place the bobbin in the bobbin case so that the thread pulls off clockwise when viewing the open side. Slide the thread through the slot and under the tension spring leaving 5-6 inches of thread hanging loose. Do not lift the lever on bobbin case. -
Page 15: Maintenance
Top Tension Puckering, gathers and thread breakage occur when the top tension is too tight. Loops and thread nests occur on the back when the top thread tension is too loose. Tension may need to be adjusted depending on the fabric, thread or batting you are using on each project. Important: Top tension should be adjusted after the bobbin case foundation tension adjustment is made. -
Page 16: Using The Handles And Menu Screens
Using the Displays on the Handles and Side of Machine Machine and Handlebar Menus Note: Review the Handi Quilter “Welcome” DVD for interactive instruction on the HQ Sixteen™ menu functions. The HQ Sixteen™ has a settings menu display on the front and rear mount handles as well as the front side pod. - Page 17 Alarm Mode: Allows the user to set overspeed Set Up alarm. Overspeed: Alarm beeps to indicate that the machine is no longer sewing in regulation mode because the machine is being moved too fast. Press Select to toggle between Y (yes, alarm is on) or N (no, alarm is off).
-
Page 18: Using The Handle Buttons
Using the Handle Buttons The following functions take effect by pressing and then quickly releasing the button: Selection Type Function Needle Up/Needle Down Allows the user to manually move the needle one half stitch or one full stitch at a time. Half or full stitch is set by the user on the settings menu. -
Page 19: Stitch Regulator Operation
HQ S TITCH EGULATOR PERATION To use regulation mode it must be selected from the SETTINGS MENU. Scroll until you can see QUILT MODE from the MENU and press SELECT (Photo 14). Choose REGULATED from the QUILT MODE MENU and press SELECT. -
Page 20: Thread And Quilting Recommendations
To Begin Quilting Thread Requirements Threads have a tendency to dry or wet rot over a period of time. Be sure to choose high quality threads for your valuable heirloom quilts. Most machine quilting threads on the market today are acceptable. Needle Requirements For general quilting, a size 16/100 needle will accommodate most threads and fabrics. -
Page 21: Troubleshooting
Troubleshooting Stitches are Skipping Corrective Measure The needle is damaged, dull, Replace the needle often, normally once or twice per day for continuous quilting or at least once bent, or installed improperly per quilt. Use HQ Sixteen™ recommended needles. Always change the needle if the needle has struck any hard object such as a straight pin, etc. The tip of the needle can become damaged or burred, resulting in fabric damage as well as skipped stitches, thread breakage or shredding. - Page 22 Leaders are stretched/worn If fabric is beginning to stretch or fray, contact Handi Quilter LLC for replacement leaders. Needle Thread Breaks Corrective Measure Thread cones/spools are...
-
Page 23: Troubleshooting
Wrong type of needle Use needles recommended by Handi Quilter LLC. Using the wrong needle with a smaller shank diameter causes many problems. For example, a system 1738 or 287WH needle with a shank diameter of 1.64mm will fit loosely into the needle bar clamp. This condition allows the needles to fit into the clamp at an angle which may cause problems including skipped stitches and the needle positioned too far away from the hook point. - Page 24 www.HandiQuilter.com...
Need help?
Do you have a question about the HQSixteen and is the answer not in the manual?
Questions and answers