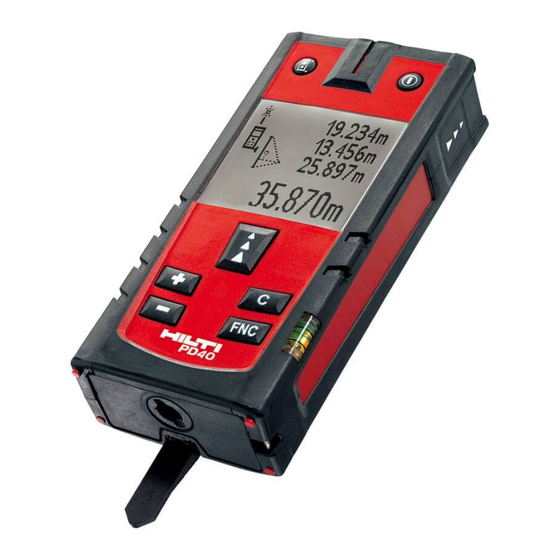
Hilti PD 40 Operating Instructions Manual
Laser range meter
Hide thumbs
Also See for PD 40:
- Original operating instructions (69 pages) ,
- Operating instructions manual (147 pages)
Summary of Contents for Hilti PD 40
- Page 1 PD 40 Operating instructions Brugsanvisning Bruksanvisning Bruksanvisning Käyttöohje Инструкция по зксплуатации Lietoßanas pamåcîba Instrukcija Kasutusjuhend...
- Page 2 +≠ +± +“ +Ç...
-
Page 4: Table Of Contents
In these operating instructions, the designation “the Always keep these operating instructions tool” always refers to the PD 40 laser range meter. together with the tool. Parts, operating controls and indicators 1 Ensure that the operating instructions are... -
Page 5: Description
Unfavorable indicator errors operating conditions Type identification plate PD 40 Hilti = trademark of Hilti Corp., Schaan, LI Made in Germany Serial number AVOID EXPOSURE Laser radiation is emitted from this aperture LASER RADIATION - DO NOT STARE INTO BEAM 620-690nm/0.95mW max. - Page 6 Take the influences of the surrounding area into account. Do not use the appliance where there is a risk of fire or explosion. Observe the information printed in the operating instructions concerning operation, care and maintenance. To avoid the risk of injury, use only genuine Hilti accessories and additional equipment. Modification of the tool is not permissible. NOTE Observe the permissible operating and storage temperatures.
- Page 7 General hardware error Switch the tool off and on again. If the fault persists, please contact Hilti Service. 2.8 Control panel Measure button Activates the laser beam. Begins distance measurement.
- Page 8 The screw on the measuring extension should be screwed into the threaded bush on the rear contact surface of the PD 40. When the measuring extension is screwed onto the tool, the rear reference is then relocated to the tip of the measuring extension, i.e. the rear reference is extended by 1270 mm (50 inches).
-
Page 9: Insert Tools, Accessories
3. Insert tools, accessories Target plate PDA 50 Target plate PDA 51 Target plate PDA 52 Measuring extension PDA 71 Hand strap PDA 60 Soft pouch PDA 65 Laser visibility glasses PUA 60 4. Technical data Right of technical changes reserved. Technical data Values Power supply... -
Page 10: Safety Rules
2. Have the tool ment from very cold conditions, or vice versa, repaired only at a Hilti service center. allow it to become acclimatized before use. d) Check that the tool functions correctly each time d) As a precaution, check the previous settings and before use. -
Page 11: Switching The Tool On/Off
Do not discharge the batteries by short circuit- are unsure. Likewise, Hilti cannot rule out the pos- ing. This may cause them to overheat and present sibility of interference with other devices (e.g. aircraft a risk of personal injury (burns). -
Page 12: First Distance Measurements
2. When the tool is switched off, press the “On / off” 6.5 Measuring references button: The tool switches on. NOTE The laser beam is switched off. The tool can take measurements from 4 different 3. When the tool is switched on, press the “On / off” reference (contact) points. - Page 13 Distances can be measured from all stationary targets without a highly reflective surface, i.e. concrete, stone, wood, plastic, paper, etc. The use of prisms or other highly reflective targets is not permissible and, if attempted, may falsify the results. 6.6.1 Measuring distances step by step NOTE The range meter measures distances in a very short 5.489...
- Page 14 1. Fold out the spike through 180°. 6.6.2.1 Single distance measuring (“Measure” The measuring reference is then set automatically button) to the end of the spike. The range meter takes 1. Switch the laser beam on by pressing the “Meas- the extended reference point into account and ure”...
-
Page 15: Operation
in range must be expected and the distance to the and when the target and/or the tool is shaded from actual point of reflection may be measured. bright light. Use of the PDA 50, PDA 51 or PDA 52 target plate 6.6.9 Taking measurements to transparent also increases the range of the tool. - Page 16 for adding several individual distances that form a 1. Press the “Measure” button (the laser beam perimeter. switches on). 1. Press the “Measure” button (the laser beam will 2. Aim the range meter at the target. switch on). 3. Press the “Measure” button. The first distance 2.
-
Page 17: Care And Maintenance
Leaking batteries may damage the Apply a test and inspection confirmation sticker tool. to the PD 40 and keep a record of the entire monitoring, test and inspection procedure and the results. 8.3 Transport... -
Page 18: Troubleshooting
To ensure that the laser range meter is adjusted the specifications given in the operating instructions. correctly, we recommend that it is returned to a Hilti The tool will be readjusted if deviations from the Service Center for calibration. Accurate adjustment of manufacturer’s specification are found. -
Page 19: Disposal
Most of the materials from which Hilti tools or appliances are manufactured can be recycled. The materials must be correctly separated before they can be recycled. In many countries, Hilti has already made arrangements for taking back old tools and appliances for recycling. -
Page 20: Ec Declaration Of Conformity
12. EC declaration of conformity Hilti Corporation Designation: Laser range meter Type: PD 40 2006 Year of design: We declare, on our sole responsibility, that this product complies with the following directives and Bodo Baur Tassilo Deinzer Quality Manager Head BU Measuring Systems standards: EN 50081 1, EN 61000 6 2, 89/336/EEC. - Page 21 Fax: +423 / 234 29 65 www.hilti.com 320291 / B Hilti = registered trademark of Hilti Corp., Schaan W 3279 0307 00-Pos. 2 1 Printed in Liechtenstein © 2007 Right of technical and programme changes reserved S. E. & O.


Need help?
Do you have a question about the PD 40 and is the answer not in the manual?
Questions and answers