Table of Contents
Advertisement
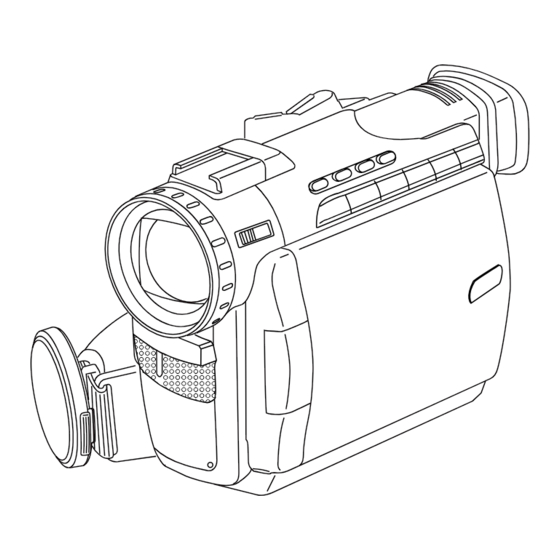
MC
(PV-DV400-K shown)
Before attempting to connect, operate or adjust this product, please read these
instructions thoroughly.
For assistance, please call 1-800-561-5505 or visit us at www.panasonic.ca
200_400-K. 1-9.p65
R
Operating Instructions
Models No.
PV-DV200-K
1
Digital Video Camcorder
PV-DV200-K
PV-DV400-K
Mini
PV-DV400-K
00/06/14, 13:09
R
LSQT0229B
Advertisement
Table of Contents

Related Manuals for Panasonic Digital Palmcorder PalmSight PV-DV200-K


Summary of Contents for Panasonic Digital Palmcorder PalmSight PV-DV200-K
-
Page 1: Operating Instructions
Operating Instructions PV-DV200-K Models No. PV-DV400-K Mini (PV-DV400-K shown) PV-DV200-K PV-DV400-K Before attempting to connect, operate or adjust this product, please read these instructions thoroughly. For assistance, please call 1-800-561-5505 or visit us at www.panasonic.ca LSQT0229B 200_400-K. 1-9.p65 00/06/14, 13:09... -
Page 2: Things You Should Know
Things You Should Know Thank you for choosing Panasonic! You have purchased one of the most sophisticated and reliable products on the market today. Used properly, we’re sure it will bring you and your family years of enjoyment. Please take time to fill in the information below. The serial number is on the tag located on the underside of your Palmcorder. -
Page 3: Safety Precautions
Things You Should Know Safety Precautions WARNING: TO PREVENT FIRE OR SHOCK HAZARD, DO NOT EXPOSE THIS EQUIPMENT TO RAIN OR MOISTURE. Your Palmcorder is designed to record and play back in Standard Play (SP) mode Mini and Long (LP) mode. It is recommended that only cassette tapes that have been tested and inspected for use in VCR machines with the mark be used. -
Page 4: Important Safeguards
Important Safeguards 1. Read Instructions — All the safety and operating 11. Grounding or Polarization — This video unit may be instructions should be read before the unit is equipped with either a polarized 2-wire AC operated. (Alternating Current) line plug (a plug having one blade wider than the other) or 3-wire grounding type 2. -
Page 5: Precautions
Important Safeguards 15. Power Lines — An outside antenna system should b. If any liquid has been spilled into, or objects have not be located in the vicinity of overhead power lines fallen onto, the video unit. or other electric light or power circuits, or where it can c. -
Page 6: Table Of Contents
Table of Contents Getting Started Things You Should Know ....................2 Important Safeguards ....................... 4 Precautions ........................5 Quick Guide ........................8 Supplying Power ......................11 Cassette Information ...................... 14 Colour Enhancement Light (Optional) ................16 Attaching the Shoulder Strap ..................17 Setting the Clock ...................... - Page 7 Index of Controls ......................77 Warranty ......................... 82 Index ..........................83 This operating Instruction book is designed for use with models PV-DV200-K and PV-DV400-K. The PV-DV400-K is the model used for illustrative purposes. Features may vary, so please read carefully.
-
Page 8: Quick Guide
• Charge the Battery (page 11). Slide the Viewfinder backward to its fully expanded position and then tilt it upward. (For model PV-DV200-K, Tilt Viewfinder upward.) Protection Film Note Insert the Battery and slide it down • Remove the Protection Film before use. - Page 9 Press LCD-OPEN Button to eyesight. unlock the LCD monitor. Swing it fully open and Viewfinder adjust the angle. 180° PV-DV400-K PV-DV200-K 90° Set POWER Switch LCD Monitor to CAMERA. OFF CAMERA Press RECORD/PAUSE Button to start recording. Press RECORD/PAUSE Button Insert MultiMediaCard again to pause recording.
- Page 10 Quick Guide Before you begin... To Watch Playback in the LCD • Charge the Battery (page 11). (Liquid Crystal Display) When the LCD monitor is fully open, the Viewfinder automatically turns OFF. Set POWER Switch to VCR. 180° 90° OFF CAMERA Press LCD OPEN Button to unlock the LCD monitor.
-
Page 11: Supplying Power
Supplying Power Charge the Battery Pack on the AC Adaptor Connect and plug in the Cable as shown. • POWER Lamp will light. Attach the battery as shown to charge. • Charge lamps on the AC Adaptor will flash and then turn solid red to indicate current charge level. -
Page 12: Battery Care
Supplying Power Insert/Remove the Battery Pack Slide the Viewfinder backward to its fully extended position and then tilt it upward. (For model PV-DV200-K, Tilt Viewfinder upward.) Insert the Battery and slide it down until it locks with a click. To remove the Battery: Slide the Battery upward while sliding the BATTERY RELEASE. - Page 13 Supplying Power AC Adaptor Slide the Battery upward while sliding the BATTERY RELEASE to remove the Battery (page 12). BATTERY RELEASE Switch Insert the DC Cable into the DC IN Terminal. Connect the other end of the DC Cable to the AC Adaptor as shown. Plug in the AC Adaptor.
-
Page 14: Cassette Information
Cassette Information Before you begin... Cassette Insertion Connect the Palmcorder to a power • source (pages 12, 13). Slide TAPE EJECT to open the TAPE EJECT Cassette Compartment Cover. Switch Insert a cassette with its window side facing up. PUSH TO CLOSE mark Press PUSH TO CLOSE mark to close the Cassette Compartment... -
Page 15: Erase Protection
Cassette Information Record Speed/Playback Time Use only those tapes having the Mini logo indicating the 6.35mm digital standard. Cassette type Record Speed/Playback time AY-DVM30EA 30 minutes 45 minutes AY-DVM60EA 60 minutes 90 minutes AY-DVM80EA 80 minutes 120 minutes Erase Protection Cassettes have a sliding record tab to ensure recordings are not accidentally erased. -
Page 16: Colour Enhancement Light (Optional)
Colour Enhancement Light (Optional) Using the Light Before you begin... • Connect the Palmcorder to a power source To brighten the natural colours in a scene. (pages 12, 13). • Set POWER to CAMERA. Built-in Light Mount Slide Light into the Built-in Light Mount. -
Page 17: Attaching The Shoulder Strap
Attaching the Shoulder Strap Undo the two strap ends from their buckles. Remove the buckles from one end of the strap. Thread the strap (with no buckle) through the Light Holder so that it faces outward. Then reinsert the buckle. Thread the strap ends through the Strap Attachment Rings. -
Page 18: Hand Strap
Attaching the Shoulder Strap Attach the Light (Optional) Insert the Light into the Light Holder for Storage. To remove the Light, press LIGHT LIGHT RELEASE RELEASE and slide Light out from the Button holder. Light Holder Hand Strap Adjust the length of the Hand Strap to the size of your hand as illustrated. -
Page 19: Setting The Clock
Setting the Clock Before you begin... Set the Date and Time • Connect the Palmcorder to a power source The date and time is calculated, including (pages 12, 13). leap year, up to DEC 31 2089. • Set POWER to CAMERA or VCR. JOG KEY Press MENU to display the Camera or VCR mode menu screen (page 21). -
Page 20: Using The Palmcorder Menu
Using the Palmcorder Menu The Palmcorder features two menu Displaying the MENU displays: one for CAMERA mode Before you begin... (recording) and the other for VCR mode • Connect the Palmcorder to a power source (Playback) (pages 21~25). (pages 12, 13). •... -
Page 21: Menu Osd
To select LCD BRIGHTNESS, LCD To select REMOTE, TALLY LED, BEEP, COLOR, or EVF BRIGHTNESS. or IR-COLOR. 5 : LCD SETTING (PV-DV200-K only) 5 : DISPLAY SETTING LCD SETTING menu is displayed. To DISPLAY SETTING menu is displayed. select LCD BRIGHTNESS or LCD To select DISPLAY, C.RESET, DATE/... - Page 22 MENU OSD Camera Mode Menu Screen Camera Mode Menu Screen CAMERA FUNCTION CAMERA FUNCTION • DIGITAL FUNCTION (page 55) D. FUNCTION MIRROR STROBE MOSAIC To select one of the 9 digital functions. SLIM TRAIL Setting to OFF cancels the previously STRETCH selected digital function.
- Page 23 • REMOTE (page 34)ly VCR1:To receive signals from the LCD SETTING (PV-DV200-K only) Remote Control set to VCR1. • LCD SETTING (page 31) VCR2:To receive signals from the Setting to ON displays the menu for Remote Control set to VCR2.
- Page 24 MENU OSD PHOTO TITLE PHOTO TITLE TITLE • TITLE (page 48) MODE WIPE Photo Title is recorded. • MODE (page 48) VCR Mode Menu Screen To select one of the 2 Photo Title modes. VCR PLAY FUNCTION VCR Mode Menu Screen D.
- Page 25 ST1: The original sound alone is played colour level and the viewfinder back. brightness. ST2: The dubbed sound alone is LCD SETTING (PV-DV200-K only) played back. • LCD SETTING (page 31) MIX: The original sound and the Setting to ON displays the menu for...
-
Page 26: Electronic Viewfinder/Lcd Monitor Indications
Electronic Viewfinder/LCD Monitor Indications Here are some of the basic indications which will appear on the Palmcorder EVF and LCD Monitor. All indications except, the Date and Time, will NOT be recorded onto the tape. P A U S E 0 h 0 0 m 0 0 s 0 0 f E I S 3 0 0 x F I L T E R... - Page 27 Electronic Viewfinder/LCD Monitor Indications P A U S E 0 h 0 0 m 0 0 s 0 0 f l, m E I S 3 0 0 x F I L T E R R 0 : 1 2 n, o, p, q W A R N I N G D .
-
Page 28: Warning Indications
Electronic Viewfinder/LCD Monitor Indications The following warning displays appear in the EVF and the LCD monitor. Warning Indications If the Palmcorder is in CAMERA mode without a TAPE NOT cassette inserted, “ ” will flash and “TAPE NOT INSERTED INSERTED” will appear for 5 seconds. Recording will not start. - Page 29 Electronic Viewfinder/LCD Monitor Indications When an AUDIO DUB is attempted on a pre-recorded LP tape, “CANNOT REC LP-MODE” will appear for 5 CANNOT REC LP-MODE seconds. If excessive moisture condenses in the unit, “WARNING” will flash, “DEW DETECTED” will WARNING appear, and the Palmcorder will automatically turn DEW DETECTED OFF in 15 seconds.
-
Page 30: Camera Recording
Camera Recording Simple Recording Before you begin... • Connect the Palmcorder to a power source (pages 12, 13). • Insert a cassette with record tab closed (page 15). Remove the lens cap and clip it to the hook. TALLY LED Lights during recording. -
Page 31: Using The Lcd Monitor
PUSH MENU E X I T PUSH MENU 3 Press JOG KEY to display the LCD/EVF (PV-DV200-K) SETTING screen. (PV-DV400-K) 4 Press JOG KEY to select BRIGHTNESS or COLOR, then rotate JOG KEY to adjust them. 5 Press MENU twice to exit this mode. -
Page 32: Recording Check
Camera Recording Recording Check To playback the final few seconds of the Press EDIT SEARCH briefly in the last recorded scene in the Recording recording Pause Mode. Pause Mode. The [CHK] indication appears. EDIT After checking, the Movie Camera returns SEARCH to the Recording Pause Mode. -
Page 33: Remote Control (Optional
Camera Recording / Remote Control Blank Search Set the POWER to VCR. You can go directly to a blank portion of • The POWER lamp lights red. tape and start recording exactly where you • Be sure POWER is fully turned to left off. -
Page 34: Replace The Battery
Set the POWER to VCR or CAMERA. Palmcorders • The POWER lamp lights red. • Be sure POWER is fully turned to You can control any two Panasonic Digital VCR or CAMERA position. Video Camcorders with one Remote Press MENU to display the VCR or control (Optional, page 71). -
Page 35: Playback Your Recordings
Playback your Recordings Playback using the LCD Monitor You can also use the LCD monitor to Before you begin... playback your recording. • Connect the Palmcorder to a power source VOLUME KEY (pages 12, 13). • Insert a recorded cassette. •... -
Page 36: Special Features
Playback Your Recordings Special Effect Features Rapid Visual Search During Playback During playback, hold down FAST (Sound is muted during all special effects) FORWARD/SEARCH or REWIND/ SEARCH. The search will continue for as long PLAY PAUSE as the button is held down. Button Button Press FAST FORWARD/SEARCH... -
Page 37: Variable Speed Search
Playback Your Recordings Special Effect Features During Playback Continued Variable Speed Search (Sound is Muted during all special effects) PLAY Button Press PLAY to start playback. Press PLAY again. Rotate the JOG KEY to adjust the playback speed. • Rotate JOG KEY downward for forward playback. -
Page 38: Frame By Frame Advance
Playback Your Recordings Frame by Frame Advance Special Effect Features During Playback Continued Optional Remote Control Only (page 71) (Sound is Muted during all special effects) Press PAUSE during playback. PAUSE PLAY Press SLOW/F.ADV to do a frame by Button Button frame advance. - Page 39 Playback Your Recordings JOG KEY Index Forward/Reverse Search Optional Remote Control Only (page 71) Search for a particular scene by using the MENU electronic index marks placed at the beginning of each recording. Set the POWER to VCR. • The POWER lamp lights red. •...
- Page 40 Playback Your Recordings Connections TV with AUDIO/VIDEO IN Jacks. Set POWER to CAMERA. You can now view what the Palmcorder A/V OUT is recording on your TV. Or, to playback a tape, set POWER to VCR. You can now playback a recorded tape on your TV.
-
Page 41: Multimediacard
MultiMediaCard You can record still images to a Before you begin... MultiMediaCard. • Connect the Palmcorder to a power source JOG KEY PHOTOSHOT (pages 12, 13). Button • Set POWER to OFF before inserting a MultiMediaCard ( page 9). Set POWER to CAMERA. •... -
Page 42: Recording Images From A Tape
Recording Images From a Tape You can record still images from a Before you begin... cassette tape to a MultiMediaCard. • Connect the Palmcorder to a power source (pages 12, 13). • Insert a MultiMediaCard (page 9). JOG KEY Set POWER to VCR. •... -
Page 43: Playback Still Images
Playback Still Images You can display the images of the Before you begin... MultiMediaCard. • Connect the Palmcorder to a power source (pages 12, 13). • Insert a recorded MultiMediaCard (page 41). JOG KEY Set POWER to CAMERA. • The POWER lamp lights red. POWER Switch •... - Page 44 Playback Still Images Press JOG KEY to display the JOG KEY selected image as a full-size screen. • “PLEASE WAIT” is displayed on the screen. • Rotate and press JOG KEY to return to the previous image, next image, or Multi playback image screen.
-
Page 45: Delete Specific Image Pages
Delete Specific Image Pages You can delete unwanted images and Before you begin... increase the remaining image memory. • Connect the Palmcorder to a power source Warning: (pages 12, 13). Once deleted, images cannot be restored. • Insert a recorded MultiMediaCard (page 41). DELETE PAGE You can delete unwanted images. -
Page 46: Delete All Image Pages
Delete All Image Pages You can delete all images from a Before you begin... MultiMediaCard easily with this operation. • Connect the Palmcorder to a power source Warning: (pages 12, 13). Once deleted, images cannot be restored. • Insert a recorded MultiMediaCard (page 41). JOG KEY Do steps 1 and 3 on page 43. -
Page 47: Format The Multimediacard
Format the MultiMediaCard You can easily format your Before you begin... MultiMediaCard using this operation. • Connect the Palmcorder to a power source Warning: (pages 12, 13). Formatting permanently removes all • Insert a recorded MultiMediaCard (page 41). image data. Do steps 1 and 3 on page 43. -
Page 48: Photo Title
Photo Title You can record PhotoShot images from a Before you begin... MultiMediaCard to a cassette to be used • Connect the Palmcorder to a power source as a WIPE or MIX effect. (pages 12, 13). • Insert a recorded MultiMediaCard (page 41). Note When Photo Title is set to ON, the selected image and Title will appear before each... - Page 49 Photo Title RECORD/PAUSE PHOTO TITLE SET screen is Button displayed. PHOTO T I T L E S E T • After 3 seconds, the screen goes back to the Camera mode screen. 1 : 2 3 : 4 5 PA U S E WIPE or MIX W I P E Press REC/PAUSE to start recording...
-
Page 50: Dual Digital Electronic Image Stabilization System (D.e.i.s.)
Special Features Dual Digital Electronic Image Camera mode Stabilization System (D.E.I.S.) Set POWER to CAMERA. This feature helps to compensate for any • The POWER lamp lights red. unintentional hand or body movement. It • Be sure POWER is fully turned to can be used in both the Recording and CAMERA position. -
Page 51: Zoom
Special Features Zoom Digital Zoom You can gradually zoom in for close ups or Camera mode zoom out for wide angle shots. Zoom slowly : By lightly pressing the “T” Set POWER to CAMERA. (Telephoto) or the “W” • The POWER lamp lights red. (Wide Angle) side of the •... -
Page 52: Digital Photoshot
Special Features Before you begin... Digital PhotoShot • Set POWER to CAMERA. Use this feature to record a seven second (approx.) still image from the current Set TAPE/M-CARD Switch to TAPE. camera picture. Audio is also recorded for on-the-spot narration. Or, you can add Press PHOTOSHOT in Record/Pause narration later with the Audio Dubbing mode. -
Page 53: White Balance
Special Features White Balance Set POWER to CAMERA. • The POWER lamp lights red. Auto White Balance automatically maintains • Be sure POWER is fully turned to optimum colour balance in most lighting CAMERA position. conditions. However, when using Digital Functions, etc., you may get better results Press MENU to display the menu using the manual adjustment. -
Page 54: Program Ae
Special Features Program AE Set POWER to CAMERA. The Auto Exposure feature can be used to • The POWER lamp lights red. make quality recordings in a variety of • Be sure POWER is fully turned to scene situations. CAMERA position. JOG KEY Press MENU to display the menu screen. -
Page 55: Other Digital Functions
Special Features Other Digital Functions Set POWER to CAMERA or VCR. • The POWER lamp lights red. Use the following features to add interest • Be sure POWER is fully turned to and professionalism to your recordings or CAMERA or VCR position. playback. -
Page 56: Focus
Special Features Auto Focus The Palmcorder automatically adjusts the focus over the entire zoom range. Manual Focus Use Manual Focus (MF) when recording ... • a subject through glass. • a bright, flat subject such as a white wall. • a scene where the subject is far from the •... -
Page 57: Audio/Video Fade In/Out
Special Features Audio/Video Fade In/Out This feature allows you to make smoother scene transitions for a more professional look. FADE Button Fade In: Starting the first scene with “ fade in” is very effective. In Record/Pause mode, hold down FADE until the picture fades out. -
Page 58: High Speed Shutter
Special Features Before you begin... High Speed Shutter • Connect the Camcorder to a power source To record high speed motion (e.g. tennis (pages 12, 13). stroke) for improved STILL or SLOW • Set POWER Switch to CAMERA. MOTION playback, when watching the •... -
Page 59: Audio Dubbing Using The External Or Built-In Microphone
Special Features Before you begin... Audio Dubbing using the • Connect the external Microphone (if used). External or Built-in Microphone • Turn on the Palmcorder. • Insert a pre-recorded tape to be dubbed. The original sound can be replaced with new sound using the built-in Palmcorder microphone or an external microphone. -
Page 60: Memory-Stop Editing
Special Features PAUSE Button Press PAUSE to start Audio Dubbing. • Connect the Palmcorder to the TV in order to monitor the sound (page 40). A-DUB Only NTSC (National Television Standards To listen to the desired audio sound, set the AUDIO setting of the VCR mode MENU Committee) recorded tapes can be audio dubbed. -
Page 61: Copying Your Tapes To S-Vhs Or Vhs Cassette
Special Features Before you begin... Copying your Tapes to • Connect both Palmcorder and VCR to their S-VHS or VHS Cassette power sources. • Connect the Palmcorder to a VCR as illustrated below. Source • Turn ON both units. (Playing) •... -
Page 62: Copying From Digital Equipment (Dubbing)
Special Features Before you begin... Copying from Digital • Connect both Palmcorders to their power Equipment (dubbing) sources. • Connect the two Palmcorders using the DV High quality digital-to-digital copying can interface cable (4-pin to 4-pin). be accomplished if both Palmcorders •... -
Page 63: Pc Connection With Dv Interface Cable (Ieee 1394)
Special Features PC Connection with DV Interface Cable (IEEE 1394) A live image can be transferred directly to your PC (Personal Computer) via a DV Interface Cable (not supplied) using products and software from Digital Origin (formerly Radius), Canopus or Pinnacle. Using these products allows you to capture live images onto your PC, edit the captured image, etc. -
Page 64: Pc Connection
PC Connection PHOTOVU Link & CARD LINK Driver An image stored in the DV Tape can be transferred to your PC (Personal Computer). System Requirements for PHOTOVU LINK & CARD LINK Driver • IBM PC/AT or compatible. • 3.5 inch 1.44 MB floppy disk drive ®... -
Page 65: Software Installation (Windows 95/98)
Software Installation (Windows 95/98) Before you begin... • Your PC is in the power on mode. Turn your PC (Personal computer) on and start up Windows. Insert PHOTOVU LINK & CARD LINK DRIVER Disk (Windows 95/98) into a floppy disk drive. Click on Start, then “Run…... -
Page 66: Card Link
• Turn your PC on. • Set Camcorder POWER to CAMERA. • Set TAPE/M-CARD Switch to M-CARD (page 9). Click on Start, “Programs”, “panasonic”, then “CARD LINK”. “CARD LINK” is opened. Note • COM Port and Baud rate are automatically selected. -
Page 67: Before You Begin
CARD LINK Before you begin... Using MultiMediaCard • Insert the MultiMediaCard (page 9). Image Data • Make Camcorder-PC connections (page 64). • Turn your PC on. Pictures captured with the Camcorder • Set Camcorder POWER to CAMERA. can be transferred to your PC. •... - Page 68 CARD LINK Before you begin... Using PC Image Data • Insert the MultiMediaCard (page 9). You can use JPEG or Bitmap files for • Make Camcorder-PC connections (page 64). Photo Title (page 48) from your • Turn your PC on. computer by transferring them to the •...
-
Page 69: Photovu Link
• Turn your PC on. • Set Camcorder POWER to VCR. • Set TAPE/M-CARD Switch to Tape (page 8). Click on Start, “Programs”, “panasonic”, then “PHOTOVU LINK”. “PHOTOVU LINK” is opened. Note • COM Port and Baud rate are automatically selected. -
Page 70: Using Tape Image Data
PHOTOVU LINK Before you begin... Using Tape Image Data • Insert the Tape (page 8). An image stored in the DV Tape can • Make Camcorder-PC connections (page 64). be transferred directly to your PC via • Turn your PC on. an RS-232C connection. -
Page 71: Palmcorder Accessory System
Palmcorder Accessory System Figure Description Accessory # AC Adaptor with AC Cable PV-DAC10-K and DC Cable CGR-D120C/1B 800mAh / 1 h 15 min, Battery (Same as Pack PV-DBP8-K/DBP8A-K) CGR-D220C/1B 1600mAh / 2 h 50 min, (Same as PV-DBP9-K/ Battery Pack DBP9A-K) 5300mAh / 9 h Battery Pack CGR-D815A/1B... -
Page 72: Notes On Operations
Notes On Operations Cleaning EVF (Electronic Viewfinder) PV-DV200-K Turn the Eyepiece counterclockwise 1/8 of a turn. Pull the Eyepiece free. Remove any lint or dust particles with a soft clean cloth being careful not to scratch the glass surfaces. To re-install the Eyepiece... -
Page 73: Approximate Brightness Values
Notes On Operations Approximate Brightness Values Your Palmcorder has been designed for normal scene illumination of 150 footcandles (1500 lx). However, the Palmcorder may be used at F1:1.6, if illumination is more than 0.5 footcandles (5 lx). The table below shows the colour temperature for reference. KELV I N NATURAL LIGHT ARTIFICIAL LIGHT SOURCE... -
Page 74: Specifications
0.4 inch (10.2 mm) Electronic Viewfinder (PV-DV200-K) 0.44 inch (11.2 mm) Liquid Crystal Electronic Viewfinder (PV-DV400-K) LCD Monitor: 2.5 inch (63.5 mm) Liquid Crystal Display (PV-DV200-K) 3.0 inch (76.2 mm) Liquid Crystal Display (PV-DV400-K) Minimum Illumination Required: 5 lux (F1:1.6) 0.5 footcandles... -
Page 75: Before Requesting Service
Please contact your nearest Panasonic Servicentre. An alternate solution is to obtain a head cleaning cassette. Please use a Panasonic cleaning cassette (AY-DVMCL). Be sure to follow the cleaning instructions carefully. Excessive use of the head cleaning cassette could shorten video head life. - Page 76 Before Requesting Service If you have a problem with your Palmcorder, it may be something you can correct yourself. Check the list below for symptoms and corrections. Symptom Correction No picture in the EVF or LCD Monitor ... • Make sure the Power Source is connected. (pp.
-
Page 77: Index Of Controls
Index of Controls Front View D.ZOOM Button BACK LIGHT page 51 Button EIS Button page 57 page 50 FADE Button page 57 A.DUB Button Lens page 59 Built-in Twin Capsule 2-Way Microphone System Lens Cap pages 18, 30 IR FILTER Switch (PV-DV400-K only) page 53 Remote Sensor... -
Page 78: Rear View
Index of Controls Rear View Electronic Viewfinder (EVF) Menu Button pages 8, 9, 26, 27, 28, 29 pages 19, 20 POWER ZOOM Switch pages 51, 56 JOG KEY Vision Adjustment pages 19, 20 Control VOLUME KEY pages 9, 30 page 35 Battery Release POWER Switch Button... -
Page 79: Underside View
Index of Controls Side View PLAY Button pages 10, 35 M-PLAY Button STOP Button pages 42, 43, 45, 46, 47 pages 10, 35 PAUSE Button pages 59, 60, 61, 62 M-STOP Button pages 43, 44, 45, 46, 47 REC Button REW Button pages 61, 62 pages 10, 35... - Page 80 Index of Controls Colour Enhancement Light (Optional) LIGHT Button LIGHT RELEASE page 16 Button page 16 AC Adaptor POWER Lamp page 11. Battery Charging Compartment page 11. AC Power Cord pages 11, 13. CHARGE Lamps page 11. CAUTION: This unit will operate on 110/120/220/ VCR DC Output 240V AC.
- Page 81 Index of Controls Remote Control (Optional) DATE/TIME Button PHOTOSHOT Button pages 27, 33 pages 33, 52 REC/PAUSE Button DISPLAY ON TV Button pages 30, 33 pages 33, 40 A.DUB Button POWER ZOOM Switch pages 33, 59 pages 33, 51 CAMCORDER SPKR VOL +/–...
-
Page 82: Warranty
5770 Ambler Drive, Mississauga, Ontario L4W 2T3 PANASONIC PRODUCT – LIMITED WARRANTY Panasonic Canada Inc. warrants this product to be free from defects in material and workmanship and agrees to remedy any such defect for a period as stated below from the date of original purchase. -
Page 83: Index
Index AC Adaptor 2, 11, 13, 71, 80 Jog Search Accessories (Optional) Accessories (Supplied) Audio/Video Cable 2, 40, 61 Lens Cap 2, 18, 30 Audio/Video Fade In/Out Auto Focus Macro Focus Manual Focus Backlight Memory Counter Battery Charging Confirmation Marker 11 MENU OSD 21, 22, 23, 24, 25 Battery Pack... - Page 84 Montréal: 3075 Louis A. Amos, Lachine, Québec H8T 1C4 (514) 633-8684 Panasonic Canada Inc. Toronto: 5770 Ambler Drive, Mississauga, Ontario L4W 2T3 (905) 238-2181 5770 Ambler Drive, Calgary: 6835 8th Street N.E., Calgary, Alberta T2E 7H7 (403) 295-3922 Mississauga, Ontario...
Need help?
Do you have a question about the Digital Palmcorder PalmSight PV-DV200-K and is the answer not in the manual?
Questions and answers