Table of Contents
Advertisement
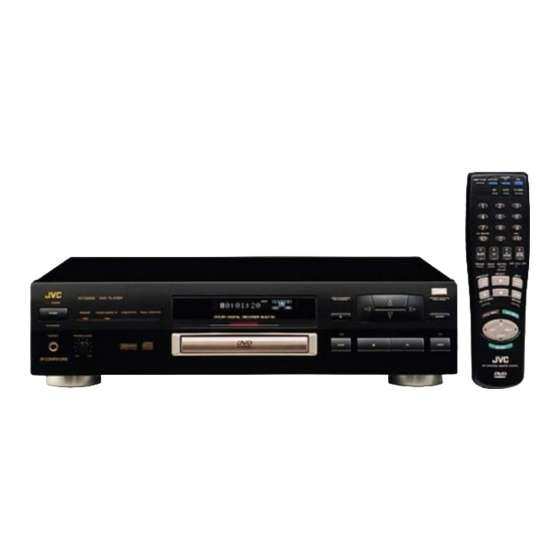
COMPACT COMPONENT SYSTEM
DVD PLAYER
XV-D2000BK
POWER
DVD
OPEN/CLOSE
CATV/SAT
TV
TV/VIDEO
SET
MUTE
1
2
3
4
5
6
7
8
9
CH RETURN
100+
+
10
0
10
+
+
+
+
TV
AUDIO
SLOW
CH
VOLUME
VOLUME
TV
RESUME
ANGLE
SUB TITLIE
DVD
CATV
ON /OFF
STANDBY
POWER
ON/STANDBY
UP
PHONES
LEFT
RIGHT
DOWN
T
RM-SVD2000U REMOTE CONTROL
XV-D2000 DVD PLAYER
RESUME
DOLBY DIGITAL 5.1
LINEAR PCM
96KHz SAMPLING
PHONES LEVEL
DOLBY
D I G I T A L
MIN
MAX
INSTRUCTIONS
DOLBY DIGITAL DECODER BUILT-IN
PlayBack
Control
For Customer Use:
Enter below the Model No. and Serial
Enter below the Model No. and Serial No.
No. which are located either on the rear,
which are located on the rear, bottom or
bottom or side of the cabinet. Retain this
side of the cabinet. Retain this information
information for future reference.
for future reference.
Model No.
Serial No.
ON SCREEN
DVD MENU
ENTER
'
LET0091-001A
[ J ]
Advertisement
Table of Contents

Related Manuals for JVC LET0091-001A


Summary of Contents for JVC LET0091-001A
-
Page 1: Dvd Player
No. which are located either on the rear, which are located on the rear, bottom or bottom or side of the cabinet. Retain this side of the cabinet. Retain this information information for future reference. for future reference. Model No. Serial No. LET0091-001A [ J ]... -
Page 2: Important For Laser Products
Warnings, Cautions and Others CAUTION RISK OF ELECTRIC SHOCK DO NOT OPEN CAUTION: TO REDUCE THE RISK OF ELECTRIC SHOCK. DO NOT REMOVE COVER (OR BACK) NO USER SERVICEABLE PARTS INSIDE. REFER SERVICING TO QUALIFIED SERVICE PERSONNEL. The lightning flash with arrowhead symbol, The lightning flash with arrowhead symbol within an equilateral triangle is intended to within an equilateral triangle alerts the user to... -
Page 3: Table Of Contents
Controlling Other Equipment ... 51 Controlling TV ... 51 Controlling CATV converter or satellite tuner ... 52 Controlling a JVC amplifier or receiver ... 52 Selecting Preferences ... 53 Preferences via "PREFERENCE" on-screen display ... 53 Setting Parental Lock ... 56 Other Information ... -
Page 4: General Information
General Information Important cautions Safety precautions Installation of the player • Select a place which is level, dry and neither too hot nor too cold (between 5˚C and 35˚C or 41˚F-95˚F). • Leave sufficient distance between the player and a TV. •... -
Page 5: Introduction
• The newly developed K2 interface LSI delivers pure sound with no digital distortion. • 1-bit DD converter that handles 20- bit, 96-kHz Fs audio signals and JVC’s original PEM (Pulse Edge Modulation) circuit achieve more than double the resolution of conventional converters. -
Page 6: Controls And Functions
Lights when all the Dolby Digital 5.1-channel audio outputs (FRONT, REAR, CENTER, SUBWOOFER) on the rear panel are feeding signals. LINEAR PCM indicator Lights when linear PCM audio is played back by DVD or CD. XV-D2000 DVD PLAYER STANDBY RESUME DOLBY DIGITAL 5.1 POWER ON/STANDBY... - Page 7 DOLBY DIGITAL DECODER BUILT-IN Disc tray Used to load discs. ON SCREEN Displays an on-screen display of the player on the television screen or monitor. (See "On-screen displays" on page 18.) 0 (Open/Close) Opens and closes the disc tray. / / / (Cursor buttons) Selects an item in on-screen displays or DVD menus.
-
Page 8: Remote Control Unit
Introduction 7 Remote control unit POWER OPEN/CLOSE CATV/SAT TV/VIDEO MUTE CH RETURN 100+ AUDIO SLOW VOLUME VOLUME RESUME ANGLE SUB TITLIE CATV ON /OFF LEFT RIGHT DOWN RM-SVD2000U REMOTE CONTROL... - Page 9 Switches input of the TV (either TV or VIDEO). TV VOLUME Adjusts the TV volume. AUDIO VOLUME Adjusts the volume of a JVC AV amplifier or receiver. SUB-TITLE ON/OFF (for DVD) Turns on or off subtitles. (See "Subtitle on/off" on page 30.)
-
Page 10: Supplied Accessories
DIGITAL OUT Outputs digital audio signals. Both coaxial and optical connectors are provided. AV COMPU LINK Connects with another JVC equipment supporting the AV Compulink to facilitate operations. (See "AV COMPULINK remote control system" on page 62.) AC POWER CORD Connects to the wall outlet. -
Page 11: Before Using For The First Time
White Audio/video cable (Supplied) To VIDEO OUT Yellow To 2CH RIGHT Audio/video cable (mono) To 2CH LEFT White DVD Player XV-D2000BK AV COMPU LINK To S-video inputs To video input To audio input left To audio input right Yellow To video input... -
Page 12: Connecting With An Audio Amplifier Or Receiver
Before Using for the First Time 7 Connecting with an audio amplifier or receiver You can enjoy high-quality audio by connecting the player's audio outputs (2CH) to your amplifier or receiver. Note: Be sure not to plug in the power cord until all other connections have been made. -
Page 13: Connecting With An Amplifier Equipped With Dolby Digital 5.1-Channel Inputs
7 Connecting with an amplifier equipped with Dolby Digital 5.1-channel inputs Connect the player’s 5.1-channel outputs (FRONT-RIGHT/LEFT, REAR-RIGHT/LEFT, CENTER, and SUBWOOFER) to the Dolby Digital 5.1-channel inputs of an amplifier using audio cables. Be sure to connect correctly between corresponding terminals. Notes: •... -
Page 14: Connecting With An Audio Equipment With Digital Input
Before Using for the First Time 7 Connecting with an audio equipment with digital input By connecting the player’s DIGITAL OUT (coaxial or optical) with the digital input of an amplifier, DAT or MD using a digital cable, the digital stereo audio signal in a disc is directly transferred. -
Page 15: Connecting With A Dolby Digital Decoder/Amplifier With Built-In Dolby Digital Decoder
Before Using for the First Time 7 Conecting with a Dolby Digital decoder/amplifier with built-in Dolby Digital decoder Connect the player’s DIGITAL OUT (coaxial or optical) to the digital input of a Dolby Digital decoder or an amplifier with built-in Dolby Digital decoder using an optional digital cable. -
Page 16: Connecting The Power Cord
Before Using for the First Time Connecting the power cord Installing batteries in the remote control unit When all the connections have been made, insert the power plug into the wall outlet firmly. The STANDBY indicator lights and the setup is completed. Warning •... - Page 17 Before Using for the First Time The batteries will last about one year with normal use. If the functions of the remote control become erratic, replace the batteries. See “Precautions for the safe use of batteries” below for more information. Precautions for the safe use of batteries Observe the following precautions for the safe use of batteries.
-
Page 18: Preliminary Knowledge
Preliminary Knowledge Playable discs by XV-D2000BK What are title, chapter and track? The XV-D2000BK can play back DVD video, video CD and audio CD discs. • DVD players and DVD discs have their own numbers describing the region(s) where they can be played by retail areas. These numbers are called "Region Codes." The Region Code for this unit is "1", so any discs whose Region Codes is not "1"... -
Page 19: How To Use Numeric Keys
How to use numeric keys CH RETURN 100+ According to the setting of the DVD/TV/CATV switch, the numeric key functions differ. 7 When setting the DVD/TV/CATV switch to “TV” The numeric keys select TV channels. 7 When setting the DVD/TV/CATV switch to “CATV” The numeric keys select channels of a CATV converter or satellite tuner. -
Page 20: On-Screen Guide And Invalid Operation Icons
Preliminary Knowledge On-screen guide and invalid operation icons On-screen displays 7 On-screen icons During DVD playback, you may see icons displayed over the picture. These have the following meanings. : Displayed at the beginning of a scene recorded from multiple angles. (See “Changing the angle”... - Page 21 CD (For CD during playback or stop and for video CD during stop) For DVD parental lock settings To access on-screen displays, press ON SCREEN (Note that operation for accessing the “Parental Lock” on screen displays is different.). Depending on the type of disc inserted (or “no disc”) and the player’s mode, a proper on-screen display is accessed.
-
Page 22: Screen Saver Function
Preliminary Knowledge Screen saver function In the displays for playback mode of DVD and video CD, the following information is displayed under the image screen. Current Current title number chapter number Current relative Elapsed time from position on the the beginning of title (B: beginning, the current title E: end) -
Page 23: Dolby Digital
Dolby Digital Dolby Digital is a surround system using the digital audio compression technology developed by Dolby laboratories Licensing Corporation. It is configured with six channels and reproduced by a speaker system including front (L and R), rear (L and R), center and sub-woofer. -
Page 24: Basic Operations
Basic Operations Playing back OPEN/CLOSE This chapter explains the basic playback common for DVD, audio CD and video CD. The illustrations in the left column here show the buttons of the remote control unit to be operated, however, you may use the corresponding buttons on the front panel of the player. -
Page 25: Selecting An Item From A Menu
Basic Operations Selecting an item from a menu LEFT RIGHT DOWN CH RETURN 100+ With some DVD and video CD discs, a menu may appear automatically after inserting a disc or manually during playback or stop. Example of menu 7 For DVD videodisc To select an item in the menu: 1. -
Page 26: Dvd Video Operations
DVD Video Operations Displaying DVD menus This chapter explains all the functions of the player for playing back DVD discs. You can enjoy DVD in various ways, some of which only DVD can offer. Read “Basic Operations” on pages 22 and 23 before reading this chapter. Most DVD discs have their own menus for selecting an item (title or chapter) to be played. -
Page 27: Locating A Title
Locating a title CH RETURN 100+ Selecting a chapter LEFT RIGHT DOWN CH RETURN 100+ You can locate a title you want to see by selecting a title number. 1. Press 7 to stop the disc. 2. Press the corresponding numeric keys for a desired title. The player starts playback of the title. -
Page 28: Starting Playback From A Specific Time
DVD Video Operations Starting playback from a specific time LEFT RIGHT DOWN CH RETURN 100+ Advancing a picture frame-by-frame If a DVD disc has time information (such a disc indicates the time in the display on the front panel), you can specify the time to start playback. 1. -
Page 29: Playing In Slow-Motion
Playing in slow-motion SLOW Resuming playback POWER CATV/SAT RESUME RESUME Repeating a title You can playback a disc in slow-motion. 1. Press SLOW “+” during playback. The playback speed slows down to half the normal speed. Thereafter, each press of SLOW “+” slows the speed down to 1/3, 1/4, 1/8, 1/16 and 1/32 of the normal speed. -
Page 30: Repeating A Chapter
DVD Video Operations LEFT RIGHT DOWN Repeating a chapter LEFT RIGHT DOWN 2. Move to “REPEAT” using 3. Press ENTER once. The message box indicates “TITLE REPEAT”. The current title will be repeated. appears when pressing ENTER: You cannot repeat the title because of the disc contents. To turn off the on-screen display: Press ON SCREEN. -
Page 31: Repeating A Desired Part
Repeating a desired part LEFT RIGHT DOWN appears when pressing ENTER: You cannot repeat the chapter because of the disc contents. To turn off the on-screen display: Press ON SCREEN. Pressing it again turns on the on-screen display again. To quit Chapter Repeat: Press 7. -
Page 32: Changing The Angle
DVD Video Operations Changing the angle ANGLE Subtitle on/off SUB TITLIE ON /OFF Changing the subtitle language Some DVD discs may have “multi-angle” parts, in which multiple cameras were used to shoot the same scene from different angles. You can select one of these angles during playback. -
Page 33: Changing The Audio
LEFT RIGHT DOWN LEFT RIGHT DOWN Changing the audio LEFT RIGHT DOWN 2. Move to “SUBTITLE” using The current subtitle number and the total number of recorded subtitles are displayed in the box. Example: The example above indicates that 3 subtitle languages are recorded in the disc and subtitle language 1 is being played back. -
Page 34: Selecting Picture Character
DVD Video Operations LEFT RIGHT DOWN Selecting picture character LEFT RIGHT DOWN LEFT RIGHT DOWN 3. Change the audio channel using The audio channel changes in numerical order. Example: Selecting from three audio channels Audio 1 To turn off the on-screen display: Press ON SCREEN. -
Page 35: Down Mix
Down Mix LEFT RIGHT DOWN You can get the optimum stereo mix signals from DVD discs recorded with Dolby Digital surround multichannel audio, depending on your audio system by selecting DOWN MIX correctly. You can change DOWN MIX setting only when playing back a DVD disc recorded with Dolby Digital surround multichannel audio. -
Page 36: Compression
DVD Video Operations Compression LEFT RIGHT DOWN LEFT RIGHT DOWN Most DVD video discs recorded with Dolby Digital offer wider dynamic range than conventional VHS-videos or video CDs, which usually is too wide for a general home- use. When setting “COMPRESSION” to “ON”, audio is played back with dynamic range compressed. -
Page 37: Audio Cd Operations
Audio CD Operations Playing back from a desired track CH RETURN 100+ Resuming playback POWER CATV/SAT RESUME RESUME This chapter explains all the functions of the player for playing back audio CDs. Read “Basic Operations” on pages 22 and 23 before reading this chapter. 7 Using 1/4, ¢/¡... -
Page 38: Playing Back In A Desired Order
Audio CD Operations Playing back in a desired order LEFT RIGHT DOWN CH RETURN 100+ You can listen to the tracks on a CD in the order you want. 1. Press ON SCREEN while the disc is stopped. The on-screen display appears. 2. -
Page 39: Repeating All Tracks
Repeating all tracks LEFT RIGHT DOWN Repeating a single track LEFT RIGHT DOWN 1. Press ON SCREEN. The on-screen display appears. 2. Move to “REPEAT” using 3. Press ENTER once. “REPEAT ALL” is displayed and all tracks are played back repeatedly. To stop playback Press 7. -
Page 40: Repeating A Desired Part
Audio CD Operations Repeating a desired part LEFT RIGHT DOWN LEFT RIGHT DOWN To quit Single Repeat: Move to “REPEAT” in the on-screen display and press ENTER. “REPEAT” returns to its original color. You can repeat a desired part in a CD. 1. -
Page 41: Starting Playback From A Specified Time
Starting playback from a specified time CH RETURN 100+ LEFT RIGHT DOWN LEFT RIGHT DOWN To quit A-B Repeat: Press 7. The player stops and quits the A-B repeat mode. You can playback a disc from the desired position by specifying the elapsed time from the beginning of the disc. -
Page 42: Playing Back Only The Beginning Of Each Track
Audio CD Operations LEFT RIGHT DOWN Playing back only the beginning of each track Playing back tracks in random order LEFT RIGHT DOWN 3. Press ENTER. You can check the first 10 seconds of each track on a disc. 1. Press ON SCREEN while the disc is stopped. 4. -
Page 43: Selecting The Displayed Time Mode
Selecting the displayed time mode The player can playback tracks in random order. 1. Press ON SCREEN while the disc is stopped. The on-screen display appears. 2. Move to “RANDOM” using 3. Press ENTER. The Random play begins. When all tracks have been played once, the Random play quits. * The same track will not be played back more than once during the Random play. -
Page 44: Video Cd Operations
Video CD Operations Playing back from a desired track CH RETURN 100+ Advancing a picture frame-by-frame Playing in slow-motion SLOW This chapter explains all the functions of the player for playing back video CDs. Read “Basic Operations” on pages 22 and 23 before reading this chapter. 7 Using 1/4, ¢/¡... -
Page 45: Resuming Playback
Resuming playback POWER CATV/SAT RESUME RESUME Playing back in a desired order LEFT RIGHT DOWN The player can memorize a position on a disc you want to interrupt playback and resume playback from that position later. 7 Memorizing a position 1. -
Page 46: Repeating All Tracks
Video CD Operations CH RETURN 100+ Repeating all tracks LEFT RIGHT DOWN 3. Select the tracks in the desired order using the numeric keys. * See page 17 for details about how to use the numeric keys. The entered numbers are displayed on the screen. -
Page 47: Repeating A Single Track
Repeating a single track LEFT RIGHT DOWN Repeating a part LEFT RIGHT DOWN * Note that this function cannot be used during playback with PBC. To use this function, press 7 to stop playback and then specify a desired track number by using the numeric keys. -
Page 48: Starting Playback From A Specified Time
Video CD Operations Starting playback from a specified time LEFT RIGHT DOWN CH RETURN 100+ LEFT RIGHT DOWN 3. At the beginning of the desired part (point A), press ENTER. 4. At the end of the desired part (point B), press ENTER. The player locates “A”... -
Page 49: Playing Back Only The Beginning Of Each Track
Playing back only the beginning of each track LEFT RIGHT DOWN Playing back tracks in random order LEFT RIGHT DOWN You can check the first 10 seconds of each track on a disc. 1. Press ON SCREEN while the disc is stopped. The on-screen display appears. -
Page 50: Selecting Audio Channels
Video CD Operations Selecting audio channels LEFT RIGHT DOWN LEFT RIGHT DOWN Selecting picture character LEFT RIGHT DOWN 3. Press ENTER. The Random play begins. When all tracks have been played once, the Random play quits. * The same track will not be played back more than once during the Random play. In some karaoke discs, one of the audio channels includes vocal while the other does not. -
Page 51: Checking Total Disc Time
LEFT RIGHT DOWN Checking total disc time LEFT RIGHT DOWN Accessing the PBC function 3. Select A, B, C using A: sharp B: soft C: noise reduction * You can set the picture characters for DVDs and video CDs independently. * The selection is memorized even if the player turns off and on. - Page 52 Video CD Operations LEFT RIGHT DOWN Method 2: 1. Press ON SCREEN during playback. The on-screen display appears. 2. Move to “PBC CALL” using 3. Press ENTER. The player starts the PBC function. appears: The disc does not support PBC or it is being played back in PBC mode.
-
Page 53: Controlling Other Equipment
CATV/SAT The remote control unit supplied with the player can control other manufacturers’ TVs, CATV converters and satellite tuners, as well as JVC’s amplifiers/receivers. When operating the other manufacturers’ components, refer to the manuals supplied with them. To operate these components with the remote control, first you need to set the manufacturers’... -
Page 54: Controlling Catv Converter Or Satellite Tuner
Note: If there is more than one code listed for your brand of CATV converter or satellite tuner, try each one until the correct one is entered. AUDIO VOLUME controls the volume of a JVC amplifier or receiver. -
Page 55: Selecting Preferences
Selecting Preferences Preferences via “PREFERENCE” on-screen display LEFT RIGHT DOWN LEFT RIGHT DOWN You can set various preferences mainly related with DVD playback via the “PREFERENCE” and “PARENTAL LOCK” on-screen displays. 7 How to set up 1. Take out the disc from the disc tray. You do not have to take out the disc if it is a DVD disc, but press 7 to make it stop. - Page 56 Selecting Preferences 7 Items The following preferences can be set. MENU LANGUAGE You can select the default “DVD menu” language to be displayed if the disc contains Each time you press , the setting language changes as follows. ENGLISH = SPANISH = FRENCH = CHINESE = GERMAN = ITALIAN = JAPANESE = language code from AA to ZU (See “Table of languages and their abbreviations”...
- Page 57 MONITOR TYPE You can select a monitor type when you playback DVD discs recorded for wide screen televisions. If your television has a normal (4:3) screen, select “4:3 PS the “wide” picture) or “4:3 LB aspect ratio). [on DVD disc] converted and output [16:9 wide television screen] squeezed recording...
-
Page 58: Setting Parental Lock
Selecting Preferences Setting Parental Lock LEFT RIGHT DOWN CENTER SPEAKER When the player is connected to an AV amplifier with Dolby Digital 5.1-channel inputs; • set to “USE” if the system includes a center speaker. • set to “NONE” if the system does not include a center speaker. The audio output balance between 5.1-channel outputs is adjusted according to the setting above. -
Page 59: Changing The Settings
3. Press ENTER. 4. Enter your 4-digit password using the numeric keys. CH RETURN 100+ 5. Press ENTER. The parental level and your password are set. Changing the settings 1. While holding down 7, press ENTER on the remote control unit. 2. - Page 60 Selecting Preferences CH RETURN 100+ 5. Enter a new password using numeric keys. 6. Press ENTER. The new setting is effective. Temporary release of the Parental lock When the parental level is set strictly, some discs may not be played back at all. When you insert such a disc and try to play it, the player will ask you whether you want the parental lock to be released temporarily or not.
-
Page 61: Other Information
Other Information Care and handling of discs How to handle discs When handling a disc, do not touch the surface of the disc (reflective silver side –– the side without the label). Since discs are made of plastic, they are easily damaged. If a disc gets dirty, dusty, scratched or warped, the images and sound will not be picked up correctly, and such a disc may cause the player to malfunction. -
Page 62: Table Of Languages And Their Abbreviations
Other Information Table of languages and their abbreviations Afar Abkhazian Afrikaans Ameharic Arabic Assamese Aymara Azerbaijani Bashkir Byelorussian Bulgarian Bihari Bislama Bengali, Bangla Tibetan Breton Catalan Corsican Czech Welsh Danish Bhutani Greek Esperanto Estonian Basque Persian Finnish Fiji Faroese Frisian Irish Scots Gaelic Galician... -
Page 63: Manufacture's Code List
Manufacture's code list 7 TV Manufacturer MAGNAVOX MITSUBISHI PANASONIC SHARP SONY TOSHIBA ZENITH HITACHI PANASONIC SAMSUNG SANYO SANYO SAMSUNG Other Information 7 CATV/SAT Manufacturer GI JERROLD GI JERROLD GI JERROLD GI JERROLD GI JERROLD GI JERROLD GI JERROLD GI JERROLD SCIENTIFIC ATRANTA SCIENTIFIC ATRANTA ZENITH... -
Page 64: Av Compulink Remote Control System
When you buy a separate TV, VCR DVD player, receiver or other components and connect them to each other, you have to operate each component individually. JVC’s AV COMPULINK remote control system meets the demand for a system made up of single components and has the ease of operation of a single unit. - Page 65 “II” with the AV COMPULINK terminal on a receiver. If connected, the system will not work correctly. • Connect the AUDIO OUT jacks of the DVD player to the audio input jacks of a receiver indicating “DVD”. Otherwise, the system will not work correctly.
-
Page 66: Troubleshooting
Other Information Troubleshooting What appears to be a malfunction may not always be serious. Please go through the following list before requesting service. Symptom Possible cause Power does Power plug is not inserted not come on. securely. Remote control Too far from the player. does not work. -
Page 67: Specifications
Specifications General Readable discs: DVD video, CD, Video CD Video format: NTSC color Other AC 120V Ó , 60Hz Power requirements: Power consumption: 30 W (POWER ON), 5 W (STANDBY mode) Mass: 4.8 kg (10.6 lbs) Dimensions (W x H x D): 435 x 112 x 327.5 mm 17-3/16 x 4-7/16 x 12-15/16 inch Video output... - Page 68 VICTOR COMPANY OF JAPAN, LIMITED Printed in Japan 0997FTYUBNPRI...
Need help?
Do you have a question about the LET0091-001A and is the answer not in the manual?
Questions and answers