
Related Manuals for JVC GC-S5


Summary of Contents for JVC GC-S5
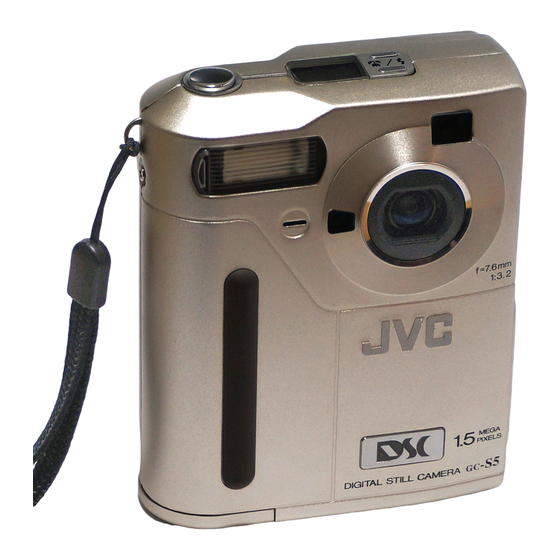
- Page 1 DIGITAL STILL CAMERA GC-S5 ENGLISH STILL CAMERA INSTRUCTIONS BB07572-A00 LYT0235-001B...
-
Page 2: Safety Precautions
Safety precautions IMPORTANT (For Customers in U.K.) Connection to the mains supply in the United Kingdom. DO NOT cut off the mains plug from this equipment. If the plug fitted is not suitable for the power points in your home or the cable is too short to reach a power point, then obtain an appropriate safety approved extension lead or consult... - Page 3 Some do’s and don’ts on the safe use of equipment This equipment has been designed and manufactured to meet international safety standards but, like any electrical equipment, care must be taken if you are to obtain the best results and safety is to be assured. read the operating instructions before you attempt to use the equipment.
-
Page 4: Table Of Contents
Contents If you want to start using your new camera right away, refer to “Quick Start Guide” (aP.12 ). Safety Precautions...2 Contents ...4 Important Information...6 Accessories...7 Features ...8 Nomenclature ...9 LCD Panel...10 Viewfinder Display ...10 Using the Hand Strap ...11 Attaching the Hand Strap ...11 Using the Hand Strap...11 Quick Start Guide...12... - Page 5 x/w Telephoto Photography ...38 m Macro (Close-Up) Mode ...39 f Flash Mode ...40 p Playback ...42 Single-Frame Playback ...43 Playback Zoom ...44 Automatic Playback (Playback) ...45 Sepia...46 Smooth ...47 Resize ...49 Copy...50 Multi-Frame Playback ...53 e Erasing Images...55 Erasing a Single Frame ...56 Erasing All Frames...58 Formatting (Initialisation)...59 d Setup ...60...
-
Page 6: Ac Power Adapter
Data that Can Be Played Back on Your Camera The GC-S5 Digital Still Camera can be used to play back recorded image data or image data transferred from a personal computer (file names DSC00001.JPG to DSC99999.JPG (Exif-JPEG format) with file sizes up to 1.2MB). See P.54 for additional... -
Page 7: Accessories
Accessories Check that you have the items shown below before using your camera. BN-V101 Battery Pack (Rechargeable Battery) (1) Supplied with Operating Instructions (1) AA-V101 AC Power Adapter (1) Supplied with Operating Instructions (1) The shape of the plug on the AC power adapter depends on the country of use. -
Page 8: Features
Features High Quality Images The 1.5 million pixel primary-colour CCD gives high-quality, high-resolution (1280 x 1024 pixels) images and video at a horizontal resolution of 480 lines or better (playback). 2-inch Low-Temperature Polysilicon LCD (Liquid Crystal Display) Screen The camera’s LCD monitor allows you to check the picture you have taken and show it to your friends immediately. -
Page 9: Nomenclature
Nomenclature LCD panel Shutter button Flash Self-timer lamp Flash control sensor Grip DC IN 5V (power input) socket VIDEO OUT (video output) socket MENU/EXE (execute) button POWER switch DISP (display) button SELECT button LCD monitor Tripod mount Monitor brightness adjustment dial DIGITAL (digital input/output) socket Viewfinder Viewfinder lamp... -
Page 10: Lcd Panel
Nomenclature LCD Panel For the purposes of explanation, this figure shows all the icons displayed on the LCD panel. In normal operation, only some of these icons are displayed concurrently. Flash/Suppress- ed flash icon Red-eye reduction icon Black and White photography icon File Size display Viewfinder Display... -
Page 11: Using The Hand Strap
Using the Hand Strap Use the hand strap to avoid dropping the camera during shooting. Attaching the Hand Strap Pass the end of the strap through the strap mount on the camera. Pass the other end of the strap through the loop and pull the strap tight. -
Page 12: Quick Start Guide
Quick Start Guide • Use the procedure given here if you want to start using your new camera right away. • For more detailed information on how to use the camera, refer to the page indicated (aP.XX). Getting Ready (loading the battery and SmartMedia and formatting the SmartMedia) Slide the battery cover in the direction of the arrow (aP.16). - Page 13 n NOTES • A fully exhausted battery takes roughly 5 hours to charge. • To use the camera immediately, use the camera while it is connected to the AC power adapter. Open the SmartMedia cover (aP.24). • Slide the SmartMedia cover release in the direction of the arrow and then release.
-
Page 14: Taking Pictures
Quick Start Guide Use the [5] or [6] button to select “FORMAT” and press the [MENU/EXE] button. • The confirmation screen appears. Press the [MENU/EXE] button. • The SmartMedia is formatted and the menu screen reappears. Taking Pictures Set the Mode dial to [r] (aP.31). - Page 15 Press the shutter button down halfway. • The camera automatically sets the focus and the exposure. Once the focus is set, the viewfinder lamp turns green. Without releasing the shutter button, press it down fully. • The electronic beep sounds and the picture is taken.
-
Page 16: Loading The Battery
Loading the Battery This section describes how to load the BN-V101 Rechargeable Battery. ! CAUTIONS • The battery is not fully charged at shipment. Always charge the battery before you use the camera. • Always switch off the camera before you replace the battery. •... -
Page 17: Charging The Battery
This is not a fault. AC Power Adapter Use only the AA-V101 AC Power Adapter (supplied) with your GC-S5 Digital Still Camera. The use of an AC power adapter other than the AA-V101 could result in damage to... -
Page 18: About The Battery
Safety Notes to ensure that you use the battery correctly. Notes on Handling the Battery The GC-S5 camera uses a lithium ion rechargeable battery. Note the points below when using the rechargeable battery. When shipped, the BN-V101 is not fully charged. Always charge the battery before using it. -
Page 19: Notes On Using The Battery
Notes on Using the Battery If you use the battery for a long period, the camera body and the battery itself will become warm. This is normal and is not a malfunction. Use the AC power adapter supplied with the camera if you are taking pictures or viewing images for a long period of time. -
Page 20: Using A Domestic Power Outlet
AA-V101 AC Power Adapter supplied with the GC-S5 to take pictures or view images. You should also use the AC power adapter when you connect your GC-S5 to a personal computer to avoid data transfer interruptions caused by an exhausted battery. -
Page 21: Switching On And Switching Off
Switching On and Switching Off Switching On Slide the POWER switch to the right. • Slide the switch in the direction of the arrow and then release it after about one second. • The direction indicator flashes and rotates. Switching Off Slide the POWER switch to the right. -
Page 22: Smartmedia
SmartMedia Compatible SmartMedia You can use the following SmartMedia with your GC-S5: • 2 MB, 5 V • 4 MB, 5 V • 4 MB, 3.3 V • 8 MB, 3,3 V • 16 MB, 3.3 V By using a commercially available PC Card Adapter, these SmartMedia can be used as PC Card Standard ATA-compliant PC cards (PCMCIA 2.1 Type II). -
Page 23: Notes On Using Smartmedia
These actions could result in damage to the SmartMedia. Use only the SmartMedia specified for use with the GC-S5. The use of other SmartMedia could damage the camera. SmartMedia are precision electronic devices. Do not bend, drop, or subject SmartMedia to excessive shocks. -
Page 24: Loading And Removing Smartmedia
Loading and Removing SmartMedia Always switch off the camera before removing or loading a SmartMedia. Loading the SmartMedia The GC-S5 records photographed images onto a SmartMedia card. Open the SmartMedia cover. • Slide the SmartMedia cover release in the direction of the arrow and then release. -
Page 25: Removing The Smartmedia
Removing the SmartMedia Open the SmartMedia cover. • Slide the SmartMedia cover release in the direction of the arrow and then release. Remove the SmartMedia. • Push the SmartMedia slowly all the way in and then pull it out. Close the SmartMedia cover. ! CAUTIONS •... -
Page 26: How To Hold The Camera
How to Hold the Camera To prevent camera shake (blurred images), hold the camera firmly so that it does not move when you take a picture. Upright Hold the camera with both hands and brace your elbows firmly against your sides. On its Side Hold the camera so that the flash is above the viewfinder window. -
Page 27: Pressing The Shutter Button
Pressing the Shutter Button The shutter button on the GC-S5 has two positions. If you press the shutter button lightly, it stops halfway down. Pressing the button beyond this point activates the shutter and takes a picture. Pressing halfway (pressing lightly): •... -
Page 28: Mode Dial
Mode Dial The Mode dial settings and the corresponding camera operations are listed below. [d]: Setup Mode (aP.60) In this mode, you can set the quality (image quality), file size (number of pixels), sharpness, color, frame no., beep volume and date and time settings. -
Page 29: Lcd Monitor, Indicator Lamps And Beeps
LCD Monitor, Indicator Lamps and Beeps The LCD monitor display (on-screen display) changes each time you press the [DISP] button, as shown below. Mode Dial Setting Self-timer mode Manual mode On-screen display Normal mode Playback mode Erase mode Protect mode PC-mode On-screen display The appearance of the viewfinder lamp and the electronic beep made by the... -
Page 30: Normal (Auto) Mode
r Normal (Auto) Mode Normal Photography Viewfinder lamp flashes orange (flash charging). Viewfinder lamp goes off. Ready to shoot. Taking Pictures Using the LCD Monitor. Press the [DISP] button to show the live image (the video image shown before a picture is taken). Use the monitor brightness adjustment dial to adjust the brightness so that the image on the LCD monitor is clear. -
Page 31: Taking Pictures Using The Viewfinder
Normal mode is a simple and convenient photography mode in which the camera automatically selects the exposure (a combination of shutter speed and aperture setting) and the focus to suit the shooting conditions. This mode is ideal for general photography where you are not trying to achieve any particular effect. To avoid depleting the battery, you should use the viewfinder rather than the LCD monitor when taking pictures. - Page 32 r Normal (Auto) Mode Without lifting your finger off, press the shutter button down fully. • The electronic beep sounds and the picture is taken. • While the image data is being recorded onto the SmartMedia, the viewfinder lamp turns orange. You cannot take pictures while the lamp is orange (approx.
-
Page 33: Taking Pictures Using The Lcd Monitor
Taking Pictures Using the LCD Monitor Set the mode dial to [r]. Press the [DISP] button. • The live image (the video image shown before a picture is taken) appears on the LCD monitor. • See P.29 for more information on using the [DISP] button. - Page 34 r Normal (Auto) Mode Press the shutter button down halfway. • The camera automatically adjusts the focus and exposure. While this is happening, the image on the LCD monitor disappears briefly and “STANDBY” appears on the LCD monitor. When the camera is focused, the image reappears and the viewfinder lamp turns green.
-
Page 35: Taking Pictures And Viewing Images On A Tv
Taking Pictures and Viewing Images on a TV To use a television to take pictures and view images, first connect the camera to the television. Use the AA-V101 AC Power Adapter supplied with the camera if you have access to a power outlet (usually indoors). ! CAUTION Always switch all devices off before connecting them together. -
Page 36: Select Button
r Normal (Auto) Mode SELECT Button By specifying “QUICK SELECT” in [d] mode in advance, you can switch the function settings to your customised specifications simply by pressing the [SELECT] button when you take the picture (aP.63). Quality You can select FINE, NORMAL or BASIC as the image quality (aP.61). Press the [SELECT] button. -
Page 37: File Size
File Size You can select 1280 or 640 as the file size (number of pixels) (aP.61). Press the [SELECT] button. • “1280” (1280 (640 480 pixels) appears on the LCD panel as designated in your QUICK SELECT settings. Color You can select colour or black and white (aP.62). Press the [SELECT] button. -
Page 38: X/W Telephoto Photography
x/w Telephoto Photography By using the digital telephoto function, you can enlarge the central area of the image to twice its normal size and thereby double the apparent focal length of the lens (to the equivalent of roughly 70 mm on a 35 mm camera). n NOTE The telephoto function is only available when you are using the LCD monitor to take pictures (aP.33). -
Page 39: Macro (Close-Up) Mode
m Macro (Close-Up) Mode Using the Macro (close-up) function, you can take pictures of subjects at distances of between 9 cm and 50 cm from the camera. Press the [m] (Macro) button. • The live image (the video image shown before a picture is taken) appears on the LCD monitor. -
Page 40: Flash Mode
Flash Mode The GC-S5 allows you to use or suppress the flash to suit the conditions for the image you want to photograph. The S mark indicates the default setting. Press the [f] Flash button. • The icons shown on the LCD panel change as shown below. - Page 41 [f] Forced Flash In this mode, the flash always operates. Use Forced Flash to shoot pictures in backlit conditions or artificial light (fluorescent lighting, etc.), to shoot portraits against night scenes, or in Macro mode. n NOTES • When you shoot a portrait in Forced Flash mode against a night scene, the shutter speed is slower (slow-synchro photography) and the camera shake warning is displayed.
-
Page 42: Playback
p Playback Playback To play back another frame Use the [3] or [4] button to move to the frame. Images are played back sequentially frame by frame. Use the [5] or [6] button to use zoomed playback. [Example of LCD Monitor Text Display] •... -
Page 43: Single-Frame Playback
• See P.35 for information on how to view images on a TV. Single-Frame Playback The GC-S5 automatically determines the quality of images played back. You can move forwards or backwards through the frames one frame at a time. Set the mode dial to [p]. -
Page 44: Playback Zoom
p Playback You can use the six functions shown below during single-frame playback. Items 2 to 6 are specified from the menu screen. 1. Playback zoom 2. Automatic play (Playback) 3. Sepia 4. Smooth 5. Resize 6. Copy ! CAUTIONS •... -
Page 45: Automatic Playback (Playback)
Automatic Playback (Playback) “Playback” plays back successive images (approx. 3 seconds per frame). During single-frame playback, select the frame at which automatic playback is to begin. • See P.43 for information on how to use single-frame playback. Press the [MENU/EXE] button to bring up the menu screen. -
Page 46: Sepia
p Playback n NOTES • Auto Play can also be used during multi-frame playback playback, playback begins at the selected frame. • The Auto Power Off function does not operate during Auto Play. Sepia This function displays an image in sepia tones during single-frame playback. During single-frame playback, select the frame to viewed in sepia tones. -
Page 47: Smooth
Press the [MENU/EXE] button. • The sepia-tone image is recorded in the last frame. The original image is left unchanged. Smooth The smooth function allows you to make the lighter areas of an image look smoother during single-frame playback. During single-frame playback, select the frame whose lighter areas you want to look smoother. - Page 48 p Playback Press the [MENU/EXE] button. • A screen is displayed which is used to set the [SMOOTHING] levels. Press the [3] or [4] button to set the level of the [SMOOTHING] effect. [3]: Sharpens the lighter areas of the image.
-
Page 49: Resize
Resize The Resize function converts a 1280 image during single-frame playback. During single-frame playback, select the frame you want to resize. • See P.43 for information on how to use single-frame playback. Press the [MENU/EXE] button to bring up the menu screen. Press the [3] or [4] button to select “RESIZE”. -
Page 50: Copy
p Playback Press the [MENU/EXE] button. • The image size is changed. • The resized image is recorded in the last frame. The original image is left unchanged. Copy This function allows you to copy images onto another SmartMedia. Images can be copied during both single-frame and multi-frame playback. - Page 51 Press the [3] or [4] button to select the image to be copied and press the [MENU/EXE] button. To copy multiple images, use [5] or [6] button to select “SELECT FRAME-1” and press the [MENU/EXE] button. • The screen in step 4 reappears. Repeat steps 4 and 5 for each image you want to copy.
- Page 52 p Playback Use the [5] or [6] button to select “START COPY” and press the [MENU/EXE] button. • Copying begins. When the “CHANGE CARD” message appears, remove the SmartMedia without switching off the camera and insert the SmartMedia onto which the images are to be copied.
-
Page 53: Multi-Frame Playback
Multi-Frame Playback Multi-frame playback allows you to view 9 images at once. Set the Mode dial to [p]. • The last recorded frame appears. Press the [DISP] button twice. • The 9-shot multi-frame playback screen appears. • Frames with no recorded images are shown in black. - Page 54 Playback ! CAUTION In some cases, you may not be able to view image data recorded using the GC-S5 if the data has been processed or edited on a personal computer and then transferred back to the camera and recorded.
-
Page 55: Erasing Images
e Erasing Images Erasing Images To erase one frame If you press the [DISP] button, the multi-frame screen appears. Use the [5] or [6] button to select “FRAME” and press the [MENU/EXE] button. Use the [3] or [4] button to move to the frame. -
Page 56: Erasing A Single Frame
Erasing Images You can use the GC-S5 Digital Still Camera to erase single frames, to erase all the frames on a SmartMedia, or to format a SmartMedia. If you are using a new SmartMedia, you must first format the SmartMedia. - Page 57 Use the [3] or [4] button to select the image to be erased and press the [MENU/EXE] button. • The confirmation screen appears. • In step 1, press the [DISP] button to select the image to be erased in the same way as in 9-shot multi-frame playback (aP.29, 53).
-
Page 58: Erasing All Frames
e Erasing Images Erasing All Frames This operation erases all the unprotected frames (Protect Mode aP.76) on a SmartMedia. Set the Mode dial to [e]. • The menu screen appears. Use the [5] or [6] button to select “ALL” and press the [MENU/EXE] button. -
Page 59: Formatting (Initialisation)
Formatting (Initialisation) This feature erases all the frames on the SmartMedia card, including any protected frames (Protect Mode aP.76), and formats the SmartMedia. ! CAUTION Always use the camera to format a SmartMedia. Set the Mode dial to [e]. • The menu screen appears. Use the [5] or [6] button to select “FORMAT”... -
Page 60: Setup
Setup Use [ d ] mode to specify the 9 settings listed below. The S icon indicates the default setting. 1. QUALITY 6. BEEP 2. FILE SIZE 7. QUICK SELECT 3. SHARPNESS 8. DATE/TIME 4. COLOR 9. RESET 5. FRAME NO. Set the Mode dial to [d]. -
Page 61: Quality
Quality You can select one of three levels of quality (image compression ratios), depending on the type of shot. The number of shots available (aP.94) varies depending on the image quality you select. [FINE], [NORMAL] or [BASIC] appears on the LCD panel to indicate the image quality setting. Select [FINE] when you want better image quality and [BASIC] when you want to fit more images on the SmartMedia. -
Page 62: Colour
d Setup Color Use this setting to select whether an image is recorded in colour or in black and white. Black and white photography is ideal for monochrome subjects and as a way of recording documents. When black and white is selected, the “u” icon appears on the LCD panel. -
Page 63: Beep Volume
Beep Volume You can set the beep volume to [HIGH], [LOW] or [OFF] as desired. [LCD Monitor Display Sequence] Quick Select By specifying [QUICK SELECT] settings in [d] mode in advance, you can switch the function settings to your customised specifications simply by pressing the [SELECT] button when you take the picture (aP.36). -
Page 64: Date And Time
d Setup Date and Time This setting specifies the date and time. If you remove the battery for more than 5 minutes at a time, the date and time setting reverts to the initial setting (’98.01.01 12:00:00 AM). You must then reset the date and time. Date: Automatic calendar (two-digit display) Time:... -
Page 65: Reset
! CAUTION If you disconnect the AC power adapter when there is no battery in the camera, the date and time setting reverts to the initial setting (’98.01.01 12:00:00 AM). Reset This function resets all the [d] settings to the default values (indicated by Press the [MENU/EXE] button. -
Page 66: Self-Timer Mode
s Self-Timer Mode Set the Mode dial to [s]. • The camera switches to self-timer mode. • When you press the [DISP] button, “SELF-TIMER” appears on the LCD monitor. Compose the picture and press the shutter button down halfway. • The camera automatically sets the focus and the exposure. -
Page 67: R Manual Mode
R Manual Mode This mode allows you to view a shot you have taken on the LCD monitor (or on a TV) and then decide whether to record the shot. This mode also allows you to select the W.B. (white balance), EV (brightness/ exposure compensation) and FLASH (flash brightness) settings and to select 16-CONT (continuous shots) mode. - Page 68 R Manual Mode Without lifting your finger off, press the shutter button down fully. • The electronic beep sounds and the preview image (photographed still image) appears on the LCD monitor. The viewfinder lamp turns orange. • If you do not want to record the image onto the SmartMedia, press the [6] button.
-
Page 69: Setting The White Balance
Setting the White Balance You can select one of five white balance settings: Outdoor, Shade, Fluorescent 1, Fluorescent 2 and Incandescent. The Outdoor setting is normally used. Use the other settings to set the white balance when you are shooting in shadow or in special lighting. - Page 70 R Manual Mode Use the [5] or [6] button to select the white balance setting. [a]: Shooting outdoors (fine weather) [C]: Shooting in shade (cloudy weather) [1]: Shooting in fluorescent light (in bluish light) [2]: Shooting in fluorescent light (in reddish light) [b]: Shooting in incandescent light...
-
Page 71: Setting The Brightness (Adjusting The Exposure)
Setting the Brightness (Adjusting the Exposure) Use this setting to achieve the optimum image brightness (exposure) when the subject is very small in the picture or when the subject is much brighter or darker than the background. n NOTES • The default setting is “0”. •... -
Page 72: Exposure Compensation
R Manual Mode Use the [5] or [6] button to select the brightness (exposure compensation). [5]: Brightens the image. [6]: Darkens the image. • There are 9 compensation levels (–0.9 to +1.5EV in approx. 0.3EV steps). ! CAUTION In some shooting conditions, pressing the [5] button may not make the image brighter. -
Page 73: Setting The Flash Power
Setting the Flash Power Use flash power adjustment to achieve the optimum flash brightness when the subject is very small in the picture or when you are using close-up flash photography for subjects such as a flower or business card. n NOTES •... -
Page 74: Continuous Shots (16-Cont)
R Manual Mode Use the [5] or [6] button to set the flash brightness. [5]: Increases the flash brightness. [6]: Decreases the flash brightness. • There are 5 compensation levels (–0.6 to +0.6EV in approx. 0.3EV steps). ! CAUTION If you are shooting in dark conditions or if the subject is too far, pressing the [5] button may not produce a brighter picture. - Page 75 Press the [MENU/EXE] button. • The menu screen appears. Use the [3] or [4] button to select [16-CONT]. Use the [5] or [6] button to set the continuous shot speed. [HIGH]: Takes 16 shots in approximately 2 seconds. [LOW]: Takes 16 shots in approximately 4 seconds.
-
Page 76: L Protect Mode (Protecting Your Images)
L Protect Mode (Protecting Your Images) This feature assigns the read-only attribute to image data to prevent the images from being inadvertently erased. ! CAUTIONS • Read-only data is also erased when you format (initialise) a SmartMedia card (aP.59). • To protect the entire SmartMedia, refer to “Write Protection” (aP.22). Protecting a Single Frame Set the Mode dial to [L]. - Page 77 To Remove Single-Frame Protection Perform steps 1 and 2 in “Protecting a Single Frame” on page 76. Use the [3] or [4] button to select the protected frame and press the [MENU/EXE] button. • The “L” icon goes off. DISP POWER MENU / EXE...
-
Page 78: Removing Protection From All Frames
L Protect Mode (Protecting Your Images) Removing Protection from All Frames This procedure removes the protection from all protected frames. Set the Mode dial to [L]. • The menu screen appears. Use the [5] or [6] button to select [UNPROTECT ALL]. Press the [MENU/EXE] button. -
Page 79: Pc-Mode (Downloading Images To A Pc)
In this mode, you should use the AA-V101 AC Power Adapter supplied with the GC-S5 to avoid data transfer interruption caused by an exhausted battery. ! CAUTIONS • Always switch all the devices off before you connect them together. - Page 80 Connection Kit for detailed information. ! CAUTIONS • Image data can only be exchanged between the GC-S5 and a personal computer using Exif-JPEG format files with the file names DSC00001.JPG to DSC99999.JPG. • The Auto Power Off function does not operate in PC-mode.
-
Page 81: Accessories Guide
Accessories Guide These optional accessories (sold separately) can make taking pictures and viewing images with the GC-S5 even easier. For information on how to attach and use these accessories, refer to the instructions provided with the accessory used. VU-V108 SmartMedia Memory capacity: 8 MB Operating voltage: 3.3 V... -
Page 82: Notes On Using Your Camera Correctly
Do not expose the camera to sand. The GC-S5 is particularly adverse to the effect of sand. In sandy locations such as beaches or deserts, or in locations where there is windborne sand, ensure that the camera is not exposed to sand. -
Page 83: Liquid Crystal
SmartMedia When you are carrying or storing SmartMedia, always keep the SmartMedia in the anti-static case provided to ensure that the SmartMedia is not adversely affected by static electricity. Inserting a SmartMedia that is charged with static electricity into your camera may result in a camera malfunction. -
Page 84: Safety Notes
Safety Notes Ensure that you read this Owner’s Manual carefully before you use your GC-S5 camera so that you use your camera correctly. Also, always read the Manual, and particularly the Safety Notes, for any connected devices, such as the AC power adapter or other accessories, to ensure that you also use these devices correctly. - Page 85 AC power outlet after you have disconnected the camera.) After checking that smoke is no longer being emitted, contact your JVC dealer or your local authorised JVC service facility and request repairs. Never attempt to repair the camera yourself as this is dangerous.
- Page 86 Do not remove the camera casing. This may cause an electric shock. Internal inspection, maintenance and repairs should be carried out by your JVC dealer or local authorised JVC service facility. aWARNING Do not disassemble.
- Page 87 Do not use this camera in the bathroom or shower. This may cause a fire or electric shock. Take care that the camera is not exposed to moisture and that water does not get into the camera. Take particular care when it is raining or snowing or when you are using the camera at the beach or near water.
- Page 88 Safety Notes Do not subject the battery to strong impacts, such as hitting it with a hammer, stepping on it or dropping it. Any of these may cause the battery to split or leak, causing fire or injury. Use only the specified battery or AC power adapter specially made for use with this equipment.
- Page 89 Do not move the camera while it is switched on. (If you are using the AC power adapter, unplug the adapter from the AC power outlet after you have switched off the camera.) Then ensure that any connector cords or cables to other devices are disconnected before moving the camera.
- Page 90 Safety Notes Contact your JVC dealer or local authorised JVC service facility to request cleaning of the interior of the camera every two years. Allowing dust to accumulate in the camera for long periods without cleaning the camera interior may cause a fire or electric shock.
-
Page 91: Warning Displays
If the camera still fails to operate normally, contact your JVC dealer or your local authorised JVC service facility and request repairs. Status The camera battery is low on charge (aP.19). -
Page 92: Troubleshooting
Troubleshooting • Before you decide the camera is faulty, check the following once more: Problem • The battery is exhausted. • The AC power adapter No power. plug has come out of the power outlet. • The Mode dial is set incorrectly. - Page 93 Problem No photograph is taken when the • The Mode dial has been shutter button is moved to another setting. pressed. • The flash is set to Suppressed Flash mode. I can’t use the flash to take • You pressed the shutter pictures.
-
Page 94: Specifications
Specifications System Model Digital Still Camera Pickup Elements 1/1.7-inch square-pixel CCD (1.5 million pixels) Resolution 1280 File format JPEG-compliant (Exif Ver. 2.0) Storage media SmartMedia (3.3 V or 5 V) Number of frames recorded (Number of shots available) The number of frames recorded may vary depending on the type of subject in the images. -
Page 95: Input/Output Terminals
These specifications are subject to change without notice. n NOTE Static electricity or strong radio interference (strong electric fields) may cause operation errors (such as power on/off, etc.). This is not a malfunction of the GC-S5. 33 mm (not including accessories and... -
Page 96: Index
Index 16-Cont (continuous shots)...74 AC Power Adapter ...17, 20 Accessories ...7 Accessories guide ...81 AF and AE lock ...27 ATA card ...7 Auto flash mode ...40 Automatic playback ...45 Auto power off function ...21 Battery About...18 Charging ...17 Loading ...16 Remaining capacity ...19 Beep...63 Brightness ...71... - Page 97 On-screen display...29 Opening screen ...21 PC card ...7 PC Card Adapter ...22 PC card standard...7 PC-mode (downloading images to a PC) ...79 PCMCIA ...7 Playback ...42, 45 Playback zoom...44 Pressing the shutter button ...27 Pressing the shutter button down fully...27 Pressing the shutter button down halfway ...27 Preview image...68, 71, 73 Protect mode (protecting your images) ...76...
- Page 98 Memo...
- Page 100 VICTOR COMPANY OF JAPAN, LIMITED Printed in Japan E/EK COPYRIGHT© 1998 VICTOR COMPANY OF JAPAN, LTD. 0998MNV...
Need help?
Do you have a question about the GC-S5 and is the answer not in the manual?
Questions and answers