
Related Manuals for Roberts Concerto2


Summary of Contents for Roberts Concerto2
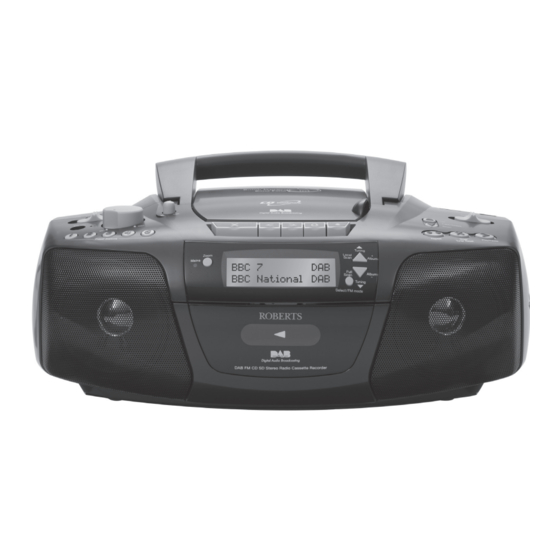
- Page 1 DAB / FM / CD / USB / SD stereo radio cassette recorder Please read this manual before use...
-
Page 2: Table Of Contents
Contents Concerto 2 CD radio cassette recorder features ....2 Recording from radio ............22 Controls ................3-4 Recording from CD ............23 Battery operation ..............5 Recording from SD/USB............24 Mains operation ..............5 Recording from internal microphone .........25 Operating your CD radio cassette recorder - DAB ....6 Recording from external microphone ........26 Selecting a station - DAB.............7 Preventing accidental erasure ...........27... -
Page 3: Concerto 2 Cd Radio Cassette Recorder Features
Concerto 2 - features SD/USB - MP3/WMA The Concerto plays MP3 and WMA fi les from an SD card or USB memory The Roberts Concerto provides the following features in an attractive devices. compact unit. SD/USB Bookmark Radio The Concerto has a SD/USB Bookmark feature which allows SD/USB The Concerto can receive DAB and FM (with RDS) wavebands. -
Page 4: Controls
Controls (Top) 1. Tone control 7. Volume control 13. DAB/FM switch 19. Raised lip for CD access 2. Preset buttons 1-5 8. Battery compartment 20. Record key 14. Track / Search Up button 3. Internal microphone 9. Telescopic aerial 21. Play key 15. - Page 5 Controls (Front view) 25. Zoom button 29. Select / FM mode button 26. LCD display 30. Cassette door 27. Tuning / Album up / local scan button 31. Headphone socket 28. Tuning / Album down / full scan button 32. Mains indicator light...
-
Page 6: Battery Operation
Battery operation 1. Remove the Battery cover on the rear of your CD radio cassette by pushing the catches in the direction shown. 2. Insert eight LR14 (C size) batteries into the compartment. Take care to ensure all batteries are inserted with the correct polarity as shown inside the battery compartment. -
Page 7: Operating Your Cd Radio Cassette Recorder - Dab
Operating your CD radio cassette recorder - DAB 1. Fully extend the Telescopic aerial and then angle and rotate for best reception. 2. Slide the Function switch to the Radio position to switch on your CD radio cassette recorder. 3. Slide the Waveband switch to the DAB position The display will show "DAB"... -
Page 8: Selecting A Station - Dab
Selecting a station - DAB 1. The top line of the display shows the name of the station currently selected. 2. Press the Tuning Up or Down buttons to scroll through the list of available stations on the lower line of the display. Stop pressing the Tuning buttons when you fi... -
Page 9: Finding New Stations - Dab
Finding new stations - DAB As time passes new stations may become available. To fi nd new stations proceed as follows:- 1. Press and hold the Local scan button. The display will show "Scan- ning" and will perform a scan of the UK DAB frequencies. As new stations are found the station counter on the right-hand side of the display will increase and stations will be added to the list. -
Page 10: Operating Your Radio - Search Tuning Fm
Operating your radio - Search tuning FM 1. Fully extend the Telescopic aerial and then angle and rotate for best reception. 2. Slide the Function switch to the Radio position to switch on your CD cassette recorder. 3. Slide the Waveband switch to the FM position The display will show "FM RADIO"... -
Page 11: Manual Tuning Fm
8. Adjust the Volume and Tone controls to the required settings. 9. To switch off your CD radio cassette recorder slide the Function switch to the Off position. Note: On FM if a station being received is weak some hiss may be audible. To reduce the hiss press and and hold the Select/FM mode button. -
Page 12: Presetting Stations
Presetting stations There are 10 memory presets available. There are 5 on each of the DAB and FM wavebands. 1. Slide the Function switch to the Radio position to switch on your CD cassette recorder. 2. Slide the Waveband switch to the desired waveband position. 3. - Page 13 Recalling a preset station 1. Slide the Function switch to the Radio position to switch on your CD cassette recorder. 2. Slide the Waveband switch to the desired waveband position 3. Momentarily press the required Preset button 1-5. Your radio will tune to the station stored in preset memory.
-
Page 14: Compact Discs / Mp3/Wma-Cds
Compact discs Use only Digital Audio CDs which have the symbol. Never write on a CD or attach any sticker to the CD. Always hold the CD at the edge and store it in its box after use with the label facing up. To remove dust and dirt, breathe on the CD and wipe it with a soft, lint free cloth in a straight line from the centre towards the edge. - Page 15 WARNING CLASS 1 LASER PRODUCT means that the laser's construction makes it inherently safe so that the legally prescribed maximum permissible radiation values can never be exceeded. Caution: Using any equipment or devices other than those described and specifi ed in these operating instructions, or tampering with the unit in any way, can result in dangerous exposure to radiation.
-
Page 16: Playing A Cd
Inserting a CD 1. To open the CD compartment, position a fi nger underneath the raised lip and lift up the CD door. 2. Put the CD on the spindle, print side facing upwards until it clicks into place and then gently close the CD compartment by pushing the cd door back into position. -
Page 17: Cd Bookmark
4. To pause playback press the Play/Pause button. The pause symbol will show on the display. Audio CD: The current track number and the elapsed playing time will be shown on the display. MP3/WMA CD: The fi le name with ID3 tag scrolls, the elapsed playing time will be shown on the display. -
Page 18: Selecting A Track
Selecting a track 1. Audio CD: While the CD is playing, press either the Track Up or Down buttons to change the desired track. You can also skip to a wanted track when the player is in stop mode. Press the Play/Pause button to play the selected track. -
Page 19: Search Function
Search function 1. While the CD is playing, press and hold down either the Track/Search Up or Down buttons. Release the button when the desired part of the track is reached. CD repeat mode 1. Whilst the CD is playing press the Repeat button. The radio will step through the following options: Audio CD: Repeat 1 Repeat ALL... -
Page 20: Sd/Usb Mode
SD / USB mode Cautions In order to minimise the risk of damage to your radio, SD card or USB This section describes how to use your radio to access and playback your memory device, please place the unit so that the device cannot be easily audio fi... - Page 21 SD / USB mode cont. Inserting and removing a USB memory device Carefully insert a USB memory device into the USB socket. To remove the USB memory device simply pull the device out. Selecting SD/USB mode 1. To select the SD/USB mode slide the Function switch to SD/USB position.
-
Page 22: Listening To Cassette Tapes
Listening to cassette tapes Note: This unit is not suitable for recording onto CHROME (IEC II) or METAL (IEC IV) cassettes. For playback any cassette type may be used 1. Slide the Function switch to the Tape position. 2. Press the Stop Eject key to open the Cassette compartment. 3. -
Page 23: Recording From The Radio
Recording from the Radio 1. Slide the Function switch to the Radio position. 2. Tune in to the desired station. 3. Adjust the Volume control to suit your requirements. 4. Insert a blank cassette with the tape surface uppermost and the side you wish to record on facing towards you. -
Page 24: Recording From Cd
Recording from CD 1. Slide the Function switch to the CD position. 2. Insert a CD into the compartment. Insert a blank cassette with the tape surface upwards and the side you wish to record on facing towards you. 3. Depress the Record key to commence recording. The CD will start automatically (CD syncro start) 4. -
Page 25: Recording From Sd/Usb
Recording from SD/USB 1. Slide the Function switch to the SD/USB position. 2. Insert an SD card into the SD slot or a USB memory device into the USB socket on the top of the unit on the right hand side. 3. -
Page 26: Recording From Internal Microphone
Recording from the internal microphone 1. Slide the Function switch to the 'Tape' position. 2. Insert a blank cassette with the tape surface upwards and the side you wish to record on facing towards you. 3. Depress the Record key to commence recording. 4. -
Page 27: Recording From External Microphone
Recording from an external microphone (not included) When recording from an external microphone the loudspeakers remain connected for monitoring purposes. If you do not wish to hear the recording being made simply rotate the volume control to minimum. The recording level is set automatically and is not affected by the setting of the Volume control. -
Page 28: Preventing Accidental Erasure
Preventing accidental erasure 1. To safeguard your recordings against accidental erasure, break off the appropriate tab on the cassette as shown. 2. There is one tab for each side of the cassette. This will prevent the Record button from being pressed. C 60 3. -
Page 29: Zoom Function
Zoom function Your CD radio cassette recorder has a zoom button which can be used to enlarge the size of fonts on the display. 1. Press the Zoom button to enlarge the upper line of the display. 2. Press the Zoom button again to enlarge the lower line of the display. 3. -
Page 30: System Reset
System Reset If your radio fails to operate correctly, or some digits on the display are missing or incomplete, carry out the following procedure. 1. Slide the Function switch to the "Radio" position. 2. Slide the Waveband switch to the DAB position. 3. -
Page 31: Headphone Socket
Headphone socket 1. A 3.5mm Headphone Socket is located on the left hand side of your CD radio cassette recorder is provided for use with either headphones or an earpiece. Inserting a plug automatically mutes the internal loudspeakers. 2. Adjust the volume on the CD radio cassette recorder as needed. Please be aware that the sensitivity of headphones can vary widely. -
Page 32: General
IMPORTANT: General • IMPORTANT: The mains plug is used as the means of connecting the Do not allow this CD radio cassette recorder to be exposed to water, radio to the mains supply. The mains socket used for the radio must steam or sand. -
Page 33: Specifi Cations
Specifi cations Circuit features Power Requirements Loudspeakers 2 x 100mm Mains AC 230 volts, 50Hz only Output power 2 x 2.5 W Batteries 8 x LR14 (C size) Headphone socket 3.5mm dia Frequency Coverage 87.5-108MHz Microphone socket 3.5mm dia 174.928 - 239.200MHz Aerial System Telescopic aerial Telescopic aerial... -
Page 34: Mains Supply
Mains supply The wire coloured BLUE must be Your Concerto 2 will operate from a supply of AC 230 volts, 50Hz only. connected to the terminal marked N DO NOT cut off the mains plug from this equipment. If the plug fi tted or coloured BLACK. -
Page 35: Guarantee
In the event that it is not possible to return the product to the Roberts dealer from whom it was purchased, please contact Roberts Radio using the contact details on the www.robertsradio.com website. - Page 36 ROBERTS RADIO LIMITED PO Box 130 Mexborough South Yorkshire S64 8YT Website: http://www.robertsradio.com © 2011, 2014 Roberts Radio Limited Issue 2...
Need help?
Do you have a question about the Concerto2 and is the answer not in the manual?
Questions and answers
how to change aerialto have an acceptable DAB signal