
Subscribe to Our Youtube Channel
Related Manuals for REED SD-3007


Summary of Contents for REED SD-3007
- Page 1 Black SD-3007 Model Pantone 534 Blue - 100/80/30/5 Humidity/Temperature Pantone 485 Red - 10/100/100/5 Datalogger Pantone 123 Yellow - 0/27/100/ Instruction Manual reedinstruments...
-
Page 2: Table Of Contents
Table of Contents Features .................... 3 Specifications ................3-5 Instrument Description ..............6 Operating Instructions ..............7-11 Function selection ................7 Humidity/Temperature measurement ..........7 Dew Point measurment..............7 Wet Bulb measurement ..............7 Data Hold ..................8 Data Record (Max., Min. reading) ........... 8 Backlight ON/OFF ................ -
Page 3: Features
Features • Dew point and Wet bulb humidity measurements • Type K, Type J thermocouple thermometer • Fast humidity measuring response time • Real time SD memory card datalogger with a built-in clock and calendar • No extra software needed, just plug the SD card into the computer and it downloads directly to EXCEL •... -
Page 4: Temperature Range
Data Output: USB/RS232 PC computer interface Temperature Range: 0-50°C (0-122°F) Résolution: 0.1°C/0.1°F Accuracy: ± 0.8°C/1.5°F Operating Temperature: 0-50°C (0-122°F) Operating Humidity: Less than 85% R.H. Power Supply: UM3/AA (1.5 V) x 6 batteries Weight: 515g/1.13lb Dimensions: 177 x 68 x 45mm (7.0 x 2.7 x 1.9”) Includes: Humidity/Temp. - Page 5 3 V/M & frequency less than 30 MHz only Blue - 100/80/30/5 Pantone 534 Blue Yellow - 0/27/100/0 Pantone 123 Yellow For service on this or any other REED product or information on other Red - 10/100/100/5 Pantone 485 Red Yellow - 0/27/100/0 Pantone 123 Yellow REED products, contact REED Instruments at info@reedinstruments.com...
-
Page 6: Instrument Description
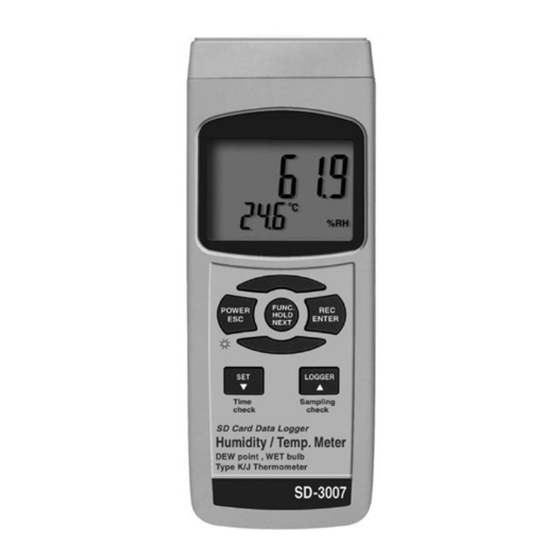
Instrument Description 1. Display 10. RS232 Output 2. Power, ESC, & Backlight Button 11. Reset Button 3. Hold Button, Function Button, 12. AC/DC 9V Power Adapter & Next Button Input Socket 4. REC Button, Enter Button 13. Battery Compartment/Cover 5. SET Button, Up Button, & Time 14. -
Page 7: Operating Instructions
Operating Instructions Function selection 1) Turn on the meter by pressing the Power Button. To turn the meter off, hold the Power Button for over 2 seconds. 2) The meter has 4 measuring functions to choose from: Humidity/ Temp, Dew Point, Wet Bulb, or Type K/J Thermometer. When the meter is on, press and hold the Function Button. -
Page 8: Data Hold
Type K/J Thermometer measurement 1) Select the “tP” function (see Function Select). 2) Plug the optional Type K or J Thermocouple Probe into the Type K/J Probe Input Socket. Be sure the Probe is not plugged in. 3) The screen will display a “K”, meaning it is configured for a Type K thermometer probe. -
Page 9: Backlight On/Off
Backlight ON/OFF After powering the meter ON, the LCD Backlight will turn on automati- cally. While taking measurements, press the Backlight Button and the LCD Backlight will turn off. Press the Backlight Button once again to turn the LCD Backlight back ON. Datalogger Preparation Before Executing the Datalogger Function: 1) Insert the optional SD card into the SD card socket. -
Page 10: Manual Datalogger
3) Stop Datalogging; while the Datalogger function is paused, press the REC Button for 2 seconds. The “REC” symbol will disappear indicating the Datalogging function has stopped. Manual Datalogger (Set sampling time = 0 seconds) 1) Set sampling time is to 0 second; Press the REC Button, and the “REC”... -
Page 11: Sd Card Data Structure
SD Card Data Structure 1) The first time the SD card is used in the meter, the SD card will generate a folder: HTA01 2) The first time you use the Datalogger, in the folder HTA01, a new file name HTA01001.XLS will be created. The Datalogger will use this file until the Data has reached to 30,000 rows. -
Page 12: Advanced Settings
Advanced Settings During normal functions (not Datalogging), press and hold the SET Button for 2 seconds to enter the “Advanced Setting” mode. Press the Next But- ton scroll through eight main functions, shown on the lower display: dAtE Set clock time (Year/Month/Date, Hour/Minute/Second) Set SD card Decimal character PoFF Auto power OFF management bEEP Set beeper sound ON/OFF... -
Page 13: Setting The Decimal Point On The Sd Card
Setting the Decimal point on the SD Card 1) When the lower display shows “dEC”, use the Up or Down Buttons to toggle between “bASIC” (“.” Decimal Point) or “Euro” (“,” Deci- mal Point). 2) After the Decimal point character has been selected, press the Enter Button to save the setting as the default. -
Page 14: Select The Temperature Unit To °C Or °F
Select the Temperature unit to °C or °F 1) When the lower display shows “t-CF”, use the Up or Down Buttons to select “C” (for °C) or “F” (for °F). 2) After selecting “C” or “F”, press the Enter Button to save the set- ting as the default. -
Page 15: Pc Serial Interface
PC Serial Interface The instrument features an PC output via 3.5 mm terminal. The connector output is a 16 digit data stream which can be utilized to the user’s specific application. An USB RS232 lead with the following connection will be required to link the instrument with the PC serial input. -
Page 16: System Reset
Blue - 100/80/30/5 Pantone 534 Blue Yellow - 0/27/100/0 Pantone 123 Yellow For service on this or any other REED product or information on other Red - 10/100/100/5 Pantone 485 Red REED products, contact REED Instruments at info@reedinstruments.com Yellow - 0/27/100/0... - Page 17 Notes _________________________________________ ________________________________________________ ________________________________________________ ________________________________________________ ________________________________________________ ________________________________________________ ________________________________________________ ________________________________________________ ________________________________________________ ________________________________________________ ________________________________________________ ________________________________________________ ________________________________________________ ________________________________________________ ________________________________________________ ________________________________________________ ________________________________________________ Blue - 100/80/30/5 Pantone 534 Blue Yellow - 0/27/100/0 Pantone 123 Yellow ________________________________________________ Red - 10/100/100/5 Pantone 485 Red Yellow - 0/27/100/0 Pantone 123 Yellow Blue - 100/80/30/5 Pantone 534 Blue...
- Page 18 Notes _________________________________________ ________________________________________________ ________________________________________________ ________________________________________________ ________________________________________________ ________________________________________________ ________________________________________________ ________________________________________________ ________________________________________________ ________________________________________________ ________________________________________________ ________________________________________________ ________________________________________________ ________________________________________________ ________________________________________________ ________________________________________________ ________________________________________________ Blue - 100/80/30/5 Pantone 534 Blue Yellow - 0/27/100/0 Pantone 123 Yellow ________________________________________________ Red - 10/100/100/5 Pantone 485 Red Yellow - 0/27/100/0 Pantone 123 Yellow Blue - 100/80/30/5 Pantone 534 Blue...
- Page 19 Notes _________________________________________ ________________________________________________ ________________________________________________ ________________________________________________ ________________________________________________ ________________________________________________ ________________________________________________ ________________________________________________ ________________________________________________ ________________________________________________ ________________________________________________ ________________________________________________ ________________________________________________ ________________________________________________ ________________________________________________ ________________________________________________ ________________________________________________ Blue - 100/80/30/5 Pantone 534 Blue Yellow - 0/27/100/0 Pantone 123 Yellow ________________________________________________ Red - 10/100/100/5 Pantone 485 Red Yellow - 0/27/100/0 Pantone 123 Yellow Blue - 100/80/30/5 Pantone 534 Blue...
- Page 20 Notes _________________________________________ ________________________________________________ ________________________________________________ ________________________________________________ ________________________________________________ ________________________________________________ ________________________________________________ ________________________________________________ ________________________________________________ ________________________________________________ ________________________________________________ ________________________________________________ ________________________________________________ ________________________________________________ ________________________________________________ ________________________________________________ ________________________________________________ Blue - 100/80/30/5 Pantone 534 Blue Yellow - 0/27/100/0 Pantone 123 Yellow ________________________________________________ Red - 10/100/100/5 Pantone 485 Red Yellow - 0/27/100/0 Pantone 123 Yellow Blue - 100/80/30/5 Pantone 534 Blue...
Need help?
Do you have a question about the SD-3007 and is the answer not in the manual?
Questions and answers