
Related Manuals for FLY MC100


Summary of Contents for FLY MC100
- Page 1 FLY Mobile Phone User Manual Model: FLY MC100 Please read this manual carefully before operating this product.
- Page 2 Thanks for choosing FLY products. For the safe and efficient operation of this product, please read this manual and other materials carefully before you first operate it. Meridian Mobile Pvt. Ltd. shall bear no liability for any losses caused by improper operation of this product not in compliance with the...
-
Page 3: Table Of Contents
CONTENTS Chapter I Safety and Maintenance----------------------------------------------- 6 Chapter II Before Using Your Phone-------------------------------------------11 2.1 P ................11 HONE XTERIOR 2.2 K ................. 12 ESCRIPTION 2.3 D ..................15 ISPLAY 2.4 I .................... 16 CONS 2.5 B ..................17 ATTERY 2.5.1 Removing and Installing Your Battery........17 2.5.2 Charging the Battery.............. - Page 4 4.2 F ............34 EATURE TRUCTURE 4.3 P .................. 40 HONEBOOK 4.3.1 Quick Search ................. 40 4.3.2 Search Entry................41 4.3.3 Add New Entry............... 42 4.3.4 Copy All ................. 42 4.3.5 Delete ..................43 4.3.6 Caller Group ................43 4.3.7 Owner Number ..............43 4.3.8 Setup ..................
- Page 5 4.7.1 Camera.................. 72 4.7.2 Video Recorder..............74 4.7.3 Album ..................75 4.7.4 Audio Player ................75 4.7.5 Video Player ................77 4.7.6 Photo Artist................78 4.7.7 Melody Composer ..............78 4.7.8 Voice Recorder..............79 4.7.9 E-book Reader ..............80 4.7.10 FM Radio................81 4.8 F ................
-
Page 6: Chapter I Safety And Maintenance
Chapter I Safety and Maintenance For the efficient and safe operation of your mobile phone, please observe the guidelines given below. •Please read this manual carefully before using this phone. •You are prohibited to use a mobile phone while in the aircraft. If the alarming and calendar features of your mobile phone can automatically power on your phone, check and disable these features before boarding an aircraft. - Page 7 •Use of a mobile phone case or a plastic mobile phone sheath may damage the film on your phone cover. •Do not use solutes, such as benzene, thinner or alcohol, to clean the cover of your mobile phone. Keep your phone away from detergents or other corrosive chemicals.
- Page 8 losing your eyesight. In this case, rinse with clean water immediately (but do not knead the eyes) and go to see your doctor. • Never squash the battery. Avoid mechanical vibration or shock. Avoid short circuit. Otherwise, the battery or the attached parts may be damaged.
- Page 9 Please follow the precautions described below when using the charger. •Please read the instructions manual and the labels on the surface of the charger carefully before using it. • Do not disassemble or modify your charger. Never use your charger with impaired wire because that may lead to an electric shock, fire and charger damage.
- Page 10 •Do not use the earphone while driving a car, riding a bike or walking on the road in case of traffic accidents. •Keep your mobile phone out of children’s reach to preclude any danger.
-
Page 11: Chapter Ii Before Using Your Phone
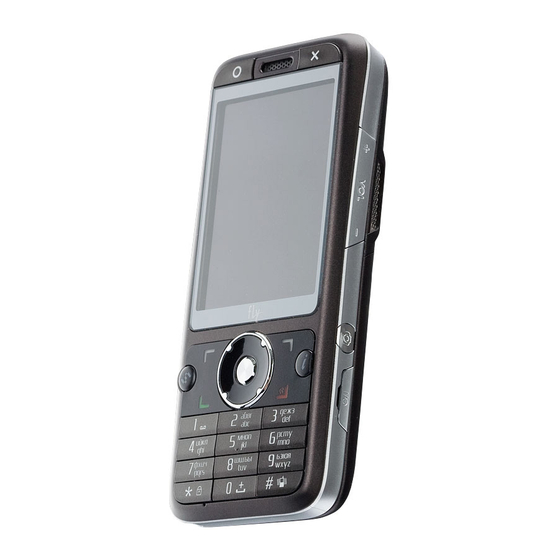
Chapter II Before Using Your Phone 2.1 Phone Exterior Left Game Earpiece Right Game Display Left Speaker Previous LeftSoft Right Soft Key Play Multimedia Next Login Key Micro Card End Key Dial Key Slot Navigation OK Key Keys String Hole Microphone Number Socket... -
Page 12: Keys Description
Right Camera Speaker Volume Key Battery Cover Capture Key Data Cable/Earphone/Charger Socket 2.2 Keys Description Right Left Game Key Game Right Left Volume Soft Previous Soft Play Capture Next Login Multimedia Dial End Key Navigation Key OK Key Number Keys... - Page 13 Keys Description Dial key Dial a phone number or answer an incoming call. When the phone is in idle mode, press this key to access the call history list of dialed calls. End Key End a call. Hold down this key to turn on/off your mobile phone.
- Page 14 operations and to enter the menu that has been selected when in the menu. Number Number keys are used to input numbers, letters Keys and special characters. Hold down the 0 key when the phone is idle to enter a "+" symbol (international access code). They can also be used as shortcut keys to quickly access the options within a menu.
-
Page 15: Display
Notes: In this manual, “Press a key” means to press a key and release it immediately, while “hold down a key” means to press a key and hold it for 2 or more seconds. 2.3 Display The display can be divided into three sections. The idle dialing interface is taken as an example for the following description. -
Page 16: Icons
2.4 Icons Icons Description Location Signal strength Icons Area indicator. GPRS Icons Area Connected Alert Type Icons Area Ring Alert Type Icons Area Vibration Alert Type Icons Area Vibration Ring Alert Type Icons Area Vibration then Ring Unread SMS Icons Area Unread Icons Area message... -
Page 17: Battery
Stopwatch Icons Area Enabled Background Icons Area Music Playing 2.5 Battery In order to get the best performance of your battery, please fully charge the battery for the first three times only when the battery is completely flat. 2.5.1 Removing and Installing Your Battery Follow the steps given below to remove your battery. -
Page 18: Charging The Battery
Follow the steps given below to install your battery. Make sure the metal contacts of your battery and those of the ① battery compartment are properly aligned and clip the battery into the compartment as shown by the arrow in Figure (1); Slightly put the compartment cover into the slot of your phone as ②... - Page 19 Plug the charger into a power socket. And plug the connector of the charger into the charger jack on one side of your phone. The battery level indicator in the Icons Area will flash cyclically. If you have powered off the phone, a charging prompt will be displayed on the screen to show that the battery is being charged.
-
Page 20: Connecting The Network
dangerous and it also violates the warranty terms stipulated by the manufacturer. When your phone turns off automatically or prompts “Battery Low”, the battery should be charged promptly. If the battery is charged when it doesn't use up, the charging time will be shortened automatically. 2.6 Connecting the Network 2.6.1 SIM Card You must insert a valid SIM (Subscriber Identity Module) card before... -
Page 21: Turning On/Off Your Phone
SIM card, slide it in the direction as shown in Figure (2), and take out SIM card. SIM card holder 2.6.3 Turning On/Off Your Phone Hold down the End Key for a few seconds to turn on/off your mobile phone. The phone will not be able to be used properly if it has been turned on without a SIM card inside. -
Page 22: Unlocking Your Sim Card
the phone lock code every time you turn on your mobile phone. Otherwise, your phone can not be used. Use the Number keys to enter your phone lock code, use the Right Key to erase input errors and press # or OK to end your input. For example, if your phone lock code is "1234", you should enter: 1 2 3 4 and <OK>... -
Page 23: Connecting To Network
Hold down the End Key to turn on your mobile phone. Use the Number Keys to enter your PIN Code, use the Right Key to erase input errors and press # or OK to end. For example, if your SIM lock code is "1234", you should enter: 1 2 3 4 and <OK>... -
Page 24: Memory Card
Press Login Key to access WAP menu. Press Capture Key to access Camera. 2.7 Memory Card Your FLY MC100 mobile phone supports multifunctional memory cards of Micro SD format. Users can store the video, photo, pictures, MP3, sound recording files, etc. in the Micro SD card. - Page 25 Remove the Micro SD card cover in the direction as shown by the ① arrow in the following Figure (2); Keep the metal side of the Micro SD card facing the front side of the ② phone and insert the card into the slot as shown by the arrow in the following Figure (3) until it clicks into place;...
-
Page 27: Chapter Iii Quick Start Guide
Chapter III Quick Start Guide 3.1 Highlight Features As a mobile phone targeting multimedia, FLY MC100 also has rich, useful and fast multimedia features besides the basic features of mobile phones. The following is a brief introduction to these features: Phonebook: Up to 1,000 entries can be stored on your phone. - Page 28 Calendar, Calculator, Stopwatch, To Do List, Stopwatch, Unit Converter, Currency Converter and World Time are supported. U Disk: The FLY MC100 supports portable storage feature, i.e. U disk. Connect the phone and PC with the attached USB data cable when the phone is off, so that the phone becomes a U disk applicable for mobile data storage.
-
Page 29: Feature Keys
Customized Settings: Your phone can be customized as required. Setting categories include Profiles, Display Characteristics, Phone Setup, Call Setup, Network Setup, Security Setup, Shortcuts, etc. There are multiple options in each category for you to customize. Such as Incoming Ring Tone, Wall Paper, Time and Date, Scheduled Power On/Off, etc. -
Page 30: Making A Call
Preview Reject Call Press the End Incoming call prompt screen Access WAP Press the Login When your phone is idle Menu Accessing the Press the Play When your phone is idle Audio Player Entering Press Idle interface phone Number Keys number End a call Press the End... -
Page 31: Dialing A Number In The List
For instance, to call a hotline number in Shanghai from other countries, you should dial: +86 21 114 3.3.4 Dialing a Number in the List You can dial numbers that are stored in your call history or phonebook. Press the Up Key and Down Key to scroll between the numbers in the list. -
Page 32: Call Options
3.7 Call Options Certain options require network support when calls are being made. Please contact your service operator for any questions regarding services. Enter the call options menu by pressing the <Options> soft key when a call is in progress. The following options are available: 1. -
Page 33: Making A Second Call
Mute: Turn on/off the mute feature. When the mute function is enabled the person on the other end of the line will not be able to hear your voice, however, you will still be able to hear their voice. DTMF (Duel Tone Multiple Frequency): Turn on/off the DTMF feature. -
Page 34: Chapter Iv Feature Menu
End Key to return to the idle mode. 4.2 Feature Menu Structure FLY MC100 Mobile Phone supports two types of main menu: Matrix and Page. The contents of these two menus are the same, but the orders are different. - Page 35 1-5 Delete 1-6 Caller Groups 1-7 Owner Number 1-8 Settings 1-9 Caller Picture 1-10 Caller Ring Tone 1-11 Caller Video 2 Messages 2-1 Messages 2-1-1 Write Message 2-1-2 Inbox 2-1-3 Outbox 2-1-4 Sent 2-1-5 Drafts 2-1-6 Delete Folder 2-1-7 Template 2-1-8 Message Settings 2-2 E-mail 2-2-1 Sent and Receive...
- Page 36 2-3 Chat 2-4 Voice Mail Server 2-5 Broadcast Message 2-5-1 Receive Mode 2-5-2 Read Message 2-5-3 Languages 2-5-4 Channel Setting 3 Call History 3-1 Missed Calls 3-2 Dialed calls 3-3 Received Calls 3-4 Delete Call Log 3-4-1 Missed Calls 3-4-2 Dialed Calls 3-4-3 Received Calls 3-4-4 Delete All 3-5 Call Time...
- Page 37 3-7-2 Last Received 3-7-3 All Sent 3-7-4 All Received 3-7-5 Reset Counter 4 Phone Setup 4.1 User Profiles 4-1-1 General 4-1-2 Meeting 4-1-3 Outdoor 4-1-4 Indoor 4-1-5 Headset 4-1-6 Bluetooth 4-2 Phone Setup 4-2-1 Time and Date 4-2-2 Schedule Power On/Off 4-2-3 Preferred Input Method 4-2-4 Speed Dial 4-2-5 Dedicated Key...
- Page 38 4-3-6 Menu Background 4-3-7 Show Date and Time 4-3-8 Show Owner Number 4-3-9 Show Operator Name 4-3-10 LCD Backlight 4-4 Call Setup 4-4-1 Caller ID 4-4-2 Call Waiting 4-4-3 Call Divert 4-4-4 Call Barring 4-4-5 Call Time Reminder 4-4-6 Call Time Display 4-4-7 Auto Redial 4-4-8 Blacklist 4-5 Network Setup...
- Page 39 5 Multimedia 5-1 Camera 5-2 Video Recorder 5-3 Album 5-4 Audio Player 5-5 Video Player 5-6 Photo Artist 5-7 Melody Compose 5-8 Voice Recorder 5-9 E-book Reader 5-10 FM Radio 6 Fun and Games 6-1 Java 6-2 Games 7 Tools 7-1 Alarm 7-2 Calendar 7-3 Calculator...
-
Page 40: Phonebook
7-10 Health 8 Service 8-1 STK* 8-2 WAP 8-2-1 Homepage 8-2-2 Bookmarks 8-2-3 Recent Pages 8-2-4 Enter Address 8-2-5 Settings 8-3 Data Account Setup 8-3-1 GSM Data 8-3-2 GPRS 9 File Manager Notes: Menu items with a “*” are only available under certain circumstances. -
Page 41: Search Entry
Enter the name to be searched with letters or numbers to search for the entry needed. When the Search menu is displayed, you may press # to change the input method needed. 4.3.2 Search Entry Enter the name you want to search. Highlight an entry in the Phonebook and press Options. -
Page 42: Add New Entry
4.3.3 Add New Entry New entries in the Phonebook can be stored on the SIM card or phone. If you choose to save the entry to SIM card, only name and telephone number will be included in the entry. If you choose to save the entry to Phone, the following information may be included in the entry: name, telephone number, home number, company name, E-mail, company telephone, fax number, birthday, associate pictures, clip link, ring tone... -
Page 43: Delete
Note: When copying entries in the pone to SIM card, only name and telephone number of the entry will be copied; other information such as home number and company number will not be copied. 4.3.5 Delete Delete all entries from the SIM card or phone or delete all call history from the phone. -
Page 44: Caller Picture
My vCard: You may edit and sent my vCard. 4.3.9 Caller Picture Access the Caller Picture. If there is no photo in default directory for saving photos in the phone, it will prompt "Blank"; If there are pictures in the default directory for saving photos in the phone, select one picture and press OK to set it as Associate Picture of new entry, existing entry or caller group. - Page 45 With EMS, SMS with texts, images, animations, tones and melodies can be sent and received. Long message feature is also supported. Select Options in the message editing interface for the following: Done: End the edit, and enter the send options menu. Use Template: Choose this option to insert the predefined text at the current cursor location.
- Page 46 Press Done to access the send options menu after the edit for the following available operations: • Send Only: Input the receiver's number and send the message. • Save and Send: If the message has been sent successfully, a copy will be stored in the Sent. The message will be stored in the Outbox if sending fails.
- Page 47 Select Edit Content to edit the content of your MMS message. Press Options in the interface for the following operations: Done: Complete the edit of the MMS. Input Method: You can choose Input Method to enter the text of your message. Add Image: Add a picture from File Manager on the frame.
- Page 48 • Save and Send: Save the MMS in Sent after the sending. (The option exists when there is at least one receiver.) • Save as Draft: Save MMS in Drafts. • Send Options: Conduct relevant settings about the sending of the MMS. (The option exists when there is at least one receiver.) •...
- Page 49 to your phone if it is saved in SIM card; or copy the current SMS message to SIM card if it is saved in your phone. Move to Phone (SIM card): Move the current SMS message to your phone if it is saved in the SIM card; or move the current SMS message to the SIM card if it is saved in your phone.
- Page 50 MMS Push Select the MMS Push to be read from the MMS Push list and press Options for the following operations: • View: View the current MMS Push. • Download: Download the MMS corresponding to the current MMS Push. • Delete: Delete the current MMS Push.
- Page 51 • Extract Number: Extract the sender number of the current SMS message, or extract the number in the message. The numbers will be shown in a list. If you choose one from the list, the dialing interface will be displayed for you to conveniently dial or save the number.
- Page 52 Sent Successfully sent messages will be stored in the Sent if you selected Save and Send for a sent message. The following operations can be chosen (depending on the type of message that you have selected) Select the SMS to be read from the SMS list and press Options for the following operations: •...
- Page 53 Drafts Choose Save as Draft for the message to be sent, and your phone will save this message to the Drafts. Here you can check messages that have been saved but not yet sent. The following operations can be chosen (depending on the type of message that you have selected) Select the SMS to be read from the SMS list and press Options for the following operations:...
- Page 54 Template Message templates offer 10 commonly used text phrases and 5 preset MMS templates that can be used at your convenience. SMS: Set the contents of preset messages that can be input directly when messages are edited. You can edit or delete the templates. MMS: Edit the content of preset MMS messages so that creating new messages is easier.
- Page 55 MMS: You may conduct various MMS settings. Compose: Set the reduction scale of the picture during the edit of MMS, the use of automatic signature and its content. Send: Set the relevant options during the sending of MMS. Validity Period: Set the duration of time that your MMS messages are stored at the network terminal.
-
Page 56: E-Mail
Change Setting Title: You can change the titles of the Settings. Homepage: Set the address of MMS Center Server and the default settings are http://mmsc.monternet.com. Network Account: You can choose the network account from GSM and GPRS. Connection Form: You can choose the connection form from WAP and HTTP. - Page 57 Check the E-mails that have not been sent in the Unsent. Select an E-mail and press Options for the following available operations: Send, Save and Send, Edit, Move to Drafts and Delete. Sent Check the E-mails that have been sent in the Sent. Please note that you need to Save while sending an E-mail.
- Page 58 Auto Retrieve: You can choose to enable / disable the function of Auto Retrieve. If this feature is enabled, E-mails will be automatically retrieved according to the auto receiving time and frequency preset by you. Max. Retrieve Capacity: Set the maximum bytes of the E-mail received by your phone.
- Page 59 Example of E-mail Setting Suppose the user has a mailbox of xxx@sohu.com on the website of www.sohu.com with the username xxx and password 123456; according to the configuration information provided by www.sohu.com for E-mail users, the user may perform the following setups on the mobile phone about the E-mail Setup “Profile1”.
-
Page 60: Chat
Password: 123456 (here is an input example. It will be displayed as”*” on your phone.) Reserve E-mail in Server: Default Value of the mobile phone Electronic Signature No need to modify. Upon the completion of the setting, you can choose to activate the profile in the interface of E-mail profile list to enable the operations of receiving and sending E-mails. -
Page 61: Call History
Enter the CB message sub-menu and you will able to see 3 options: Receive Mode: Turn on or turn off the receiving of broadcast messages. Read Message: Open the received broadcast message. Language: You can choose whether to receive broadcast messages in all languages. -
Page 62: Dialed Calls
• Send SMS: Send SMS to the selected phone number. • Send MMS: Send MMS to the selected phone number. 4.5.2 Dialed calls List the recently dialed calls. Rejected number list options are the same as those for missed calls. 4.5.3 Received Calls List the most recent received calls. -
Page 63: User Profiles
Your phone supports multiple phone setup options, by which you can set up your phone according to your interests and needs. You can also revert to default settings. 4.6.1 User Profiles Different user profiles can be set for different scenarios and environments. -
Page 64: Phone Setup
Keypad Tone: The keypad tone can be set to be Silent, Tone or Click. Volume: Adjust the volume of ring tones and keypad tones. Use the Navigation keys (Up/Down) to adjust the volume in the volume adjusting screen. Alert Type: Set up the alert type for calls and messages. Options available include Ring, Vibration, Vibra and Ring, and Vibra then Ring. -
Page 65: Display Characteristic
Scheduled Power-on/off Set up the time and status of scheduled power-on/off. Preset Input Method: Set the default language input method (for when text is edited) Speed Dialing In this submenu, open or close quick dialing function by activating or deactivating status; In dialing list, set up "2-9" number keys, making it possible complete dialing of set numbers by holding down corresponding keys in idle interface. -
Page 66: Call Setup
download wallpapers from File Manager. The pictures can be in the format of JPG, BMP or GIF. Note: If the wallpaper is set as "Simulation Clock" or "Digital Clock", information like the name of the song being played currently by the Audio Player, the owner number, etc. - Page 67 Certain options require network support when calls are being made. Please contact your service operator to check for these functions. Caller ID (requiring network support). You can choose whether or not your number is displayed on the screen of the mobile that you are calling. Set by Network: Use the default settings of the network.
- Page 68 Call Barring (requiring network support) This network feature allows you to prohibit all incoming and outgoing calls. You are required to enter the barring password that has been provided by your service operator before this function can be used. The following options are available: Outgoing Calls: You may carry out activate, deactivate and inquiry operations Numbers,...
-
Page 69: Network Setup
Blacklist With this function, you may add phone number you do not want to answer into Blacklist and realize Reject / Answer function about this number by Activating / Deactivating this function mode. 4.6.5 Network Setup This function allows you to choose a network when you are roaming (when you are not within the range of your own network) Notes: Do not subscribe to a network that is not in accordance with your SIM card. -
Page 70: Security Setup
The GPRS Connection can be changed to the following two states: • Connect when Needed: You phone will connect to GPRS when it is needed by the current feature and disconnect after the feature is ended. • Always: The phone remains connected to the GPRS network after it is turned on. -
Page 71: Flight Mode
Automatic Keypad Lock With this function enabled, the keypad will lock itself automatically if the user does no operation on the phone within a set period of time (when in idle mode). You can set the Auto Key Lock function as follows: Press the Up and Down keys to select Auto Keypad Lock. -
Page 72: Shortcuts
4.6.8 Shortcuts Modify the feature items in the shortcut menu triggered by the Left soft key in idle interface 4.6.9 Restore Factory Settings Restore certain settings to their original factory settings. Notes: Your phone lock password is required to restore factory defaults. Your phone will restart automatically after settings are restored. - Page 73 Focus Adjustment: You may adjust the focus at low resolutions. The zooming feature is unavailable when the resolution is above 640X480. Effect Setup: The color styles of the photos created by the camera include normal, grayscale, retro, retro-green, retro-blue, negative, grey negative, black board, white board, copper plate engraving, blue engraving, emboss, contrast and sketch.
-
Page 74: Video Recorder
Storage Location: Set the storage location of the photo. Restore Settings: Restore the camera parameters to default settings. Capture Access the preview interface. Focus the camera on the subject and adjust the image. Press Capture or OK key to take pictures. Select Save to save the current picture and return to the preview interface. -
Page 75: Album
Video Recording Access the preview interface of record. Press OK Key or Capture Key to start recording videos. Press the Right Soft Key to stop recording and save the clip automatically. You can view the saved clips from the Video Player or from the directory "Video"... - Page 76 Press Options in the interface of Audio Player for the following operations: • Sound Effects Setup: You may set up BEX Sound Effects Enhancement and Equalizer. Note: BEX sound effects enhancement is unavailable for bluetooth earphones. Play Setup: The mode, background play, play speed, spectrum display style, backlight, lyric synchronization, Bluetooth stereo output and Bluetooth stereo earphones can be set.
-
Page 77: Video Player
Details: View the properties of the current song, such as route, sound channel, pitch, size, duration, song name, performer, album etc. (the information displayed depends on the file). This option shall not appear when the Current Play List is empty. Skip To: You can jump to the specified play time to start the music. -
Page 78: Photo Artist
• Storage Location: You can choose to display the clip list stored in the phone or the memory card. • BEX Sound Effects Enhancement: You can choose the type of BEX sound effects enhancement or choose to deactivate the enhancement. Note: BEX sound effects enhancement is unavailable for bluetooth earphones. -
Page 79: Voice Recorder
# Key: If the current symbol is a note, then have the current note switch between halftone rise, normal and halftone fall. * Key: If the current sign is a note or a pause, then modify the beat of the current note. Up key: If the current symbol is a note, then have the current note rise for one tone, i.e., octave higher. -
Page 80: E-Book Reader
• Empty: Delete all the recording files under the current directory. • Setup: The storage paths and formats (amr, wav or awb) of the recording files can be set. • Send: The currently selected record file can be sent To Profile, To MMS, To E-mail and To Bluetooth. -
Page 81: Fm Radio
Add New Bookmark: Add new bookmarks to the bookmark list. Delete Bookmark: Access the bookmark list and delete bookmarks. Details: You can check the topic, size and format of the current E-book. Settings: You can conduct settings about the Font, Scrolling Mode, Auto Scrolling, Scrolling Speed, Full Screen Mode and Encode Type of the E-book currently being read. - Page 82 Number key "1": Briefly pressing this key will help you switch to the corresponding channel when there is a first channel in Channel List, while holding down this key will set the current channel as the first channel in the Channel List. Number keys "2-9": Similar to 1 key, the number keys only control the channels whose numbers in Channel List correspond to the number keys.
-
Page 83: Fun And Games
4.8 Fun and Games In the main menu, press the Up Key and Down Key to scroll among the Fun and Games. Press Left soft key to access the following options: Java and Games. 4.8.1 Java There are two options available after accessing Java: Java setup and Java application installed in the phone. -
Page 84: Games
Delete: Delete the current Java application. You can install Java application in the following way: Store the JAD and JAR files of the Java program to be installed in the same folder in the mobile phone or on the memory card, or store the JAR file in File Manager only;... -
Page 85: Calendar
from the list. You can turn it on or off and set the time, frequency and the delay time. The frequency includes: Daily, Customized (i.e. Alarm on certain specified days of one week) and Once. 4.9.2 Calendar Choose Calendar, and the calendar of the current month will be shown on the display. -
Page 86: To Do List
Once Calculator is chosen, the operation screen appears on the display. Enter numbers to be calculated with number keys 0-9 and enter the decimal point with the * key. Enter minus (-) with the # key. Enter operators +, –, x, and ÷ with the Up/Down/Left/Right keys respectively. -
Page 87: Currency Converter
Conversions are performed as follows: Choose a conversion unit and press OK to access. In the menu of Unit Converter, press Up and Down keys to choose the corresponding conversion units. Press Left and Right keys to select the conversion unit and input numbers in the selected unit bar. - Page 88 Inquiry New Device Search for a Bluetooth device. After a Bluetooth device is found, select a device and press Bond to pair it with the targeted Bluetooth device. Bluetooth password may be necessary for a successful paring in the process of pairing. Notes: Some devices, especially the Bluetooth earphones, may have a fixed password, e.g.
-
Page 89: World Clock
Change Device Name: You can set the name of your phone displayed on other Bluetooth devices. Audio Path: You may choose whether or not to activate voice communication via Bluetooth devices. FTP Setting: Set the shared file directory and the disclosure rights during FTP service by Bluetooth. -
Page 90: Health
4.9.10 Health Features of BMI and Menstrual are available in Health. Body Mass Index Choose your Gender, then enter your Height (Scope: 55~300cm) and Weight (Scope: 1~300kg). Press OK and your Body Mass Index will be displayed as Lean, Normal or Obese. Menstrual Input the last menstrual date and the averaged period with this feature and the phone will thoughtfully mark the ovulation and menstrual... - Page 91 Such services designed for your phone are provided by your WAP service operator. Since WAP services require network support, please turn to your network service operator or the service provider providing you with what you need for information. Press Up and Down keys to select and access the browser in the WAP menu with the following options available: Homepage, Bookmark, History, Go to URL and Settings.
- Page 92 Edit Settings: You can surf the internet only when you have made the correct settings according to local network, including gateway setting and network account setting (GSM account or GPRS account). Browse Options: The time needed for the pictures to display and the setting about whether or not to display are included.
-
Page 93: Data Account
Setting: Set the WAP services. End: Exit the WAP browser and terminate the link. Note: Press End key during visit to WAP page to exit WAP browser and terminate the link. Specifications of phone keys during visit to a web page Press Up and Down keys to scroll the page line by line. -
Page 94: File Manager
GPRS The list of GSM accounts are listed in the submenu. You can edit the selected account in the following way: Name: The name of the account. GPRS Connection Point: APN connected. User Name: The user identity of your APN server. The default setting is blank. - Page 95 Format: Format the storage device. All existing data will be deleted. Remove: Remove the memory card. This option will not be available if you have selected the phone as storage device. Press Options after selecting a folder in File Manager and the following options will be available: Open: To open the folder and list the sub-directories and files in this folder.
- Page 96 • Send: This option has different meaning for different types of files. You may follow the instructions on the display to perform corresponding operations. Note: If the size of the image to be sent To MMS surpasses the limit of MMS, the phone will compress the image according to the size of the screen and send it To MMS if its size is within the limit after compression.
-
Page 97: Chapter V Input Method
Chapter V Input Method 5.1 General Description This phone offers the following input methods: Smart English (both upper and lower cases), English (both upper and lower cases) and Number Input Method. Features accepted for input into the phone include: Input and edit an SMS message Input and edit a phonebook entry Edit the text in an MMS message …... -
Page 98: English Input
Smart English Input includes upper case and lower case letters, i.e., Smart ABC and Smart abc. The Keypad of Smart English Input Method is specifically defined as the following:(The ";" symbol in the following table divides Smart English ABC and Smart English abc; if there is no symbol, then the two correspond to the same character.): Corresponding Character or Description... -
Page 99: Number Input Method
Corresponding Character or Description Function 0 Key 0 or Space 1 Key 1 or symbol 2 Key ABC2; abc2 3 Key DEF3; def3 4 Key GHI4; ghi4 5 Key JKL5; jkl5 6 Key MNO6; mno6 7 Key PQRS7; pqrs7 8 Key TUV8;... -
Page 100: Chapter Vi Troubleshooting
Chapter VI Troubleshooting Please refer to the list below if you encounter any problems when using your phone. If you tried but the problem has not been solved, contact a qualified Meridian Mobile dealer or your local maintenance center immediately. ■Your display prompts Enter PIN Code: Enter the valid PIN code for your SIM card. - Page 101 ■Standby Time Drops: If the signal is weak, your mobile phone has to search for the signal for a longer time. This is a possible cause. When you do not want to answer calls, you may power off your phone temporarily. Or, your battery has been used for a long time and has worn out.
-
Page 102: Chapter Vii Definitions
Chapter VII Definitions ■BROADCAST MESSAGE Enable this feature to receive CB messages, such as messages about weather or traffic. ■DTMF (Dual Tone Multiple Frequency) DTMF is a signaling method useful for services such as phone banking and automatic answering. ■International Indicator When you enter a correct international phone number, add a '+' in the front of the number. - Page 103 ■SIM (Subscriber Identity Module) Card It includes security information and user information, e.g., Phonebook and SMS. ■SMS (Short Message Service) The sending and receiving of a SMS message is carried out via your wireless network’s SMS center. This feature requires network support. ■WAP (Wireless Application Protocol) This is the specification specially designed for mobile communication devices.
-
Page 104: Chapter Viii Technical Parameters
Chapter VIII Technical Parameters Standard Product: GSM dual band digital mobile phone with GPRS features Model: FLY MC100 System: GSM900/DCS1800 (supporting PCS 1900) Operating Temperature Highest: +55°C Lowest: -10°C Basic parameters Size: 111.4mm (Length) * 50.2mm (Width) * 15.5mm (Depth) Weight: About 112.8g (including the standard battery)
Need help?
Do you have a question about the MC100 and is the answer not in the manual?
Questions and answers