Amigo RT Express Operational Manual
Rear drive products
Hide thumbs
Also See for RT Express:
- Owner's operating manual (28 pages) ,
- Operational manual (28 pages)

Related Manuals for Amigo RT Express


Summary of Contents for Amigo RT Express
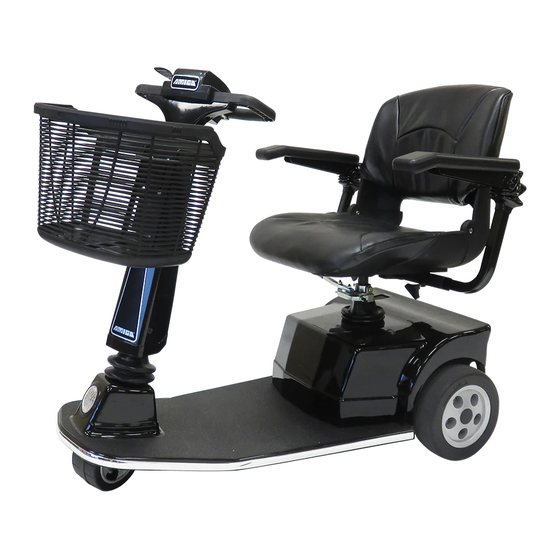
- Page 1 AMIGO REAR DRIVE PRODUCTS ® O P E R AT I O N A L M A N U A L For Amigo RT Express, Amigo RT Express Junior, Amigo ® ® ® Amigo EXT350, Amigo HD450 ® ® Serial Number:...
-
Page 2: Table Of Contents
A new industry began in 1968, when Amigo TABLE OF CONTENTS revolutionized mobility for people with walking limitations. Amigo power-operated vehicles Safety First (POVs) quickly became a household name for their ease of operation and maneuverability. Location of Controls Ever since our first creation, Amigo has... -
Page 3: Safety First
Use the following guidelines for the safe operation and use of your Amigo. Should you have any questions about the safe operation of your vehicle, please contact your Amigo dealer. If you are in doubt about your ability to operate your Amigo, consult your personal physician. -
Page 4: Location Of Controls
DO NOT • Do not exceed the maximum weight capacity. Exceeding the weight capacity voids your warranty and may result in personal injury and damage to your Amigo. Amigo will not be responsible for injuries and/or property damage resulting from failure to observe weight limitations. • Do not drive over or off obstacles more than 1 inch (2.5 cm) high. This could be unsafe and could damage your Amigo. • Do not turn your Amigo at high speeds, as this could result in tipping. • Do not reverse down a steep hill or incline. • Do not park on inclines or declines. • Do not sit on the unit in a moving vehicle. • Do not allow anyone to ride with you. -
Page 5: Adjusting Your Amigo
Handle controls include: HI/LO speed adjustment knob, ON/OFF key switch, battery status gauge and horn button. The ON/OFF key switch, located on the right side of the handle control cover, will turn the power of the Amigo ON or OFF. -
Page 6: Operating Your Amigo
The freewheeling mode will allow you to push the unit, if necessary. To terminate the freewheeling mode, pull the brake lever toward the rear of the Amigo (Figure 5). When pulled into “normal,” Figure 5 the vehicle will be back into “drive” mode. -
Page 7: Riding Your Amigo
A battery indicator and diagnostic system are incorporated into the touchpad of all Amigo rear drive models with a TouchTron handle. The battery status gauge will be lit whenever the key is in the ON position. However, if the Amigo is inactive for more than 25 minutes, the Amigo automatically switches to “sleep mode.”... -
Page 8: Basic Driving
Approach an unfamiliar door slowly. Does it have a knob or push bar? Does it open toward or away? Think in terms of using the power of the Amigo to do the work for you. Hold the doorknob or bar in one hand and apply the power with the other hand. -
Page 9: Safety Warnings
Note: when batteries are removed, the wheels will not rotate as long as the manual brake release lever is in the “normal” position. 7. Place seat and batteries into the trunk. 8. If your Amigo has a power seat lift, we suggest placing a cut out tennis ball or something similar over the seat post to protect it. -
Page 10: Helpful Hints For Everyday Use
Amigos have an overcharge protection feature so that the batteries can be charged anytime the Amigo is not being used. It is a popular misconception that batteries should be deeply discharged before recharging. This is not the proper procedure for all batteries. They can actually be damaged if they are discharged too deeply before recharging. - Page 11 20 seconds, then it will turn solid color. The batteries are fully charged when the tallest bar on the far right is blinking. Your Amigo can be charged with the key in the ON or OFF position. The indication will display only while in the charging mode (when power cord is plugged into AC outlet).
-
Page 12: Battery Storage
Battery Storage All the Amigo rear drive models use a battery system that allows the batteries to be removed after they have been disconnected from the platform battery connections. Each battery has a wire assembly with a two-position connector that slides into the connector mounted to the platform. -
Page 13: Cleaning Instructions
If you remove your batteries from your Amigo, put them on a surface that cannot be damaged by acid fumes. Whenever a battery is charged and discharged through a cycle, it breathes. The breathing of the battery emits acid fumes into the cloth strap (used to lift the batteries on rear drive models) and may mark surfaces it rests on for long periods of time. - Page 14 Lighting The Amigo is equipped with a headlight, and with optional tail lights and turn signals. To replace the headlight bulb, twist the gray rubber part of the light assembly counterclockwise and remove. Bulbs come straight out (do not twist bulbs) of fixture and should be replaced in reverse order.
-
Page 15: Troubleshooting
The circuit breaker is located under the rear cover and attached to the positive terminal on the batteries (Figure 11). If you suspect the circuit breaker is defective, use a jumper wire between the two terminals of the breaker. If the Amigo runs now, replace the circuit breaker. - Page 16 ASIC MPC DIAGNOSTICS CODES The Amigo is equipped with an ASIC MPC. This controller has a built-in diagnostic feature that will cause the diagnostic light LEDs (located on either side of the battery gauge) to flash a numeric code indicating service issues and to aid in diagnoses. When indicating a service problem, the diagnostic light LEDs will flash, hesitate for a moment, and then flash again.
-
Page 17: Electromagnetic Interference
ELECTROMAGNETIC INTERFERENCE RADIO WAVE SOURCES MAY AFFECT POWERED MOBILE VEHICLE CONTROL. Electromagnetic Interference (EMI) From Radio Wave Sources Power-operated vehicles (POV) may be susceptible to electromagnetic interference (EMI), which is interfering electromagnetic energy (EM) emitted from sources such as radio stations, TV stations, amateur radio (HAM) transmitters, two-way radios and cellular phones. -
Page 18: Wiring Diagrams
WIRING DIAGRAMS HI/LO Handle Controls (for RD, RT and HD models) www.myamigo.com... - Page 19 WIRING DIAGRAMS TouchTron Handle Controls (for RT and RD models only) www.myamigo.com...
-
Page 20: Exploded Views
EXPLODED VIEWS RT EXPRESS 9855-STANDARD SET 9856-2" HIGHER SET 9699 300369 210203 210204-SET 9247 9250 10301 10765.20 11311 9248 1444 9251 9980.10 1344 1180 9992.20 1253 1036 10065.10 267001 1299 2788 1450 1025 1081 1254 4075 3083 6191 11087 9936 11236 8221.15... - Page 21 EXPLODED VIEWS REAR DRIVE 9855-STANDARD SET 9856-2" HIGHER SET 210203 9699 210204-SET 9967.20 10347.20 10661.20 10662.20 9247 300369 9250 10301 10765.20 11311 9248 1444 9251 1344 1180 1253 300514 1036 267001 1299 2788 1450 1025 1081 4075 1254 6191 8221.15 9936 8223.16 8670...
- Page 22 EXPLODED VIEWS HD450 & EXT350 9856-SET 9497 10347.20 10980.20 210203 210204-SET 9250 10301 11081.20 11311 1444 9251 1344 300514 1253 1036 267001 9983.30 9983.31 1450 1025 4075 1081 1254 6191 9936 8223.16 3083 8670 8694 7600 7541 7361.30 3083 8669 11087 1192 11355...
-
Page 23: Parts Lists
PARTS LISTS #690000 RT EXPRESS PARTS LIST - AMI0071232 TO PRESENT Part# Description Qty/Unit Part# Description Qty/Unit 1025 Bushing w/ Shoulder, 1 1/16 ID x 1 3/16 OD 9768 Wire Asm, Battery QC To Controller 1036 Collar Stem 9798 Seat Post Asm, PSL, Upper Accessory Adaptor... - Page 24 #310000 REAR DRIVE PARTS LIST - AMI0063706 TO PRESENT Part# Description Qty/Unit Part# Description Qty/Unit 1025 Bushing w/ Shoulder, 1 1/16 ID x 1 3/16 OD 9766 Wire Asm, Battery To QC 1036 Collar Stem 9768 Wire Asm, Battery QC To Controller 1081 Bushing 1 3/16 OD x 1 Lg 9798...
- Page 25 #650000 HD450/ #670000 EXT 350 PARTS LIST - AMI0071239 TO PRESENT Part# Description Qty/Unit Part# Description Qty/Unit 1025 Bushing w/ Shoulder, 1 1/16 ID x 1 3/16 OD 9936 Handle, Upper 1036 Collar Stem 9950 Lever, Handle Adjustment 1081 Bushing 1 3/16 OD x 1 Lg 9983.30 Seat Lock Asm, RH, 20"...
-
Page 26: Warranty
Amigo Brand Product Warranty Effective July 9, 2003 Amigo Mobility International, Inc. (AMI) warranties the original completed unit it manufactures to the original purchaser. Structural components including platform, frame and seat post, have a limited lifetime warranty (seven years) against defects in materials and workmanship. - Page 27 MAINTENANCE HISTORY Date Remark Date Remark Date Remark Date Remark Date Remark Date Remark Date Remark www.myamigo.com...
- Page 28 AMIGO MOBILITY INTERNATIONAL, INC. 6693 Dixie Highway, Bridgeport, Michigan 48722 Phone (800) 248-9131 • Fax (800) 334-7274 • www.myamigo.com © 2012 Amigo Mobility International, Inc. Amigo is a registered trademark of Amigo Mobility International, Inc. 1112-878 ®...
Need help?
Do you have a question about the RT Express and is the answer not in the manual?
Questions and answers
after the amigo was accidentally sprayed with the water hose, the horn noise starts to blare each time the key is turned on, as well the horn starts to blare when the amigo express is plugged in to charge.
is their an easy solution?