
Related Manuals for PRESONUS AUDIOBOX USB - V 2.0


Summary of Contents for PRESONUS AUDIOBOX USB - V 2.0
- Page 1 AudioBox USB 24 bit/48k Recording Interface User’s Manual Version 2.0 © 2009, PreSonus Audio Electronics, Inc.
- Page 2 PreSonus reserves the right to update any unit returned for repair. PreSonus reserves the right to change or improve the design of the product at any time without prior notice. This warranty does not cover claims for damage due to abuse, neglect, alteration or attempted repair by unauthorized personnel, and is limited to failures arising during normal use that are due to defects in material or workmanship in the product.
-
Page 3: Table Of Contents
TABLE OF CONTENTS 1 OVERVIEW 1.1 Introduction ................3 1.2 Features ..................4 1.3 What is in the Box ..............5 1.4 System Requirements ..............6 2 GETTING STARTED 2.1 Hardware Installation ..............7 2.1.1 Installation in Mac OSX ........... 7 2.1.2 Installation in Windows ............ -
Page 4: Overview
All you need is a computer with USB connection, a couple of microphones and cables along with your instruments and you are ready to record! We encourage you to contact us at 225 216 7887 or techsupport@presonus.com with any questions or comments you may have regarding your AudioBox USB. -
Page 5: Features
The AudioBox USB is a powerful and affordable computer recording system complete with everything needed for real world recording applications. The AudioBox USB comes complete with two high quality PreSonus microphone preamps, MIDI I/O, rock solid drivers, as well as a PreSonus Studio One Artist music recording and production software. -
Page 6: What Is In The Box
1.3 WHAT IS IN THE BOX Your AudioBox USB package contains the following: • AudioBox USB • 6’ USB Cable • Software installation discs: PreSonus AudioBox USB Driver Installation Disc Studio One Artist Installation DVD • PreSonus Warranty Card 5 | PreSonus 2008... -
Page 7: System Requirements
NOTE: The speed of your processor, amount of RAM, and size and speed of your hard drives greatly affect the overall performance of your recording system. A more powerful system (faster processor with more RAM) allows for lower latency (signal delay) and better overall performance. 6 | PreSonus 2008... -
Page 8: Getting Started
(Vista) or “Continue anyway” (XP). The installer will now show you where the drivers for your AudioBox USB will be installed. The installer will automatically choose the Program Files folder in your System drive. Click “Next” 7 | PreSonus 2008... - Page 9 GETTING STARTED ) You will now notify you that the driver will now be installed. Click “Next” Congratulations! You have finished installing your AudioBox USB. Click “Finish” connect your AudioBox USB to your PC. 8 | PreSonus 2008...
-
Page 10: Studio One Artist
, Studio One Artist provides you with all the tools necessary to capture and mix a great performance. As a valued PreSonus customer, you are also eligible for an upgrade discount for Studio One Pro when you are ready to master your work, create a digital version for the Web, or incorporate third party VST plug ins into your recording process. - Page 11 Studio One Artist content can be installed at any time by accessing the Help/Studio One Installation menu. If you choose not to install any portion of the content, you can install it at a later time. 10 | PreSonus 2008...
-
Page 12: Enabling The Audio Driver
PreSonus interface. Click the Apply button and then OK. After you have verified that the PreSonus driver has been detected, please continue to the next Section to set up your external MIDI devices. If you do not have any MIDI devices to connect at this time, please skip to Section 2.2.4: Configuring Audio I/O. -
Page 13: Configuring Your Midi Devices
Specify which MIDI channels will be used to communicate with this keyboard. For most purposes, you should select all MIDI channels. If you are unsure of which MIDI channels to select, we suggest you select all 16. 12 | PreSonus 2008... - Page 14 MIDI keyboard controller, take a moment to configure your sound module. STEP 1 Connect the MIDI In of your external sound module to the MIDI Out of your AudioBox USB. STEP 2 In the External Devices window, click the Add button. 13 | PreSonus 2008...
- Page 15 Click OK and close the External Devices window. You are now ready to start recording in Studio One Artist. The remainder of this guide will go over how to set up a Song and will discuss some general workflow tips for navigating through the Studio One Artist enviroment. 14 | PreSonus 2008...
-
Page 16: Configuring Audio I/O
File | Options… (PC) or Studio One | Preferences (Mac), and click on the Audio Setup button. STEP 4 Click on the Song Setup button to open the Song Setup window, then click on the on the Audio I/O Setup icon. 15 | PreSonus 2008... - Page 17 Studio One Artist. In general, you will want this to be the Main Out bus. If you would like this output configuration available every time you launch Studio One Artist, click the Make Default button. 16 | PreSonus 2008...
-
Page 18: Creating A Dong
AudioBox’s headphone output. You may also wish to connect monitors to your interface’s Main Outs. You are now ready to record. For complete instructions, please consult the Studio One Reference Manual, which is located on your Studio One Artist Installation DVD. 17 | PreSonus 2008... - Page 19 The Browse button opens the Browser window, which displays all of the available virtual instruments, plug in effects, audio files, and MIDI files, as well as the pool of audio files loaded into the current session. 18 | PreSonus 2008...
- Page 20 If you drag the file to an existing track, the file will be placed as a new part on the track. 19 | PreSonus 2008...
-
Page 21: Sample Hookup Diagram
(or two) and the creative energy to bring it all together. This is a typical singer/songwriter setup. Your needs may vary depending upon the variety of sources you are recording. Feel free to adapt the sample setup below to your precise needs. 20 | PreSonus 2008... -
Page 22: Microphones
The most important thing to note about Ribbon microphones is that nearly all Ribbon Microphones do NOT require phantom power. In fact, unless a Ribbon microphone specifically calls for phantom power, sending phantom power to a ribbon microphone will destroy it – usually beyond repair. 21 | PreSonus 2008... -
Page 23: Usb And Other Types
MEMS, etc.), please consult your microphone’s user’s manual for power requirement or compatibility information. Regardless of the microphone type you are using, we recommend reading your microphone’s user’s manual thoroughly before engaging phantom power or if any other usage questions arise. 22 | PreSonus 2008... -
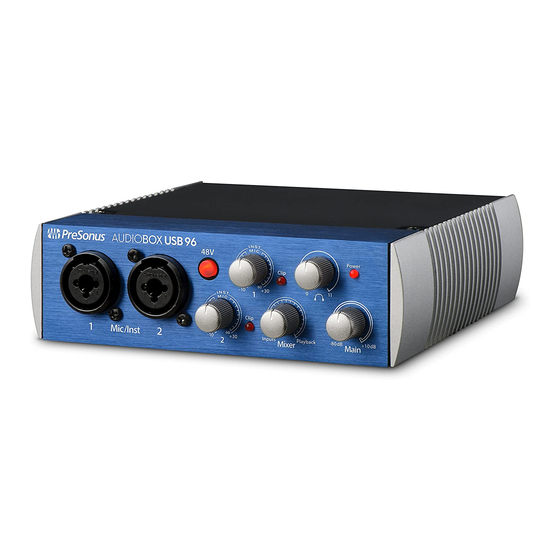
Page 24: Front Panel Layout
PreSonus microphone preamplifiers for use with all types of microphones including Dynamics, Condensers and Ribbons as well as instruments and line level signals. The award winning PreSonus preamplifier design is a Class A input buffer followed by a dual servo gain stage. - Page 25 • Main. The Main knob controls the output level for the Main Outputs on the back of the AudioBox USB with a range of 80 db to +4 dB. • Power Light. This light indicates the AudioBox USB is receiving bus power. 24 | PreSonus 2008...
-
Page 26: Back Panel Layout
USB. Please consult the User’s Manual of your MIDI devices for help with MIDI setup and usage. • USB port. This is where you connect the USB cable from your AudioBox USB to your computer. The AudioBox is completely bus powered from this connection. 25 | PreSonus 2008... -
Page 27: Specifications
. 26 | PreSonus 2008...
Need help?
Do you have a question about the AUDIOBOX USB - V 2.0 and is the answer not in the manual?
Questions and answers