Table of Contents
Advertisement
Quick Links
Advertisement
Table of Contents

Related Manuals for Docomo Arrows X F-10D


Summary of Contents for Docomo Arrows X F-10D
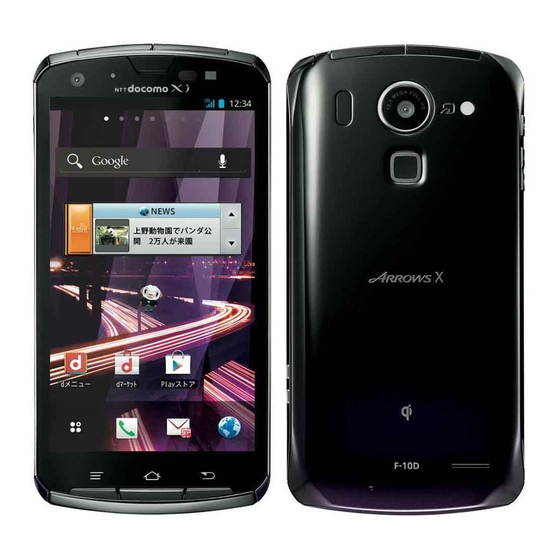
- Page 1 F-10D ’12.7 INSTRUCTION MANUAL...
- Page 2 They may differ from the actual displays. Learning operations In this manual, explanations and screen images for docomo Palette UI as Home application are provided. "Quick Start Guide" (in Japanese only) In this manual, "authenticate" indicates the operating This manual provides information about screens and procedure for entering security code or performing operations of basic functions.
-
Page 3: Basic Package
Battery Pack F27 Basic package F-10D (including warranty) Quick start guide (Japanese) Wireless charger F02 (including warranty) <Wireless charger> <Dedicated AC adapter 02> Back Cover F72 microSD card (2GB)(sample) (with manual) * Attached to the terminal at the time of purchase Other options P143 Contents/Precautions... -
Page 4: Table Of Contents
Display ...............71 Multimedia ..............73 Before using the terminal ..24 Storage ..............74 Part names and functions........24 NX!eco ...............74 docomo mini UIM card..........25 Applications...............75 microSD card............26 Accounts & sync ............76 Battery pack .............. 27 Lock/Security .............77 Charging ..............29 Setting my body............88... - Page 5 File management....101 International roaming ... 137 Infrared communication ........101 Outline of international roaming (WORLD WING) Bluetooth communication ........102 ..................137 Connecting an external device......105 Available service overseas........137 Linking with DLNA device ........107 Before using the terminal overseas ......137 Settings for overseas use........139 Applications......
-
Page 6: Before Using The Terminal
Schedule, Memo, etc.) you saved in the terminal. Note be available or some unintended bugs may occur after that DOCOMO assumes no responsibility for any loss of software update. saved contents of data resulting from malfunction,... -
Page 7: Precautions (Always Follow These Directions)
You can use the terminal only with docomo mini UIM Precautions (Always follow card. If you have a UIM or FOMA card, bring it to a docomo Shop to replace. these directions) If your terminal is lost, change your each account... - Page 8 Precautions contain the description below. NTT DOCOMO for your terminal. Handling the terminal, battery pack, adapter, wireless May cause fire, burns, injuries, electric shock. charger and docomo mini UIM card (common) .... 6 Handling the terminal ............7 WARNING Handling battery pack ............9 Handling adapter and wireless charger......
-
Page 9: Handling The Terminal
Do not cover or wrap the terminal with a CAUTION blanket, etc while using or charging. Do not leave the equipment on unstable or May cause fire or burns. Don’t sloping surfaces. Do not attach metal object (sticker made of May cause injuries. - Page 10 Do not put foreign objects such as liquid like May cause harmful effect on heart. water, metal pieces or burnable things into docomo mini UIM card slot or microSD card When you use electronic medical equipment, Don’t slot.
-
Page 11: Handling Battery Pack
Handling battery pack CAUTION Check that the battery type matches the type Do not swing the terminal by the antenna, displayed on the battery pack label. strap, etc. Display Battery type May cause accident such as injury to yourself or Don’t others by hitting. - Page 12 Shop. If your local municipality has a battery May cause fire, burns, electric shock. recycling program, dispose of them as provided for.
-
Page 13: Handling Mobile Phones Near Electronic Medical Equipment
If incorrect voltage is used, this may cause fire, burns May cause fire, burns, electric shock. or electric shock. Handling docomo mini UIM card AC adapter : 100V AC DC adapter : 12 or 24V DC (specific for negative ground vehicle) -
Page 14: Material List
Surface Wearers of medical equipment such as Part Material treatment implanted pacemakers or defibrillators must carry and use the terminal at least 22 cm Front key PC resin Acrylic UV away from the implanted device. curable The terminal's signals may affect the performance of coating electronic medical equipment. - Page 15 Wireless charger F02 Surface Part Material treatment Surface Part Material treatment Side keys (Power key, PC resin Discontinuity Volume key) evaporated Wireless Upper case PC resin N-TONE 17G Acrylic UV charger (In charging curable range: N- coating TONE 15G) External connection jack Discontinuity PC resin Lower case,...
-
Page 16: Handling Precautions
Clean the jack occasionally with a dry cotton swab etc. - If the data is deleted, DOCOMO assumes no - If the jack is soiled, connection gets worse and it may responsibility for the loss of any data. -
Page 17: Battery Pack
Do not leave the terminal with the camera in areas Battery pack under strong direct sunlight. The battery pack is a consumable part. - May cause discoloring or burn-in of elements. - Replace the battery pack if the terminal has extremely Use the terminal with the external connection jack cap short operation time on a full charge, though it may closed. - Page 18 Continue to use it. Always keep UIM ICs clean. When using the DC adapter for charging, keep the Clean docomo mini UIM card with a soft, dry cloth (such vehicle engine running. as a cloth for eyeglasses).
-
Page 19: Bluetooth Devices
Bluetooth. production lines of a factory that require a license, DOCOMO assumes no responsibility for any specified low power radio stations, or amateur radio information which may be leaked during stations that do not require a license (hereafter "other... - Page 20 Wireless LAN (WLAN) Using wireless LAN built-into the terminal in 5.2/5.3 GHz outside is prohibited by the Radio Law. Wireless LAN (WLAN) exchanges information using Available channel varies by countries. To use WLAN radio waves, and allows you to freely establish LAN overseas, check the conditions such as available connection if you are within an area where radio wave frequency, regulation, etc.
-
Page 21: Waterproofness/Dustproofness
FeliCa reader/writer Use FeliCa reader/writer function only in Japan. FeliCa reader/writer function of the terminal conforms to FeliCa reader/writer function of the terminal uses weak Japanese radio standards. waves requiring no licenses for radio stations. If you use this function overseas, you may be punished. It uses 13.56 MHz frequency band. - Page 22 ❖ What you can do with waterproofness To ensure waterproofness/ of F-10D dustproofness You can talk and watch 1Seg without an umbrella in the To avoid water/dust ingress, be sure to observe the rain (for rainfall of 20 mm or less per hour). following points.
- Page 23 (from a hair dryer etc.) to it. abnormal. DOCOMO takes the terminal to replace the Do not move the terminal in water or slam the terminal parts as a chargeable service. Bring the terminal to a against the surface of water.
- Page 24 Draining water from the terminal DOCOMO does not guarantee actual operations under When the terminal is wet, water may flow out after all states. Malfunctions deemed to be caused by wiping it off; drain the water in the following steps.
- Page 25 c Swing the terminal in about 10 times against dry, clean Charging cloth etc. to wipe off water remaining in the Check the following before and after charging. microphone, earpiece, speaker, keypad, etc. Check if the terminal is not wet. Never try to charge the battery pack when the terminal is wet.
-
Page 26: Before Using The Terminal
<Functions> Before using the terminal a Stereo earphone jack * If you insert the plug of the stereo earphones, the earphone connecting MIC selection screen appears. P71 b External connection jack (MHL (HDMI connection) available) Part names and functions Connect optional AC adapter 03 etc. * To connect HDMI cable (commercially available), HDMI conversion cable L01(optional) or HDMI conversion cable SC01 (optional) is needed. -
Page 27: Docomo Mini Uim Card
* The antenna is built-in the terminal. Covering around the antenna by the hand may affect the quality. t Camera light (Flash) The docomo mini UIM card is an IC card in which user mark information such as your phone number etc. is saved. -
Page 28: Microsd Card
Removing microSD card a Press the lock with your finger (a) and pull docomo mini UIM card out 2-3 mm toward b b Lift your finger from the lock, press docomo mini UIM microSD card card lightly and slide it toward b... -
Page 29: Battery Pack
Installing Battery pack a With the metal contacts side facing down, insert a microSD card at the orientation shown until it locks Attaching/Removing battery pack Attach/Remove the battery pack after turning OFF the power. When you attach/remove the back cover, hold the terminal in your hand so that you will not scratch the display etc. - Page 30 b With the arrow side of the battery pack label facing up, Removing align the metal contacts of the battery pack with those a Perform Step a in Attaching the battery pack of the terminal, insert in the direction of the a to b Pinch the tab of battery pack and pick it up in the attach in the direction of b direction of the arrow to remove...
-
Page 31: Charging
❖ Charging times (approximate) Charging The following is the time for charging an empty battery pack with F-10D's power switched OFF. Charging with the ❖ Precautions on charging terminal ON or under low temperature requires longer time. If you use the terminal while charging, it may take time AC adapter 03 Approx. - Page 32 DC adapter. Compatible products marked by supplied by FOMA AC Adapter 01 (optional) : 100V AC only DOCOMO can be charged with the wireless charger. FOMA AC Adapter 02 (optional)/FOMA AC Adapter 01 for Products marked by comply with the international...
- Page 33 a Insert the dedicated AC adapter connector to the Charge information wireless charger You can check the charging status with the charge b Insert the dedicated AC adapter's power plug into an information. Charge information descriptions are as outlet follows. c Put the terminal on the wireless charger Turning on : Charging (Lights where detected) Put the terminal with the...
-
Page 34: Charging With Ac Adapter
e Remove the microUSB plugs from the AC adapter and If the charge information of the wireless charger flashes rapidly, it may be an abnormality of charging or the terminal, and close the jack cap of the terminal malfunction. Check if no foreign substance between the To AC 100V outlet wireless charger and terminal, then position the terminal Indicator LED... -
Page 35: Turning Power On/Off
- Operation with finger wet by sweat or water Changing the Home application - Operation under water [docomo Palette UI] is set in Home screen for the first ❖ Tap/Double-tap activation. To change to [NX! comfort UI] etc., from the Home screen, m [Settings] [Display] Select a Tap : Touch the screen lightly and release the finger. -
Page 36: Screen Shot
❖ ❖ Drag/Slide (Swipe)/Pan Flick Drag : Touch an item or icon on the screen and move it to Touch the screen and sweep the finger quickly. the desired position. Slide (Swipe) : Touch the screen with your finger and drag to the desired position. -
Page 37: Initial Settings
❖ Easy data transfer support Initial settings Restore FOMA terminal data saved on a microSD card to the terminal. You can set necessary items collectively for the first time Restore received/sent/unsent mails, phonebook data, to use the terminal. redial/incoming history, schedule, bookmark or alarm Each setting can be changed anytime. -
Page 38: Screen/Icon
: NX!eco (Timer eco-mode setting 1) Screen/Icon : NX!eco (Timer eco-mode setting 2) : NX!eco (Battery care eco-mode) : NX!eco (Instant eco-mode) Icons on the status bar : Screen is zoomed in with Best-fit zoom. : Screen is fixed with Shake to unrotate Various conditions can be checked with notification icons : Positioning with GPS and status icons appearing on the status bar. -
Page 39: Notification Panel
c The name of network in the region : Battery level is low. d The name of SIM card carrier : Battery level is enough. e Tab : Charging (white) : Screen is lit with Lit when held. ❖ Closing the Notification panel : Kana input mode : Alphabet input mode Drag the tab at the bottom of the... -
Page 40: Task Manager
When lock screen appears Task manager If you cancel the operation of an application by pressing On the lock screen, B etc., the application may remain activated in the The lock is canceled. background. Also, 2 or more applications may be running depending on the operations. -
Page 41: Character Entry
QWERTY keypad Character entry Enter characters using Romaji input. Enter characters using software keyboard displayed on the screen. Entering characters with NX!input is mainly described in this section. Switching to other input method is available. P42 You can connect an external keyboard to enter Handwritten input characters. - Page 42 d Handwritten input area : Write a character with your : Restore the latest fixed text to the original. finger to enter. : Display characters assigned in the numeric When you write a character, a recognized character keypad input in the reverse order. appears on the top of input area.
-
Page 43: Numeric Keypad Input Mode
Handwritten input Flick input If you touch and keep on the key assigned the character When the numeric keypad or QWERTY you want to enter, characters (flick guide) will be displayed keypad is displayed, touch and hold on that key. Flick towards the desired character without Slide it to without lifting your finger releasing your finger from the screen. - Page 44 ❖ Entering from the phrase/character Alternatively, while entering characters, tap to operate. code table ❖ Entering by voice input You can enter characters by converting your voice. When is displayed on the keypad, tap it to enter from the phrase. While entering characters, (touch If you use the handwritten input,...
- Page 45 Setting NX!input and ATOK Utility : Register words with the Dictionary utility ( P43), register and edit common phrases ( P44) ❖ with the Common phrase utility. Keypad settings Initialize : Initialize setting values and learning data for entered words. Set operations, design, etc.
-
Page 46: Editing Text
Reading word data saved on the microSD card : Editing text (Batch register)] In the " You can copy texts in the character entry field, web page (Output to)" field, [sdcard] Select a folder or received mail and cut and paste texts in the character Select a file [OK] [ (Register)] Tap [ entry field. - Page 47 ❖ Pasting a text Move the cursor to the destination to paste and touch and hold [PASTE] The text is pasted to the cursor position. Using external keyboard You can enter characters by connecting the terminal with a USB keyboard or Bluetooth keyboard (HID/SPP). 101 keyboard, 104 keyboard,106 keyboard, OADG 109 keyboard and OADG 109A keyboard are supported.
-
Page 48: Docomo Palette Ui
Palette UI Customizing the Home screen You can locate desired application shortcuts, widgets, etc. on the Home screen. Flick left and right to display the Home Home screen screen you want to customize Touch and hold blank area in the customize area Home screen is a start screen to use applications. -
Page 49: Application Screen
Switching application list/recommended Home screen or touch and hold a blank area in the applications : [Application]/[Recommends] customize area to display home screen list. From the Home screen, m Tap [Help] to display the docomo Palette UI operation guide. docomo Palette UI... -
Page 50: Application List
Applications on Google Play are also (sp-mode mail) : Send and receive mail introduced there. P110 using DOCOMO mail address (@docomo.ne.jp). dmenu : A shortcut application for "dmenu" to find Pictograms and deco-mail can be used, and automatic contents that you use in i-mode and joyful and reception also is supported. - Page 51 P114 Disaster kit : An application which helps you to record Navigation : Search routes toward destinations using and check messages on the docomo Disaster Message Google Maps Navigation. Board. HighlightCam : Analyze a shot video or still image and Infrared : Send or receive data such as phonebook edit automatically to create a video.
- Page 52 Managing application menu Installing "Recommends" applications When the Application menu is displayed, Tap [Recommends] tab to display applications perform target operations recommended by NTT DOCOMO. Uninstalling an application : Touch and hold an From the Home screen, [Recommends] application [Uninstall] [OK] [OK]...
-
Page 53: Calling
Calling Emergency call This terminal supports "Emergency call location notification". If you use the terminal to place a call to emergency numbers such as 110, 119, or 118, the information of a location where you are calling from Making a call (location information) is automatically notified to the Emergency call acceptance organization such as the Police Station. -
Page 54: International Call (World Call)
When a call is made, [Send] ✔INFORMATION ✔INFORMATION If the docomo mini UIM card is not inserted in Japan, For details on sending touch-tone signals during a call, emergency calls 110, 119 and 118 cannot be made on the see "Operation during a call"... -
Page 55: Receiving A Call
Receiving a call Operation during a call A call is received The following operations are possible in the screen during a call. SD : Stop ringtone sounding or vibration. [Activate] [Accept] Rejecting call : [Reject] m [Quick responses] Quick responses : m [On hold] On-hold : Recording a phone memo :... -
Page 56: Recent Calls
Call volume Recent calls The call volume can be adjusted only during a call. During a call, SD You can check call logs. From the Application menu, [Phone] Voice clear [Recent calls] The terminal senses ambient noise during a call and make the other party's voice to be heard clearly by emphasizing hard hearing part of the voice per sound range. -
Page 57: Call Settings/Others
Phonebook. You can contact registered parties through simple operation. Call settings/Others From the Application menu, [Phonebook] Use DOCOMO network services from Call settings as follows. On the Application menu, [Phone] m [Call settings] [Network service] Select a service you want to use Koe-no-Takuhaibin : Use service, or check/change the settings. - Page 58 And changing to fujitsu account may Tap a character you want to search lose data using with docomo services. ❖ Registering to Phonebook from a history Select a party from the Log screen [Add Phonebook] Select an account if required.
-
Page 59: Creating A New Group
Displaying phonebook entries by Communication group Display call logs, sp-mode mail logs, SMS logs and SNS messages. You can make calls, send mail from the logs. You can display phonebook entries data by group specified in registration. From the Application menu, [Phonebook] In the Phonebook list screen, [Groups] [Communication] Select a group... - Page 60 [Import/Export] Select an item Perform each operation Import from SIM card : From phonebook entries saved on the docomo mini UIM card, specify the entries you want to add and import them. Phone numbers and mail addresses are imported as "Others".
- Page 61 ❖ My profile Exchanging name card You can check your own phone number. You can also You can exchange created name cards between the enter, edit your own information. compatible terminals. From the Application menu, [Phonebook] From the Application menu, [Phonebook] [My profile] [Edit] Set each item [Save] [My profile] [Exchange this name card] Follow the guidance to operate...
-
Page 62: Settings
Bluetooth Low Energy Settings P104 Font size P72 DEVICE Privacy view P72 Best-fit zoom P73 Call settings : Set DOCOMO's network services or Internet phone call. Intelligent color adjust P73 Shake to unrotate P73 Network service P55 Phone memo P53... - Page 63 PERSONAL displayed launcher (list of applications or shortcuts) by docomo service : Set up applications provided by sliding your finger from the screen. P89 DOCOMO or set application usage status notifying Use Slide-in launcher function. Slide Spot Application manager Launcher Setting...
-
Page 64: Wireless & Networks
SYSTEM ✔INFORMATION Date & time : Make settings about date and time. P90 To use USB debugging function for [Developer options], Automatic date & time install USB driver to a PC. For details, refer to the Automatic time zone information about this product in the following site. Set date http://www.fmworld.net/product/phone/sp/android/ Set time... - Page 65 Point Names] ❖ Setting mopera U m [New APN] mopera U is ISP of NTT DOCOMO. If you have subscribed [Name] Enter a network profile [OK] to mopera U, you can use Internet after making the simple settings. [APN] Enter the access point name [OK] mopera U is a service requiring subscription.
- Page 66 Check signal condition and reconnect. Within 10 m, turn off the Bluetooth device. To use the following docomo services and functions via Available channels Wi-Fi, Wi-Fi option password is required beforehand. To 1 - 13 channel frequency bands can be used in Japan, and make settings, from the Home screen, m [Settings] 1 - 11 channel frequency bands overseas.
- Page 67 ❖ ❖ Scanning Wi-Fi network Advanced Wi-Fi settings Set Wi-Fi to ON in advance. From the Home screen, m [Settings] From the Home screen, m [Settings] [Wi-Fi] [Wi-Fi] [SCAN] m [Advanced] ❖ Adding Wi-Fi network Set required items Enter network SSID or security to add Wi-Fi network Network notification : Set to notify you when Wi-Fi manually.
-
Page 68: Setting Airplane Mode
Simple registration of Wi-Fi network FM transmitter You can connect through simple operations if connecting You can transmit music saved in the terminal via FM radio via a Wireless access point supporting AOSS or WPS. waves to listen from an FM radio or car stereo system. From the Home screen, m [Settings] From the Home screen, m [Settings] [Easy Wi-Fi registration]... -
Page 69: Adding A Vpn
Connecting VPN (Virtual Private Tethering Network) Tethering is a function for using mobile devices such as smartphones as modems to allow external devices VPN (Virtual Private Network) is a technology to connect to connected via USB or Wi-Fi to access the Internet. the information in a protected local network such as When tethering is enabled, sp-mode functions other enterprises or universities from another network. -
Page 70: Wi-Fi Tethering
✔INFORMATION [Network SSID] Enter a network SSID By default, "F-10D_AP" is set. The system requirements of a PC for USB tethering are as When changing registered setting, select follows. Operations on upgraded OS or added/modified [Configure Wi-Fi hotspot] to display the setting environment are not guaranteed. -
Page 71: Sound And Vibration
✔INFORMATION Sound and Vibration When number of AOSS registration devices exceeds 24, a confirmation screen for deleting old registration appears. To use AOSS connection with new device, tap For Public mode (Drive mode), see "Call settings/ [Yes]. Others". P55 To cancel AOSS setting, on the [Configure Wi-Fi Setting Manner mode hotspot] screen, tap [AOSS OFF]. - Page 72 ❖ Setting original manner Setting Distinct touch Set whether to adjust touch sensitivity according to the From the Home screen, m [Settings] ambient condition. [Sound and Vibration] [Manner mode] From the Home screen, m [Settings] [Original manner settings] [Sound and Vibration] [Distinct touch] [Volume] Set each item [Call ringtone volume]/[Media volume]/...
-
Page 73: Display
Setting phone ringtone/notification Display sound/touch tones/vibrate From the Home screen, m [Settings] Setting Lock screen [Sound and Vibration] ❖ Setting lock screen display Set each item MIC Input : Set microphone when connecting stereo Set whether to display the lock screen. earphones. - Page 74 ❖ Setting screen Auto-rotate screen ❖ From the Home screen, m [Settings] Setting screen brightness [Display] From the Home screen, m [Settings] Mark/Unmark [Auto-rotate screen] [Display] [Brightness] ✔INFORMATION Slide the slider to adjust brightness [OK] Some applications such as Still camera or Video camera To adjust brightness automatically according to the record are not according to this setting.
-
Page 75: Multimedia
❖ Best-fit zoom Multimedia Set whether to zoom in Browser screen automatically when swing of the terminal is detected. Image quality correction To use Best-fit zoom, set [Step/Activity counter app] of [Setting my body] in advance. Set whether to correct image quality of videos (TV, From the Home screen, m [Settings] YouTube, etc.) and still images (Gallery). -
Page 76: Storage
Storage NX!eco Adjust the screen brightness or each function according to Checking the memory space the remaining battery level or at the set time for reducing You can check memory space of the terminal, microSD the battery consumption. card, and USB mass storage connected via USB. Setting eco-mode From the Home screen, m [Settings] [Storage]... -
Page 77: Applications
❖ Setting eco level Applications From the Home screen, m [Settings] [NX! eco] Set [Eco level] in each mode Viewing permitted operation of the applications in the terminal Select mode [OK] Tap [Confirm] to check set value for each level. You From the Home screen, m [Settings] can customize the values. -
Page 78: Uninstalling Applications
Uninstalling applications Accounts & sync For uninstalling the applications you obtained from Play Store, operating from the Play Store screen is Adding accounts recommended. P111 You cannot uninstall some pre-installed applications by From the Home screen, m [Settings] default. And if pre-installed applications are unistalled, you can reset the terminal to restore. -
Page 79: Lock/Security
Canceling synchronization subscription, the terminal and the docomo mini During synchronization, m [Cancel UIM card to a docomo Shop. For details, contact "General Inquiries" on the last page of this manual. sync] The PUK code is written on a subscription form (copy for user) handed at subscription in a docomo Shop. -
Page 80: Puk Code
Set PIN code to be entered when the terminal is turned ON. PIN code From the Home screen, m [Settings] Security code called as PIN code can be set in the docomo [Security] [Set up SIM card lock] mini UIM card. The code is set to "0000" at the time of subscription, but you can change the number by yourself. -
Page 81: Security Lock
❖ Changing the PIN code Security lock To change the PIN code, set the PIN code (mark [Lock SIM By setting to require authentication on the locked screen, card]) in advance. you can prevent others from misusing the terminal. You can also use authentication operation set in the From the Home screen, m [Settings] security unlock setting when using Password manager. - Page 82 ❖ Setting security unlock method Unlocking by face authentication : [Face recognition] [Set it up] [Continue] Fit your face to the Set unlock the screen lock or type of authentication guide frame [Continue] Select a backup lock operation for Password manager. Set security unlock preference [OK] From the Home screen, m [Settings] ✔INFORMATION...
-
Page 83: Unlocking The Screen
❖ Locking screen automatically For [Face recognition] : On the lock screen, Face to the display To validate screen lock authentication, set security ❖ When you forget unlocking method unlock preference in advance. From the Home screen, m [Settings] When you forget unlocking method of Lock screen, set a security unlock preference according to the followings and [Security] [Automatically lock] Select then unlock. - Page 84 - Fingers are wrinkled, wet or sweaty after taking a bath verification. Note that DOCOMO assumed no etc. responsibility for any damage caused by use of this - Fingers are sweaty or oily enough to obscure ridges of product or unavailability of this product.
- Page 85 ❖ ❖ Usage precautions for fingerprint Registering fingerprint sensor Register your fingerprint for authentication. To use fingerprint authentication, register 2 or more Usage precautions for fingerprint sensor are as follows: fingerprints. Up to 10 items can be registered. The sheet on the fingerprint sensor is a protective film to maintain waterproofness.
-
Page 86: Privacy Mode
[Security] Mark [Make passwords to refer. visible] Privacy mode can be set only for phonebook in fujitsu account. If you change docomo account to fujitsu Password manager account, data added by i-concier, name card data, SNS account information are not saved. - Page 87 ❖ ❖ Privacy mode operation settings Privacy mode operation settings (Phonebook/History) (Action when call received) Specify a phonebook entry to be hidden Set actions for incoming call or mail. To make operation settings for Phonebook/history, Specify phonebook in "Privacy mode operation settings install Nx! Contacts.
- Page 88 ❖ Privacy mode operation settings [Hide specified bookmarks] (Others privacy) If [Hide specified bookmarks settings] screen is displayed, tap [OK]. You can specify to hide icons, folders or bookmarks of Canceling : [Show] Browser, albums or images in Gallery on the Application Skip Step 4 and later.
- Page 89 ❖ Setting for deactivating Privacy mode To cancel the setting, tap [Unknown sources] to unmark. From the Home screen, m [Settings] Managing authentication information [Security] [Privacy mode settings] Authenticate [Deactivate option] You can install authentication information for accessing security-protected Wi-Fi networks or VPNs or other [Deactivation option] [With displaying certificates from a microSD card.
-
Page 90: Setting My Body
And the information of steps is retained for about a month even with the battery removed or vacant, but they may be lost if more time passes. Note that, even if the information of steps are lost, DOCOMO assumes no responsibility for the loss of any data. Settings... -
Page 91: Slide-In Launcher
Setting the Android keyboard Slide-in launcher Set key operation tone of the Android keyboard, auto- correction of text, etc. Set to activate an application from the displayed launcher From the Home screen, m [Settings] (list of applications or shortcuts) by sliding your finger [Language &... -
Page 92: Date & Time
Date & time Make the settings of date and time. From the Home screen, m [Settings] [Date & time] Set each item When you unmark [Automatic date & time]/ [Automatic time zone], you can set date, time zone, and time manually. Accessibility Make the settings for supporting user operations. -
Page 93: Mail/Browser
"Mobile Phone User's Guide [International Services]" or sp-mode mail DOCOMO International Services website. To send to users of overseas network operators, enter "+", "Country code" and then "the recipient mobile phone You can send and receive mail using i-mode mail address number". -
Page 94: Deleting Sms
Manage SIM card messages : Manage messages saved on the docomo mini UIM card. Notifications : Set whether to show notification on the status bar when receiving a message. Choose ringtone : Set ringtone when receiving a message. -
Page 95: Email
Setting up a general provider mail Email account Obtain the information required for setting up the mail Set mail accounts provided by mopera U or general account from your service provider in advance. providers to use Email. From the Application menu, [Email] Setting mopera U mail account [Email address] Enter a mail address Set mopera U account to use mopera U mail. -
Page 96: Composing And Sending Email
Composing and sending email Receiving/Displaying emails From the Application menu, [Email] From the Application menu, [Email] If you have several mail accounts, tap account at the If you have several mail accounts, tap account at the top of the screen to switch. top of the screen to switch. -
Page 97: Forwarding Emails
❖ Forwarding emails Setting Email account Display an email [Forward] [To] From the Application menu, [Email] Enter a mail address m [Settings] Select an account Deleting emails Set each item Account name : Edit account name. Display an email Your name : Edit name. Signature : Register signature. -
Page 98: Gmail
Gmail Early Warning "AreaMail" Gmail is a Google online email service. You can send and This is a service with which you can receive emergency receive emails using Gmail on the terminal. earthquake flash report delivered by the Meteorological To use Gmail, you need to set up a Google account on Agency etc. -
Page 99: Google Talk
Setting Early Warning "AreaMail" Browser From the Application menu, [Area Mail] m [Settings] You can view web pages like on a PC using Browser. On the terminal, Browser can be used over a packet Set each item communication or Wi-Fi connection. Receive setting : Set whether to receive Area Mail. - Page 100 Activating Browser to display a Displaying web pages from history website When a web page is displayed, m From the Application menu, [Browser] [Bookmarks] [History] The preset home page is displayed. To display the history of frequently viewed web pages, tap [Most visited]. Slide the screen downward Enter a URL/ Select a history of the web page keyword in the address bar...
- Page 101 Registering a bookmark to quickly Prefetch Cache display a web page Dedicated cache fetches a linked page for displayed web page. ❖ Registering a bookmark If prefetched in cache, tapping the link opens linked page quickly, regardless of conditions of communication lines. When a web page is displayed, m Depending on linked page, this feature may not be [Save to bookmarks]...
- Page 102 Web page link operations Setting Browser Operate a link displayed on a web page. When a web page is displayed, m [Settings] [General]/[Privacy & security]/ Tap a web page to open. [Accessibility]/[Advanced]/[Bandwidth Touch and hold a web page to open in a new tab, to save management]/[Labs] link, or copy link.
-
Page 103: File Management
<Example> Sending all phonebook entries Depending on the terminal of the other party, it may be For sending all, set the docomo apps password in difficult to exchange data. advance. From the Home screen, m [Settings]... -
Page 104: Bluetooth Communication
Bluetooth communication <Example> Receiving a phonebook entry For receiving all, set the docomo apps password in You can connect the terminal and a Bluetooth device to perform advance. From the Home screen, m [Settings] wireless communication or play voice sound or music. - Page 105 ❖ Radio wave interference with wireless Connecting with registered Bluetooth devices Because a Bluetooth device and wireless LAN Connect Bluetooth device. You can talk or play back (IEEE802.11b/g/n) use the same frequency band (2.4 GHz), sounds or music using a Bluetooth device, or exchange if the device is used near a device with wireless LAN data to or from a Bluetooth device.
-
Page 106: Setting Bluetooth Low Energy
Sending or receiving data to or from Changing name of Bluetooth device Bluetooth device From the Home screen, m [Settings] You can send data such as Gallery ( P125) and contacts [Bluetooth] or receive data from a Bluetooth device. for a Bluetooth device [Rename] <Example>... -
Page 107: Connecting An External Device
Exchanging data to or from USB Connecting an external mass storage device You can exchange data between the terminal and a USB memory or an external hard disk drive connected with a USB cable for connecting peripheral device (commercially Operating data on microSD card available). - Page 108 TV connected. In that case, HDMI conversion cable SC01 (optional). change the TV display setting. DOCOMO does not guarantee actual operations for all While the HDMI cable is connected, do not hold the HDMI HDMI devices.
-
Page 109: Linking With Dlna Device
(Action in lock screen) : Set Linking with DLNA device whether to continue server operation even when screen unlock authentication is required. Still images, videos or music stored in the terminal can be Playing back the terminal's played back on the DLNA compatible TV or PC. And the contents on the DLNA device contents stored in the DLNA compatible PC or network- attached storage (NAS) can be played back on the... - Page 110 Distributing contents in the Playing back the DLNA device's terminal contents on the terminal Distribute contents on the terminal to DLNA devices. Disclose contents on the DLNA device to allow access Playback can be operated via the terminal. from the terminal in advance. Activate DiXiM Server to allow access from a DLNA From the Application menu, [DiXiM] [ device in advance.
- Page 111 Saving and playing digital recorded programs You can save digital recorded programs on DLNA devices such as a recorder to the terminal to play. The DLNA device is required to support uploading a content. From the Application menu, [DiXiM] [ (Setup) (DIXIM SERVER)] Set to allow access from the DLNA device.
-
Page 112: Applications
[ Alternatively, by default, from the Home screen, tap (Use)]. [dmenu]. For details on dmarket, refer to NTT DOCOMO ✔INFORMATION website. To use dmenu, Internet connection by packet communication (LTE/3G/GPRS) or Wi-Fi is required. - Page 113 Displayed items differ depending on the virus and the data may be damaged. application. NTT DOCOMO is not liable for malfunctions, if any, If the application needs to access the data or functions of the terminal, functions to be used by caused by the application you installed.
-
Page 114: Osaifu-Keitai
Using Osaifu-Keitai Keitai when you change Osaifu-Keitai for repair, changing of the model. From the Application menu, [Osaifu-Keitai] Visit a sales outlet such as docomo Shop to use the iC Service information is acquired to refresh the service transfer service. list. - Page 115 Holding Osaifu-Keitai over card [Lock Osaifu-Keitai] Authenticate reader Using fingerprint authentication : [Use fingerprint authentication] Enter the password in the You can exchange data with an IC card reader only by Password field [OK] holding mark over the card reader. To use fingerprint authentication, make fingerprint settings as security release method in advance.
-
Page 116: 1Seg
ToruCa 1Seg ToruCa is an electronic card that can be obtained to mobile terminals. It can be obtained from the IC card reader or site 1Seg is a terrestrial digital TV broadcasting service for as store information, coupon ticket, etc. Obtained ToruCa mobile devices, and can receive data broadcasts with is saved to the [ToruCa] application. - Page 117 About signal To house the 1Seg antenna, hold the root part of the 1Seg antenna and pull in until it stops. Do not pull in 1Seg is one of the broadcasting services, and the receiving with holding the top part of the 1Seg antenna. signal (broadcast) differs from that of the Xi or FOMA Activating 1Seg service.
- Page 118 ❖ j Volume adjustment bar 1Seg screen Drag left and right to adjust volume. SD : Adjust volume SD (1 sec. or more) : Switch channels Deactivating 1Seg On the 1Seg watching screen, m [ (Exit)] TVlink For some data broadcasting programs, link information to related websites (TVlink) is displayed.
-
Page 119: Using Twitter
❖ Using Twitter Checking reservation You can activate Twitter while watching 1Seg to view the Check your reservation. timeline or post tweet. On the 1Seg watching screen, m [ On the 1Seg screen, m [Twitter (Reserve watching/ (Activate Twitter)] [OK] recording)] [ (Reserve recording)]/[... - Page 120 ❖ Recording 1Seg programs Playing recorded video You can record image, sound, subtitle and data On the 1Seg watching screen, m [ broadcasting you are watching and save on a microSD (Recording list)] card. Select data On the TV operation screen, slide left If playback ended halfway in the previous session, to start recording...
- Page 121 ❖ Deleting broadcasting stations from (Channel setting) : "Setting the channel" P119 the channel list Twitter (Twitter operation button) : Display buttons for Twitter operation. On the 1Seg watching screen, m [ (Reserved alarm setting) : Set alarm (Settings)] [ (Channel sound or alarm time for starting reserved setting)] [...
-
Page 122: Camera
Select a digital terrestrial broadcasting Attach a microSD card before shooting in "Unlimited shooting" or "Panorama shooting". program Keep approximately 9-11 cm away from the object when ✔INFORMATION Focus mode is set to [Macro], and at least 9 cm away when Scene mode is set to [Auto]. -
Page 123: Viewing Shooting Screen
Viewing shooting screen Still image shooting While using the camera, the camera light blinks as the shooting indicator. From the Application menu, [Still camera] Display an object on the shooting screen Shutter sound is heard and a still image is shot. Main operations on the still image shooting screen Still image shooting screen... - Page 124 Shoot setting menu for still images Effect shooting You can apply special effect to images. You can adjust Change the settings for shooting using setting menu tab or effect level by sliding when the adjustment bar is shooting setting menu icons displayed on the still image displayed on the shooting screen.
-
Page 125: Video Shooting
Search me focus : If a face is registered as individual Exposure recognition data for Search me focus, the face is Make setting for image brightness. automatically recognized and the name appears. Video shooting Registered face is given priority of focus and brightness adjustment. -
Page 126: Barcode Reader
❖ Shooting setting menu for videos Shooting setting menu icons for videos Change the settings for shooting using setting menu tab or shooting setting menu icons displayed on the video Tap the shooting setting menu tab displayed on the video shooting screen. -
Page 127: Gallery
Display barcode on the shooting screen Gallery Scan or tap on the shooting screen A confirmation sound is played when scanning is complete and the scanned data appears. Display/Play saved images (still images or videos) by Scanning divided data : shooting with the camera or downloading. -
Page 128: Media Player
❖ Operation while viewing a still image Media Player Pinch-out/Pinch-in to zoom in/out. While a still image is displayed, press m to operate You can use the Media player to play music/video and [Slideshow]/[Edit]/[Rotate left]/[Rotate right]/[Crop]/[Set music/video contents downloaded from the store. picture as]/[Details]. -
Page 129: Youtube
Purchasing from the store YouTube From the Application menu, [Media Player] [MUSIC Store]/[VIDEO Store] YouTube is a Google online video streaming service. You can play, search and upload videos to this service. A store screen appears. When you activate for the first time, agree to "d From the Application menu, [YouTube] (dmarket The video list screen appears. -
Page 130: Gps/Navigation
Inside a basement or tunnel, and below the ground or Using the GPS function water Note that DOCOMO is not liable for any damages that Inside a bag or box may occur as a result of irregularities in the GPS system. -
Page 131: Street View
❖ ❖ Using Google's location service Displaying the current location Permit to identify the current location by information from From the Application menu, [Maps] a Wi-Fi connection or a mobile network base station. The following operations are available while the From the Home screen, m [Settings] map is displayed. -
Page 132: Joining Latitude
❖ Displaying layers Checking the friend's location by Google Latitude You can add traffic information to the map or switch to aerial photomap display. You and your friends can check where you are on the map. To use Google Latitude, you need to set up a Google In the map screen, Select an item account on the terminal. -
Page 133: Calendar
Registering a schedule Calendar In the calendar screen, m [New event] If the calendar is not synchronized yet, a screen to You can manage your schedule synchronizing the add an account appears. Add an account if required. calendar of Google account etc. Alternatively, touch and hold day or hour Tap From the Application menu, [Calendar] [New event]. -
Page 134: Alarmclock
AlarmClock Calculator From the Application menu, [Calculator] You can set Comfortable Alarm which detects your sleep cycle to sound alarm in a lighter part of your sleep. Calculate Up to 10 alarms can be registered for Alarm. Only 1 Comfortable Alarm can be set per a day. Deleting an entered character : [DELETE] The alarm clock does not operate if the terminal is not... -
Page 135: Search
m [Setting/ Setting electronic dictionary : Search Manage/Info] [Misc Settings] Set required items Set font size, number of search results, operations for Enter a keyword to search in the terminal or websites, call playing videos or sound. up applications in the terminal to activate. Searching web m [Setting/Manage/ Managing dictionaries : sites using Voice search is also available. -
Page 136: Document Viewer
Phonebook account copy : For copying contacts in Google account to docomo account, from the menu screen, [Phonebook account copy] [Select] on contacts in Google account Select [Overwrite]/ [Add] to execute. The copied contacts data is saved to the docomo account. -
Page 137: Health Diary Karada Life
✔INFORMATION Health Diary Karada Life Data saved in the microSD card such as images/video files cannot be backed up. Do not remove the battery pack or microSD card from the Use applications for supporting your health management terminal during backup or restoration. Data may be by quantifying amount of daily activity and life habit with damaged. - Page 138 Beauty Body Clinic Beauty Body Clinic is an application which supports your fixing up body balance. Measure distortion of a body or body part where easily putting on fat and introduce training etc. based on the measurement result. Takahashi Naoko's Walking Clinic/Takahashi Naoko's Running Clinic Just walk or run attaching the terminal on your waist to check your form and receive advice.
-
Page 139: International Roaming
* To use data communication during roaming, set Data roaming operator affiliated with DOCOMO. You can use Phone and setting to on. P139 SMS without changing settings. - Page 140 After arriving overseas About inquiries When you arrive overseas and turn the terminal ON, a For loss or theft of the terminal or docomo mini UIM connection to the available network is established card, immediately contact DOCOMO from the spot to automatically.
-
Page 141: Settings For Overseas Use
Setting a network operator Settings for overseas use manually From the Home screen, m [Settings] By default, the terminal is set to automatically search and [More...] [Mobile networks] [Network switch to an available network. To switch network manually, perform the following operations. operators] Available networks are searched for and displayed. -
Page 142: Making/Receiving A Call In The Country You Stay
For details on available countries, network operators, etc., refer to DOCOMO International Services website. You can receive a call in the same way as you do in Japan. From the Application menu, [Phone] [Dial] ✔INFORMATION... -
Page 143: Setting International Roaming
Setting the international dial assistance : Setting international roaming [International dial assist] Set required items Mark [Automatic conversion function] to enable the automatic conversion. Make settings for international roaming or international If [Country code] is set, registering or adding call. country codes for making international calls are available. -
Page 144: After Returning To Japan
After returning to Japan When you return to Japan, the terminal is connected to DOCOMO network automatically. If connection is failed, perform the following operations. Set [Network Mode] in [Mobile networks] to [LTE/3G/ GSM (Auto)]. P139 Set [Network operators] in [Mobile networks] to [Select automatically]. -
Page 145: Appendix/Index
Some products are unavailable depending Troubleshooting on the area. For details, contact a sales outlet such as docomo Shop. Check for the necessity of software update first, and For details about the optional devices, refer to the update the software if necessary. - Page 146 The docomo mini UIM card is not recognized. charging area approximately 2 seconds later. Is the docomo mini UIM card installed in the right direction? P25 Appendix/Index...
- Page 147 The screen reacts slowly when a touch panel is Boot the terminal in safe mode by the following tapped/button is pressed. method. Press X for 2 seconds or more with the power of When large amount of data is saved in the terminal or terminal OFF, and then press and hold m from transferring large-size data between the terminal and microSD card, the reactions on the screen may be...
- Page 148 Phone/Voice call Calls cannot be made. During a voice call, the distant party's voice is hard • Is the docomo mini UIM card installed in the right to listen to or too loud. direction? P25 • Change the listening volume. Turn Voice clear, •...
- Page 149 Check if the service area and network operator are Bluetooth available, referring to "Mobile Phone User's Guide The terminal cannot be connected to a Bluetooth [International Services]" or DOCOMO International device/A Bluetooth communication device cannot be Services website. found from the terminal.
- Page 150 Others Fingerprint authentication is unavailable when connecting terminal with a PC, etc. When performing fingerprint authentication or When connecting the terminal using a USB cable to a registering fingerprints, "Swipe was too short" or device which requires grounding such as a desktop "Swipe was too slow", etc.
-
Page 151: Smartphone Anshin Remote Support
SIM card may cause reboot. Regular cleaning recommended. Clean with dry cotton swab. It may appear if metal part of docomo mini UIM card is dirty, but it is not malfunction. Clean the metal part of docomo mini UIM card regularly. -
Page 152: Resetting The Terminal
If the result of inquiries indicates that a repair is pack. required ✔INFORMATION Take the terminal to DOCOMO-specified repair office. Be When the touch panel is not worked properly, etc., turn sure to check the opening hours of the office before you the terminal OFF and ON. - Page 153 - A sticker etc. is put on the LCD or keypad part may be changed or lost when you change the model - The terminal is embellished with adhesive material or have repairs done to the terminal. DOCOMO shall etc. have no liability for any change or loss of any kind.
-
Page 154: Software Update
[When docomo network is not available, or during roaming software update is not available even if Wi-Fi is connected.] or [When docomo network is not available, or during roaming, install cannot be started even if Wi-Fi is connected.] appears. The same messages appear even while connecting via Wi-Fi. -
Page 155: Updating Software Automatically
If the update file is downloaded automatically, automatically sent to the server for software update (software update available) appears on the status bar to managed by DOCOMO. DOCOMO does not use the sent notify. information for purposes except software update. - Page 156 Updating software immediately Rewriting starts automatically approximately 10 seconds after [Ready for Software update starts immediately. update. Please refrain from starting other There are 2 ways to activate software update: activating application.] is displayed from Software update notice screen and activating from the menu.
- Page 157 ❖ ❖ Post-update display When the reserved time is reached When software update is complete, appears on the When the preset time is reached, rewriting starts status bar. Open the Notification panel and tap the automatically approximately 10 seconds after [Ready for notification to display the update completion screen.
-
Page 158: Main Specifications
Image Type Out-camera : CMOS Main specifications pickup In-camera : CMOS device Size Out-camera : 1/3.0 inches In-camera : 1/6.0 inches Phone Number of effective pixels Out-camera : Approx. Product name F-10D 13,100,000 pixels Size Approx. 135mm In-camera : Approx. ×... -
Page 159: File Format
❖ Continuous call time indicates the estimated time that the File format phone can send or receive radio waves normally. Still images and videos taken by the terminal are saved in Charging time indicates the estimated time for charging an the following file formats : empty battery with the terminal turned OFF. -
Page 160: Declaration Of Conformity
Declaration of Conformity can be found on http:// international guidelines when used with a carrying case or www.fmworld.net/product/phone/doc/ (in Japanese a wearable accessory approved by NTT DOCOMO, INC.( only). In case you are not using the approved accessory, please use a product that does not contain any metals, and one that positions the mobile phone at least 1.5 cm away from... -
Page 161: Fcc Rf Exposure Information
This mobile phone complies with the EU requirements for Federal Communications exposure to radio waves. Commission (FCC) Notice Your mobile phone is a radio transceiver, designed and This device complies with part 15 of the FCC rules. manufactured not to exceed the SAR limits for exposure Operation is subject to the following two conditions :... - Page 162 Before a phone model is available for sale to the public, it These limits are designed to provide reasonable protection must be tested and certified to prove to the FCC that it does against harmful interference in a residential installation. not exceed the limit established by the U.S.
-
Page 163: Export Administration Regulations
Important Safety Information Export Administration AIRCRAFT Regulations Switch off your wireless device when boarding an aircraft or whenever you are instructed to do so by airline staff. If your device offers flight mode or similar feature consult This product and its accessories may be under coverage of airline staff as to whether it can be used on board. - Page 164 ACCESS CO., LTD. All "WORLD WING", "sp-mode", "Xi", and logo of "iD" are rights reserved. trademarks or registered trademarks of NTT DOCOMO. "ATOK" is a registered trademark of "Catch Phone (Call waiting service)" is a registered JustSystems Corporation in Japan and trademark of Nippon Telegraph and Telephone other countries.
- Page 165 Bluetooth SIG, INC. and any use of such Portfolio License. The use of MPEG-4 Video Codec marks by NTT DOCOMO, INC. is under license. Other function is allowed for personal and nonprofit use only trademarks and names are those of their respective in the cases below.
- Page 166 This product is licensed under the AVC patent portfolio <Taishukan Shoten> license for the personal and noncommercial use of a consumer to (i) encode video in compliance with the AVC standard (henceforth referred to as AVC video) and/ or (ii) decode AVC video that was encoded by a consumer engaged in a personal and noncommercial activity and/or was obtained from a video provider licensed to provide AVC video.
-
Page 167: Sim Unlock
SIM unlock This terminal supports SIM unlock. If you release SIM lock, you can use SIM by a carrier other than NTT DOCOMO. The SIM unlock service is provided at a docomo Shop. A SIM unlock charge is separately required. -
Page 168: Index
Authentication information........Distinct touch ............. Auto-rotate screen ............. DiXiM................. DLNA ................. dmarket ..............Barcode reader............dmenu ............... Battery docomo mini UIM card Charging ..............Installing/Removing..........Charging time............Security code ............Operation time ............Document Viewer ............ Best-fit zoom............... Dolby Mobile setting.......... - Page 169 Infrared communication .......... Initial settings ............. Early Warning "AreaMail".......... Installing/Removing microSD card ......Easy data transfer support ........Intelligent color adjust..........Editing text..............International call............Electronic dictionary ..........International call (WORLD CALL)......Email ................137, 141 International roaming ........English ................. Export Administration Regulations ......
- Page 170 Phonebook list ............Profile screen ............Name card Registering .............. Creating ..............Registering group ........... Exchange ..............Search..............Network mode............TimeLine..............Network operators ........... PIN code ..............Network service............Play Store..............Network service (overseas) ........Playing video ............Notification icon ............Privacy mode ..............
- Page 171 Software update............Voice input..............Sound ................Voice Search ............. Sound and Vibration ..........Voice slowing ............. sp-mode............... Volume ................ sp-mode mail .............. VPN................Status bar..............Status icon ..............Still camera shooting screen........Warranty ..............Still image shooting ..........Wi-Fi................Storage ................ Wi-Fi direct..............
-
Page 172: Your Location
* Some services may be charged when accessing from sp-mode around you when taking and sending photos using * You need "docomo ID/Password" to access the site from your PC. * If you do not have or forget " Network security code" or camera-equipped mobile phones. - Page 173 If you lose your terminal or have it stolen, immediately take the steps necessary for suspending the use of the terminal. If the terminal you purchased is damaged, bring your terminal to a repair counter specified by DOCOMO after returning to Japan.
Need help?
Do you have a question about the Arrows X F-10D and is the answer not in the manual?
Questions and answers