Table of Contents
Advertisement
Advertisement
Table of Contents

Related Manuals for 3R Anyty

Summary of Contents for 3R Anyty
- Page 1 2.4GHzWireless Digital Microscope Comprehensive Operating Instruction...
-
Page 2: Table Of Contents
Turn the power on and Channel Harmonization About operation of Anyty Digital Microscope Capture with Anyty VIEW Edit images which have been photographed by Anyty VIEW Play movies which have been filmed by Anyty VIEW Spec Manual of Anyty Series TV Model... -
Page 3: For Your Safety
For your safety For safety use of the product, prohibition of using and cautions are written. To ensure customer’s safety, PLEASE read this carefully before using. Caution Contents of actions lead to danger to life or serious injury. Attention TV Model has two types of charging adaptors. PLEASE use them properly. DO NOT mix them up. Attention DO NOT leave or use the product under direct sunlight and circumstances of high temperature. -
Page 4: Anyty Series Line Up And Accessories
Anyty Series Line UP and Accessory This Comprehensive Operating Instruction is for 2.4GHz Wireless Microscope「Anyty」Series. PLESE NOTE: The combination of Accessory could be different due to the your demanded Model Contents of Accessories in different type of products mentioned below(To see all contents of every models, please go to next page)... - Page 5 Contents and accessories in every Model are noted below. PLEASE check Alphabets in previous page if it contains the right accessories. Product Model Contents 2.4GHz Wireless Digital Microscope 3R-WM401PC A、B、D Magnification x 200 PC Model 2.4GHz Wireless Digital Microscope 3R-WM401TV A、B、E Magnification x 200 TV Model 2.4GHz Wireless Digital Microscope...
-
Page 6: P1 How To Charge Anyty Wireless Digital Microscope
How to charge Anyty Wireless Digital Microscope Microscope itself is chargeable. Before start using it, please charge the battery of microscope. Connect charging cable (attached inside) to charging connector on Microscope. Then, connect to USB port on PC or AC/USB Transform Adaptor. -
Page 7: P2 Requirement Of Using Attached Software(Anyty View
Requirements of using attached Software(Anyty VIEW) Installation of Anyty VIEW will be required in order to be able to use PC Model on PC. Requirements will be mentioned below. ※The software of this product is not officially compatible with Windows8 purchased in 2012. -
Page 8: P3 Installation Of Anyty View(Windows7/Vista
Installation of Anyty VIEW(Windows7/Vista) ※The installation could be done irregular if antivirus software is active. PLEASE exit antivirus software for a while refers to its manual during installation. ※ DO NOT connect Receiver to PC until installation is complete. ※ Please press ‘Continue’ if User Account Control(UAC) is activated. - Page 9 The Menu will be shown as below when set up program is activated. Choose ‘Install Software(32bit)’ ② or ‘Install Software(64bit)’ on the basis of your PC specs. ※Please see 49 page to confirm your PC spec(32bit or 64bit) The image will be shown on screen as below. Please press ‘Next’ ③...
- Page 10 ‘License Agreement’ will be shown. To continue installation, please tick ‘I accept'. ④ Then click ‘Next’. ⑤ You could choose which folder to save it at next screen. Normally, click ‘Next’ to start program installation.
- Page 11 ⑥ Press ‘Finish’ when screen shows as below. It is all complete about installation of Anyty VIEW. Move on to examination of Receiver. ⑦ Connect Receiver to USB port on PC with miniUSB cable. Windows will detect the device automatically.
- Page 12 ※ During the Device installation, please press ‘Install this driver software anyway’ to continue installation.
-
Page 13: P4 Installation Of Anyty View(Windows8
Installation of Anyty VIEW(Windows8) ※The software of this product is not officially compatible with Windows8 purchased in 2012. To understand the newest compatibility, please contact us at: inquiry@3rrr.co.jp ※In case of using Windows8 32bit version to install, insert install CD into CD-ROM. Then click the icon of computer on Desktop so the explorer will be shown. -
Page 14: P5 Simple Use Of The Product
Simple use of the product ※Detailed manual of step of use will be showing below ① Connect Receiver to PC and tune the ② Install a lens cover and turn the power channel Launch software ‘Anyty VIEW’ ③ ④ Adjust luminance Magnification dial. -
Page 15: P6 Turn The Power On And Channel Harmonization
Then adjust the switch on Anyty Wireless Microscope as same number as on Receiver。 Switch of Channel (Channel of 1、2、3、4) Once the channel has been tuned, please turn dial switch right on Anyty Wireless Microscope Sound of ‘click’ is the sign of power on. Dial switch ※... -
Page 16: P7 About Operation Of Anyty Digital Microscope
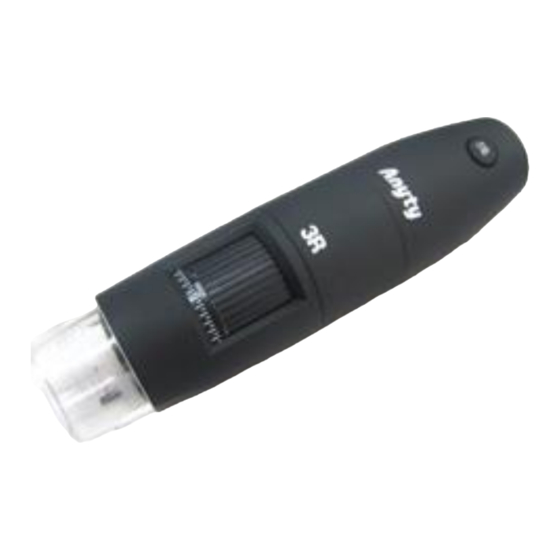
About operation of Anyty Microscope ※Magnification dial should be facing you when you use Microscope 1. Load the lens cover The product is monofocal. Lange from object to Microscope will be different according to different magnification you have selected. Figure of magnification is printed on attached lens cover. Please use switch to lens cover with the corresponding figure of magnification when you take picture. -
Page 17: P8 Capture With Anyty View
※ In some case, icon would not be established on desktop. Desktop icon Double click to launch Anyty VIEW.。 You are also able to open it from ‘Start’ → ‘(All)Program’→ ‘3R Anyty VIEW 40101’ Please left click ‘3R Anyty VIEW 40101’ to launch it ●Main Window... - Page 18 Data of image and movie will be shown as thumbnail on left side of main window. Click the icons shown above to switch between thumbnail of images and movies. Data of image/movie will be saved in ‘3R files’ in ‘My Document’ so you are able to browse those data through ‘Exploler’...
- Page 19 ③ Press round button on Microscope Image data will be saved in folder, ‘3R Files’ in ‘My Document’ as name of Still pic_year-month-day hour minute second_(magnification)_number.bmp Magnification will be the figure that you have entered in main window. See scale Magnification dial to enter magnification.(→page 23)...
- Page 20 ●Film movies Two ways of film movies ① Press icon on tool bar ② Press keyboard button F3 The setting window as below will be showing through two steps above. Set each option and press ‘OK’. Filming will start. Frame Rate(1~30) To set how many images will be saved per second.
- Page 21 ●Continuous shooting of still picture You could use this function to shoot still pictures continually. to display window (Setting menu) as an image below. Press ‘Start’ to start photographing Click after finish setting each option. Start Time・・・Set start later year, month, day, hour ,minute, second by now Interval・・・Setting shooting time interval in seconds.
- Page 22 ●About options on Main bar ■File Contains the same functions of icons on the Main Window (Save edited data in any file you want in your PC, Delete chosen images/movies or all data). ■Settings You are able to change each setting or make it display scales. Two kinds of resolution of saved pics Changing options of display (see page 22) Mainly changes the measurement functions settings...
- Page 23 ●Settings of image quality You are able to set quality of Microscope in this option. Change resolution of the saving picture. Adjust Brightness of captured image Adjust Contrast of captured image Adjust Saturation of captured image Adjust Sharpness of captured image Adjust Hue of captured image ●Display cross line and others You are able to set cross line on screen during shooting.
- Page 24 ●Full Screen Mode Click Maximization icon to view ‘Anyty View’ in full screen. To terminate full screen mode, please press ’ESC’ button on keyboard. ●Input magnification. There is a blank for entering magnification at top of right side of the main window during shooting period.
- Page 25 Color Invalidation Icons (choose two) Negative and Vampix ●Measurement functions Icons at right side of menu bar are for measuring. Each icon has its specific measurement method. Icons of measurement ●Operation of Measurement functions(e.g. Linear size) ① Click the icon on menu bar. Measurement of Linear size...
- Page 26 ② Next, please click two points of what you want to measure. For example, click bottom and top part of the ‘L’ when you want to measure height of it. Click twice at the point of red arrow ③ At last, click anywhere you want to display the value. It will be displayed Please click ‘Save’...
- Page 27 Attention ※ The figures are calculated based on shooting magnification at top right side of the Main window. If you want to obtain more accurate numerical value, please see page 26 or page 27 (Additions and Corrections). ※ You might need to click more than twice depend on some specific measurement. ●Additions and Corrections Use ‘Additions and Corrections’...
- Page 28 ④Value will be filled in left side of ‘magnification’. From then on, the measurement will be done based on the calibration value. ●Clear the measurement function If you want to renewal the measurement or delete it, please click the icon at right side of correction icon’▼’.
-
Page 29: P9 Edit Images Which Have Been Photographed By Anyty View
Click thumbnail of still picture to open editing window。 You are able to measure and input words here as you have done in capture screen. Open Open named picture which are captured by Anyty VIEW only. Save You are able to save the picture as another name after editing. - Page 30 Text setting You are able to input text on picture. Please enter texts in black. Change font of texts ※ Font will be different between vertical writing and horizontal writing. Press ‘OK’ when finish entering Left click to insert text on part of images where you wish to put Undo Return to previous status during editing.
-
Page 31: P10 Play Movies Which Have Been Filmed By Anyty View
Playing captured movies with Anyty Double click the movies you have captured in main window to open movie player and start playing it. -
Page 32: P11 Spec
Spec Spec of 2.4GhzWireless microscope Anyty PC Model Image sensor 350 thousand pixel CMOS sensor Still picture size 720x480,640x480,320x240 Movie size 720x480,640x480,320x240(maximum 30fps) Light source 8 adjustable LED white light Wireless type 2.4Ghz wireless 4 channels(Transmitter/receiver) Transmission distance Approx 5m PC interface (receiver) USB 2.0/1.1... -
Page 33: T1 How To Charge Anyty Digital Microscope And Lcd Monitor
Charging Anyty Microscope and LCD Monitor Before using Microscope, please charge battery of Microscope. Connect attached charging cable to charging connector on Microscope. Connect other side of cable to USB port on PC or AC/USB transform adaptor. During charging period, dial switch flashes blue Charging period will be approx 3 hours. - Page 34 Next, please charge battery of monitor. Connect attached adaptor to the charging port on left side of the LCD Monitor, and then connect other side to household wall outlet. (100V) A part of monitor at left up side will light red during charging period. The red light will turn off when the charging is complete.
-
Page 35: T2 Switch On And Channel Harmonization
Turn on the power and tuning radio channel Insert MicroSD card in to LCD Monitor. Confirm that the MicroSD card is inserted properly. Then choose one of four channels. After tuning, turn the dial switch right on the Microscope until it sounds ‘click’ to turn on the power. Dial switch ※... - Page 36 The monitor will shows screen as described below Channel will be shown on top right side of the screen. Radio Channel Press ▼ button to do the tuning in case of mismatching channel. ▼button Setting is complete if the picture is displayed.
- Page 37 ■ Language setting ※This manual is based on English. 【Steps】 ① Press button(≡) for about 2 seconds and release in condition of power on. ② Setting menu will be displayed Select ‘SYSTEM SETTING’ with ▲, ▼ button and press ‘OK’ to confirm. ③Each setting will be displayed Select ‘Language’...
-
Page 38: T3 Simple Use Of The Product
Simple use of the product ※See more details about operation steps. ① Turn the both power of Microscope and ② Load lens cover and adjust magnification LCD monitor on. and focal point. Press ‘▲’ button on the monitor to Press ‘OK’ button to save the data. ③... -
Page 39: T4 About Operation Of Anyty Digital Microscope
About operation of Anyty Microscope ※Shutter button would not be used in TV model ※Magnification dial should be facing you when you use Microscope 1. Load the lens cover The product is monofocal. Lange from object to Microscope will be different according to different magnification you have selected. -
Page 40: T5 Capturing Still Pictures
Capture the still picture The images captured by Anyty Wireless Microscope will be saved in SD card in the LCD screen. In order to capture still pictures, please turn on the power of LCD Monitor first and press ‘▲’ button. -
Page 41: T6 Capturing Movie
Capture movie The Initial State (first time turn the power on) of the LCD Monitor will be Movie capture mode. Or press ‘▲’ at Still picture mode. It will be switched to Movie capture mode ・ Saving movie mode Residual amount of a batter Icon of Movie mode Icon of Micro SD card... -
Page 42: T7 Preview Of Images/Movies
Preview (Images/Movies) Press ‘≡’ button at right side of the LCD monitor to activate Preview of Images/Movies Mode. Index of folders will be shown. They are separated by different capturing date. Press ‘▲’, ‘▼’ button to select and ‘OK’ to confirm. Then, the index of selected file will be shown. - Page 43 Preview of movies Press ‘OK’ to play the movie. Press ‘OK’ when the movie is playing. Halt : Press ‘▲’ when the movie is playing Forwarding : Press ‘▼’ when the movie is playing Rewind : Press ‘≡’ to end :...
-
Page 44: T8 Deletion Of Images/Movies
Delete images/movies Select the file that you want to delete with ‘▲’, ‘▼’ button. Then, press ‘≡’ button for 2 seconds. It will ask you if you confirm. Select ‘Yes’ and press ‘OK’ to delete the file. -
Page 45: T9 About All Kinds Of Setting
About each settings You are able to change each setting of LCD Monitor. Turn on the LCD monitor and Press ‘≡’ button for 2 seconds Setting menu will be showing up as below. Press ‘▲’, ‘▼’ button to select and press ‘OK’ to confirm. ●... - Page 46 ● Version information Confirm a version of the internal software. Select ‘SYSTEM SETTING’ in setting menu. ① Select ‘Version’. ② ③ Current software version will be displayed. ● Frame rate Change the frame rate of the movie Select ‘RECORDER SETTING’ in setting menu. ①...
- Page 47 ● Time setting Change the setting of the internal date and time Select ‘Date / Time’ in setting menu ① Set ‘Year-month-day’ and ‘Hours’ ② Use ‘Up’ and ‘Down’ button to change value and move to the next item by the ‘Confirm’ button ③...
-
Page 48: T10 About All Atteched Accessory(Tv Connection・Stand
About accessories (TV connection・stand) ● Loading of Magnet stand for LCD monitor. The LCD Monitor could not only be held by hand to use it, but also can be fixed with a magnet stand. Attach stand to LCD monitor to put it on the desk or fix it with magnet power. Caution Please be careful not to fix it to device which could be affected by its magnetic force. -
Page 49: T11 Spec(Lcd Monitor
Spec(LCD Monitor) 2.4Ghz Wireless Microscope Anyty TV Model Spec of the LCD Monitor ※Please refer to the detail of the specifications of the PC model for the specifications of the main body of Anyty microscope ※The magnification will be based on the size of images which are displayed on 15 inches monitor. The magnification of when it is displayed it with a attached monitor of the TV model will be different. -
Page 50: Common Fix
Anyty VIEW might not work properly, please close it and re-open to try. C If it does not work even if you connect a microscope and re-start Anyty VIEW, please uninstall Anyty VIEW once, and install Anyty VIEW once again and try. - Page 51 Manufactured and sold by 3R SYSTEMS CORP. No.5-8-11 Naka, Hakata-ku, Fukuoka City, Japan +81-92-441-4056 +81-92-441-4077 Official website...
Need help?
Do you have a question about the Anyty and is the answer not in the manual?
Questions and answers