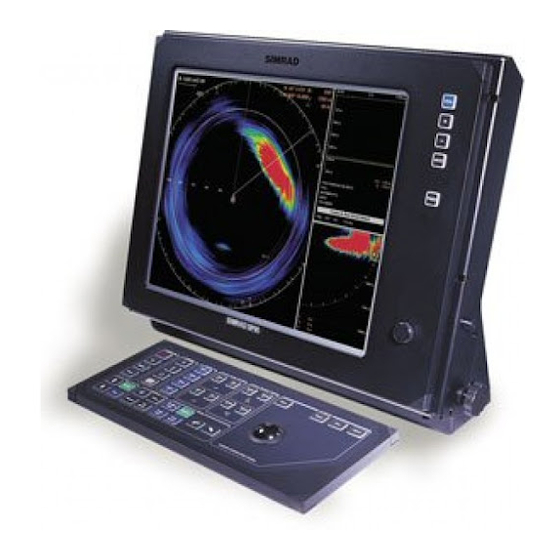
Simrad SX90 Operator's Manual
Fish finding sonar
Hide thumbs
Also See for Simrad SX90:
- Quick start manual (76 pages) ,
- Manual (52 pages) ,
- Datasheet (4 pages)

Related Manuals for Simrad Simrad SX90


Summary of Contents for Simrad Simrad SX90
- Page 1 Operator manual Simrad SX90 Fish finding sonar www.simrad.com T E C H N O L O G Y F O R S U S T A I N A B L E F I S H E R I E S...
-
Page 3: Simrad Sx90
Operator manual This manual provides you with basic information required to operate the commands, menus, operational modes and options provided by the Simrad SX90 Fish finding sonar. For detailed operational information, refer to the Simrad SX90 Reference manual. WARNING: The sonar must never be powered up when the ship is in dry dock. - Page 4 If you require maintenance on your Simrad equipment, contact your local dealer. You can also contact Simrad using the following address:simrad.support@simrad.com. If you need other information about this product, or any other Simrad products, visit www.simrad.com. On our web site you will also find a list of our dealers and distributors.
-
Page 5: Table Of Contents
Operator manual Table of contents INTRODUCTION ..............7 Important matters .....................8 GETTING STARTED............9 Power on/off procedures...................9 How to switch on the sonar................9 How to switch off the sonar ................. 10 How to perform basic operations ................11 Echo presentation and menu ................ 11 Temporary menu.................. - Page 6 Simrad SX90 How to store sonar images................30 How to recall sonar images................31 How to keep sonar images ................32 How to delete sonar images ................. 33 How to rename sonar images ............... 33 How to print sonar images ................34 How to burn sonar images on a CD ..............
- Page 7 Operator manual About beam widths ..................56 About Gain....................56 What is RCG? .................... 57 About search sectors ................... 57 About tilt....................57 Noise and reverberation..................58 Cavitation....................59 Reverberation ..................... 59 Blocking ....................60 Check the noise yourself! ................60 Layers and deflections ....................60 Temperature and salinity layers..............
- Page 8 Simrad SX90 307672/B...
-
Page 9: Introduction
INTRODUCTION The purpose of this manual is to give you a short introduction to the operational use of the Simrad SX90 Fish finding sonar. It is not possible to explain all the functionality and possibilities in detail, it is therefore important that you familiarize yourself with the reference manual also provided with the sonar. -
Page 10: Important Matters
Simrad SX90 Important matters As with all advanced instruments, there are a few important matters about the SX90 that you must remember. Before you switch on the sonar When you power up the sonar, the transducer is lowered down below the vessel’s hull. Make sure that you have sufficient water... -
Page 11: Getting Started
Getting started GETTING STARTED These sections provide the basic information required to get you started up. Power on/off procedures These procedures explain how to switch the sonar system on and off. How to switch on the sonar Press the button on the colour display monitor. Power Press the button on the Operating Panel, and keep it... -
Page 12: How To Switch Off The Sonar
Simrad SX90 Note If the sonar system has been disconnected from AC power, the Processor and Beamformer Units must be started manually. Remove the protective panels on the front panels (above the fans), and use the on/off switch. How to switch off the sonar Press the button on the Operating Panel. -
Page 13: How To Perform Basic Operations
Getting started How to perform basic operations Observe this brief procedure to familiarize yourself with the basic operations with echo presentations and menu operations. Echo presentation and menu Once the sonar system is up and running, observe the layout of the display presentation: •... -
Page 14: Temporary Menu
Simrad SX90 Temporary menu On the Operating Panel, press the button to remove Menu the menu. On the display, observe that the menu disappears. Use the trackball, and move the cursor over to the left side of the display. Observe that the menu reappears on the left hand side, and that the remaining echo presentation area is not re-scaled. -
Page 15: The Menu Structure
Getting started The menu structure The menu on the right hand side of the sonar display contains several different buttons, tabs and parameter dialogues. The following elements are in use on the menu: : This field simply states the name (A) Sonar type of the sonar. -
Page 16: Control The Cursor
Simrad SX90 Control the cursor Operate the trackball (A) on the Operating Panel. CURSOR Object Menu Select View Observe that the cursor moves on the sonar display, and that it changes its form depending on its location. Observe the location of the button (B). -
Page 17: Changing A Parameter Value
Getting started Changing a parameter value Observe this generic procedure to change a parameter value. Once you have gained more experience, and have become more familiar with the available options, you will select the parameters directly from the buttons. Figure 3 Changing a parameter value D015010B Move the cursor to the middle of the menu button (A). - Page 18 Default setting Setup dedicated parameter dialogue is used. In the Simrad SX90 sonar, all parameters are stored. This function will cause the sonar to remember all the selected parameter settings, even when the sonar is switched off. 307672/B...
-
Page 19: Visual Aids
Getting started Visual aids The sonar display contains not only the sonar picture and the menu system, but also other information that is useful for efficient operation. Common information on the display In nearly all display modes, the following information is provided. -
Page 20: Cosmetics
Simrad SX90 Cosmetics The choices in the menu allows you to enable or Cosmetics disable a range of visual aids in the sonar picture. Click the tab to open the menu. Display Display Click the button to open the menu. - Page 21 Getting started Figure 6 Variable Range Marker (D), Compass Card (E) and Vertical Ring (F) 100 m 200 m 1123 m 300 m 400 m (CD015013C) (D) consists of an adjustable Variable Range Marker (VRM) range ring with range read-out. It can be used for any type of distance marking relative to the vessel.
- Page 22 Simrad SX90 Figure 7 Depth Dividers (G), Bow Marker (H) and Minute Markers (I) 100 m 200 m 300 m 400 m (CD015013D) (G) are horizontal dotted lines used to Depth Dividers visualize the depth steps in the vertical slices.
-
Page 23: On-Line Help
Getting started On-line help The Simrad SX90 sonar is equipped with a comprehensive on-line help system. Help is provided in two levels: On-line and Free. It is available from all the parameter dialogues and menus by clicking the button. Help Once pressed, the first help text will appear in the bottom of the... -
Page 24: Operational Procedures
Simrad SX90 OPERATIONAL PROCEDURES This chapter presents how to perform the most common procedures on the SX90 sonar. Note that the power on/off procedures have been previously explained. Topics Menu procedures on page 23 Gain adjustment procedures on page 24... -
Page 25: Menu Procedures
Operational procedures Menu procedures This section provides general procedures for menu handling. How to hide the menu The menu is normally located on the right hand side of the display, but if you don’t need it, you can easily remove it. Press the button on the Operating Panel. -
Page 26: Gain Adjustment Procedures
Simrad SX90 Gain adjustment procedures This section explains how to control the manual and automatic gain settings on the SX90 sonar. How to adjust the gain You can adjust the sonar gain by means of the control buttons on the Operating Panel, or by using the... -
Page 27: How To Adjust The Tvg
Operational procedures Note Scattered fish can be perceived as reverberation. The RCG function must therefore be used with care if you wish to find scattered schools. Click the tab to open the respective Horizontal Vertical menu. Click the button to adjust the parameter. Click the left or right side of the button to decrease or increase the setting, or the middle of the button to open... -
Page 28: Mode Procedures
Simrad SX90 Mode procedures This section explains how to choose operational modes, and how to set up the buttons on the SX90 Operating Unit. Mode Related topics Display modes on page 41 How to select operational mode Your SX90 sonar is equipped with several operational modes. -
Page 29: How To Sort The Operational Modes
Operational procedures How to sort the operational modes Your SX90 sonar provides you with a selection of operational modes. This list of modes can be sorted to suit your preferences. The top four modes on your list can be accessed by pressing the four buttons on the Operating Panel. -
Page 30: How To Add An Own Ship Symbol
Simrad SX90 button can also be used for manual target Target marker tracking as the system is designed to calculate the speed, course and distance between the last two chosen targets. The target marker data is displayed in white figures for 15 minutes in the lower right hand corner of the horizontal presentation. -
Page 31: How To Investigate Marker And Symbol Information
This is a useful aid in providing an overview of the trawl operation. Trawl data can be set manually using the menu or automatically by interfacing a Simrad FS trawl sonar or Simrad ITI trawl monitoring system with the sonar. -
Page 32: How To Delete A Marker Or Symbol
Simrad SX90 • The identification (ID) abbreviations for the different objects are: – AT: Automatic target track marker – Ci: Circle marker – M: Target marker – OS: Own Ship marker – PT: Position track marker – F: Radio buoy marker •... -
Page 33: How To Recall Sonar Images
Operational procedures Prepare the recording parameters Click the tab to open the menu. Setup Click the button to open the menu. Store/Recall Store/Recall Click the button to choose recording mode. Store mode Click the left side of the button to scroll down Store mode the list of options. -
Page 34: How To Keep Sonar Images
Simrad SX90 Click the tab to open the menu. Setup Click the button to open the menu. Store/Recall Store/Recall Observe the list of images in the menu. Store/Recall To recall a single image: Click the button, and select Recall mode Single shot Click one of the images to select it. -
Page 35: How To Delete Sonar Images
Operational procedures Click the arrow on the top of the field to Permanent files move the selected image down. list does not limit the number of files it can Permanent files contain. This is however limited by the storage capacity of the hard disk in the Processing Unit. -
Page 36: How To Print Sonar Images
Simrad SX90 Figure 8 On-screen keyboard You are also permitted to change the file name on images in the field. However, if you wish to transfer the chosen Temporary files image to the field afterwards, you will find that Permanent files the new file name is changed by the transfer process. -
Page 37: How To Copy Sonar Images To A Usb Memory Stick
Operational procedures Double-click to open sub-folder Permanent or Temporary. Click to select the images you wish to burn on the CD, and copy them to the CD’s window. Windows Explorer Click in the Write these files to CD Windows Explorer window, and wait until the process has finished. -
Page 38: How To Start The Horizontal Search Program
Simrad SX90 How to start the horizontal search program Observe the following procedure to run the automatic search program. TRAIN Position Manual Track Target Auto Search Track (CD015022H) Press the button in the field on the Auto search Train Operating Panel to start the horizontal search program. -
Page 39: How To Enable Target Track
Operational procedures Press the button in the field on the Position track Train Operating Panel. A geographically fixed circle will appear on the display, and its position will automatically be tracked by the system with respect to the bearing and tilt angle. The track parameters can be investigated by accessing the menu. -
Page 40: How To Add A Target Tracking Line
Simrad SX90 How to add a target tracking line Observe this procedure to add a tracking line to a tracked target to indicate its movement history. Choose an operational mode with a horizontal presentation. Place the cursor in the horizontal presentation. -
Page 41: How To Delete A User Setting
Operational procedures Note In principles you can use any name, but the buttons on the Mode Operator Panel will only choose from User 1, User 2, User 3 and User 4. These names must also be on the top of the list. If you wish to add users, apply names like for example “User 5 Charlie”. - Page 42 Simrad SX90 Click the tab to open the menu. Setup Setup Click the button. Default setting Click in the next parameter dialogue to confirm the action. The factory settings are loaded and implemented. 307672/B...
-
Page 43: Display Modes
Display modes DISPLAY MODES The SX90 sonar provides you with several different display modes. These have been created to cover all your operational needs. Only the most common modes are described here. Bow up When is selected, the vessel symbol is stationary on the Bow up screen with the bow pointing upwards. - Page 44 Simrad SX90 movements of the targets through the water. When the vessel symbol reaches the edge of the screen, it will automatically be moved back to the centre, or to a position determined by the button. This position is reset to the screen centre Off Centre whenever the mode is changed.
-
Page 45: Operating Panel
The buttons are grouped in fields according to their purpose. Most sonar functions may also be accessed and activated using the menu system on the display and the trackball button on the Operating Panel. Select SIMRAD CURSOR MAIN SW. SYMBOL RANGE... - Page 46 Simrad SX90 the operational modes, click on the menu. See Sort modes Setup Mode procedures on page 26 and User setting procedures on page 38. Gain This is where you set up the gain in both horizontal and vertical presentations. See Gain adjustment procedures on page 24.
-
Page 47: Menu Descriptions
Menu descriptions MENU DESCRIPTIONS The SX90 sonar is equipped with an extensive menu system, and you will use this to choose parameters for the various operational modes. In order to select active menu and to click the various buttons, you must use the cursor. The cursor is controlled by the trackball on the Operating Panel, and to “click”... - Page 48 Simrad SX90 Buttons : Select the range for the horizontal presentation. Range : Select the sonar beam’s vertical angle. Tilt : This button controls the direction of the white bearing Bearing line on your sonar picture. This line may be used to control the direction of the vertical slice.
-
Page 49: Vertical Menu
Menu descriptions Vertical menu menu is only shown in Vertical modes with a vertical slice function. All relevant settings, except the , can be selected separately for Power the vertical modes independent of the horizontal settings. When any vertical setting is selected and defined in one mode, the setting will be applied to all vertical modes. -
Page 50: Vertical 180 Menu
Simrad SX90 : Automatic Gain Control. This function will automatically reduce the gain if you experience reverberation and noise, or increase it if the conditions permit it. Using the AGC will ensure best possible signal processing. : Reverberation Controlled Gain. This function will automatically remove unwanted reverberation from the bottom or from the sea surface. -
Page 51: Display Menu
Menu descriptions Display menu menu is shown in all Display display modes, and provides access to parameters controlling the visual presentation of the sonar views. Some of the choices on the menu are simple on/off buttons. Buttons : Click this button to remove or retrieve the menu. Full screen : Not used. -
Page 52: Setup Menu
Simrad SX90 : Use this button to choose how the buttons on Mode buttons Mode the Operating Panel shall work. You can either choose between the four most frequent modes, or the four most frequent user settings. : Choose the menu language. - Page 53 Mode : This function makes it possible to External sync(hronisation) eliminate interference from other Simrad sonars on board your vessel. If the sonars are connected together, you can use these settings to synchronise their transmissions. 307672/B...
-
Page 54: Objects Menu
Simrad SX90 : This is an optional functionality designed to Scientific Output be used when the sonar is used for scientific purposes. When enabled, the sonar will provide special information on an ethernet port. This button replaces the button. Wind speed... -
Page 55: Temporary Menus
Menu descriptions Temporary menus The temporary menus are those selected from the active menus. They are also shown with vertical tabs on the right side of the menu, and can easily be selected by the trackball and the button. The temporary menus must however be removed Select manually using the button in the bottom of menu. -
Page 56: Basic Theory
Simrad SX90 BASIC THEORY This chapter explains some of the basic theory related to settings, error sources and noise conditions. Topics Settings on page 54 Noise and reverberation on page 58 Layers and deflections on page 60 Settings A sonar will transmit a sound wave into the water around the vessel. -
Page 57: What Is Agc
Basic theory When you choose the TVG setting you can either switch it off, or choose a value. The different settings determine how “X log R” much gain the sonar will use as time elapses along the X-axis. A higher value for “X” will make the angle (C) steeper. Default setting on the SX90 sonar is 20 log R What is AGC? -
Page 58: About Beam Widths
Simrad SX90 About beam widths A narrow beam will always reach further than a wide beam. This is because the transmitted power of the sonar is concentrated. Nevertheless, you can easily “miss” a school of fish if you make the beam too narrow. If the range is reduced, it is the common to use a wider beam. -
Page 59: What Is Rcg
Basic theory What is RCG? RCG means “Reverberation Controlled Gain”. This function compare the strength from each echo, and then automatically adjust the range and echo level in the sonar picture. The RCG will remove unwanted echoes from the sea surface and the bottom. -
Page 60: Noise And Reverberation
Simrad SX90 Figure 13 Tilt (CD015005D) The challenge will always be to find a tilt that prevents the fish echoes to be buried in reverberation and bottom echoes. If you use a steep tilt (A) the fish will easily be disguised by the bottom echoes, but a strong RCG setting will help. -
Page 61: Cavitation
Basic theory Cavitation As the propeller blades move through the water, low pressure areas are formed as the water accelerates around and moves past the blades. The faster the blades move, the lower the pressure around it will become. As it reaches vapour pressure, the water vaporizes and forms small bubbles of gas. -
Page 62: Blocking
Simrad SX90 Blocking The movement of your vessel through the water will often — especially in higher sea states — cause air bubbles to be generated, and these bubbles will move along the hull. This is called blocking. In order to prevent this noise from disturbing your sonar operations, it is important to lower the sonar transducer as far down below the hull as possible. -
Page 63: Temperature And Salinity Layers
Basic theory Temperature and salinity layers You may experience that temperature and/or salinity layers exist in the water column. Since the speed of sound in water depends on its temperature and salinity, such layers will cause the sound beam to be reflected. Figure 15 Temperature and salinity layers (CD015005F) If you transmit a sonar beam down towards a temperature... - Page 64 Simrad SX90 Figure 17 Water temperatures on cold days (CD015005H) When the temperature decreases (A) closer to the surface, the sonar beam is deflected up as indicated by the illustration. The school of fish (B) you thought you would see is once again not visible at all, and you will also see a ring of surface echoes.
- Page 65 Index basic operation, 14 adjust, 25 menu, 49 modes, 41 circle marker, 27 Display Gain gear symbol, 28 Cavitation, theory, 59 button, 49 own ship symbol, 28 Distance Rings target marker, 27 Circle marker, 52 description, 18 vessel symbol, 28 Circle marker, 52 adjust, 24...
- Page 66 Simrad SX90 gear symbol, 28 switch power on, 9 Menu own ship symbol, 28 target button target marker, 27 track, 37 Display menu, 49 vessel symbol, 28 tracking line, 38 buttons, 14 adjust track Cosmetics, 53 AGC, 24 position, 36...
- Page 67 Index Move down, 53 delete Move up, 53 marker, 30 Palette Store/Recall, 53 sonar images, 33 button structure, 13 user setting, 39 Display menu, 49 System test, 53 hide menu, 23 Panel Backlight tabs, 13 horizontal button temporary, 12 search program, 36 Display menu, 49 Vertical, 47 investigate...
- Page 68 Simrad SX90 button position, 36 Setup menu, 50 target, 37 Radio Buoy menu, 53 Track window marker, 52 Stabilizer button Range button Setup menu, 50 button Setup menu, 50 Tracking Horizontal menu, 45 Store line, 38 display read-out, 17 sonar images, 30...
- Page 69 Index 307672/B...
- Page 70 ISBN-10: 82-8066-086-0 ISBN-13: 978-82-8066-085-5 2007 Simrad © Simrad Kongsberg Maritime AS Telephone: +47 33 03 40 00 Strandpromenaden 50 Telefax: +47 33 04 29 87 P.O.Box 111 www.simrad.com N-3191 Horten, Norway simrad.sales@simrad.com...
Need help?
Do you have a question about the Simrad SX90 and is the answer not in the manual?
Questions and answers