Table of Contents
Advertisement
CD RECEIVER
RÉCEPTEUR CD
KD-R303/KD-R302/KD-R301
For canceling the display demonstration, see page 6.
Pour annuler la démonstration des affichages, référez-vous à la page 6.
For installation and connections, refer to the separate manual.
Pour l'installation et les raccordements, se référer au manuel séparé.
INSTRUCTIONS
MANUEL D'INSTRUCTIONS
GET0568-003A
[EX/EU]
Advertisement
Chapters
Table of Contents
Troubleshooting

Related Manuals for JVC GET0564-006A


Summary of Contents for JVC GET0564-006A
- Page 1 CD RECEIVER RÉCEPTEUR CD KD-R303/KD-R302/KD-R301 For canceling the display demonstration, see page 6. Pour annuler la démonstration des affichages, référez-vous à la page 6. For installation and connections, refer to the separate manual. Pour l’installation et les raccordements, se référer au manuel séparé. INSTRUCTIONS MANUEL D’INSTRUCTIONS GET0568-003A...
-
Page 2: Important For Laser Products
Notice: The sign Pb below the symbol for batteries indicates that this battery contains lead. Thank you for purchasing a JVC product. possible performance from the unit. Warning: If you need to operate the unit while driving, be sure to look around carefully or you may be involved in a traffic accident. -
Page 3: Table Of Contents
How to reset your unit • Your preset adjustments will also be erased. How to forcibly eject a disc • Be careful not to drop the disc when it ejects. • If this does not work, reset your unit. Detaching the control panel Attaching the control panel CONTENTS OPERATIONS... -
Page 4: Basic Operations
Basic operations • FM/AM: Select preset station. • CD: Select folder. • Turn on the power. • Attenuate the sound (if the power is on). • Turn off the power [Hold]. Select the source. CD * AUX IN * AM * the beginning) •... -
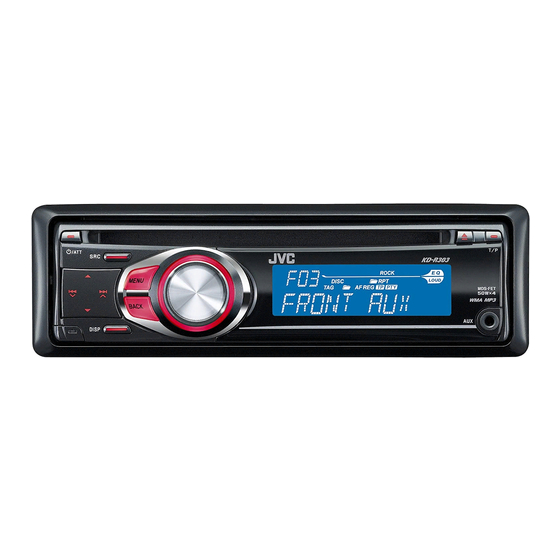
Page 5: Display Window
Display window Tr (track) indicator Source display / Track number / Folder number / Time countdown indicator DISC indicator Sound mode indicators—CLASSIC, HIP HOP, JAZZ, ROCK, POPS, USER Playback mode / item indicators— RND (random), (disc), (folder), RPT (repeat) EQ (equalizer) indicator LOUD (loudness) indicator Disc information indicators—... -
Page 6: Cancel Display Demonstration/Set Clock
Preparation Cancel the display demonstration and set the clock • See also page 13. [Turn] [Press] When the power is turned off: Check the current clock time when “CLOCK DISP” is set to “CLOCK OFF,” (see page 13) When the power is turned on: Change the display information of the current source FM/AM Station Frequency FM Radio... -
Page 7: Manual Presetting
Listening to the radio Select “FM” or “AM.” Search for a station to listen—Auto Search. Manual Search: Hold either one of the buttons until “M” flashes on the display, then press it repeatedly. • When receiving an FM stereo broadcast with sufficient signal strength, “ST” When an FM stereo broadcast is hard to receive •... -
Page 8: Using The Standby Receptions
Selecting preset station The following features are available only for FM Radio Data System stations. Searching for FM Radio Data System programme — PTY Search You can tune in to a station broadcasting your favorite programme by searching for a PTY code. The last selected PTY code appears. -
Page 9: Tracing Same Programme—Network-Tracking Reception
PTY Standby Reception PTY Standby Reception allows the unit to switch temporarily to your favorite PTY programme from any source other than AM. To activate and select your favorite PTY code for PTY Standby Reception, see page 14. The PTY indicator either lights up or flashes. •... -
Page 10: Disc Operations
Disc operations Stop playing and ejecting the disc • “NO DISC” appears. Press SRC to listen to another playback source. Prohibiting disc ejection To cancel the prohibition, repeat the same procedure. Selecting a track/folder [Turn] [Press] • For MP3/WMA discs, select the desired folder, then the desired track by performing the control dial. -
Page 11: Listening To The Other External Components
Selecting the playback modes You can use only one of the following playback modes at a time. [Turn] [Press] Ô REPEAT RANDOM [Turn] [Press] Listening to the other external components You can connect an external component to AUX (auxiliary) input jack on the control panel. Preparation: Make sure “AUX ON”... -
Page 12: Selecting A Preset Sound Mode
Selecting a preset sound mode You can select a preset sound mode suitable to the music genre. • See also page 13 (“EQ”). [Turn] [Press] Select “EQ” Preset value setting for each sound mode Preset values Indication (For) USER (Flat sound) ROCK (Rock or disco music) CLASSIC (Classical music) POPS (Light music) -
Page 13: Menu Operations
Menu operations Category Menu items Selectable settings, [reference page] DEMO • DEMO ON Display demonstration • DEMO OFF CLOCK DISP * • CLOCK ON Clock display • CLOCK OFF CLOCK SET : Adjust the hour, then the minute, [6]. Clock setting 24H/12H •... - Page 14 Category Menu items Selectable settings, [reference page] AF-REG * • AF ON Alternative frequency/ regionalization reception • AF-REG ON • OFF PTY-STANDBY * PTY OFF, PTY PTY standby codes TA VOLUME * VOLUME 00 Traffic – VOLUME 50 announcement (or VOLUME 00 volume –...
-
Page 15: More About This Unit
Category Menu items Selectable settings, [reference page] BEEP • BEEP OFF Keypress tone • BEEP ON TEL MUTING • MUTING 1/ Telephone MUTING 2 muting • MUTING OFF AMP GAIN * • LOW POWER Amplifier gain control • HIGH POWER AM * •... -
Page 16: Fm Radio Data System Operations
FM Radio Data System operations • Network-Tracking Reception requires two types of Radio Data System signals—PI (Programme Identification) and AF (Alternative Frequency) to work correctly. Without receiving these data correctly, Network-Tracking Reception will not operate correctly. • If a Traffic Announcement is received by TA Standby Reception, the volume level automatically changes to the preset level (TA VOL) if the current level is lower than the preset level. -
Page 17: Troubleshooting
• The maximum number of characters for file/folder names vary depending on the disc format used (includes 4 extension characters—<.mp3> or <.wma>). – ISO 9660 Level 1: up to 12 characters – ISO 9660 Level 2: up to 31 characters –... - Page 18 Symptoms • Disc cannot be played back. • CD-R/CD-RW cannot be played back. • Tracks on the CD-R/CD-RW cannot be skipped. • Disc can neither be played back nor ejected. • Unlock the disc (see page 10). • Disc sound is sometimes interrupted. •...
-
Page 19: Maintenance
Maintenance How to clean the connectors Frequent detachment will deteriorate the connectors. To minimize this possibility, periodically wipe the connectors with a cotton swab or cloth moistened with alcohol, being careful not to damage the connectors. Connectors Moisture condensation Moisture may condense on the lens inside the unit in the following cases: •... -
Page 20: Specifications
Specifications AUDIO AMPLIFIER SECTION Maximum Power Output: Continuous Power Output (RMS): Load Impedance: Tone Control Range: Frequency Response: Line-Out Level/Impedance: Output Impedance: Other Terminal: TUNER SECTION Frequency Range: FM Tuner Usable Sensitivity: 50 dB Quieting Sensitivity: Alternate Channel Selectivity (400 kHz): Frequency Response: Stereo Separation: MW Tuner... -
Page 21: Cd Player Section
CD PLAYER SECTION Type: Signal Detection System: Number of Channels: Frequency Response: Dynamic Range: Signal-to-Noise Ratio: Wow and Flutter: MP3 Decoding Format: (MPEG1/2 Audio Layer 3) WMA (Windows Media® Audio) Decoding Format: GENERAL Power Requirement: Grounding System: Allowable Operating Temperature: Dimensions (W ×... - Page 22 This apparatus is in conformance with the valid European directives and standards regarding electromagnetic compatibility and electrical safety. European representative of Victor Company of Japan, Limited JVC Technical Services Europe GmbH Postfach 10 05 04 61145 Friedberg Germany EN, FR ©...
- Page 23 • Be sure to ground this unit to the car’s chassis again after installation. Notes: • Replace the fuse with one of the specified rating. If the fuse blows frequently, consult your JVC IN-CAR ENTERTAINMENT dealer. • It is recommended to connect to the speakers with maximum power of more than 50 W (both at the rear and at the front, with an impedance of 4 Ω...
-
Page 24: Removing The Unit
INSTALLATION (IN-DASH MOUNTING) The following illustration shows a typical installation. If you have any questions or require information regarding installation kits, consult your JVC IN-CAR ENTERTAINMENT dealer or a company supplying kits. • If you are not sure how to install this unit correctly, have it installed by a qualified technician. -
Page 25: Raccordements Electriques
ENGLISH ELECTRICAL CONNECTIONS If your car is equipped with the ISO connector / Si votre voiture est équippée d’un connecteur ISO • Connect the ISO connectors as illustrated. • Connectez les connecteurs ISO comme montré sur l’illustration. From the car body De la carrosserie de la voiture ISO connector of the supplied power cord... -
Page 26: En Cas De Difficultes
Connecting the external amplifier / Connexion d’un amplificateur extérieur You can connect an amplifier to upgrade your car stereo system. • Connect the remote lead (blue with white stripe) to the remote lead of the other equipment so that it can be controlled through this unit. - Page 27 CD RECEIVER CD-RECEIVER РЕСИВЕР С ПРОИГРЫВАТЕЛЕМ КОМПАКТ-ДИСКОВ ∆ΕΚΤΗΣ ΜΕ CD KD-R303/KD-R302/KD-R301/ KD-R33 INSTRUCTIONS BEDIENUNGSANLEITUNG ИНСТРУКЦИИ ПО ЭКСПЛУАТАЦИИ Ο∆ΗΓΙΕΣ GET0568-006A [EY]...
-
Page 28: Important For Laser Products
Notice: The sign Pb below the symbol for batteries indicates that this battery contains lead. Thank you for purchasing a JVC product. possible performance from the unit. Warning: If you need to operate the unit while driving, be sure to look around carefully or you may be involved in a traffic accident. - Page 29 How to reset your unit • Your preset adjustments will also be erased. How to forcibly eject a disc • Be careful not to drop the disc when it ejects. • If this does not work, reset your unit. Detaching the control panel Attaching the control panel CONTENTS OPERATIONS...
-
Page 30: Basic Operations
Basic operations • FM/AM: Select preset station. • CD: Select folder. • Turn on the power. • Attenuate the sound (if the power is on). • Turn off the power [Hold]. Select the source. CD * AUX IN * AM * the beginning) •... - Page 31 Display window Tr (track) indicator Source display / Track number / Folder number / Time countdown indicator DISC indicator Sound mode indicators—CLASSIC, HIP HOP, JAZZ, ROCK, POPS, USER Playback mode / item indicators— RND (random), (disc), (folder), RPT (repeat) EQ (equalizer) indicator LOUD (loudness) indicator Disc information indicators—...
-
Page 32: Preparation
Preparation Cancel the display demonstration and set the clock • See also page 13. [Turn] [Press] When the power is turned off: Check the current clock time when “CLOCK DISP” is set to “CLOCK OFF,” (see page 13) When the power is turned on: Change the display information of the current source FM/AM Station Frequency FM Radio... -
Page 33: Listening To The Radio
Listening to the radio Select “FM” or “AM.” Search for a station to listen—Auto Search. Manual Search: Hold either one of the buttons until “M” flashes on the display, then press it repeatedly. • When receiving an FM stereo broadcast with sufficient signal strength, “ST” When an FM stereo broadcast is hard to receive •... - Page 34 Selecting preset station The following features are available only for FM Radio Data System stations. Searching for FM Radio Data System programme — PTY Search You can tune in to a station broadcasting your favorite programme by searching for a PTY code. The last selected PTY code appears.
- Page 35 PTY Standby Reception PTY Standby Reception allows the unit to switch temporarily to your favorite PTY programme from any source other than AM. To activate and select your favorite PTY code for PTY Standby Reception, see page 14. The PTY indicator either lights up or flashes. •...
-
Page 36: Disc Operations
Disc operations Stop playing and ejecting the disc • “NO DISC” appears. Press SRC to listen to another playback source. Prohibiting disc ejection To cancel the prohibition, repeat the same procedure. Selecting a track/folder [Turn] [Press] • For MP3/WMA discs, select the desired folder, then the desired track by performing the control dial. -
Page 37: Selecting The Playback Modes
Selecting the playback modes You can use only one of the following playback modes at a time. [Turn] [Press] Ô REPEAT RANDOM [Turn] [Press] Listening to the other external components You can connect an external component to AUX (auxiliary) input jack on the control panel. Preparation: Make sure “AUX ON”... -
Page 38: Selecting A Preset Sound Mode
Selecting a preset sound mode You can select a preset sound mode suitable to the music genre. • See also page 13 (“EQ”). [Turn] [Press] Select “EQ” Preset value setting for each sound mode Preset values Indication (For) USER (Flat sound) ROCK (Rock or disco music) CLASSIC (Classical music) POPS (Light music) -
Page 39: Menu Operations
Menu operations Category Menu items Selectable settings, [reference page] DEMO • DEMO ON Display demonstration • DEMO OFF CLOCK DISP * • CLOCK ON Clock display • CLOCK OFF CLOCK SET : Adjust the hour, then the minute, [6]. Clock setting 24H/12H •... - Page 40 Category Menu items Selectable settings, [reference page] AF-REG * • AF ON Alternative frequency/ regionalization reception • AF-REG ON • OFF PTY-STANDBY * PTY OFF, PTY PTY standby codes TA VOLUME * VOLUME 00 Traffic – VOLUME 50 announcement (or VOLUME 00 volume –...
- Page 41 Category Menu items Selectable settings, [reference page] FADER* R06 – F06 Fader BALANCE L06 – R06 Balance LOUD • LOUD OFF Loudness • LOUD ON AUX ADJUST AUX ADJ 00 Auxiliary input — AUX ADJ 05 level adjustment BEEP • BEEP OFF Keypress tone •...
-
Page 42: Color Settings (For Kd-R33)
Color settings (for KD-R33) Creating your own color —USER Color You can create your own colors—“DAY COLOR” or “NIGHT COLOR.” DAY COLOR: Used when “DIMMER” is set to “DIMMER OFF.” NIGHT COLOR: Used when “DIMMER” is set to “DIMMER ON.” Select “COLOR”... -
Page 43: More About This Unit
More about this unit Basic operations Turning on the power • By pressing SRC button on the unit, you can also turn on the power. If the source is ready, playback also starts. Turning off the power • If you turn off the power while listening to a track, playback will start from where it had been stopped previously next time you turn on the power. -
Page 44: Playing An Mp3/Wma Disc
Playing a CD-R or CD-RW • Use only “finalized” CD-Rs or CD-RWs. • This unit can only play back files of the same type as those detected first if a disc includes both audio CD (CD-DA) files and MP3/WMA files. •... -
Page 45: Troubleshooting
Troubleshooting What appears to be trouble is not always serious. Check the following points before calling a service center. Symptoms • Sound cannot be heard from the speakers. • The unit does not work at all. • “AUX IN” cannot be selected. •... - Page 46 Symptoms • Disc cannot be played back. • Noise is generated. • A longer readout time is required (“READING” keeps flashing on the display). • Tracks do not play back in the order you have intended them to play. • The elapsed playing time is not correct. •...
-
Page 47: Maintenance
Maintenance How to clean the connectors Frequent detachment will deteriorate the connectors. To minimize this possibility, periodically wipe the connectors with a cotton swab or cloth moistened with alcohol, being careful not to damage the connectors. Connectors Moisture condensation Moisture may condense on the lens inside the unit in the following cases: •... -
Page 48: Specifications
Specifications AUDIO AMPLIFIER SECTION Maximum Power Output: Continuous Power Output (RMS): Load Impedance: Tone Control Range: Frequency Response: Signal-to-Noise Ratio: Line-Out Level/Impedance: Output Impedance: Other Terminal: TUNER SECTION Frequency Range: FM Tuner Usable Sensitivity: 50 dB Quieting Sensitivity: Alternate Channel Selectivity (400 kHz): Frequency Response: Stereo Separation: MW Tuner... -
Page 49: Cd Player Section
CD PLAYER SECTION Type: Signal Detection System: Number of Channels: Frequency Response: Dynamic Range: Signal-to-Noise Ratio: Wow and Flutter: MP3 Decoding Format: (MPEG1/2 Audio Layer 3) WMA (Windows Media® Audio) Decoding Format: GENERAL Power Requirement: Grounding System: Allowable Operating Temperature: Dimensions (W ×... - Page 50 Having TROUBLE with operation? Please reset your unit Refer to page of How to reset your unit Haben Sie PROBLEME mit dem Betrieb? Bitte setzen Sie Ihr Gerät zurück Siehe Seite Zurücksetzen des Geräts Затруднения при эксплуатации? Пожалуйста, перезагрузите Ваше устройство Для...
- Page 51 Dieses Gerät ist für einen Betrieb in . If your vehicle does not have this system, a voltage inverter is required, which can be purchased at JVC IN- Anlage, ist ein Spannungsinverter erforderlich, der CAR ENTERTAINMENT dealers. bei JVC Autoradiohändler erworben werden kann.
-
Page 52: Einbau
Informationen hinsichtlich des Einbausatzes brauchen, your JVC IN-CAR ENTERTAINMENT dealer or a wenden Sie sich an ihren JVC Autoradiohändler oder company supplying kits. ein Unternehmen das diese Einbausätze vertreibt. • If you are not sure how to install this unit •... - Page 53 ELECTRICAL CONNECTIONS ELEKTRISCHE ANSCHLÜSSE ЭЛЕКТРИЧЕСКИЕ ПОДКЛЮЧЕНИЯ • Connect the ISO connectors as illustrated. • Schließen Sie die ISO-Steckverbinder an, wie in der Abbildung gezeigt. • • Συνδέστε τоυς συνδέσµоυς ISO σύµφωνα µε την εικóνα. From the car body Von der Fahrzeugkarosserie Απó...
-
Page 54: Fehlersuche
Geräts an, so daß es über dieses Gerät this unit. gesteuert werden kann. • • Rear speakers JVC Amplifier Hintere Lautsprecher JVC Verstärker Задние громкоговорители Ενισχυτής JVC Πίσω ηχεία Verbinden Sie den Erdungsleiter mit der Karosserie Firmly attach the ground wire to the metallic body oder dem Rahmen des Fahrzeugs. - Page 55 CD-RWs is lower than that of regular CDs. Thank you for purchasing a JVC product. Please read all instructions carefully before operation, to ensure your complete understanding and to obtain the best possible performance from the unit.
-
Page 56: External Component Operations
OPERATIONS Basic operations Control panel Select the source. • Turn on the power. • Attenuate the sound (if the power is on). • Turn off the power [Hold]. Detach the panel. Check the current clock time/other information. Return to the See also “CLOCK DISP“... -
Page 57: Sound Adjustments
SETTINGS Sound adjustments Indication (For) USER (Flat sound) ROCK (Rock or disco music) CLASSIC (Classical music) POPS (Light music) Select “EQ” HIP HOP (Funk or rap music) JAZZ (Jazz music) * You can change “USER” settings and store as your own sound mode (see below). Storing your own sound mode Select “USER”... -
Page 58: Installation
The following illustration shows a typical installation. If you have any questions or require information regarding installation kits, consult your JVC car audio dealer or a company supplying kits. • If you are not sure how to install this unit correctly, have it installed by a qualified technician. - Page 59 CD RECEIVER KD-R306/KD-R305/KD-R206/KD-R205 KD-R306/KD-R305/KD-R206/KD-R205 For canceling the display demonstration, see page 7. For installation and connections, refer to the separate manual. INSTRUCTIONS GET0564-001A [U/UH]...
- Page 60 Lower the volume before playing a disc to avoid damaging the speakers by the sudden increase of the output level. Thank you for purchasing a JVC product. possible performance from the unit. For safety... • Do not raise the volume level too much, as this will block outside sounds, making driving dangerous.
- Page 61 How to reset your unit • Your preset adjustments will also be erased. How to forcibly eject a disc • Be careful not to drop the disc when it ejects. • If this does not work, reset your unit. Detaching the control panel Attaching the control panel CONTENTS OPERATIONS...
-
Page 62: Basic Operations
Basic operations Using the control panel • FM/AM: Select preset station. • CD: Select folder (for KD-R306/KD-R305). • Turn on the power. • Attenuate the sound (if the power is on). • Turn off the power [Hold]. Select the source. AM * CD * AUX IN *... - Page 63 Display window Tr (track) indicator Source display / Track number / Folder number / Time countdown indicator DISC indicator Sound mode indicators—CLASSIC, HIP HOP, JAZZ, ROCK, POPS, USER EQ (equalizer) indicator LOUD (loudness) indicator Disc information indicators (for KD-R306/ KD-R305)—TAG (Tag information), file), (folder) Main display...
-
Page 64: Using The Remote Controller (Rm-Rk50)
Using the remote controller (RM-RK50) RM-RK50 is supplied only for KD-R306/KD-R305 Installing the lithium coin battery (CR2025) Caution: • Danger of explosion if battery is incorrectly replaced. Replace only with the same or equivalent type. • Battery shall not be exposed to excessive heat such as sunshine, fire, or the like. -
Page 65: Preparation
Preparation Cancel the display demonstration and set the clock • See also page 13. [Turn] [Press] When the power is turned off: Check the current clock time when “CLOCK DISP” is set to “CLOCK OFF,” (see page 13) When the power is turned on: Change the display information of the current source Station name * FM/AM Audio CD/CD Text: Disc title/performer *... -
Page 66: Listening To The Radio
Listening to the radio Select “FM” or “AM.” Search for a station to listen—Auto Search. Manual Search: Hold either one of the buttons until “M” flashes on the display, then press it repeatedly. • When receiving an FM stereo broadcast with sufficient signal strength, “ST” lights up on the display. -
Page 67: Disc Operations
Selecting preset station Disc operations Stop playing and ejecting the disc • “NO DISC” appears. Press SRC to listen to another playback source. Prohibiting disc ejection To cancel the prohibition, repeat the same procedure. [Turn] [Press] Turn on the power. Insert a disc. -
Page 68: Listening To The Other External Components
Selecting the playback modes You can use only one of the following playback modes at a time. [Turn] [Press] Ô REPEAT RANDOM [Turn] [Press] Listening to the other external components You can connect an external component to AUX (auxiliary) input jack on the control panel. Preparation: Make sure “AUX ON”... -
Page 69: Settings
Selecting a preset sound mode You can select a preset sound mode suitable to the music genre. • See also page 13 (“EQ”). Selecting from Menu. [Turn] [Press] Select “EQ” Preset value setting for each sound mode Preset values Indication (For) USER (Flat sound) ROCK (Rock or disco music) CLASSIC (Classical music) -
Page 70: Title Assignment
Title assignment You can assign titles to 30 station frequencies (FM and AM) using 8 characters (maximum) for each title. Select “FM” or “AM.” Show the title entry screen. Assign a title. Select a character. Move to the next (or previous) character position. -
Page 71: Menu Operations
Menu operations Category Menu items Selectable settings, [reference page] DEMO • DEMO ON Display demonstration • DEMO OFF CLOCK DISP * • CLOCK ON Clock display • CLOCK OFF CLOCK SET : Adjust the hour, then the minute, [7]. Clock setting [Initial: 1:00] : Select a preset sound mode suitable to the music genre. - Page 72 Category Menu items Selectable settings, [reference page] MONO * • MONO ON Monaural mode • MONO OFF IF BAND • AUTO Intermediate frequency band • WIDE FADER* R06 – F06 Fader BALANCE L06 – R06 Balance LOUD • LOUD OFF Loudness •...
-
Page 73: More About This Unit
More about this unit Basic operations Turning on the power • By pressing SRC button on the unit, you can also turn on the power. If the source is ready, playback also starts. Turning off the power • If you turn off the power while listening to a track, playback will start from where it had been stopped previously next time you turn on the power. -
Page 74: Playing An Mp3/Wma Disc
– The files on the CD-R/CD-RW are written using the “Packet Write” method. – There are improper recording conditions (missing data, etc.) or media conditions (stained, scratched, warped, etc.). • CD-RWs may require a longer readout time since the reflectance of CD-RWs is lower than that of regular CDs. -
Page 75: Troubleshooting
Troubleshooting What appears to be trouble is not always serious. Check the following points before calling a service center. Symptoms • Sound cannot be heard from the speakers. • The unit does not work at all. • “AUX IN” cannot be selected. •... - Page 76 Symptoms • Disc cannot be played back. • Noise is generated. • A longer readout time is required (“READING” keeps flashing on the display). • Tracks do not play back in the order you have intended them to play. • The elapsed playing time is not correct. •...
-
Page 77: Maintenance
Maintenance How to clean the connectors Frequent detachment will deteriorate the connectors. To minimize this possibility, periodically wipe the connectors with a cotton swab or cloth moistened with alcohol, being careful not to damage the connectors. Connectors Moisture condensation Moisture may condense on the lens inside the unit in the following cases: •... -
Page 78: Specifications
Specifications AUDIO AMPLIFIER SECTION Maximum Power Output: Continuous Power Output (RMS): Load Impedance: Tone Control Range: Frequency Response: Signal-to-Noise Ratio: Line-Out Level/Impedance: Output Impedance: Other Terminal: TUNER SECTION Frequency Range: FM Tuner Usable Sensitivity: 50 dB Quieting Sensitivity: Alternate Channel Selectivity (400 kHz): Frequency Response: Stereo Separation: AM Tuner... -
Page 79: Cd Player Section
CD PLAYER SECTION Type: Signal Detection System: Number of Channels: Frequency Response: Dynamic Range: Signal-to-Noise Ratio: Wow and Flutter: For KD-R306/KD-R305: MP3 Decoding Format: (MPEG1/2 Audio Layer 3) WMA (Windows Media® Audio) Decoding Format: GENERAL Power Requirement: Grounding System: Allowable Operating Temperature: Dimensions (W ×... - Page 80 Having TROUBLE with operation? Please reset your unit Refer to page of How to reset your unit EN, TH © 2008 Victor Company of Japan, Limited 0808DTSMDTJEIN...
-
Page 81: Installation/Connection Manual
• Be sure to ground this unit to the car’s chassis again after installation. Notes: • Replace the fuse with one of the specified rating. If the fuse blows frequently, consult your JVC car audio dealer. • It is recommended to connect speakers with a maximum power of more than 50 W (both at the rear and at the front, with an impedance of 4 Ω... -
Page 82: Removing The Unit
The following illustration shows a typical installation. If you have any questions or require information regarding installation kits, consult your JVC car audio dealer or a company supplying kits. • If you are not sure how to install this unit correctly, have it installed by a qualified technician. -
Page 83: Electrical Connections
ENGLISH ELECTRICAL CONNECTIONS Typical connections / °“√‡™◊ Ë Õ ¡µË Õ ·∫∫ª°µ Before connecting: Check the wiring in the vehicle carefully. Incorrect connection may cause serious damage to this unit. The leads of the power cord and those of the connector from the car body may be different in color. Connect the colored leads of the power cord in the order specified in the illustration below. - Page 84 Connecting the external amplifier / You can connect an amplifier to upgrade your car stereo system. • Connect the remote lead (blue with white stripe) to the remote lead of the other equipment so that it can be controlled through this unit.
- Page 85 • Be sure to ground this unit to the car’s chassis again after installation. Notes: • Replace the fuse with one of the specified rating. If the fuse blows frequently, consult your JVC car audio dealer. • It is recommended to connect speakers with a maximum power of more than 50 W (both at the rear and at the front, with an impedance of 4 Ω...
- Page 86 The following illustration shows a typical installation. If you have any questions or require information regarding installation kits, consult your JVC car audio dealer or a company supplying kits. • If you are not sure how to install this unit correctly, have it installed by a qualified technician.
- Page 87 ENGLISH ELECTRICAL CONNECTIONS Typical connections / 典型的接線方法 Before connecting: Check the wiring in the vehicle carefully. Incorrect connection may cause serious damage to this unit. The leads of the power cord and those of the connector from the car body may be different in color. Connect the colored leads of the power cord in the order specified in the illustration below.
- Page 88 Connecting the external amplifier / 連接至外部功率放大器 You can connect an amplifier to upgrade your car stereo system. • Connect the remote lead (blue with white stripe) to the remote lead of the other equipment so that it can be controlled through this unit.
-
Page 89: Selecting A Preset Sound Mode
Selecting a preset sound mode You can select a preset sound mode suitable to the music genre. • See also page 13 (“EQ”). Selecting from Menu. [Turn] [Press] Select “EQ” Preset value setting for each sound mode Preset values Indication (For) USER (Flat sound) ROCK (Rock or disco music) CLASSIC (Classical music) -
Page 90: Title Assignment
Title assignment You can assign titles to 30 station frequencies (FM and AM) using 8 characters (maximum) for each title. Select “FM” or “AM.” Show the title entry screen. Assign a title. Select a character. Move to the next (or previous) character position. -
Page 91: Menu Operations
Menu operations Category Menu items Selectable settings, [reference page] DEMO • DEMO ON Display demonstration • DEMO OFF CLOCK DISP * • CLOCK ON Clock display • CLOCK OFF CLOCK SET : Adjust the hour, then the minute, [7]. Clock setting [Initial: 1:00] : Select a preset sound mode suitable to the music genre. - Page 92 Category Menu items Selectable settings, [reference page] MONO * • MONO ON Monaural mode • MONO OFF IF BAND • AUTO Intermediate frequency band • WIDE FADER* R06 – F06 Fader BALANCE L06 – R06 Balance LOUD • LOUD OFF Loudness •...
-
Page 93: More About This Unit
More about this unit Basic operations Turning on the power • By pressing SRC button on the unit, you can also turn on the power. If the source is ready, playback also starts. Turning off the power • If you turn off the power while listening to a track, playback will start from where it had been stopped previously next time you turn on the power. -
Page 94: Playing An Mp3/Wma Disc
– The files on the CD-R/CD-RW are written using the “Packet Write” method. – There are improper recording conditions (missing data, etc.) or media conditions (stained, scratched, warped, etc.). • CD-RWs may require a longer readout time since the reflectance of CD-RWs is lower than that of regular CDs. - Page 95 Troubleshooting What appears to be trouble is not always serious. Check the following points before calling a service center. Symptoms • Sound cannot be heard from the speakers. • The unit does not work at all. • “AUX IN” cannot be selected. •...
- Page 96 Symptoms • Disc cannot be played back. • Noise is generated. • A longer readout time is required (“READING” keeps flashing on the display). • Tracks do not play back in the order you have intended them to play. • The elapsed playing time is not correct. •...
-
Page 97: Maintenance
Maintenance How to clean the connectors Frequent detachment will deteriorate the connectors. To minimize this possibility, periodically wipe the connectors with a cotton swab or cloth moistened with alcohol, being careful not to damage the connectors. Connectors Moisture condensation Moisture may condense on the lens inside the unit in the following cases: •... -
Page 98: Specifications
Specifications AUDIO AMPLIFIER SECTION Maximum Power Output: Continuous Power Output (RMS): Load Impedance: Tone Control Range: Frequency Response: Signal-to-Noise Ratio: Line-Out Level/Impedance: Output Impedance: Other Terminal: TUNER SECTION Frequency Range: FM Tuner Usable Sensitivity: 50 dB Quieting Sensitivity: Alternate Channel Selectivity (400 kHz): Frequency Response: Stereo Separation: AM Tuner... -
Page 99: Cd Player Section
CD PLAYER SECTION Type: Signal Detection System: Number of Channels: Frequency Response: Dynamic Range: Signal-to-Noise Ratio: Wow and Flutter: For KD-R306/KD-R305: MP3 Decoding Format: (MPEG1/2 Audio Layer 3) WMA (Windows Media® Audio) Decoding Format: GENERAL Power Requirement: Grounding System: Allowable Operating Temperature: Dimensions (W ×... - Page 100 Having TROUBLE with operation? Please reset your unit Refer to page of How to reset your unit Ada MASALAH dengan cara pengoperasian? Setel kembali unit Anda Lihat halaman mengenai Bagaimana mereset unit anda EN, IN © 2008 Victor Company of Japan, Limited 0808DTSMDTJEIN...
- Page 101 • Be sure to ground this unit to the car’s chassis again after installation. Notes: • Replace the fuse with one of the specified rating. If the fuse blows frequently, consult your JVC car audio dealer. • It is recommended to connect speakers with a maximum power of more than 50 W (both at the rear and at the front, with an impedance of 4 Ω...
- Page 102 The following illustration shows a typical installation. If you have any questions or require information regarding installation kits, consult your JVC car audio dealer or a company supplying kits. • If you are not sure how to install this unit correctly, have it installed by a qualified technician.
-
Page 103: Electrical Connections
ENGLISH ELECTRICAL CONNECTIONS Typical connections / Ciri khas sambungan-sambungan Before connecting: Check the wiring in the vehicle carefully. Incorrect connection may cause serious damage to this unit. The leads of the power cord and those of the connector from the car body may be different in color. Connect the colored leads of the power cord in the order specified in the illustration below. -
Page 104: Pemecahan Masalah
Connecting the external amplifier / Penyambungan penguat eksternal You can connect an amplifier to upgrade your car stereo system. • Connect the remote lead (blue with white stripe) to the remote lead of the other equipment so that it can be controlled through this unit. -
Page 105: Selecting A Preset Sound Mode
Selecting a preset sound mode You can select a preset sound mode suitable to the music genre. • See also page 13 (“EQ”). Selecting from Menu. [Turn] [Press] Select “EQ” Preset value setting for each sound mode Preset values Indication (For) USER (Flat sound) ROCK (Rock or disco music) CLASSIC (Classical music) - Page 106 Title assignment You can assign titles to 30 station frequencies (FM and AM) using 8 characters (maximum) for each title. Select “FM” or “AM.” Show the title entry screen. Assign a title. Select a character. Move to the next (or previous) character position.
-
Page 107: Menu Operations
Menu operations Category Menu items Selectable settings, [reference page] DEMO • DEMO ON Display demonstration • DEMO OFF CLOCK DISP * • CLOCK ON Clock display • CLOCK OFF CLOCK SET : Adjust the hour, then the minute, [7]. Clock setting [Initial: 1:00] : Select a preset sound mode suitable to the music genre. - Page 108 Category Menu items Selectable settings, [reference page] MONO * • MONO ON Monaural mode • MONO OFF IF BAND • AUTO Intermediate frequency band • WIDE FADER* R06 – F06 Fader BALANCE L06 – R06 Balance LOUD • LOUD OFF Loudness •...
-
Page 109: More About This Unit
More about this unit Basic operations Turning on the power • By pressing SRC button on the unit, you can also turn on the power. If the source is ready, playback also starts. Turning off the power • If you turn off the power while listening to a track, playback will start from where it had been stopped previously next time you turn on the power. -
Page 110: Playing An Mp3/Wma Disc
– The files on the CD-R/CD-RW are written using the “Packet Write” method. – There are improper recording conditions (missing data, etc.) or media conditions (stained, scratched, warped, etc.). • CD-RWs may require a longer readout time since the reflectance of CD-RWs is lower than that of regular CDs. - Page 111 Troubleshooting What appears to be trouble is not always serious. Check the following points before calling a service center. Symptoms • Sound cannot be heard from the speakers. • The unit does not work at all. • “AUX IN” cannot be selected. •...
- Page 112 Symptoms • Disc cannot be played back. • Noise is generated. • A longer readout time is required (“READING” keeps flashing on the display). • Tracks do not play back in the order you have intended them to play. • The elapsed playing time is not correct. •...
-
Page 113: Maintenance
Maintenance How to clean the connectors Frequent detachment will deteriorate the connectors. To minimize this possibility, periodically wipe the connectors with a cotton swab or cloth moistened with alcohol, being careful not to damage the connectors. Connectors Moisture condensation Moisture may condense on the lens inside the unit in the following cases: •... -
Page 114: Specifications
Specifications AUDIO AMPLIFIER SECTION Maximum Power Output: Continuous Power Output (RMS): Load Impedance: Tone Control Range: Frequency Response: Signal-to-Noise Ratio: Line-Out Level/Impedance: Output Impedance: Other Terminal: TUNER SECTION Frequency Range: FM Tuner Usable Sensitivity: 50 dB Quieting Sensitivity: Alternate Channel Selectivity (400 kHz): Frequency Response: Stereo Separation: AM Tuner... -
Page 115: Cd Player Section
CD PLAYER SECTION Type: Signal Detection System: Number of Channels: Frequency Response: Dynamic Range: Signal-to-Noise Ratio: Wow and Flutter: For KD-R306/KD-R305: MP3 Decoding Format: (MPEG1/2 Audio Layer 3) WMA (Windows Media® Audio) Decoding Format: GENERAL Power Requirement: Grounding System: Allowable Operating Temperature: Dimensions (W ×... - Page 116 Having TROUBLE with operation? Please reset your unit Refer to page of How to reset your unit Ada MASALAH dengan cara pengoperasian? Setel kembali unit Anda Lihat halaman mengenai Bagaimana mereset unit anda EN, IN © 2008 Victor Company of Japan, Limited 0808DTSMDTJEIN...
- Page 117 • Be sure to ground this unit to the car’s chassis again after installation. Notes: • Replace the fuse with one of the specified rating. If the fuse blows frequently, consult your JVC car audio dealer. • It is recommended to connect speakers with a maximum power of more than 50 W (both at the rear and at the front, with an impedance of 4 Ω...
- Page 118 The following illustration shows a typical installation. If you have any questions or require information regarding installation kits, consult your JVC car audio dealer or a company supplying kits. • If you are not sure how to install this unit correctly, have it installed by a qualified technician.
-
Page 119: Electrical Connections
ENGLISH ELECTRICAL CONNECTIONS Typical connections / Ciri khas sambungan-sambungan Before connecting: Check the wiring in the vehicle carefully. Incorrect connection may cause serious damage to this unit. The leads of the power cord and those of the connector from the car body may be different in color. Connect the colored leads of the power cord in the order specified in the illustration below. -
Page 120: Pemecahan Masalah
Connecting the external amplifier / Penyambungan penguat eksternal You can connect an amplifier to upgrade your car stereo system. • Connect the remote lead (blue with white stripe) to the remote lead of the other equipment so that it can be controlled through this unit. -
Page 121: Installation/Connection Manual
• Be sure to ground this unit to the car’s chassis again after installation. Notes: • Replace the fuse with one of the specified rating. If the fuse blows frequently, consult your JVC car audio dealer. • It is recommended to connect speakers with a maximum power of more than 50 W (both at the rear and at the front, with an impedance of 4 Ω... -
Page 122: Removing The Unit
The following illustration shows a typical installation. If you have any questions or require information regarding installation kits, consult your JVC car audio dealer or a company supplying kits. • If you are not sure how to install this unit correctly, have it installed by a qualified technician. - Page 123 ENGLISH ELECTRICAL CONNECTIONS Typical connections / 典型的接線方法 Before connecting: Check the wiring in the vehicle carefully. Incorrect connection may cause serious damage to this unit. The leads of the power cord and those of the connector from the car body may be different in color. Connect the colored leads of the power cord in the order specified in the illustration below.
- Page 124 Connecting the external amplifier / 連接至外部功率放大器 You can connect an amplifier to upgrade your car stereo system. • Connect the remote lead (blue with white stripe) to the remote lead of the other equipment so that it can be controlled through this unit.
- Page 125 • Be sure to ground this unit to the car’s chassis again after installation. Notes: • Replace the fuse with one of the specified rating. If the fuse blows frequently, consult your JVC car audio dealer. • It is recommended to connect speakers with a maximum power of more than 50 W (both at the rear and at the front, with an impedance of 4 Ω...
- Page 126 The following illustration shows a typical installation. If you have any questions or require information regarding installation kits, consult your JVC car audio dealer or a company supplying kits. • If you are not sure how to install this unit correctly, have it installed by a qualified technician.
- Page 127 ENGLISH ELECTRICAL CONNECTIONS Typical connections / 典型的接線方法 Before connecting: Check the wiring in the vehicle carefully. Incorrect connection may cause serious damage to this unit. The leads of the power cord and those of the connector from the car body may be different in color. Connect the colored leads of the power cord in the order specified in the illustration below.
- Page 128 Connecting the external amplifier / 連接至外部功率放大器 You can connect an amplifier to upgrade your car stereo system. • Connect the remote lead (blue with white stripe) to the remote lead of the other equipment so that it can be controlled through this unit.
- Page 129 Selecting a preset sound mode You can select a preset sound mode suitable to the music genre. • See also page 13 (“EQ”). Selecting from Menu. [Turn] [Press] Select “EQ” Preset value setting for each sound mode Preset values Indication (For) USER (Flat sound) ROCK (Rock or disco music) CLASSIC (Classical music)
-
Page 130: Title Assignment
Title assignment You can assign titles to 30 station frequencies (FM and AM) using 8 characters (maximum) for each title. Select “FM” or “AM.” Show the title entry screen. Assign a title. Select a character. Move to the next (or previous) character position. -
Page 131: Menu Operations
Menu operations Category Menu items Selectable settings, [reference page] DEMO • DEMO ON Display demonstration • DEMO OFF CLOCK DISP * • CLOCK ON Clock display • CLOCK OFF CLOCK SET : Adjust the hour, then the minute, [7]. Clock setting [Initial: 1:00] : Select a preset sound mode suitable to the music genre. - Page 132 Category Menu items Selectable settings, [reference page] MONO * • MONO ON Monaural mode • MONO OFF IF BAND • AUTO Intermediate frequency band • WIDE FADER* R06 – F06 Fader BALANCE L06 – R06 Balance LOUD • LOUD OFF Loudness •...
-
Page 133: More About This Unit
More about this unit Basic operations Turning on the power • By pressing SRC button on the unit, you can also turn on the power. If the source is ready, playback also starts. Turning off the power • If you turn off the power while listening to a track, playback will start from where it had been stopped previously next time you turn on the power. - Page 134 – The files on the CD-R/CD-RW are written using the “Packet Write” method. – There are improper recording conditions (missing data, etc.) or media conditions (stained, scratched, warped, etc.). • CD-RWs may require a longer readout time since the reflectance of CD-RWs is lower than that of regular CDs.
- Page 135 Troubleshooting What appears to be trouble is not always serious. Check the following points before calling a service center. Symptoms • Sound cannot be heard from the speakers. • The unit does not work at all. • “AUX IN” cannot be selected. •...
- Page 136 Symptoms • Disc cannot be played back. • Noise is generated. • A longer readout time is required (“READING” keeps flashing on the display). • Tracks do not play back in the order you have intended them to play. • The elapsed playing time is not correct. •...
-
Page 137: Maintenance
Maintenance How to clean the connectors Frequent detachment will deteriorate the connectors. To minimize this possibility, periodically wipe the connectors with a cotton swab or cloth moistened with alcohol, being careful not to damage the connectors. Connectors Moisture condensation Moisture may condense on the lens inside the unit in the following cases: •... -
Page 138: Specifications
Specifications AUDIO AMPLIFIER SECTION Maximum Power Output: Continuous Power Output (RMS): Load Impedance: Tone Control Range: Frequency Response: Signal-to-Noise Ratio: Line-Out Level/Impedance: Output Impedance: Other Terminal: TUNER SECTION Frequency Range: FM Tuner Usable Sensitivity: 50 dB Quieting Sensitivity: Alternate Channel Selectivity (400 kHz): Frequency Response: Stereo Separation: AM Tuner... - Page 139 CD PLAYER SECTION Type: Signal Detection System: Number of Channels: Frequency Response: Dynamic Range: Signal-to-Noise Ratio: Wow and Flutter: For KD-R306/KD-R305: MP3 Decoding Format: (MPEG1/2 Audio Layer 3) WMA (Windows Media® Audio) Decoding Format: GENERAL Power Requirement: Grounding System: Allowable Operating Temperature: Dimensions (W ×...
- Page 140 Having TROUBLE with operation? Please reset your unit Refer to page of How to reset your unit Ada MASALAH dengan cara pengoperasian? Setel kembali unit Anda Lihat halaman mengenai Bagaimana mereset unit anda EN, IN © 2008 Victor Company of Japan, Limited 0808DTSMDTJEIN...
- Page 141 • Be sure to ground this unit to the car’s chassis again after installation. Notes: • Replace the fuse with one of the specified rating. If the fuse blows frequently, consult your JVC car audio dealer. • It is recommended to connect speakers with a maximum power of more than 50 W (both at the rear and at the front, with an impedance of 4 Ω...
- Page 142 The following illustration shows a typical installation. If you have any questions or require information regarding installation kits, consult your JVC car audio dealer or a company supplying kits. • If you are not sure how to install this unit correctly, have it installed by a qualified technician.
-
Page 143: Electrical Connections
ENGLISH ELECTRICAL CONNECTIONS Typical connections / Ciri khas sambungan-sambungan Before connecting: Check the wiring in the vehicle carefully. Incorrect connection may cause serious damage to this unit. The leads of the power cord and those of the connector from the car body may be different in color. Connect the colored leads of the power cord in the order specified in the illustration below. - Page 144 Connecting the external amplifier / Penyambungan penguat eksternal You can connect an amplifier to upgrade your car stereo system. • Connect the remote lead (blue with white stripe) to the remote lead of the other equipment so that it can be controlled through this unit.
- Page 145 – Connect the equipment into an outlet on a circuit different from that to which the receiver is connected. – Consult the dealer or an experienced radio/TV technician for help. Caution Changes or modifications not approved by JVC could void the user’s authority to operate the equipment. IMPORTANT FOR LASER PRODUCTS 1. CLASS 1 LASER PRODUCT 2.
-
Page 146: Radio Operations
OPERATIONS Basic operations Control panel Select the source. • Turn on the power. • Attenuate the sound (if the power is on). • Turn off the power [Hold]. Detach the panel. Check the current clock time/other information. Return to the See also “CLOCK DISP“... - Page 147 (7-7/16” × 2-5/16” × 1/4”) Mass (approx.): 1.3 kg (2.9 lbs) (excluding accessories) Design and specifications are subject to change without notice. Having TROUBLE with operation? Please reset your unit Still having trouble?? Call 1-800-252-5722 (USA ONLY) http://www.jvc.com Initial: Underlined...
-
Page 148: Installation
The following illustration shows a typical installation. If you have any questions or require information regarding installation kits, consult your JVC car audio dealer or a company supplying kits. • If you are not sure how to install this unit correctly, have it installed by a qualified technician. -
Page 149: Canceling The Display Demonstrations
CD-RWs is lower than that of regular CDs. may not be recommended. Thank you for purchasing a JVC product. Please read all instructions carefully before operation, to ensure your complete understanding and to obtain the best possible performance from the unit. - Page 150 OPERATIONS Basic operations Control panel Select the source. • Turn on the power. • Attenuate the sound (if the power is on). • Turn off the power [Hold]. Detach the panel. Check the current clock time/other information. Return to the See also “CLOCK DISP“...
- Page 151 SETTINGS Sound adjustments Indication (For) USER (Flat sound) ROCK (Rock or disco music) CLASSIC (Classical music) POPS (Light music) Select “EQ” HIP HOP (Funk or rap music) JAZZ (Jazz music) * You can change “USER” settings and store as your own sound mode (see below). Storing your own sound mode Select “USER”...
- Page 152 The following illustration shows a typical installation. If you have any questions or require information regarding installation kits, consult your JVC car audio dealer or a company supplying kits. • If you are not sure how to install this unit correctly, have it installed by a qualified technician.
Need help?
Do you have a question about the GET0564-006A and is the answer not in the manual?
Questions and answers