Table of Contents
Advertisement
Advertisement
Table of Contents

Related Manuals for TV Ears TV


Summary of Contents for TV Ears TV
- Page 1 TV Ears TV Instruction Manual...
- Page 2 TV Ears TV even shuts off when you fall asleep! Instead of programming a built in shut off timer the TV Ears TV shuts off after four hours of inactivity; perfect for when you have left the house or fallen asleep. TV Ears proprietary Voice Clarifying Circuitry makes difficult to hear words and dialogue “jump out”...
-
Page 3: Table Of Contents
2 | Top Panel Controls 3 | Rear Panel Connections Remote Control ..............1 | Remote Control Instructions in TV Mode 2 | Remote Control Setup → Battery Installation Headset Overview ..............1 | Battery and Pairing Light 2 | Using the Headset... -
Page 4: Warning / Caution
FCC Caution Pursuant to 47CFR, Part 15.21 of the FCC rules, any changes or modifications to this TV receiver not expressly approved by the manufacturer could cause harmful interference and would void the user’s authority to operate this device. -
Page 5: Important Safety Instructions
6. Ventilation - Do not block any ventilation openings on the back of the TV. Install in accordance with the manufacturer’s instructions. - Page 6 Safety Instructions 13. Lightning - Unplug the apparatus during lightning storms or when unused for a long period of time. This will prevent damage to the equipment due to lightning and power-line surges. 14. Servicing - Refer all servicing to qualified service personnel. Servicing is required when the apparatus has been damaged in any way, such as the power-supply cord or plug is damaged, liquid has been spilled or objects have fallen into the apparatus, the apparatus has been exposed to rain or moisture, does not operate normally, or has been dropped.
- Page 7 We have not had any customers indicate a problem using TV Ears in the presence of a pacemaker or internal defibrillator. We recommend not placing the ear tip ends of the headsets (where the speakers are) on your chest or directly in the vicinity of a pacemaker or defibrillator.
-
Page 8: Contents
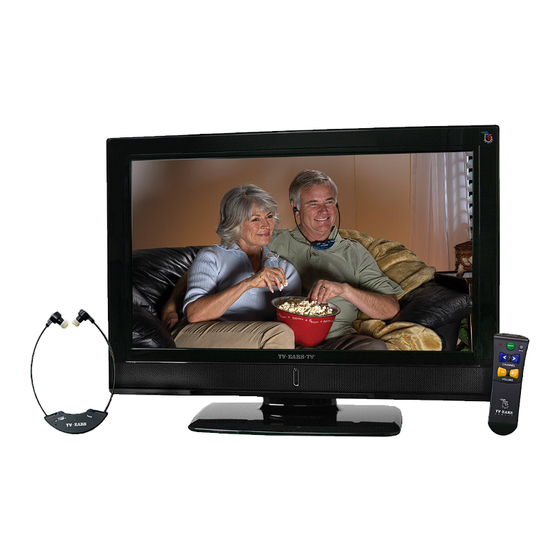
Contents TV, Remote & Headset Manual & Power Cord (not pictured) Headset TV Remote & AC Adapter & AAA Batteries (not pictured) (not pictured) TV EARS Remote Manual TV EARS Remote & AAA Batteries (not pictured) -
Page 9: Television Antenna Connection Protection
Protection External Television Antenna Grounding If an outside antenna, satellite dish or cable system is to be connected to the TV, make sure that the antenna or cable system is electrically grounded to provide some protection against voltage surges and static charges. -
Page 10: Basic Controls
MENU – Will bring the main menu on the screen. CH +/- – Use these buttons to step up or down the TV channels. When the On Screen Display (OSD ) is active, these buttons function as up and down controls in the OSD menus. -
Page 11: Rear Panel Connections
Basic TV Controls and Connections | Front & Top Panel Controls POWER 1. POWER 2. CH+ or CH- 3. VOL+ or VOL- 4. MENU 5. SOURCE 6. Power Indicator Light 7. Remote Sensor Light 6 , 7 | Rear Panel Connections 1. -
Page 12: Remote Control
Remote Control Instructions in TV mode 1 | Remote Control instructions in TV mode POWER ( Turns TV on when in standby mode. Returns TV to standby mode when on. MUTE ( Turns sound on and off. INPUT: Allows user to cycle through input source. Use scroll to preferred source &... -
Page 13: Remote Control Setup → Battery Installation
Remote Control Set Up 2 | Remote Control Setup 1. Remove the battery cover. 2. Insert AAA size batteries into the battery compartment of the remote. When inserting the batteries, make sure that you match the (+) and (-) symbols on the batteries with the (+) and (-) symbols inside the battery compartment. -
Page 14: Headset Overview
Headset Overview Front View of Headet| 1. On & Off / Volume 2. Tone 3. Indicator Light 4. AC Adapter (not pictured) -
Page 15: Battery And Pairing Light
Turning off the headset | Turn the headset off. After it is turned off, the TV screen will say “TV Ears Disconnected”. Walked too far away from TV | The headset will lose sound and the TV will say “ TV Ears Disconnected”. (Depending on environment, the distance may vary.) Walked back in range of TV signal | The headset will regain sound and the TV will say “TV Ears Connected”. -
Page 16: Pairing Headset
Step 6 | Scroll down until PAIR is highlighted and press ENTER. Step 7 | Turn on the headset. Step 8 | A pop up will appear on your screen that says “TV Ears pairing…press menu to exit”. Step 9 | Once pairing is complete your TV will say “TV Ears Pair Success…”. -
Page 17: Wall Mounting
Wall Mounting | Wall Mounting your TV Ears TV Your TV Ears TV can be mounted on the wall. If you choose to mount your TV•EARS TV on the wall, follow the instructions below. 1. If the base has been attached, remove the base: •... -
Page 18: Tv Installation
TV Installation | Power Cord Connection 1. Plug the power cord into the port labeled AC IN on the back of the TV. 2. Plug the opposite end of the power cord into a standard electrical outlet or surge protector. -
Page 19: Av / Composite Connection
3. Connect the video cable of the port labeled Video on the back of the TV. 4. Connect the audio cables to the ports labeled L & R on the back of the TV. 5. In the source list, select Composite. -
Page 20: Ypbpr / Component Connection
3. Connect the component cable to the ports labeled Y, Pb, & Pr (1 or 2) on the back of the TV. 4. Connect the audio cables to the ports TV labeled L & R on the back of the TV. 5. In the source list, select Component (1 or 2). -
Page 21: Vga / Computer Connection
2. Connect the audio cable to the audio out or heaphone jack on the computer. 3. Connect the VGA cable to the port labled VGA (PC) on the back of the TV. 4. Connect the audio cable to the port labled PC Audio on the back of the TV. -
Page 22: Basic Operations
Basic Operations Turning the TV On & Off: Press the Power button on either of the remotes or the TV control panel. The power indicator light will turn GREEN when the TV is ON and RED when the TV is OFF. -
Page 23: Osd Adjustment
OSD Adjustments On Screen Display (OSD) Adjustment Press the MENU button on your remote control or on the top panel of the TV to display the main menu. Press buttons to navigate to a topic and to select the topic. -
Page 24: Osd Adjustment
OSD Adjustments Picture Options 1 |Picture Options Picture Menu Opti Press to select the item you would like to adjust, then press ENTER or to select that item. Picture Picture Mode User Picture Brightness Sound Contrast Color Channel Tint Sharpness Settings Advanced Video Enter... -
Page 25: Sound Option
OSD Adjustments Sound Options 2 | Sound Options Press to select the item you would like to adjust, then press ENTER or to select that item. Sound Equalizer Mode User Picture Balance Audio Channel Stereo Sound Audio Language 1 English Channel Audio Language 2 English... -
Page 26: Channel Option
OSD Adjustment Channel Options 3 | Channel Options ( Only available with input source set to TV) Press to select the item you would like to adjust, then press ENTER or to select that item. Channel Tuning Band Cable Picture... -
Page 27: Channel Options
OSD Adjustment Channel Options • Manual Channel Set – This function will add the channels that were not detected during the auto channel search process. • Press ENTER/ to select skipped or viewable. Channel Manual Channel Set Channels List Picture Viewable Skipped Sound... -
Page 28: Settings Option
Settings Parental Control Menu Picture Time Set Closed Caption Sound Menu Setting Channel Input Labels TV EARS Settings Reset Enter Menu to Move to Select to Exit Parental Control | • Press to select the item you would like to adjust, then press ENTER or to select that item. - Page 29 OSD Adjustments Setting Options Canada Ratings - • Press to select the item you would like to adjust, then press ENTER or to select that item. Canadian Rating Menu Canadian English Canadian French NONE NONE 8 ans+ 13 ans+ 16 ans+ 18 ans+ Enter Menu...
-
Page 30: Time Set
OSD Adjustment Setting Options Intelligence Level - • Press to select the item you would like to adjust, then press ENTER or to select that item. • Press ENTER or to set the current channel to lock. If the current channel is already locked, press ENTER or again to unlock. -
Page 31: Closed Caption
OSD Adjustments Setting Options Closed Caption | • Press to select the item you would like to adjust, then press ENTER or to select that item. Settings Close Caption CC Mode CC Off Picture Analog CC Sound Digital CC Advanced CC Settings Channel Settings Enter... -
Page 32: Menu Settings
OSD Adjustments Setting Options Menu Settings | • Press to select the item you would like to adjust, then press ENTER or to select that item. Settings Menu Setting Language English Picture Transparency Sound Sleep Timer Channel Settings Enter Menu to Move to Select to Exit... - Page 33 ENTER or to select that item. Note: TV Ears Mode must be set to Send to send the signal to the headset. Settings TV EARS TV Ears Mode Send...
- Page 34 OSD Adjustments Setting Options Pair - • Press to select Pair, then press ENTER or to select. • Once paired, the headset will deliver the TV sound. Settings TV EARS Settings TV EARS TV EARS Mode Send Picture Picture Password...
- Page 35 OSD Adjustments Setting Options Reset | To reset all items to their default value select “Yes”. Settings Reset Picture This will reset Picture Settings to factory mode. Sound Do you want to continue? Channel Settings Enter Menu to Select to Move to Exit PC Setting | Only used for PC Source...
-
Page 36: 4-Hour Shut Off
When no buttons have been pressed for 4 hours the TV will shut off. Starting 4 minutes before the TV is going to shut off, a serious of warnings will appear on the screen. Pressing any button during this period will cancel the shut off. -
Page 37: Maintenance
Cleaning the housing of the TV and the Remote Control 1. Use a soft cloth for cleaning. 2. If the housing of the TV or the remote control is seriously contaminated, use a soft cloth moistened with diluted neutral cleaner to clean the display. -
Page 38: Troubleshooting Guide
The TV is not turning on or displaying a picture. Is the power indicator lit (the power indicator is in the middle of the lower front of the TV. See page 8)? If the power indicator is lit RED, the TV has power, but is not turned on. - Page 39 TV Ears headset. Leave the TV on an input or channel that you know is playing sound through the speakers, and then turn the TV volume down to a low volume. Then, bring your headset within a few feet of the TV and: 1.
-
Page 40: Technical Support
If there is a problem that requires your TV to be sent in for repair or replacement, our technical support technicians will be able to provide you with a required return (RMA) number, and give you the proper instructions on how to send your TV in for service. -
Page 41: Specifications
32 Inch Display Type Resolution (Pixels) 1366 x 768 (1080i) Aspect Ratio 16:9 Power Source AC 110-240V at 50/60Hz 140W TV System PAL / NTSC Video Input Format PAL / NTSC Antenna Input Standard antenna socket 75 Audio Output Stereo (analog) HDMI 1 &... -
Page 42: Warranty
Warranty Term TV Ears TV: For a period of one (1) year from the Date of Purchase, TV Ears will repair or replace, with new or refurbished products or parts, any product or parts determined to be defective by TV Ears. - Page 43 TV Ears. If the product is returned to TV Ears (1) without a TV Ears RMA Number,...
- Page 44 Toll Free Help Line 1-888-883-3277 Printed in USA To Learn More: ©2010 TV Ears, Inc. www.tvears.com...
Need help?
Do you have a question about the TV and is the answer not in the manual?
Questions and answers