Table of Contents
Advertisement
WARNING:
Improper installation, adjustment, alter-
ation, service, or maintenance can cause
injury or property damage. Refer to this
manual. For assistance or additional infor-
mation, consult a qualified installer, serv-
ice agency, or the gas utility.
FOR YOUR SAFETY
• Do not store or use gasoline or other
flammable vapours and liquids in the
vicinity of this or any other appliance.
• Installation and service must be per-
formed by a qualified installer, service
agency or the gas utility.
WARNING:
If the information in these instructions is
not followed exactly, a fire or explosion
may result causing property damage, per-
sonal injury or death.
WHAT TO DO IF YOU SMELL GAS
• Do not try to light any appliance.
• Do not touch any electrical switch; do
not use any phone in your building.
• Immediately call your gas supplier from
a neighbor's phone. Follow the gas
supplier's instructions.
• If you cannot reach your gas supplier,
call the fire department.
GSW Water Heating is a division of
A. O. Smith Enterprises Ltd.
POWER VENTED WATER HEATER
INSTALLATION AND
OPERATING INSTRUCTIONS
Read these instructions thoroughly before starting
PART NO. 71189 REV. G (09-06)
Advertisement
Table of Contents

Related Manuals for GSW 71189


Summary of Contents for GSW 71189
-
Page 1: Operating Instructions
• Immediately call your gas supplier from a neighbor’s phone. Follow the gas supplier’s instructions. • If you cannot reach your gas supplier, call the fire department. GSW Water Heating is a division of PART NO. 71189 REV. G (09-06) A. O. Smith Enterprises Ltd. -
Page 2: Table Of Contents
TABLE OF CONTENTS I) INTRODUCTION ......3 Lighting Instructions (White-Rodgers) User Responsibilities Gas Control/Thermostat II) SAFETY. -
Page 3: I) Introduction
Your safety and the safety of others is very important. We have provided many important safety messages in this manual and on your appliance. Always read and obey all safety messages. This is the safety alert symbol. This symbol alerts you to potential hazards that can kill or hurt you and others. All safety messages will follow the safety alert symbol and either the word “DANGER”... -
Page 4: Ii) Safety
II) SAFETY lar products, should not be stored or used near the water heater or air intake. Due to the nature of air movement, This water heater is design-certified by CSA International as flammable vapours can be carried some distance from the a Category III, non-direct vented water heater that takes its point of storage. -
Page 5: Relief Valve Requirements (T&P)
UNSEEN INTERNAL DAMAGE and are not subject to war- multi-story building, on finished flooring or carpeted sur- ranty coverage. faces. GSW WILL NOT ASSUME ANY LIABILITY for CAUTION damage caused by water leaking from the water heater, pressure relief valve, or related fittings. Select a location Hydrogen gas can be produced in a hot water system as centralized within the piping system as possible. -
Page 6: In Earthquake Zones
to the area adjacent to the water heater or to lower floors of Figure 2 may be used as a reference guide to locate the the structure (see "IMPORTANT" notice on the previous specific clearance locations. A minimum of 600mm (24 in.) page). -
Page 7: Gas Supply Pressure
Gas Leak Testing This gas piping must be installed in accordance with all local and provincial or state codes or, in the absence of such, the Important: This water heater and its gas connection must latest edition of "Natural Gas and Propane Installation be leak tested before placing the appliance in operation. -
Page 8: Air Requirements
Any failure due to cor- the largest input. For example: GSW's water heaters' rosive elements in the atmosphere is excluded from war- burners are 150mm (6 in.) from the floor, plus 300mm ranty coverage. -
Page 9: U.s. Installations
Confined Space Air Requirements for U.S. Installations Refer to Figure 5 (a), (b), (c) or (d) for proper sizing and location of combustion air ducts and openings. CHECK LOCAL CODES. PERMANENT OPENINGS (a) Equipment located in confined spaces; all air from CONFINED inside the building. -
Page 10: Exhaust Venting
Exhaust Venting Important Notes and Warnings • This heater is certified to be installed using Schedule 40 This heater is designed to exhaust the products of combus- PVC or CPVC plastic vent material. In Canada some tion (flue gases) to the outdoors using a sealed piping sys- jurisdictions require that this material is approved to tem. -
Page 11: Venting Terminations And Sizing
Venting terminations and sizing shown in Figure 8. The appropriate screen is to be • Refer to Figure 8 and Table 2 for vent pipe materials installed into the end of the termination elbow and and sizing. Examples of the vent terminations are secured with a small amount of silicone sealant. -
Page 12: Venting Instructions
Venting instructions 10. Insert the vent piping through this hole and secure into 1. Plan the venting layout starting at the vent termination position. Connect the vent pipe to the end termination and work back toward the heater. Take into considera- elbow as shown in Figures.9-11. - Page 13 11. Dry fit all vent pipes, elbows, connectors and fittings before joining any parts with solvent cement. PARTS MUST FIT WITHOUT STRESS OR BENDING OF ANY SECTION and each connection must overlap a mini- mum of 13mm (1/2 in.). Do not force fit any of the con- nections.
-
Page 14: Vent Pipe Connection To Blower
Vent pipe connection to blower VENT PIPE 1. The plastic vent piping connects into the rubber cou- 50mm (2 in.) pling located on the top of the blower assembly. This ADAPTER FOR 40, 50 AND 60-GALLON 150mm (6 in.) coupling includes gear clamps to connect the venting to HEATERS. -
Page 15: Water Supply
7. Tighten the upper clamp so that the vent piping is firmly insulation of the water heater to get wet as water can reduce secured in the coupling and is gas tight. Do not over the effectiveness of the insulation. tighten or cause distortion of any of the parts. -
Page 16: Closed System/Thermal Expansion
Important: Only a new temperature and pressure relief FOLLOW THE TEMPERING valve should be used with your water heater. Do not use an TEMPERED T E R VALVE MANU- WATER TO old or existing valve, as it may be damaged or not adequate FACTURER'S FIXTURE for the working pressure of the new water heater. -
Page 17: Electrical Supply
Electrical Supply WARNING Electrical Shock Hazard • Disconnect power before servicing. • Replace all parts and panels before operating. • Failure to do so can result in death or electrical shock. Important: The electrical controls used inside the gas con- trol/thermostat of this water heater are polarity sensitive. -
Page 18: Flammable Vapour Sensor
Flammable Vapour Sensor * ROTATE LEFT (CCW) When using a gas fired water heater there is a risk of flam- SCREW TO REMOVE mable vapours entering the combustion chamber, being ignited by the burner flame and causing a flashback. In COVER* order to detect such flammable vapours before they enter the combustion chamber, this water heater is equipped with... -
Page 19: Resettable Lockout
rounding area for damage and call a qualified service tech- nician to service the water heater and replace the flamma- ble vapour sensor. If there is a problem with the wiring of the CALL FOR flammable vapour sensor or the flammable vapour interface HEAT IGNITER IS the LED will flash the failure status code. -
Page 20: Installation Checklist
Installation Checklist Check Here Check Here Water Heater Location Vent Termination Centrally located with the water piping system. Horizontal Located as close to gas piping and vent pipe 300mm (12 in.) min. above grade/snow level. system as possible. Away from corners, other vents, windows etc. Located indoors and in a vertical position. -
Page 21: Iv) Operating Instructions
Mixing Valves IV) OPERATING INSTRUCTIONS Hot water can scald: Water heaters are intended to pro- CAUTION: duce hot water. Water heated to a temperature that will sat- Read before proceeding. If you do not isfy space heating, clothes washing, dish washing, and other sanitizing needs can scald and permanently injure you follow these instructions exactly, a fire or upon contact. -
Page 22: Lighting Instructions (Robertshaw)
Lighting Instructions (Robertshaw) – 22 –... -
Page 23: Gas Control/Thermostat
Heater Shutdown CAUTION: 1. Turn the thermostat dial to the lowest setting. Read before proceeding. If you do not follow 2. If the heater is running let it shut down first. these instructions exactly, a fire or explosion 3. Turn off all electrical power to the heater or unplug the may result, causing property damage, per- power cord from the receptacle. -
Page 24: Lighting Instructions (White-Rodgers)
Lighting Instructions (White-Rodgers) – 24 –... -
Page 25: Gas Control/Thermostat
CAUTION: The temperature of the water can be selected by using the temperature adjustment buttons on the front of the gas con- Read before proceeding. If you do not follow trol (see Figure 25) as follows: these instructions exactly, a fire or explosion 1. -
Page 26: Heater Shutdown
Heater Shutdown Note: All the temperature indicators will be off during normal operation. If any time you see the indicators on, there may 1. Turn off all electrical power to the heater or unplug the be a system error and you should consult the power cord from the receptacle. - Page 27 SYMPTOM CORRECTIVE ACTION POSSIBLE CAUSE(S) The self-diagnostic test found 1. Cycle power to the water heater “OFF” for 10 seconds and then Error 7 a problem with the gas valve back “ON”. driver circuit. 2. If the above step did not clear the error, the control must be replaced.
-
Page 28: V) Operation
Smoke/Odour V) OPERATION The water heater may give off a small amount of smoke and Burner Flames odour during the initial start-up of the unit. This is due to the Inspect the burner flames through the viewport and com- burning off of oil from metal parts of a new unit and will dis- pare them to the drawings in Figure 26. -
Page 29: Anode Rod Replacement
Anode Rod Replacement Temperature and Pressure Relief Valve To replace the anode: WARNING 1. Turn off gas supply to the water heater. 2. Shut off the water supply and open a nearby hot-water faucet to depressurize the water tank. 3. Drain approximately 20 litres (5 US gallons) of water from tank (Refer to "Draining and Flushing"... -
Page 30: Venting System And Blower
Venting System and Blower WARNING Keep the area around the heater clear and unobstructed. Inspect the venting system periodically (minimum twice annually) to make certain that the vent passageways, vent terminal and blower assembly are free and unobstructed. Ensure that any condensate is draining freely. Clean as nec- essary. -
Page 31: Vii) Combo Heating
VII) COMBO HEATING 2. Install a drain valve at the lowest point of the heating This section serves as a guide for the installation and use of loop so that water can be drained from the heating mod- "Combo" heating systems utilizing a domestic water heater ule without affecting the water heater. -
Page 32: Viii) Troubleshooting Guide
VIII) TROUBLESHOOTING GUIDE Robertshaw 2000WDER and White-Rodgers Intelli-Vent SYMPTOM CORRECTIVE ACTION POSSIBLE CAUSE(S) 1. No Power to unit. 1. Plug in power cord, check fuses/supply 2. Thermostat setting too low. voltage. 3. Defective air pressure switch (must be 2. Increase thermostat temperature set- BLOWER WILL NOT open at start-up before blower is ener- ting. -
Page 33: Ix) Reference Parts
IX) REFERENCE PARTS 19. Air Inlet Snorkel Reference Parts Listing 20. Combo Heating System Supply Outlet (Optional) Replacement parts may be ordered through your plumber or 21. Power Cord the local distributor. When ordering replacement parts, 22. Air Switch (inside box) always have the following information ready: 23. -
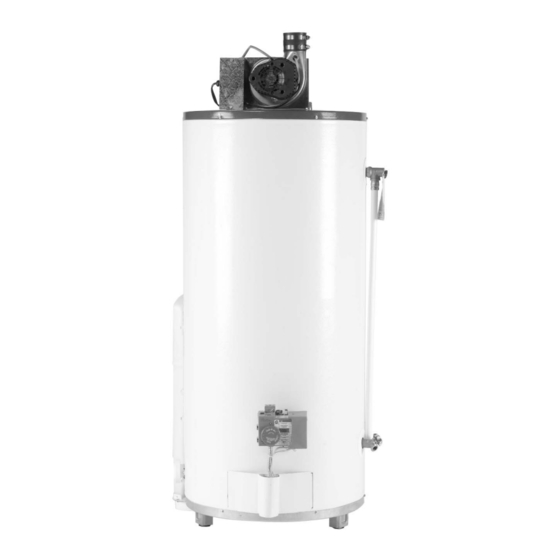
Page 34: Parts Reference Illustration
Parts Reference Illustration 23 24 Rear View 10 11 *Robertshaw Equipped Front View Robertshaw and White-Rodgers systems are not interchangeable. *White-Rodgers Equipped Figure 31 Parts Reference – 34 –... - Page 35 This page intentionally left blank. May be used for notes or to record other installation information. – 35 –...
- Page 36 This page intentionally left blank. May be used for notes or to record other installation information. – 36 –...
-
Page 37: Limited Warranty
RESIDENTIAL STORAGE TANK TYPE WATER HEATER FOR INSTALLATION IN A SINGLE FAMILY DWELLING A. WHO IS COVERED. GSW WATER HEATING AND ITS SUPPLIERS, (herein collectively referred to as “Manufacturer”) warrants only to the original consumer purchaser (hereinafter “Owner”) of the water heater, within the boundaries of continental United States, or Canada, or their territories, so long as he or she continuously occupies the single family dwelling in which this water heater is initially installed for the period specified below. - Page 38 Fergus, ON Canada N1M 2X1 Should you have any questions please Email us at techsupport@gsw-wh.com or Visit our websites: www.gsw-wh.com or www.johnwoodwaterheaters.com or Call our Technical Support line at 1-888-GSW-TECH (479-8324) GSW Water Heating is a division of A.O.Smith Enterprises Ltd. – 38 –...
Need help?
Do you have a question about the 71189 and is the answer not in the manual?
Questions and answers