Table of Contents
Advertisement
Quick Links
Advertisement
Table of Contents

Related Manuals for Baumatic BT06.8ME


Summary of Contents for Baumatic BT06.8ME
- Page 1 BT06.8ME BT08.8ME 60 cm Integrated hood...
- Page 2 User Manual for your Baumatic BT06.8ME/BT08.8ME 60 cm Integrated hood NOTE : This User Instruction Manual contains important information, including safety & installation points, which will enable you to get the most out of your appliance. Please keep it in a safe place so that it is easily available for future reference; for you or any person not familiar with the operation of the appliance.
-
Page 3: Table Of Contents
IMPORTANT SAFETY INFORMATION 5 – 7 Specifications of your cooker hood 8 – 9 BT06.8ME BT08.8ME Using your Baumatic cooker hood 10 – 11 Before first use To use your cooker hood 10 – 11 Turning the cooker hood off... -
Page 4: Environmental Note
ENVIRONMENTAL NOTE Note: Before discarding an old appliance, switch off and disconnect it from the power supply. Cut off and render any plug useless. Cut the cable off directly behind the appliance to prevent misuse. This should be undertaken by a competent person. -
Page 5: Important Safety Information
IMPORTANT SAFETY INFORMATION Your safety is of the utmost importance to Baumatic. Please make sure that you read this instruction booklet before attempting to install or use the appliance. If you are unsure of any of the information contained in this booklet, please contact the Baumatic Customer Care Department. - Page 6 o The edges of the cooker hood are sharp – be mindful of this as you handle your appliance, especially during installation and cleaning. DO NOT CLEAN IN BEHIND THE GREASE FILTER! o If the room where the cooker hood is to be used contains a fuel burning appliance such as a central heating boiler then its flue must be of the sealed or balanced flue type.
- Page 7 o Remember that when in extraction mode, your cooker hood is removing air from your room. Ensure that proper ventilation measures are being observed. o Note that the cooker hood removes odours from your kitchen, not steam. o Warning - Always ensure that the cooker hood been disconnected...
-
Page 8: Specifications Of Your Cooker Hood
Specifications of your cooker hood BT06.8ME Dimensions: Height: 395 mm Width: 600 mm Depth: 282 mm Specifications: o 1 x Integrated axial motor o Slider control operation o Non-return airflow flap o 3 Speeds o 1 Light o 1 synthetic grease filter o Extraction capacity: 250 m³... -
Page 9: Bt08.8Me
BT08.8ME Dimensions: Height: 395 mm Width: 600 mm Depth: 282 mm Specifications: o Twin integrated axial motor o Slider control operation o Non-return airflow flap o 3 Speeds o 1 Light o 1 synthetic grease filter o Extraction capacity: 440 m³ / hr o Recirculation capacity: 208 m³... -
Page 10: Using Your Baumatic Cooker Hood
Using your Baumatic cooker hood Before first use IMPORTANT: THIS PROCESS MUST BE FOLLOWED BEFORE THE COOKER HOOD IS USED FOR THE FIRST TIME. o You should clean the appliance using a brand new cloth, with warm soapy water before using the appliance for the first time. -
Page 11: Turning The Cooker Hood Off
Speed control slider Low speed Medium speed High speed o The cooker hood can be operated by leaving the speed control slider on setting 1, 2 or 3 and closing the extractor door. This will automatically turn the motor off. o When the extractor door is opened again, the motor will resume at the last set speed. -
Page 12: Cleaning Your Baumatic Cooker Hood
Cleaning your Baumatic cooker hood IMPORTANT: BEFORE CLEANING, ALWAYS ENSURE THAT YOU HAVE SWITCHED YOUR COOKER HOOD OFF AT THE OMNI-POLAR SWITCH, SET AT THE WALL FROM THE CABLE. Cleaning o Clean the external parts of your cooker hood with mild liquid detergent and a new damp cloth. -
Page 13: Maintenance
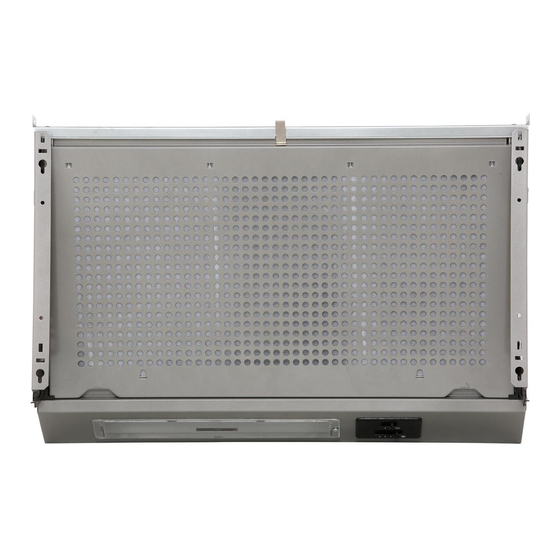
Maintenance Removing and changing the grease filter o Locate the two catches at the base of the filter as shown in the diagram above (1). o Insert a finger into each catch and gently lift and pull the filter outwards (2). o Ensure the filter unclips from the hood, as shown in the diagram above (3), before you pull it away. - Page 14 o Remove the metal wires which hold the synthetic filter in place. o Remove the synthetic filter and replace with a new clean one. o Reattach the metal wires in their original positions to secure the synthetic filter in place. o Refit the filter in the cooker hood.
-
Page 15: Changing A Light Bulb
Changing a light bulb IMPORTANT: BEFORE ATTEMPTING TO CHANGE A LIGHT BULB, YOU MUST ENSURE THAT YOU HAVE DISCONNECTED THE COOKER HOOD FROM YOUR MAINS SUPPLY. o You should use a suitable screwdriver to loosen the screws holding the panel into place. Once this is removed, you will have access to the bulb. -
Page 16: Fitting The Carbon Filters
o Once the bulb has been replaced, refit the panel by screwing the screws back into place. Fitting the carbon filter If the appliance is going to be used in recirculation mode then it is necessary to a fit a carbon filter. This will help to absorb unpleasant odours caused by cooking. - Page 17 o Ensure the filter unclips from the hood, as shown in the diagram on the previous page, before you pull it away. This will allow you access to the motor where the carbon filter should be fitted. o Hook the carbon filter which has two fixing pins (C) onto the motor (D).
-
Page 18: Installation
Installation IMPORTANT: Before installation and usage read all the instructions and make sure that the voltage (V) and the frequency (Hz) indicated on the rating plate are exactly the same as the voltage and frequency in your home. The rating plate can be found behind the grease filter. -
Page 19: Before Beginning Installation
o The brown wire must be connected to the terminal marked “L” (live), or coloured red. Before beginning installation o Check that the product purchased is of a suitable size for the chosen installation area. In addition check whether there is an electrical socket available that will be accessible once the hood is mounted. -
Page 20: Installing Your Cooker Hood
o Select a flat surface for assembling the cooker hood. Cover that surface with a protective covering and place all cooker hood parts and fittings on it. o Do not tile, grout or silicone this appliance to the wall or cabinetry. - Page 21 o Remove the filter by locating the two catches at the base of the filter as shown in the diagram on the previous page (1). o Insert a finger into each catch and gently lift and pull the filter outwards (2). o Ensure the filter unclips from the hood, as shown in the diagram above (3) before you pull it away.
- Page 22 o Hang the cooker hood onto the screws between the two cupboards. o Push the fan-shaped door frames to the end (fully closed), in order to ensure the outer edges of the door frames are parallel to the outer edge of the adjacent cupboards (not the doors). o Mark the positions where the lower screws are to be fixed.
-
Page 23: Fitting The Décor Door
Fitting the décor door o The décor door should be no less than 16 mm thick, 385 – 700 mm high and weigh no more than 7 kg. o Pull out the movable fan-shaped door frames, which are located in two curved plastic slides on each side of the cooker hood. - Page 24 o Place the décor door on a protective surface to avoid damage. Mark the installation position of the door frame and the size of the fixed screws to ensure you do not drill too deeply and damage the décor door. o If the upper edge of the door is not as high as the upper edge of the cupboards then you should adjust the size accordingly.
-
Page 25: Connecting To External Ducting
o Install the adjusting plate, in order to cover the gap between the wall and the bottom of the cooker hood, by screwing it into place. Connecting to external ducting Recirculation: Ducted out: o To use the appliance in extraction mode it is necessary to install external ducting. -
Page 26: Extraction Mode Or Recirculation Mode
Fit a suitable ducting terminal (not supplied) to the wall and connect a 125 mm ducting hose (not supplied) to the terminal. Genuine spare parts can be obtained by contacting the Baumatic Spares Department. o Connect the other end of the ducting hose to the top of the cooker hood. -
Page 27: Troubleshooting
Troubleshooting IMPORTANT: If your cooker hood appears not to be operating properly, before contacting the Baumatic Service Department, please refer to the checklist below. My cooker hood will not start. - Page 28 Or any installation other than the one specified by Baumatic Ltd. has been completed. Please refer to the conditions of guarantee that appear on the...
-
Page 29: Baumatic Consumables
BC005 Stainless Steel Cleaner and Protector (250 ml) o BC007 E-Cloth – General Purpose Cloth o BC008 Microwave Cover To order a Baumatic consumable product please call 0123 5437 244 and quote the product code. You can also order online from eshop.baumatic.co.uk... -
Page 30: Contact Details
Czech Republic United Kingdom Baumatic CR spol s.r.o. Baumatic Ltd., Lìpovà 665 Baumatic Buildings, 460 01 Liberec 4 6 Bennet Road, Czech Republic Reading, Berkshire RG2 0QX +420 483 577 200 United Kingdom www.baumatic.cz Sales Telephone (0118) 933 6900 Slovakia Sales Fax Baumatic Slovakia, s.r.o.
Need help?
Do you have a question about the BT06.8ME and is the answer not in the manual?
Questions and answers