dji PHANTOM 2 VISION+ User Manual
Phantom 2 vision+
Hide thumbs
Also See for PHANTOM 2 VISION+:
- User manual (71 pages) ,
- Manual (49 pages) ,
- Quick start manual (2 pages)
Table of Contents
Advertisement
Quick Links
Advertisement
Table of Contents

Related Manuals for dji PHANTOM 2 VISION+


Summary of Contents for dji PHANTOM 2 VISION+
- Page 1 PHANTOM 2 VISION+ User Manual...
- Page 2 Due to ongoing development, information contained in this manual may change without notice. If you have any questions or concerns about your product, please contact your DJI authorized dealer or DJI Customer Service. ©2014 DJI. All Rights Reserved.
-
Page 3: Using This Manual
Guide. Improve your flying skills in subsequent flights using the Phantom Pilot Training Guide. Refer to this manual for more comprehensive information. Experienced users, particularly those with DJI Phantom 2 Vision experience should skip to the Phantom 2 Vision+ Quick Start Guide to begin preparing for flight. Tutorials Watch the quick start tutorial videos below to ensure a safe first flight. -
Page 4: Table Of Contents
EMOTE ONTROLLER AND ECEIVER Linking Procedures ....................................27 Link Indicator ......................................27 5.7 C ............................27 OMPLIANCE ERSION ONFIGURATION 6 PREPARING THE RANGE EXTENDER ............................29 6.1 I ......................................29 NTRODUCTION SYSTEM Indicator ....................................29 ©2014 DJI. All Rights Reserved. - Page 5 ANGE XTENDER 6.4 B ......................31 INDING THE HANTOM ISION ANGE XTENDER 7 DOWNLOADING AND INSTALLING THE DJI VISION APP ....................33 7.1 D ..................................33 OWNLOAD AND NSTALL 7.2 R ....................................33 EGISTER AND OGIN [1] Register ........................................33 [2] Login ........................................34...
- Page 6 IRMWARE PGRADE OF THE HANTOM ISION 2.3 U PHANTOM RC A .........................69 SING THE SSISTANT OFTWARE APPENDIX ......................................71 1 REAR LED FLIGHT INDICATOR STATUS ........................... 71 2 SPECIFICATIONS.................................... 72 3 TROUBLESHOOTING (FAQ) ............................... 73 ©2014 DJI. All Rights Reserved.
-
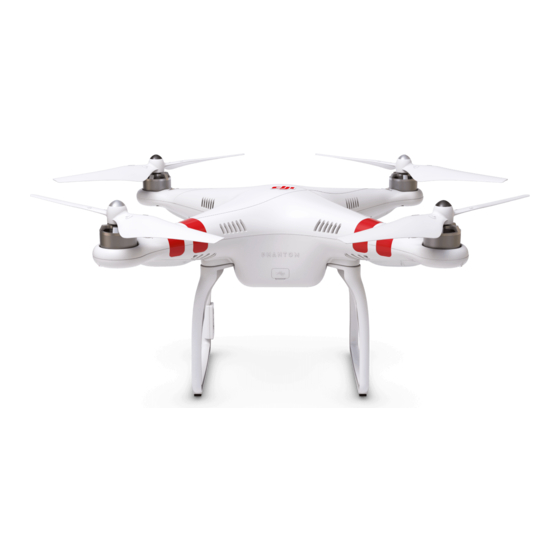
Page 7: Overview
Inserted in aircraft Micro-SD slot Lens Cap Fixed to camera lens Gimbal Clamp Attached to the gimbal Propeller Detaching In maintenance packet Wrench Remote Includes attached Phone Holder Controller and Range Extender AA Batteries For Remote Controller ©2014 DJI. All Rights Reserved. - Page 8 Pilot Training Guide, Phantom 2 Manuals Vision+ Quick Start Guide, User Manual Stickers 2 Colors: Pink, Blue Spare Dampers In maintenance packet Anti-drop Kit In maintenance packet In maintenance packet Spare Screws M3X5(6pcs); M3X8(5pcs) Damper Packet In maintenance packet ©2014 DJI. All Rights Reserved.
-
Page 9: Introduction
Ready to Fly (non-GPS): When less than 6 GPS satellites have been found, the Flight Control System will stabilize itself less than in full Ready to Fly mode and will require more skilled flying. Rear LED Flight Indicators will blink a slow yellow ( ©2014 DJI. All Rights Reserved. -
Page 10: Assembly And Use
2.1 DJI Smart Flight Battery This battery has been specially designed for the Phantom 2 series. It has a battery capacity of 5200mAh, voltage of 11.1V and charge-discharge management functionality. It can only be charged with a DJI charger or Phantom 2 Car Charger. -
Page 11: Usages
Powering off: Press Circular Power Button once, then press again and hold for 2 seconds to turn off. Battery Level Indicators will all go out. Checking the battery level When the battery is powered off, press the Circular Power Button once. Battery Level Indicators will light up to ©2014 DJI. All Rights Reserved. -
Page 12: Battery Life
80%~90% 70%~80% 60%~70% 50%~60% 40%~50% 30%~40% 20%~30% Less than 20% When batter life reaches 0, it is no longer operational. More battery information is available in the battery tab of the Phantom 2 Vision+ Assistant. ©2014 DJI. All Rights Reserved. -
Page 13: Charging The Flight Battery
3S-6S Li-Po batteries. Contact your authorized dealer or DJI customer service for details. Battery should only be charged with the charger provided by DJI. DJI does not take any responsibility for damage caused by third party chargers. -
Page 14: Correct Battery Usage Notes
Place battery in Phantom and turn on. Leave on until there is less than 8% of power left or until the battery can no longer be turned on. See DJI VISION App for battery levels. Motors do not need to be turned on, reducing wear. -
Page 15: Preparing The Phantom 2 Vision
3.2 Built-in Flight Control System The Phantom 2 Vision+ is equipped with a DJI Naza-M V2 Flight Control System. This provides incredible ease of use and stability. Pilots can control the Phantom’s movements in many directions, including pitch (forwards and backwards), roll (left and right), elevator (up and down) and yaw (turn left or right). -
Page 16: Fc Assistant Port
Remote Controller Signal Refer to Failsafe Function (Page41) (Quick Yellow flashing) Lost for details. Low Battery Level DJI VISION App will also show (Slow Red flashing) Warning warning message. Critical Low Battery Level DJI VISION App will show warning (Quick Red flashing) Warning message. -
Page 17: 3-Axial Stabilized Gimbal
The 3-axial stabilized gimbal of the Phantom 2 Vision+ will power on and self-check each time the flight battery is installed and powered on. Its pitch can be controlled using the DJI VISION App. This gimbal has two working modes, video mode and FPV mode, with the video mode set as default. -
Page 18: Micro-Sd Slot
Figure 15 The Phantom 2 Vision+ comes with a 4GB Micro-SD card and can support cards up to 32GB. The DJI VISION App may not be able to read some Micro-SD cards. Using the DJI VISION App to reformat new Micro-SD cards is recommended. -
Page 19: Camera
The Phantom 2 Vision+ camera powers up when the flight battery has been installed and switched on. Photos and videos can be shot by pressing either the onboard button or the DJI VISION App. For aerial photography it supports burst shots, continuous capture and timed capture, and exports to both Adobe DNG Raw and JPEG. For aerial video, it shoots in full HD at (1080p30/1080i60) and can even shoot 720p60 for internet ready slow motion. -
Page 20: Camera Function Buttons
Blink Once (0.2s on, 0.3s off) ON/OFF Micro-SD card error Blink 3 Times(0.1s on, 0.1s off) ON/OFF Upgrade error Fast Blink (0.1s on, 0.3s off) ON/OFF Overheated Camera (0.5s green, 0.5s yellow, 0.5s red, 0.5s Off) ©2014 DJI. All Rights Reserved. -
Page 21: Attaching The Propellers
Protective gloves are recommended during propeller assembly and removal. 4.3 Removing the Propellers (Figure 22) Prevent motor rotation using the included wrench or a hand, then remove propeller according to the un-fastening instructions. Figure 22 ©2014 DJI. All Rights Reserved. -
Page 22: Notes
To avoid injury, STAND CLEAR of and DO NOT touch propellers or motors when they are spinning. ONLY use original DJI propellers for a better and safer flight experience. For beginner flyers, PHANTOM 2 Prop Guards are recommended. Contact your authorized dealer or DJI customer service to purchase if necessary. -
Page 23: Preparing The Remote Controller
The Remote Controller will then beep. If it is set to CE compliance, then there will be one beep while the FCC compliant version will beep twice. The Power LED will blink green quickly indicating that the Remote Controller and receiver are binding. Once binding is completed, the Power LED will change to a ©2014 DJI. All Rights Reserved. -
Page 24: Remote Controller Power Led Status Information
Failsafe Function (Page41) for details). Replacing batteries immediately after the low voltage warning (3.9V-4.5V) is strongly recommended. 5.4 Antenna Orientation Keep the antennas pointing skyward, perpendicular to the ground for maximum communication range during flight. ©2014 DJI. All Rights Reserved. -
Page 25: Remote Controller Operation
Push up to fly forward and down to fly backward. The Phantom will hover in place if the stick is centered. Push the stick further for a larger pitch angle (maximum 35˚) and faster flight. ©2014 DJI. All Rights Reserved. -
Page 26: Linking The Remote Controller And Receiver
Figure 27. The Remote Controller and the receiver are paired before delivery. Only use this button if you have replaced your Remote Controller or receiver. Link Button & Link Indicator Figure 27 ©2014 DJI. All Rights Reserved. -
Page 27: Linking Procedures
FCC compliant devices have an effective range of 800 meters in open spaces. Watch your flight distance as the Phantom 2 Vision+ will enter Failsafe mode (auto-landing or go home and land) if it flies beyond the relevant range limits. Always follow local laws and regulations. ©2014 DJI. All Rights Reserved. - Page 28 It is recommended to use a Φ2.4mm flathead screwdriver for adjustments. There is another potentiometer for reserved use. ©2014 DJI. All Rights Reserved.
-
Page 29: Preparing The Range Extender
Each Range Extender has a unique MAC address and network name (SSID), details of which are printed on the label as ‘Phantom_XXXXXX’. The ‘XXXXXX’ represents the last 6 letters or numbers of the MAC address for the Range Extender. This can be renamed in the DJI VISION App. 6.1 Introduction... -
Page 30: Use
Phantom 2 Vision+ again to recreate its Wi-Fi network. Failure to do so will cause the DJI VISION App to fail to connect with the camera. 6.2 Use Charging the Range Extender Charge the Range Extender by connecting the charging port to a power supply device such as a PC or a USB charger using a Micro-USB cable. -
Page 31: Binding The Phantom 2 Vision+ And Range Extender
Enable Wi-Fi on your mobile device then select “Phantom_XXXXXX” the (SSIDof your Range Extender) from theWi-Fi network list. (Figure 37) Run the DJI VISION App then tap -> Settings -> General -> Binding. (Figure 38) Select ’Scan ©2014 DJI. All Rights Reserved. - Page 32 The QR code is located on the bottom cover of the Phantom 2 Vision+. If you cannot find the QR code, please contact DJI customer service and provide your camera serial number (printed on the label of the camera) so they can generate a new QR code for you.
-
Page 33: Downloading And Installing The Dji Vision App
Download and install methods Scan the QR code to get the download link. Download and install the DJI VISION App on your mobile device. You can find the QR code on the ‘Quick Start Guide’ as well as on the packaging of the Phantom 2 Vision+. -
Page 34: Login
Useful tips will display when you enter the welcome page. Tap the screen to display the next useful tip. Figure 44 Enable the “Tutorial” switch in the Settings page to get hints and tips the first time you use the DJI VISION App. -
Page 35: Connecting The Camera
(Figure47) Run the DJI VISION App on your mobile device. When the Wi-Fi connection indicator on the App main menu goes green, the connection is good. Tap the “CAMERA” icon and the DJI VISION App will begin a live camera preview (Figure48). This means everything is functioning normally. -
Page 36: Wi-Fi Connection Indicator Description
The SSID is unique for each Phantom 2 Vision+ It will appear as Phantom_XXXXXX in your Wi-Fi list. Android users can tap the SSID button on the main page to mobile device Wi-Fi settings directly. ©2014 DJI. All Rights Reserved. -
Page 37: Flight
Anti-drop kits have been mounted correctly. Camera lens cap has been removed. Micro-SD card has been inserted if necessary. Gimbal is functioning as normal. Motors can start and are functioning as normal. DJI VISION App can connect to the camera. ©2014 DJI. All Rights Reserved. -
Page 38: Calibrating The Compass
-> Flip once Figure 49 If compass calibration is needed before flight, a prompt will appear on the DJI VISON App’s camera page. It will disappear after successful calibration. 1.2 When to Recalibrate When compass data is abnormal, the rear LED flight indicator will blink red and yellow. -
Page 39: Starting/Stopping The Motors
Figure 52 Do not execute CSC during normal flight. This will stop the motors and cause the aircraft to drop without control. Conduct the CSC as neatly as you can. Release the sticks once motors start/stop. ©2014 DJI. All Rights Reserved. -
Page 40: Flight Test
Power on the Remote Controller and Range Extender, then the Smart Flight Battery. Launch the DJI VISION App and start bind it with your smartphone then enter the camera preview page. Wait until the Rear LED Flight Indicator blinks green. This means it has initialized and is Ready to Fly. If it flashes yellow, it is in Ready to Fly (non-GPS) mode and will require more careful flight. -
Page 41: Failsafe Function
Home point coordinates are used to calculate the horizontal distance of the aircraft (shown as “Distance” on the GUI of the DJI VISION App). After successfully record the home point, rear LED flight indicators blink fast green. -
Page 42: Failsafe On The Dji Vision App
Rear LED flight indicators will blink green rapidly when successful. Failsafe on the DJI VISION App The DJI VISION App will provide information during Failsafe. Figure 54 Figure 55 4.3 Regaining Control During Failsafe Procedures... -
Page 43: Low Battery Level Warning Function
Low Battery Level Warning on the DJI VISION App Battery level warnings will show on the camera page of the DJI VISION App when the battery level is low. A red rectangle will blink on the camera screen. -
Page 44: Flight Limits
Flight height must be under the set Warning: Height limit Max Height None. height. reached. Flight distance must be within the Warning: Distance limit Rapid red flashing Max Radius max radius. reached. when close to the max radius limit. ©2014 DJI. All Rights Reserved. -
Page 45: Flight Limits Of Special Areas
6.2 Flight Limits of Special Areas Special areas include airports worldwide. All special areas are listed on the DJI official website. Please refer to http://www.dji.com/fly-safe/category-mc for details. These areas have been divided into category A and category B. -
Page 46: Conditions Of Flight Limits
Ground Station. Refer to the Ground Station manual for details. Phantom mode Flight Status Limits of Special Area Max Height Max Radius √ √ √ Ready to Fly × √ × Ready to Fly (non-GPS) ©2014 DJI. All Rights Reserved. -
Page 47: Disclaimer
©2014 DJI. All Rights Reserved. -
Page 48: Dji Vision App Usage
DJI VISION App Usage The DJI VISION App controls the Phantom 2 Vision+ camera including capture, recording, settings and pitch angle. It also displays essential flight information including flight parameters and battery level. 1 DJI VISION App Main Menu After logging in you will see the VISION App home screen. This shows current Wi-Fi connection status and the four main features of the App. -
Page 49: Camera Page
Normal Mode Tap up arrow to pitch camera upwards and down arrow to pitch downwards. Green slider indicates current camera pitch. Gimbal pitch control (Normal Mode) Gimbal pitch movement Figure 64 Figure 63 ©2014 DJI. All Rights Reserved. -
Page 50: Accelerometer Sensor Mode
Flight attitude is indicated by the flight attitude icon. The red arrow shows which direction the Phantom 2 Vision+ is facing. Light blue and dark blue areas indicate pitch. Pitching of the boundary between light blue and dark blue area shows roll angle. ©2014 DJI. All Rights Reserved. -
Page 51: Flight Parameters
The connection between the camera and mobile device may fail if Wi-Fi signal strength is low. Refer to < Phantom 2 Vision+ CONNECTION BROKEN> for more information. [6] Flight Battery Level Show current flight battery level. When battery level is low and the battery icon turns red it is recommended to fly ©2014 DJI. All Rights Reserved. -
Page 52: Aircraft Gps Status
Displays estimated shots remaining, based on the current photo size setting and storage capacity of the Micro-SD card. This shows ‘0’ if: (1) Micro-SD card is not inserted. (2) Micro-SD card is full. (3) Micro-SD card is damaged. (4) Connection between the DJI VISION App and camera is broken. [11] Shutter Button Tap to take photos. -
Page 53: Camera Settings
[13] Camera Settings Tap to open the camera settings menu, refer to Camera Settings (Page 53). [14] Hide or Show Flight Parameters. Tap to hide flight parameters. Tap again to show. Figure 72 Figure 73 ©2014 DJI. All Rights Reserved. -
Page 54: Camera Settings
1280 x 720 30p, 16:9 640 x 480 30p, 4:3(VGA) Three Field of View (FOV) options are supported when shooting in 1920x1080 60i, 1920x1080 ° ° 30p and 1920x1080 25p: Medium (110 ) and Narrow (85 ©2014 DJI. All Rights Reserved. -
Page 55: Photo Format
Spot: Measures a small area in the center of the scene. This mode is used in a high contrast scene where the subject must be accurately exposed. [8] Exposure Compensation -2.0(EV) 2.0(EV) -1.7(EV) 1.7(EV) -1.3(EV) 1.3(EV) ©2014 DJI. All Rights Reserved. -
Page 56: Sharpness
Restores all default camera settings. Flight battery restart is needed to allow restoration to take effect. [12] Format Micro-SD Card Format the Micro-SD card. All data stored in the Micro-SD card will be lost after formatting. Remember to backup before formatting. ©2014 DJI. All Rights Reserved. -
Page 57: Album Page
4 Album Page The DJI VISION App has an SD Card album and a Mobile Device album. Images and videos on the SD Card album can be synchronized to the Mobile Device album. In the DJI VISION App, tap to enter into the SD Card album and tap to enter into Mobile Device album. - Page 58 [5] Tap “Cancel” or “Finished” to exit multiple synchronization mode and return to the SD Card page. Connect camera data port to a PC via a Micro-USB cable to copy photos or videos on the SD card album from the Micro-SD card to the PC conveniently. ©2014 DJI. All Rights Reserved.
-
Page 59: Mobile Device Album
Internet access is required for map downloads. Geo-tagged locations Figure 83 [4] Tap any thumbnail for single view; you can slide left or right to view the previous or next photo. Tap a video thumbnail to play a single video. ©2014 DJI. All Rights Reserved. - Page 60 Figure 84 Figure 85 [5] Tap to share your photos and videos to social networks. Access to the Internet is required for photo and video sharing. Figure 86 ©2014 DJI. All Rights Reserved.
-
Page 61: News Page
5 News Page View the latest DJI news. (Internet access is required.) Figure 87 Figure 88 ©2014 DJI. All Rights Reserved. -
Page 62: Settings Page
Slide the switch from left to right to enable this function. Toolbar will auto hide on the camera page. Figure 91: Toolbar Auto Hide Enabled Figure 92: Toolbar Auto Hide Disabled [2] When Connection Lost [17] [18] Figure 93 ©2014 DJI. All Rights Reserved. -
Page 63: Camera Settings Display
Figure 94 Figure 95 [4] Preview Quality Figure 96 High: 640 x 480@30fps Medium: 640 x 480@15fps Medium: 320 x 240@30fps Low: 320 x 240@15fps (Recommended when there is a lot of interference.) ©2014 DJI. All Rights Reserved. -
Page 64: Parameter Unit
Switched on, the gimbal will work in FPV mode. Switched off, the gimbal will work in Stabilize mode. [7] Auto Flips The user interface of the DJI VISION App will flip if the mobile device’s auto-flip is enabled. [8] Battery Low Warning If enabled, an alarm will sound when the battery level is too low. -
Page 65: Find M Yphantom 2 Vision
Tap to see user account information. [15] Rate Tap to rate the DJI VISION App. Internet access required. Android App does not include rating. [16] About Tap to see the current version of the DJI VISION App and contact information. ©2014 DJI. All Rights Reserved. -
Page 66: Assistant Software
Locate the Phantom 2 Vision+ icon in Finder, press Control then click the icon (or right-click the icon using a mouse). Choose Open from the shortcut menu, then click Open in the prompt dialog box to launch. ©2014 DJI. All Rights Reserved. - Page 67 .DMG installer supports Mac OS X 10.6 or above. Phantom 2 Vision+ Assistant Software on Mac OS X and Windows are the same. Assistant Software pages shown in this manual are from the Windows version. ©2014 DJI. All Rights Reserved.
-
Page 68: Using Assistant Software
Do not enable Naza-M mode before finishing “Advanced Flight Maneuvers” in the "Phantom Pilot Training Guide”. Enable Phantom mode by tapping the same button if Naza-M mode is enabled. Once changed to Phantom working mode, all parameters will return to factory settings. ©2014 DJI. All Rights Reserved. -
Page 69: Firmware Upgrade Of The Phantom 2 Vision
Mac, and then follow the below steps to configure the Remote Controller. DT7调参软件 Figure 105 Turn off the Remote Controller and find its Micro-USB port. Power on PC and Remote Controller then connect Remote Controller to the PC with a Micro-USB cable. ©2014 DJI. All Rights Reserved. - Page 70 Finish upgrade in the [Info] page if necessary. Language swap Main page Firmware upgrade Account, software version *This image is for Communication indicator reference only. Please refer to the actual user interface. Connection indicator Figure 106 ©2014 DJI. All Rights Reserved.
-
Page 71: Appendix
(Three Red flashes off and on) Error* (Solid red) Compass Needs Calibration (Red, Yellow flashes in turn) *You can investigate the error by connecting the Phantom 2 Vision+ to the Phantom 2 Vision+’s Assistant Software. ©2014 DJI. All Rights Reserved. -
Page 72: Specifications
-93dBm Transmitting Power (EIRP) CE Compliance: 25mW; FCC Compliance: 100mW Working Current/Voltage 80 mA@6V Battery 4 AA Batteries Range Extender Operating Frequency 2412MHz 2462MHz Communication Distance (open area) 500m 700m Transmitting Power 20dBm Power Consumption ©2014 DJI. All Rights Reserved. -
Page 73: Troubleshooting (Faq)
(c) Re-attempt Remote Controller calibration in Assistant. If the above solutions do not solve your issue, please send your Remote Control to DJI Customer service for repair. 3.2 How to restore a video file if power is turned off during a recording session? Solution: Keep or place the Micro-SD card back into the camera. - Page 74 A battery aging test is performed prior to delivery which affects the discharge time of the new battery. This is why the discharge time of a new battery is not zero. The battery is okay to use. ©2014 DJI. All Rights Reserved.
Need help?
Do you have a question about the PHANTOM 2 VISION+ and is the answer not in the manual?
Questions and answers