
Related Manuals for Sun Microsystems StorageTek 5220 NAS Appliance


Summary of Contents for Sun Microsystems StorageTek 5220 NAS Appliance
- Page 1 Sun StorageTek ™ 5220 NAS Appliance Getting Started Guide Sun Microsystems, Inc. www.sun.com Part No. 819-7167-10 October 2006, Revision A Submit comments about this document at: http://www.sun.com/hwdocs/feedback...
- Page 2 Mozilla are trademark or registered trademarks of Netscape Communications Corporation in the United States and other countries. The OPEN LOOK and Sun™ Graphical User Interface was developed by Sun Microsystems, Inc. for its users and licensees. Sun acknowledges the pioneering efforts of Xerox in researching and developing the concept of visual or graphical user interfaces for the computer industry. Sun holds a non-exclusive license from Xerox to the Xerox Graphical User Interface, which license also covers Sun’s licensees who implement OPEN...
-
Page 3: Table Of Contents
Contents Preface ix System Overview 1 System Features 1 Hardware Overview 3 Sun StorageTek 5220 NAS Appliance 3 Appliance Options 4 Back-End Storage 4 Software Overview 6 Web Administrator 7 Administrator Console Licensed Options 7 Installing the Appliance and Back-End Storage 9... - Page 4 Connecting a Controller Unit to Expansion Units 46 ▼ To Cable a Controller Unit to One Expansion Unit 47 ▼ To Cable a Controller Unit to Two Expansion Units 48 Connecting to the Network 49 Sun StorageTek 5220 NAS Appliance Getting Started Guide • October 2006...
- Page 5 ▼ To Connect to Copper Fast Ethernet or Gigabit Ethernet Networks 49 ▼ To Connect to Optical Gigabit Ethernet Networks 50 Powering On the System 51 ▼ To Power On the Appliance and Controller Unit Initially 52 ▼ To Power On the Appliance, Controller Unit, and Expansion Units Initially 54 ▼...
- Page 6 Sun StorageTek 5220 NAS Appliance Getting Started Guide • October 2006...
- Page 7 Figures Sun StorageTek 5220 NAS Appliance, Front 3 FIGURE 1-1 Sun StorageTek 5220 NAS Appliance With Single HBA Card, Back 4 FIGURE 1-2 RAID Controller Unit, Front 5 FIGURE 1-3 RAID Controller Unit, Back 5 FIGURE 1-4 Expansion Unit, Front 6...
- Page 8 Attaching a Mounting Bracket to the Chassis 31 FIGURE 2-15 Mounting a Slide Rail 32 FIGURE 2-16 Adjusting the Distance Between the Slide Rails 33 FIGURE 2-17 Mounting the Chassis on the Slide Rails 34 FIGURE 2-18 Inserting the CMA Rail Extension Into the Back of the Left Slide Rail 35 FIGURE 2-19 Mounting the Inner CMA Connector 36 FIGURE 2-20...
-
Page 9: Preface
Preface The Sun StorageTek 5220 NAS Appliance Getting Started Guide is a combined installation, configuration, and getting started guide for the Sun StorageTek™ 5220 NAS Appliance. This guide describes how to install the appliance and its back-end storage, how to connect the appliance and storage, and how to configure the system. -
Page 10: Related Documentation
Sun StorageTek 5220 NAS Appliance Getting Started Guide • October 2006... -
Page 11: Sun Welcomes Your Comments
Sun is interested in improving its documentation and welcomes your comments and suggestions. You can submit your comments by going to: http://www.sun.com/hwdocs/feedback Please include the title and part number of your document with your feedback: Sun StorageTek 5220 NAS Appliance Getting Started Guide, part number 819-7167-10. Preface... - Page 12 Sun StorageTek 5220 NAS Appliance Getting Started Guide • October 2006...
-
Page 13: System Overview
“Software Overview” on page 6 ■ System Features The Sun StorageTek 5220 NAS Appliance is the Sun Microsystems modular, scalable, network-attached storage (NAS) solution. Its configuration uses a single appliance, with controller unit and optional expansion units available for back-end storage. - Page 14 A client is any computer on the network that requests file services from the Sun StorageTek 5220 NAS Appliance. In general, Sun StorageTek 5220 NAS Appliance supports any client implementation that follows the NFS version 2 or 3 protocol or the CIFS specifications.
-
Page 15: Hardware Overview
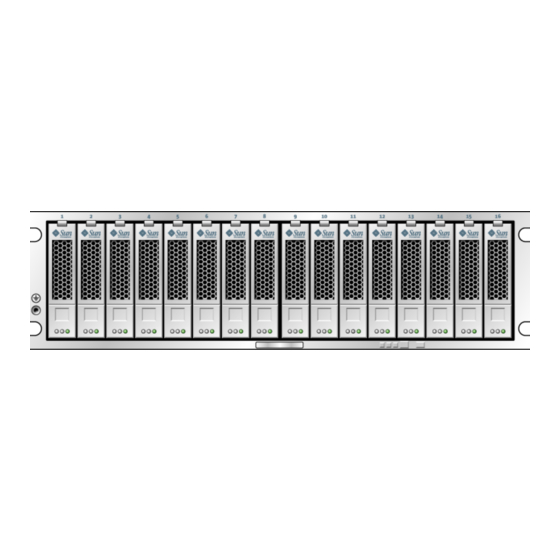
The following sections describe the system components of the Sun StorageTek 5220 NAS Appliance with back-end storage. Sun StorageTek 5220 NAS Appliance The Sun StorageTek 5220 NAS Appliance is the basic unit. shows the front FIGURE 1-1 of the appliance. You need the software serial number for any calls for service and for adding licenses and you need the hardware serial number if you decide to expand the system. -
Page 16: Appliance Options
Back-End Storage The RAID controller unit provides direct-attached back-end storage for the Sun StorageTek 5220 NAS Appliance. At a minimum, the system has an appliance and one controller unit containing SATA disk drives. Sun StorageTek 5220 NAS Appliance Getting Started Guide • October 2006... -
Page 17: Figure 1-3 Raid Controller Unit, Front
shows the front of the controllers unit. FIGURE 1-3 RAID Controller Unit, Front FIGURE 1-3 shows the back of the controller unit. FIGURE 1-4 Power supply switch Power supply switch RAID Controller Unit, Back FIGURE 1-4 Chapter 1 System Overview... -
Page 18: Software Overview
The appliance and its back-end storage are configured and managed through the following software components, described in the following sections: “Web Administrator” on page 7 ■ “Administrator Console” on page 7 ■ “Licensed Software Options” on page 8 ■ Sun StorageTek 5220 NAS Appliance Getting Started Guide • October 2006... -
Page 19: Web Administrator
Web Administrator The Sun StorageTek 5220 NAS Appliance ships with the Web Administrator software installed. Other than a standard web browser, you do not need to install any software to manage your system. The Web Administrator graphical user interface (GUI) lets you configure system parameters through a series of menus and screen panels. -
Page 20: Licensed Options
You can purchase additional software for the system: Sun StorageTek File Replicator duplicates data from one volume onto a mirrored ■ volume on a different Sun StorageTek 5220 NAS Appliance or Sun StorageTek 5320 NAS Appliance. Sun StorageTek Compliance Archiving Software enable volumes to follow ■... -
Page 21: Installing The Appliance And Back-End Storage
C H A P T E R Installing the Appliance and Back-End Storage This chapter describes the process of installing the Sun StorageTek 5220 NAS Appliance, a controller unit, and expansion units. It contains the following sections: “Cabinets, Racks, and Rail Kits” on page 10 ■... -
Page 22: Cabinets, Racks, And Rail Kits
Cabinets, Racks, and Rail Kits The Sun StorageTek 5220 NAS Appliance can be installed in the Sun™ Rack 900, the Sun™ Rack 1000, or third-party racks that comply with the requirements. Although the system is installed in a single cabinet or rack, the appliance and the back-end storage units require different rails to support them. -
Page 23: Slide Rail Kit For The Appliance
Slide Rail Kit for the Appliance The Sun StorageTek 5220 NAS Appliance is supported with the slide rail kit (370- 7669-02) and cable management arm (370-7668-02). The slide rail kit contains four- point mounted slide rails and is designed to enable the Sun StorageTek 5220 NAS Appliance to be installed in the Sun Rack™... -
Page 24: Preparing The Cabinet
3. Remove or open the front panel. 4. Remove or open the vented back panel. Note – Sun Microsystems makes no warranties or guarantees as to fit, form, or function of the Sun StorageTek 5220 NAS Appliance system installed in third-party racks or cabinets. -
Page 25: Proper Grounding Technique
■ Caution – Do not power on any units until after you have connected the Sun StorageTek 5220 NAS Appliance to the network. Grounding the Rack During Installation The safe ground conductor provides proper grounding only for the Sun StorageTek 5220 NAS Appliance. -
Page 26: Checking The Slide Rail Kit
Mount left and right rails to back of cabinet rails Metric M6 panhead screw Secure front of tray to left and right cabinet rails 6-32 flathead screw Secure back of tray to left and right side rails Sun StorageTek 5220 NAS Appliance Getting Started Guide • October 2006... -
Page 27: Checking The Appliance
Checking the Appliance When you unpack the shipping box, verify that you have all of the parts: Sun StorageTek 5220 NAS Appliance ■ Ship kit for the appliance, containing documentation and cables ■ Make sure you have the two power cords for your location, shipped separately. -
Page 28: Planning The Installation
The appliance is installed last. Uneven loading of the rack can cause dangerous instability. Note – Some procedures require two people to complete. Sun StorageTek 5220 NAS Appliance Getting Started Guide • October 2006... -
Page 29: Figure 2-1 Appliance, Controller Unit, And Expansion Units In A Rack
FIGURE 2-1 expansion unit, and an appliance. Available space Sun StorageTek 5220 NAS Appliance Sun StorageTek 5220 Expansion Unit (optional) Sun StorageTek 5220 Expansion Unit Sun StorageTek 5220 RAID Controller Unit... -
Page 30: Figure 2-2 Rack With Two Complete Storage Systems
Sun StorageTek 5220 NAS Appliance Sun StorageTek 5220 Expansion Unit Sun StorageTek 5220 Expansion Unit Sun StorageTek 5220 RAID Controller Unit Rack With Two Complete Storage Systems FIGURE 2-2 Sun StorageTek 5220 NAS Appliance Getting Started Guide • October 2006... -
Page 31: Attaching The Universal Rail Kit
Attaching the Universal Rail Kit his procedure describes the steps to attach the universal rail kit to all standard Sun cabinets. To Attach the Universal Rail Kit to a Cabinet ▼ 1. Position the front of the left rail behind the left front cabinet rail ( FIGURE 2-3 Positioning the Front of the Left Rail Behind the Left Front Cabinet Rail FIGURE 2-3... -
Page 32: Figure 2-4 Securing The Left Rail To The Front Of The Cabinet
These screws pass through the cabinet rail holes and screw into threaded holes in the left rail. Securing the Left Rail to the Front of the Cabinet FIGURE 2-4 3. Repeat Step 1 Step 2 for the right rail. Sun StorageTek 5220 NAS Appliance Getting Started Guide • October 2006... -
Page 33: Figure 2-5 Adjusting The Length Of The Left Rail At The Back Of The Cabinet
4. At the back of the cabinet, adjust the length of the left rail as needed to fit the cabinet, and position the rail flange over the face of the cabinet rail ( FIGURE 2-5 Adjusting the Length of the Left Rail at the Back of the Cabinet FIGURE 2-5 5. -
Page 34: Figure 2-6 Securing The Left Rail To The Back Of The Cabinet
(two per side) at the back of the rail ( FIGURE 2-6 Securing the Left Rail to the Back of the Cabinet FIGURE 2-6 7. Repeat Step Step 5, and Step 6 for the right rail. Sun StorageTek 5220 NAS Appliance Getting Started Guide • October 2006... -
Page 35: Figure 2-7 Tightening The Rail Adjustment Screws
8. Using the No. 2 Phillips screwdriver, tighten the eight adjustment screws (four on each side) toward the back of each rail ( FIGURE 2-7 Tightening the Rail Adjustment Screws FIGURE 2-7 Chapter 2 Installing the Appliance and Back-End Storage... -
Page 36: Installing A Unit In A Cabinet
( FIGURE 2-8 Caution – Use care to avoid injury. A unit can weigh up to 95 pounds (45 kg). Unit Positioning the in the Cabinet FIGURE 2-8 Sun StorageTek 5220 NAS Appliance Getting Started Guide • October 2006... -
Page 37: Figure 2-9 Sliding The Unit Into The Cabinet
2. Slide the unit carefully into the cabinet until the front flanges of the unit touch the vertical face of the cabinet ( FIGURE 2-9 Sliding the Unit Into the Cabinet FIGURE 2-9 Chapter 2 Installing the Appliance and Back-End Storage... -
Page 38: Figure 2-10 Securing The Unit To The Front Of A Cabinet
3. Use the No. 3 Phillips screwdriver to install and tighten four M6 screws (two per side) to secure the tray to the front of the cabinet ( FIGURE 2-10 Unit Securing the to the Front of a Cabinet FIGURE 2-10 Sun StorageTek 5220 NAS Appliance Getting Started Guide • October 2006... -
Page 39: Figure 2-11 Securing The Unit To The Back Of The Cabinet Rail
4. Install and tighten two 6-32 screws (one per side) at the back of the unit, to secure the back of the unit to the cabinet ( FIGURE 2-11 Note – The two upper holes on the back of the unit are not used. Securing the Unit to the Back of the Cabinet Rail FIGURE 2-11 Chapter 2 Installing the Appliance and Back-End Storage... -
Page 40: Installing The Appliance In A Cabinet
Press and hold simultaneously the upper and lower lock buttons of the slide rail lock ( FIGURE 2-12 Unlocking the Slide Rail Assembly FIGURE 2-12 b. Pull the mounting bracket out until it locks in the extended position. Sun StorageTek 5220 NAS Appliance Getting Started Guide • October 2006... -
Page 41: Figure 2-13 Sliding The Mounting Bracket Release Button
c. Slide the mounting bracket release button in the direction shown in FIGURE 2-13 and then slide the mounting bracket out of the slide rail. Sliding the Mounting Bracket Release Button FIGURE 2-13 Chapter 2 Installing the Appliance and Back-End Storage... -
Page 42: Figure 2-14 Unlocking The Slide Rail Middle Section
Press the metal lever labeled Push on the middle section ( ) of the FIGURE 2-14 sliding rail, and then push the middle section back into the rack. Metal lever Unlocking the Slide Rail Middle Section FIGURE 2-14 Sun StorageTek 5220 NAS Appliance Getting Started Guide • October 2006... -
Page 43: Figure 2-15 Attaching A Mounting Bracket To The Chassis
2. Attach a mounting bracket to the right side of the appliance chassis. a. Position the mounting bracket against the appliance chassis ( ) so that FIGURE 2-15 the bracket’s slide rail lock is at the front and its three keyed openings align with the three locating pins on the side of the chassis. -
Page 44: Figure 2-16 Mounting A Slide Rail
Use two screws to attach the back of the slide rail to the back rack post loosely. 7. In the same way, attach the second slide rail to the left rack posts. Do not tighten the screws. Sun StorageTek 5220 NAS Appliance Getting Started Guide • October 2006... -
Page 45: Figure 2-17 Adjusting The Distance Between The Slide Rails
8. Use the slide rail spacing tool to adjust the distance between the slide rails: a. At the front of the rack, insert the left side of the tool into slots at the end of the left rail ( FIGURE 2-17 Adjusting the Distance Between the Slide Rails FIGURE 2-17 b. -
Page 46: Figure 2-18 Mounting The Chassis On The Slide Rails
11. Simultaneously release the rail locks on each side of the sliding rails, and guide the chassis into the rack. Caution – Verify that the appliance is securely mounted in the rack, and that the slide rails are locked to the mounting brackets. Sun StorageTek 5220 NAS Appliance Getting Started Guide • October 2006... -
Page 47: To Install The Cable Management Kit
▼ To Install the Cable Management Kit The.cable management assembly (CMA) clips into the ends of the left and right sliding rail. No screws are necessary for mounting the CMA. Caution – Support the CMA during this installation. Do not allow the assembly to hang by its own weight until it is secured by all three attachment points. -
Page 48: Figure 2-20 Mounting The Inner Cma Connector
CMA Connector for Outer Member, and attaches to the right sliding rail. 2. Insert the smaller extension into the clip located at the end of the mounting bracket ( FIGURE 2-20 Mounting the Inner CMA Connector FIGURE 2-20 Sun StorageTek 5220 NAS Appliance Getting Started Guide • October 2006... -
Page 49: Figure 2-21 Attaching The Outer Cma Connector
3. Insert the larger extension into the end of the right sliding rail ( FIGURE 2-21 Attaching the Outer CMA Connector FIGURE 2-21 Chapter 2 Installing the Appliance and Back-End Storage... -
Page 50: Figure 2-22 Mounting The Left Side Of The Slide Rail
( FIGURE 2-22 The plastic tab on the CMA rail extension locks the hinged plastic connector in place. Mounting the Left Side of the Slide Rail FIGURE 2-22 Sun StorageTek 5220 NAS Appliance Getting Started Guide • October 2006... -
Page 51: To Verify The Operation Of The Slide Rails And The Cma
▼ To Verify the Operation of the Slide Rails and the CMA Tip – Two people are needed for this procedure: one to move the appliance and one to observe the cables and CMA. 1. Deploy the cabinet’s anti-tilt bar, if it has one. 2. -
Page 52: Figure 2-24 Unlocking The Slide Rail Lever Stops
5. When the appliance is fully extended, release the slide rail lever stops FIGURE 2-24 Push both levers simultaneously and slide the appliance back into the rack. Metal lever Unlocking the Slide Rail Lever Stops FIGURE 2-24 Sun StorageTek 5220 NAS Appliance Getting Started Guide • October 2006... -
Page 53: Figure 2-25 Locating The Slide Rail Release Button
6. Simultaneously unlock both slide rail release buttons ( ), and push the FIGURE 2-25 appliance completely into the rack. Locating the Slide Rail Release Button FIGURE 2-25 The appliance stops after approximately 15 inches (40 cm) of travel. 7. Verify that the cables and the CMA retracted without binding. 8. -
Page 54: Connecting The Power Cables
Caution – The cabinet must have two power sources connected to two separate power circuits. 3. Connect each power supply in the Sun StorageTek 5220 NAS Appliance to a separate power source in the cabinet. As soon as you connect the appliance’s power cords to the cabinet, the AC LE D on the front lights, indicating standby power mode. -
Page 55: Connecting The Sun Storagetek 5220 Nas Appliance
■ Connecting the Appliance to Back-End Storage This section describes how to cable the Sun StorageTek 5220 NAS Appliance to back- end storage, for several different configurations. This section includes the following tasks: “Connecting the Appliance to the Controller Unit” on page 44 ■... -
Page 56: Connecting The Appliance To The Controller Unit
HBA card and on the controller unit. FIGURE 3-1 HBA Port 1 Ch2 Ch1 Ports for HBA Cards and Controller Unit FIGURE 3-1 Sun StorageTek 5220 NAS Appliance Getting Started Guide • October 2006... -
Page 57: To Connect A Controller Unit
FIGURE 3-2 ● Connect the HBA port 1 on the appliance to the controller unit’s Ch 1 port. Connecting the Appliance to the Controller Unit FIGURE 3-2 Chapter 3 Connecting the Sun StorageTek 5220 NAS Appliance... -
Page 58: Connecting A Controller Unit To Expansion Units
“To Cable a Controller Unit to One Expansion Unit” ■ on page For two expansion units, see “To Cable a Controller Unit to Two Expansion Units” ■ on page Sun StorageTek 5220 NAS Appliance Getting Started Guide • October 2006... -
Page 59: To Cable A Controller Unit To One Expansion Unit
Connect one cable between the P1 port of the controller unit and the 1B port of the expansion unit. The other ports in the units remain empty. Expansion Unit Controller Unit Connecting the Controller Unit and One Expansion Unit FIGURE 3-4 Chapter 3 Connecting the Sun StorageTek 5220 NAS Appliance... -
Page 60: To Cable A Controller Unit To Two Expansion Units
2. Connect one cable between the P2 port of the controller unit and 1B port of the second expansion unit. The other ports in the units remain empty. Connecting a Controller Unit to Two Expansion Units FIGURE 3-5 Sun StorageTek 5220 NAS Appliance Getting Started Guide • October 2006... -
Page 61: Connecting To The Network
Connecting to the Network Use the following procedures to connect the Sun StorageTek 5220 NAS Appliance to your network, either Fast Ethernet or optical Gigabit Ethernet, depending on your site’s configuration. The cables are provided in the ship kit. Each configuration is described in the following sections. -
Page 62: To Connect To Optical Gigabit Ethernet Networks
Identifiers for Network Ports TABLE 3-1 Hardware Software Identifier Identifier Appliance NET0 emc1 NET1 emc2 NET2 emc3 NET3 emc4 optical Gigabit Ethernet card emf5 emf6 Sun StorageTek 5220 NAS Appliance Getting Started Guide • October 2006... -
Page 63: Powering On The System
Note – If you are using a UPS, connect all units to the UPS. Note – To achieve fault tolerance, units with two power supplies must receive power from two different AC circuits. Chapter 3 Connecting the Sun StorageTek 5220 NAS Appliance... -
Page 64: To Power On The Appliance And Controller Unit Initially
“To Power On the Appliance, Controller Unit, and Expansion Units Initially” on page 1. Verify that all cables between the Sun StorageTek 5220 NAS Appliance and the “Connecting the controller unit are secured according to the instructions in Appliance to the Controller Unit”... - Page 65 5. Using a pen tip or similar implement, press the recessed Power button on the appliance’s front panel, as shown in FIGURE 3-8 Power LED Power button Detail of Power Button and Front Panel FIGURE 3-8 Chapter 3 Connecting the Sun StorageTek 5220 NAS Appliance...
-
Page 66: To Power On The Appliance, Controller Unit, And Expansion Units Initially
If you do not have any expansion units, you must use the procedure described in “To Power On the Appliance and Controller Unit Initially” on page 1. Verify that all cables between the Sun StorageTek 5220 NAS Appliance, controller “Connecting unit, and expansion units are secured according to the instructions in the Appliance to the Controller Unit”... -
Page 67: To Power On The System After A Shutdown
If you power the units off and on too quickly, unexpected results can occur. 1. Verify that all cables between the Sun StorageTek 5220 NAS Appliance, controller units, and expansion units are secured according to the instructions in “Connecting the Appliance to the Controller Unit”... -
Page 68: Configuring The Appliance
DHCP server on another network. The DHCP server or agent assigns an IP address to the Sun StorageTek 5220 NAS Appliance whenever it is powered on while connected to the network. If a DHCP server is not available, you must assign the IP address manually. -
Page 69: To Display The Ip Address
1. Turn on the Sun StorageTek 5220 NAS Appliance and wait for the power-on sequence to complete. Note – If you have a DHCP server, skip the discovery step. When the LCD panel displays “DHCP Discovery NIC X” status message, press any key on the LCD panel to display the “Abort DHCP?”... -
Page 70: Accessing The Web Administrator
To Connect to the Web Administrator 1. From a client system on the same network as the appliance, open a web browser and type the IP address of the Sun StorageTek 5220 NAS Appliance in the address or location field, for example: http://123.111.78.99... -
Page 71: Next Steps
Web Administrator displays is a running log that can overflow. To save the entire log, set up a local log according to the instructions in the Sun StorageTek NAS OS Administration Guide. Chapter 3 Connecting the Sun StorageTek 5220 NAS Appliance... - Page 72 Sun StorageTek 5220 NAS Appliance Getting Started Guide • October 2006...
-
Page 73: Hardware Specifications
A P P E N D I X Hardware Specifications This appendix describes the characteristics and requirements of the Sun StorageTek 5220 NAS Appliance, the Sun StorageTek 5220 RAID Controller unit, and the Sun StorageTek 5220 Expansion unit. Environmental Specifications TABLE A-1 Specifications Operating... -
Page 74: Physical Characteristics
13.0 cm x 48.3 cm x 57.2 cm (5.1 in. x 19 in. x 22.5 in.) Controller/Expansion Units Height in Rack Appliance Controller/Expansion Units Weight 18.6 kg (41.1 lb) Appliance Controller Unit 37.2 kg (82 lb) Expansion Unit 36.7 kg (81 lb) Sun StorageTek 5220 NAS Appliance Getting Started Guide • October 2006... - Page 75 Power Requirements TABLE A-3 Specification Value 90-264VAC Voltage 47-63 Hz Frequency AC current input (maximum) Appliance 3.6A (115V~) or 1.8A (230V~) 4.2A (115V~) or 2.1A (230V~) Controller Unit 4.1A (115V~) or 2.0A (230V~) Expansion Unit Power consumption Appliance 418VA (from AC source), maximum 251W (from power supply), maximum Power availability: 550W maximum (from power supply) Controller Unit...
- Page 76 Sun StorageTek 5220 NAS Appliance Getting Started Guide • October 2006...
-
Page 77: Third-Party License Agreements
A P P E N D I X Third-Party License Agreements 1 The software provided as part of the Sun StorageTek 5220 NAS Appliance system may contain code provided by the following organizations or individuals under the described licenses. 2 The University of California Berkley Software Distribution License Copyright (c) 1991 The Regents of the University of California. - Page 78 M.I.T. software. M.I.T. makes no representations about the suitability of this software for any purpose. It is provided “as is” without express or implied warranty. Sun StorageTek 5220 NAS Appliance Getting Started Guide • October 2006...
- Page 79 5 The OpenVision Technologies Inc License Copyright 1993 by OpenVision Technologies, Inc. Permission to use, copy, modify, distribute, and sell this software and its documentation for any purpose is hereby granted without fee, provided that the above copyright notice appears in all copies and that both that copyright notice and this permission notice appear in supporting documentation, and that the name of OpenVision not be used in advertising or publicity pertaining to distribution of the software without specific, written prior permission.
- Page 80 It is provided “as is” without express or implied warranty of any kind. These notices must be retained in any copies of any part of this documentation and/or software. Sun StorageTek 5220 NAS Appliance Getting Started Guide • October 2006...
- Page 81 11 MD5 License “THE BEER-WARE LICENSE” (Revision 42): <phk@login.dknet.dk> wrote this file. As long as you retain this notice you can do whatever you want with this stuff. If we meet some day, and you think this stuff is worth it, you can buy me a beer in return. Poul-Henning Kamp 12 NIS License Copyright (c) 1996, 1997 Bill Paul <wpaul@ctr.columbia.edu>.
- Page 82 LIABILITY, WHETHER IN CONTRACT, STRICT LIABILITY, OR TORT (INCLUDING NEGLIGENCE OR OTHERWISE) ARISING IN ANY WAY OUT OF THE USE OF THIS SOFTWARE, EVEN IF ADVISED OF THE POSSIBILITY OF Sun StorageTek 5220 NAS Appliance Getting Started Guide • October 2006...
- Page 83 SUCH DAMAGE. The names of the authors and copyright holders must not be used in advertising or otherwise to promote the sale, use or other dealing in this Software without specific, written prior permission. Title to copyright in this Software shall at all times remain with copyright holders.
- Page 84 THIS SOFTWARE IS PROVIDED BY THE AUTHOR “AS IS” AND ANY EXPRESS OR IMPLIED WARRANTIES, INCLUDING, Sun StorageTek 5220 NAS Appliance Getting Started Guide • October 2006...
- Page 85 BUT NOT LIMITED TO, THE IMPLIED WARRANTIES OF MERCHANTABILITY AND FITNESS FOR A PARTICULAR PURPOSE ARE DISCLAIMED. IN NO EVENT SHALL THE AUTHOR BE LIABLE FOR ANY DIRECT, INDIRECT, INCIDENTAL, SPECIAL, EXEMPLARY, OR CONSEQUENTIAL DAMAGES (INCLUDING, BUT NOT LIMITED TO, PROCUREMENT OF SUBSTITUTE GOODS OR SERVICES; LOSS OF USE, DATA, OR PROFITS;...
- Page 86 [including the GNU Public License.] Sun StorageTek 5220 NAS Appliance Getting Started Guide • October 2006...
- Page 87 19 Sun RPC License Sun RPC is a product of Sun Microsystems, Inc. and is provided for unrestricted use provided that this legend is included on all tape media and as a part of the software program in whole or part. Users may copy or modify Sun RPC without charge, but are not authorized to license or distribute it to anyone else except as part of a product or program developed by the user.
- Page 88 THIS SOFTWARE, EVEN IF ADVISED OF THE POSSIBILITY OF SUCH DAMAGE. Inspiration and ideas about this driver are from Erik Moe’s Linux driver (qlogicisp.c) and Dave Miller’s SBus version of same (qlogicisp.c). Some ideas dredged from the Solaris driver. Sun StorageTek 5220 NAS Appliance Getting Started Guide • October 2006...
- Page 89 22 QLogic SCSI License Copyright (c) 1997, 1998 by Matthew Jacob NASA/Ames Research Center All rights reserved. Redistribution and use in source and binary forms, with or without modification, are permitted provided that the following conditions are met: 1.Redistributions of source code must retain the above copyright notice immediately at the beginning of the file, without modification, this list of conditions, and the following disclaimer.
- Page 90 ANY THEORY OF LIABILITY, WHETHER IN CONTRACT, STRICT LIABILITY, OR TORT (INCLUDING NEGLIGENCE OR OTHERWISE) ARISING IN ANY WAY OUT OF THE USE OF THIS SOFTWARE, EVEN IF ADVISED OF THE POSSIBILITY OF SUCH DAMAGE. Sun StorageTek 5220 NAS Appliance Getting Started Guide • October 2006...
- Page 91 25 NIC Bonding Pseudo Device Driver The bonding pseudo device driver contains various copyright statements: 1.Copyright 1999, Thomas Davis, tadavis@lbl.gov. Licensed under the GPL. Based on dummy.c, and eql.c devices. 2.Portions are (c) Copyright 1995 Simon “Guru Aleph- Null” Janes NCM: Network and Communications Management, Inc. BUT, I’m the one who modified it for ethernet, so: (c) Copyright 1999, Thomas Davis, tadavis@lbl.gov This software may be used and distributed according to the terms of the GNU Public License, incorporated herein by reference.
- Page 92 FOR ANY CLAIM, DAMAGES OR OTHER LIABILITY, WHETHER IN AN ACTION OF CONTRACT, TORT OR OTHERWISE, ARISING FROM, OUT OF OR IN CONNECTION WITH THE SOFTWARE OR THE USE OR OTHER DEALINGS IN THE SOFTWARE. Sun StorageTek 5220 NAS Appliance Getting Started Guide • October 2006...
-
Page 93: Glossary
Glossary array (n.) Multiple disk drives that function as a single storage element and is managed by the NAS appliance. The array consists of one controller unit and, optionally, up to two expansion units. (American wire gauge) (n.) A unit for measuring the thickness of wire. The trays of disk drives. - Page 94 The card includes encoding and decoding circuitry and a receptacle for a network cable connection. Network Information Service patch A software or firmware update for a storage device or device component. Sun StorageTek 5220 NAS Appliance Getting Started Guide • October 2006...
- Page 95 RAID (Redundant Array of Independent Disks) (n.) A group of hard disks under the control of management software that work together to improve performance and decrease the odds of losing data to mechanical or electronic failure by using techniques such as data striping. RAID-5 (n.) The most common RAID implementation.
- Page 96 Sun StorageTek 5220 NAS Appliance Getting Started Guide • October 2006...
-
Page 97: Index
Index appliance, 44, 49 to 50 back-end storage, 43 administrator console, 7, 58 Ethernet, 49 appliances fiber optic, 45 cabling, 43, 44 network, 49 to 50 configuration, 56 to 59 optical fiber, 44 dimensions, 62 power, 42 height in rack, 62 cabling installation, 28 to 41 appliance to controller units, 44... - Page 98 file access protocols, 2 identifiers, 50 protocol, 2 security, 2 Gigabit Ethernet, 49 copper, 4 fiber, 4 optical fiber cable, 44 optical, 50 optical Gigabit Ethernet, 50 grounding, 9, 13 to 14 Sun StorageTek 5220 NAS Appliance Getting Started Guide • October 2006...
- Page 99 53 Sun StorageTek 5220 Controller Unit, See controller power cables, 42 units power supply switch, 5, 52, 54 Sun StorageTek 5220 NAS Appliance, See appliances Sun StorageTek 5320 Expansion Unit, See expansion units racks Sun StorageTek Compliance Archiving Software, 8...
- Page 100 Sun StorageTek 5220 NAS Appliance Getting Started Guide • October 2006...
Need help?
Do you have a question about the StorageTek 5220 NAS Appliance and is the answer not in the manual?
Questions and answers