JVC GR-DVL220U Service Manual

Jvc digital video camera service manual
Hide thumbs Also See for GR-DVL220U:
Table of Contents

Advertisement

JVC SERVICE & ENGINEERING COMPANY OF AMERICA
DIVISION OF JVC AMERICAS CORP.
Head office
:
1700 Valley Road Wayne, New Jersey 07470-9976
:
10 New Maple Avenue Pine Brook, New Jersey 07058-9641
East Coast
:
705 Enterprise Street Aurora, Illinois 60504-8149
Midwest
:
5665 Corporate Avenue Cypress, California 90630-0024
West Coast
:
1500 Lakes Parkway Lawrenceville, Georgia 30043-5857
Atlanta
:
2969 Mapunapuna Place Honolulu, Hawaii 96819-2040
Hawaii
JVC CANADA INC.
Head office
:
21 Finchdene Square Scarborough, Ontario M1X 1A7
:
Montreal
16800 Rte Trans-Canadienne, Kirkland, Quebec H9H 5G7
:
Vancouver
13040 Worster Court Richmond, B.C. V6V 2B3
(973)317-5000
(973)396-1000
(630)851-7855
(714)229-8011
(770)339-2582
(808)833-5828
(416)293-1311
(514)871-1311
(604)270-1311
S40895-04
Printed in Japan
SERVICE MANUAL

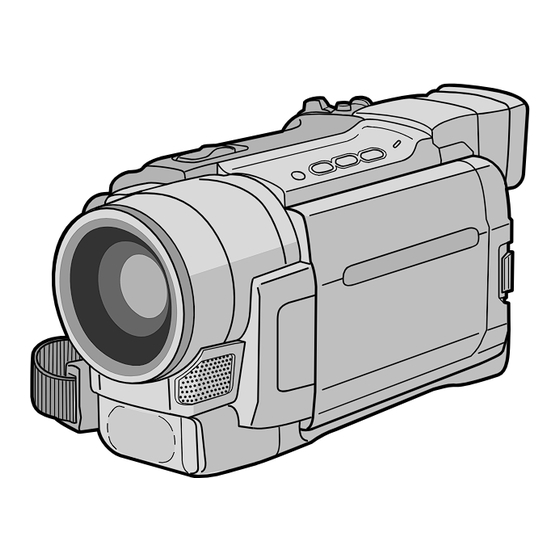
DIGITAL VIDEO CAMERA

GR-DVL220U,DVL320U,DVL520U,
DVL522U,DVL720U
SPECIFICATIONS
(The specifications shown pertain specifically to the model GR-DVL320/DVL520/DVL720)
Camcorder
General
Power supply
: DC 11.0 V } (Using AC Adapter)
DC 7.2 V } (Using battery pack)
Power consumption
LCD monitor off, viewfinder on : Approx. 4.3 W
LCD monitor on, viewfinder off : Approx. 5.3 W
Video light
: Approx. 3.5 W
Dimensions (W x H x D) : 79 mm x 89 mm x 167 mm (3-1/8" x 3-9/16" x 6-5/8")
(with the LCD monitor closed and the viewfinder
pushed down)
Weight
: Approx. 570 g (1.3 lbs) (GR-DVL720)
Approx. 560 g (1.3 lbs) (GR-DVL520)
Approx. 550 g (1.3 lbs) (GR-DVL320)
Operating temperature : 0°C to 40°C (32°F to 104°F)
Operating humidity
: 35% to 80%
Storage temperature
: –20°C to 50°C (–4°F to 122°F)
Pickup
: 1/4" CCD
Lens
: F 1.8, f = 3.8 mm to 38 mm, 10:1 power zoom lens
Filter diameter
: ø37 mm
LCD monitor
: 3.5" diagonally measured, LCD panel/TFT active
matrix system (GR-DVL720)
2.5" diagonally measured, LCD panel/TFT active
matrix system (GR-DVL520/DVL320)
Viewfinder
: Electronic viewfinder with 0.24" black/white LCD
Speaker
: Monaural
Digital Video Camera
Format
: DV format (SD mode)
Signal format
: NTSC standard
Recording/Playback format : Video: Digital component recording
: Audio: PCM digital recording, 32 kHz 4-channel (12-bit),
48 kHz 2-channel (16-bit)
Cassette
: Mini DV cassette
Tape speed
: SP: 18.8 mm/s
LP: 12.5 mm/s
Maximum recording time : SP: 80 min.
(using 80 min. cassette) LP: 120 min.
This service manual is printed on 100% recycled paper.
COPYRIGHT © 2001 VICTOR COMPANY OF JAPAN, LTD.
Digital Still Camera Function (GR-DVL720/DVL520 only)
Storage media
: SD Memory Card/MultiMediaCard
Compression system : JPEG (compatible)
File size
: 2 modes (1024 x 768 pixels, 640 x 480 pixels)
Picture quality
: 2 modes (FINE/STANDARD)
Approximate number of storable images
with memory card [8 MB] (provided)
FINE
: 20 (1024 x 768 pixels), 45 (640 x 480 pixels)
STANDARD
: 65 (1024 x 768 pixels), 160 (640 x 480 pixels)
For other memory cards, «g. 27.
Connectors
S-Video
Output
: Y:1 V (p-p), 75 , analog
C:0.29 V (p-p), 75 , analog
AV
Video output
: 1 V (p-p), 75 , analog
Audio output
: 300 mV (rms), 1 k, analog, stereo
DV
Output
: 4-pin, IEEE 1394 compliant
Input
: 4-pin, IEEE 1394 compliant
USB (GR-DVL720/DVL520 only) : 5-pin
PC (GR-DVL320 only)
:
ø2.5 mm, 3-pole
EDIT (GR-DVL720/DVL520 only) : ø3.5 mm, 2-pole
JLIP (GR-DVL320 only)
: ø3.5 mm, 4-pole
AC Adapter
Power requirement
U.S.A. and Canada : AC 120 V `, 60 Hz
Other countries
: AC 110 V to 240 V `, 50 Hz/60 Hz
Output
: DC 11 V } , 1 A
Specifications shown are for SP mode unless otherwise indicated. E & O.E.
Design and specifications subject to change without notice.
No. 86658
December 2001

Advertisement

Table of Contents
loading

Summary of Contents for JVC GR-DVL220U

  • Page 1: Digital Video Camera

    JVC SERVICE & ENGINEERING COMPANY OF AMERICA DIVISION OF JVC AMERICAS CORP. Head office 1700 Valley Road Wayne, New Jersey 07470-9976 10 New Maple Avenue Pine Brook, New Jersey 07058-9641 East Coast 705 Enterprise Street Aurora, Illinois 60504-8149 Midwest 5665 Corporate Avenue Cypress, California 90630-0024...
  • Page 2: Table Of Contents

    2.6.1 Assembling slide deck assembly and main deck assembly 2-16 2.6.2 Locating tension pole ... 2-17 2.7 SERVICE NOTE ... 2-18 2.8 JIG CONNECTOR CABLE CONNECTION ... 2-20 The following table lists the differing points between Models GR-DVL220U,GR-DVL320U, GR-DVL520U,GR-DVL522U and GR-DVL720U in this serise. GR-DVL220U LCD MONITOR...
  • Page 3: Important Safety Precautions

    Important Safety Precautions Prior to shipment from the factory, JVC products are strictly inspected to conform with the recognized product safety and electrical codes of the countries in which they are to be sold. However, in order to maintain such compliance, it is equally important to implement the following precautions when a set is being serviced.
  • Page 4 • Safety Check after Servicing Examine the area surrounding the repaired location for damage or deterioration. Observe that screws, parts and wires have been returned to original positions, Afterwards, perform the following tests and confirm the specified values in order to verify compliance with safety standards.
  • Page 5: Disassembly

    1.1 BEFORE ASSEMBLY AND DISASSEMBLY 1.1.1 Precautions 1. Be sure to remove the power supply unit prior to mount- ing and soldering of parts. 2. When removing a component part that needs to discon- nect the connector and to remove the screw for remov- ing itself, first disconnect the connecting wire from the connector and then remove the screw beforehand.
  • Page 6: Jigs And Tools Required For Disassembly, Assembly And Adjustment

    1.2 JIGS AND TOOLS REQUIRED FOR DISASSEMBLY, ASSEMBLY AND ADJUSTMENT 1.2.1 Tools required for adjustments Torque Driver YTU94088 YTU94088-003 Tweezers Chip IC Replacement Jig P-895 Cleaning Cloth KSMM-01 Table 1-2-1 1. Torque driver Be sure to use to fastening the mechanism and exterior parts because those parts must strictly be controlled for tightening torque.
  • Page 7: Disassembly Method

    1.3.2 Disassembly method STEP Fig.No. PART POINT UPPER CASE Fig. 1-3-1 6(S1a), 4(S1b), 3(S1c), ASSY (Inc. MONITOR ASSY / E.VF ASSY) - - - - - - - - - - - - - - - - - - - - - - - - - - - - - - - - - - - - - - - - - - - - - - - - - - - - - - - DSC BOARD (S2), CN2a, CN2b ASSY...
  • Page 8 Fig. 1-3-2 ∗ : 0.147N·m (1.5kgf·cm) Fig. 1-3-3 ∗ SPEAKER ∗ BRACKET (MONITOR) Fig. 1-3-4 NOTE KNOB (VIDEO-DSC) KNOB (DC LIGHT) Fig. 1-3-5...
  • Page 9 NOTE TO MAIN TO CCD Fig. 1-3-7 NOTE COVER (JACK) Fig. 1-3-6 NOTE NOTE COVER DC LIGHT DC LIGHT (DC) Fig. 1-3-8...
  • Page 10 Fig. 1-3-9 NOTE EJECT SW NOTE Fig. 1-3-10 SHIELD PLATE Fig. 1-3-11 BRACKET (MECHA) Fig. 1-3-12...
  • Page 11: Monitor Assembly

    MONITOR ASSEMBLY Note: The shape of the monitor assembly varies by the size of the LCD screen. For the 2.5”-type LCD, refer to Fig. 1-4-1. 1.4.1 Disassembly/assembly of monitor assembly (for 2.5”-type LCD) Note: Be careful not to soil or scratch the monitor screen through the disassembly/assembly work.
  • Page 12: Disassembly/Assembly Of Monitor Assembly (For 3.5"-Type Lcd)

    Note: The shape of the monitor assembly varies by the size of the LCD screen. For the 3.5”-type LCD, refer to Fig. 1-4-2. 1.4.3 Disassembly/assembly of monitor assembly (for 3.5”-type LCD) Note: Be careful not to soil or scratch the monitor screen through the disassembly/assembly work.
  • Page 13: Vf Assembly

    E. VF ASSEMBLY 1.5.1 Disassembly/assembly of E.VF assembly (for the B/W VF) 1. Remove the EYE CUP. 2. Remove the three screws (1 to 3) and then remove the CASE B (VF). 3. Remove the screw (4) to remove the LEVER (VF) and pull out the LENS ASSY.
  • Page 14: Disassembly/Assembly Of 0 Op Block Assembly/Ccd Board Assembly

    1.6 DISASSEMBLY/ASSEMBLY OF 0 OP BLOCK ASSEMBLY/CCD BOARD ASSEMBLY 1.6.1 Precautions 1. Take care in handling the CCD image sensor, optical LPF and lens components when performing maintenance etc., especially with regard to surface contamination, at- tached dust or scratching. If fingerprints are present on the surface they should be wiped away using either a silicon paper, clean chamois or the cleaning cloth.
  • Page 15: Emergency Display

    1.7 EMERGENCY DISPLAY Whenever some abnormal signal is input to the syscon CPU, an error number (E01, as an example) is displayed on the LCD monitor or (in the electronic view finder). In every error status, such the message as shown below alternately appear over and over.
  • Page 16: Service Note

    1.8 SERVICE NOTE 1-12...
  • Page 17: Mechanism Adjustment

    2.1 PRELIMINARY REMARKS ON ADJUSTMENT AND REPAIR 2.1.1 Precautions 1. When fastening parts, pay careful attention to the tight- ening torque of each screw. Unless otherwise specified, tighten a screw with the torque of 0.039 N 2. Be sure to disconnect the set from the power supply be- fore fastening and soldering parts.
  • Page 18: Jigs And Tools Required For Disassembly, Assembly And Adjustment

    2.2 JIGS AND TOOLS REQUIRED FOR DISASSEMBLY, ASSEMBLY AND ADJUSTMENT 2.2.1 Tools required for adjustments Torque Driver YTU94088 Tweezers Chip IC Replacement Jig P-895 Guide Driver Adjustment Driver YTU94148A Jig Connector cable Slit Washer Installation Jig YTU94121A Communication cable YTU93107A Service Support System Alignment Tape YTU94057-57...
  • Page 19: Disassembly/Assembly Of Mechanism Assembly

    2.3 DISASSEMBLY/ASSEMBLY OF MECHANISM ASSEMBLY 2.3.1 General statement The mechanism should generally be disassembled/assem- bled in the EJECT mode (ASSEMBLY mode). (Refer to Fig. 2-3-1.) However, when the mechanism is removed from the main body, it is set in the STOP mode. Therefore, after the mechanism is removed from the main body, supply 3 V DC to the electrode on the top of the loading motor to enter the mechanism mode into the EJECT mode compulsory.
  • Page 20: Mechanism Timing Chart

    2.3.3 Mechanism timing chart MODE EJECT C IN PARTS MAIN CAM (ø10.4) 31.7 45.6 SUB CAM (ø11) 43.1 ENCODER (ø10) 47.4 ROTARY ENCODER CAM SW SLIDE END <SLIDE DECK> SLIDE POLE BASE EJECT LEVER SUP LOADING BRAKE RELEASE GUIDE SUB BRAKE (T) PINCH ROLLER TENSION PAD ARM...
  • Page 21: Disassembly/Assembly Of Mechanism Assembly

    2.4 DISASSEMBLY/ASSEMBLY OF MECHANISM ASSEMBLY 2.4.1 Follow chart 1. Configuration Cassette housing assembly 2. Procedures for disassembly Slide deck assembly Mechanism assembly Slide deck assembly Fig. 2-4-1 Mechanism assembly Cassette housing assembly Main deck assembly Fig. 2-4-2 Main deck assembly...
  • Page 22 3. Disassembling procedure table PART NAME A Cassette housing assembly Reel disk (SUP) assembly Reel disk (TU) assembly Reel cover assembly Tension arm assembly Release guide assembly Idler arm assembly Guide arm assembly Pinch roller arm assembly Cleaner arm assembly Slant pole arm assembly Drum assembly Guide roller (S) assembly...
  • Page 23 < TOP VIEW > Slide deck assembly 7b 7a 7d 7e 9c 3c 3b 7h 2b < BOTTOM VIEW > Slide deck assembly 4b 11b 11a Fig. 2-4-3 Fig. 2-4-4 Main deck assembly Main deck assembly...
  • Page 24: Disassembly/Assembly

    2.4.2 Disassembly/assembly 1. A Cassette housing assembly (L1b) (S1) (S1) Note 1b (L1b) (L1d) (L1c) Slide deck assembly /Main deck assembly Note 1c Fig. 2-4-5 2. 2a Reel disk (SUP) assembly 2b Reel disk (TU) assembly 2c Reel cover assembly (W2) (W2) Note 2b...
  • Page 25 3. 3a Tension arm assembly/ 3b Release guide assembly 3c Idler arm assembly/ 3d Guide arm assembly 3e Pinch roller arm assembly (W3a) Note 3a (W3b) (W3a) Note 3b Fig. 2-4-7 4. 4a Cleaner arm assembly/ 4b Slant pole arm assembly 4c Drum assembly (S4) (S4)
  • Page 26 5. 5a Guide roller (S) assembly/ 5b Rail assembly Note 5a (P5) Note 5b (W5a) (W5b) Note 5c (W5a) (W5a) Fig. 2-4-9 6. B Slide deck assembly/ C Main deck assembly (L6a) (W6) BSlide deck assembly (L6b) Note 6a (L6c) (L6d) Fig.
  • Page 27 7. 7a Loading brake assembly/ 7b Guide pin (S) 7c Pad arm assembly/ 7d Slide guide plate assembly 7e Collar/ 7f Collar/ 7g Sub brake assembly 7h Control plate assembly Note 7d (W7) (P7b) Note 7c (S7b) (S7a) (P7a) (W7) Note Note 7e (W7)
  • Page 28 9. 9a Loading guide/ 9b Timing belt 9c Center gear assembly/ 9d Motor bracket assembly 9e Worm wheel/ 9f Gear holder Note 9b Note 9a (S9) (W9) (S9) Fig. 2-4-13 10. 10a Main cam gear/ 10b Brake control plate 10c Rotary encoder/ 10d Connect gear 10e Reel drive pulley assembly (S10) (W10a)
  • Page 29 11. 11a Catcher (T) assembly/ 11b Capstan motor 11c Charge arm assembly/ 11d Sub cam gear 11e PWB holder (S11) Note 11 (W11) (S11) (S11) (S11) (S11) (S11) Fig. 2-4-15 Note 11: The following figure shows how to put the charge arm as- sembly and sub cam gear assembly together.
  • Page 30: List Of Procedures For Disassembly

    2.4.3 List of procedures for disassembly Cassette housing assembly (L1b) (S1) (L1d) (L1c) (S1) (S10) (S9) (W7) (P7b) (W3a) (S7a) (W7) (P7a) (S7b) (W6) (W7) (P7d) (W2) (W2) (S2a) (S2a) (S2b) (W2) Note) Classification Part No. Symbol in drawing Grease KYODO-SH-P YTU94027 2-14...
  • Page 31: Checkup And Adjustment Of Mechanism Phase

    2.5 CHECKUP AND ADJUSTMENT OF MECHANISM PHASE <Rotary encoder> Set the “I” of the rotary part at the tapped hole as shown in the figure. <Worm wheel> (Note 2) Set the worm wheel so that its locating hole meets the hole on the main deck assembly.
  • Page 32: Mechanism Adjustments

    2.6 MECHANISM ADJUSTMENTS 2.6.1 Assembling slide deck assembly and main deck assembly œ Œ Assembling procedure 1. Loosen the screw A. 2. Set the mechanism in the PLAY mode. (Refer to “2.3.2 Explanation of mechanism mode”.) 3. Press the end face B of the slide deck assembly (reel disk side) and the end face C of the main deck assem- bly (drum assembly side) with uniform force so that the two assemblies are tightly pressed to each other.
  • Page 33: Locating Tension Pole

    2.6.2 Locating tension pole <PLAY mode> Locating procedure 1. Enter the mechanism assembly into the PLAY mode. (Refer to “2.3.2 Explanation of mechanism mode”.) 2. When the “ ” part is positioned down, make sure that the part “a” of the tension arm assembly is located within the range of “b”.
  • Page 34: Service Note

    2.7 SERVICE NOTE Use the following chart to manage mechanism parts that are removed for disassembling the mechanism. Cassette housing assembly S1×3 Reel disk (SUP) assembly W2×1 Reel disk (TU) assembly W2×1 Tension arm Release guide assembly assembly W3a×1 Cleaner arm assembly Guide roller (S) assembly P5×1 2-18...
  • Page 35 Slide deck assembly W6×1 Main deck assembly Loading Timing belt guide S9×1 Main cam Brake control gear plate S10×1 Catcher (T) Capstan motor assembly S11×2 S11×2 Loading Guide pin brake assembly W7×1 P7a×1 S7a×1 Collar Collar Slide lever Tension lever assembly assembly Center gear...
  • Page 36: Jig Connector Cable Connection

    2.8 JIG CONNECTOR CABLE CONNECTION Remove one screw (1) first and the cover (JIG) next. CN105 Cover(JIG) MAIN CN105 VPPC REG_3V SRV_TX CJIG_RST IF_TX I_MTR FS_PLL ATFI MAIN VCO ENV_OUT PB_CLK HID1 JLIP_TX JLIP_RX MON_G CVF_G SRV_RX VPPD Al_3VSYS DRST DISCRI SRV_GND TRST...
  • Page 37: Electrical Adjustment

    ELECTRICAL ADJUSTMENT 3.1 PRECAUTION 1. Precaution Both the camera and deck sections of this model needs a personal computer for adjustment except simple adjustment with potentiometers. If some of the following parts is replaced for repair or other reason, the repaired set must be adjusted with a personal computer.
  • Page 38: Setup

    Torque driver Be sure to use to fastening the mechanism and exte- rior parts because those parts must strictly be control- led for tightening torque. This bit is slightly longer than those set in conventional torque drivers. Tweezers To be used for removing and installing parts and wires. Chip IC replacement jig To be used for adjustment of the camera system.

Table of Contents