Table of Contents
Advertisement
Quick Links
L
-
L
-
1
/
6
S
C
A
L
E
A
1
/
6
S
C
A
L
E
A
I
N
S
T
I
N
S
T
The Piper J-3 Cub is a small, simple, light aircraft that was built between 1937 and 1947 by Piper
Aircraft. With tandem (fore and aft) seating, it was intended for flight training, but became one of the
most popular and best-known light aircraft of all time.
Piper developed a military variant variously designated as the O-59 (1941), L-4 (after April 1942), and
NE (U.S. Navy). The variety of models, as well as similar, tandem-cockpit accommodation aircraft from
Aeronca and Taylorcraft, were collectively nicknamed "Grasshoppers" and used extensively in World
War II for reconnaissance, transporting supplies, and medical evacuation. In Europe, the final dogfight of
WWII occurred between an L-4 and a German Fieseler Fi-156 Storch. The pilot and co-pilot of the L-4,
Lts. Duane Francis and Bill Martin, opened fire on the Storch with their pistols, forcing the German air
crew to land and surrender.
After the war, most L-4s were destroyed or sold as surplus, but a few saw service in the Korean War.
The Grasshoppers sold as surplus in the U.S. were redesignated as J-3s, but often retained their wartime
glazing and paint.
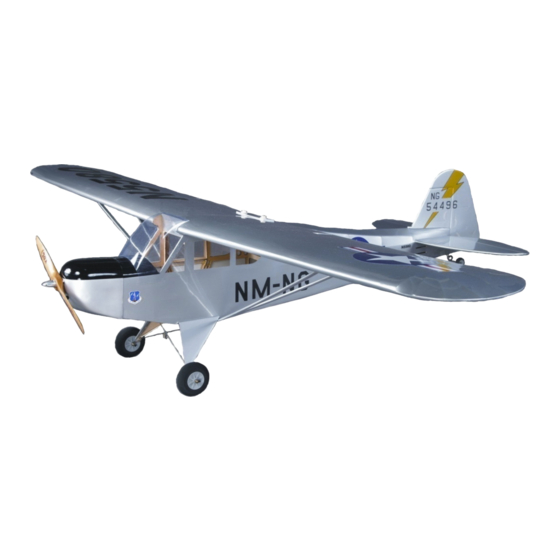
This 1/6 scale RC model airplane is made of balsa, light-ply and fiberglass, and is based on L-4
"Grasshopper" S/N: 45-4496 which is currently owned and operated by the Air National Guard in the
state of New Mexico.
We invite you to enjoy the pride of ownership and the joy of flying
this beautiful model of the famous L-4 Grasshopper.
TABLE OF CONTENTS
I. Safety Precautions & Assembly Tips .............. 2
III. Parts List ........................................................... 3
IV. Special Features ............................................... 4
4
4
"
G
r
"
G
r
R
F
R
A
D
I
O
C
O
R
F
R
A
D
I
O
C
O
R
U
C
T
R
U
C
T
Shown with optional electric power system
and 11 x 6 wooden propeller.
a
s
s
h
o
a
s
s
h
o
N
T
R
O
L
S
P
O
R
T
N
T
R
O
L
S
P
O
R
T
I
O
N
M
I
O
N
M
V. Specifications ....................................... 4
VI. Assembly Instructions .......................... 4
VII. Setup & Adjustments ........................... 9
VIII. Transport & Preflight Checks .............. 9
Page 1 of 10
p
p
e
r
"
p
p
e
r
"
-
S
C
A
L
E
A
I
R
P
L
-
S
C
A
L
E
A
I
R
P
L
A
N
U
A
A
N
U
A
/
S110729 Copyright 2011
A
N
E
A
N
E
L
L
Advertisement
Table of Contents

Related Manuals for Maxford L-4 Grasshopper


Summary of Contents for Maxford L-4 Grasshopper
-
Page 1: Table Of Contents
“Grasshopper” S/N: 45-4496 which is currently owned and operated by the Air National Guard in the state of New Mexico. We invite you to enjoy the pride of ownership and the joy of flying this beautiful model of the famous L-4 Grasshopper. TABLE OF CONTENTS I. Safety Precautions & Assembly Tips ....2 V. -
Page 2: Safety Precautions & Assembly Tips
4. Throughout the lifetime of this model, use only the Maxford USA-supplied or a same-sized motor and a new or well-maintained radio-control system and batteries recommended by Maxford USA or your radio system. -
Page 3: Warranty, Liability Waiver & Return Policy
Maxford USA from all current or future liability for any personal injury, property damage, or wrongful death, and if you (the buyer or user of this product) are involved in any claim or suit, you will not sue Maxford USA or any of its representatives. -
Page 4: Special Features
• Optional upgrades: Dashboard, throttle control, dummy engine and floats. • Options required for EP conversion: U35425 motor, 60A electronic speed control (ESC), 2 ea. 3 cell 2100 mAh LiPo batteries, and connectors (to run the batteries in parallel and connect the batteries to the ESC). - Page 5 2. Engine (or Motor) and Cowl – a. Test-fit your engine, the engine mount, fuel lines, throttle pushrod and all related engine-mounting hardware as shown below. b. Using the spacing required by your engine’s mounting lugs, drill holes in the engine mounts and use engine mounting bolts, washers and nuts (#6-7-8 above) to securely attach your engine to the engine mounts.
- Page 6 c) Attach your ESC and confirm that the motor runs in the correct direction by connecting the ESC’s throttle lead to your radio receiver’s throttle channel; switch ON your transmitter and set transmitter’s throttle and throttle trim controls to minimum; with no propeller on the motor, switch ON your transmitter and connect the ESC to the battery;...
- Page 7 d. Test-fit the vertical stabilizer into its slot at the top rear of the fuselage. (Ensure the lower portion of the rudder will align with but not bind against the lower end of the fuselage.) e. Secure the vertical stbilizer (#1) into its Elevator’s slot with thin CA adhesive.
- Page 8 Website at www.maxfordusa.com (NOTE: All of the optional upgrade items for the L-4 Grasshopper may also be purchased for use with our ARF model of the Piper J-3 Cub.) 8. Mount the Wing –...
-
Page 9: Setup & Adjustments
Y-cable. (To help ensure the security of these servo connections, we recommend use of optional Maxford USA servo extension safety clips.) 3. With the wing and aileron extensions neatly and safely reconnected and properly positioned, align and insert the plywood projections at the middle of the wing’s... - Page 10 Grasshopper has achieved adequate flying speed, give only a slight amount of UP elevator to gently climb to a safe manuevering altitude. Congratulations on your new L-4 Grasshopper. May you enjoy many Happy Landings! However, please remember …...
Need help?
Do you have a question about the L-4 Grasshopper and is the answer not in the manual?
Questions and answers