JVC Everio GZ-MC100 Instructions Manual
Digital media camera
Hide thumbs
Also See for Everio GZ-MC100:
- Instructions manual (69 pages) ,
- Bedienungsanleitung (44 pages) ,
- Brochure & specs (8 pages)
Table of Contents
Advertisement
Quick Links
DIGITAL MEDIA CAMERA
GZ-MC100
INSTRUCTIONS
This instruction manual describes the basic operations of the camera.
For more information, read the advanced operation manual provided
as HTML format in the CD-ROM. See page 32 for details.
To deactivate the demonstration, set
"DEMO MODE" to "OFF". (
LYT1350-001A
ENGLISH
6
19
26
32
pg. 26)
EN
Advertisement
Table of Contents

Related Manuals for JVC Everio GZ-MC100


Summary of Contents for JVC Everio GZ-MC100
- Page 1 DIGITAL MEDIA CAMERA GZ-MC100 INSTRUCTIONS This instruction manual describes the basic operations of the camera. For more information, read the advanced operation manual provided as HTML format in the CD-ROM. See page 32 for details. ENGLISH GETTING STARTED BASIC OPERATIONS (RECORDING &...
-
Page 2: Direct Printing
Major Features of this Camera Removable hard disk In contrast to conventional digital video cameras that record to DV tapes, the removable hard disk is a new type of card media that enables extended hours of high- resolution, MPEG2 video recording. ( Various Recording Media and Modes Video and still images can be recorded to CompactFlash card (CF card) and SD... -
Page 3: Safety Precautions
Continue using the camcorder or AC Adapter under these conditions could lead to fire or electric shock. Contact your JVC dealer. Do not attempt to repair the malfunction yourself. To prevent shock, do not open the cabinet. No user serviceable parts inside. - Page 4 When the equipment is installed in a cabinet or on a shelf, make sure that it has sufficient space on all sides to allow for ventilation (10 cm or more on both sides, on top and at the rear). Do not block the ventilation holes. (If the ventilation holes are blocked by a newspaper, or cloth etc.
- Page 5 JVC shall not be responsible for any personal data that is released.
-
Page 6: Getting Started
GETTING STARTED Index ATTENTION: Be careful not to cover during shooting. Be careful not to cover during playback. The top, buttom, left or right sides of the 49rtwe button can be pressed to operate like a lever. The explanation “pressing r” in this instruction manual means moving the 49rtwe button in the r direction. -
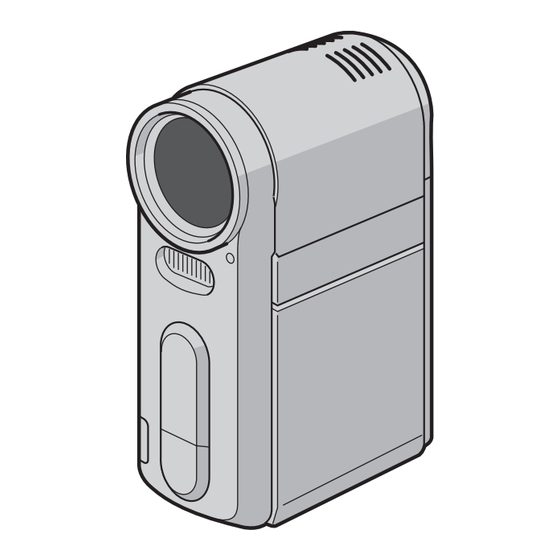
Page 7: Other Parts
Controls Delete Button [ pg. 21, 23, 24) Information Button [INFO] (Used to display the file information. Refer to the advanced operation manual. pg. 32) Mode Button [MODE] ( pg. 19) Recording Start/Stop Button ( Zoom Lever [T/W] ( pg. 20) Speaker Volume Control ( pg. -
Page 8: Indications On Lcd Monitor
GETTING STARTED Indications on LCD Monitor During both Video and Still Image Recording Manual Mode Indicator ( pg. 19) Tele Macro Mode Indicator ( Approximate Zoom Ratio ( Zoom Indicator ( pg. 20, 28) Iris Lock Indicator (Appears when iris is locked. Refer to the advanced operation manual. - Page 9 During Still Image Recording only Mode Indicator ( pg. 19) : Focus Icon ( pg. 22) Image Size: 1600 (1600 x 1200), 1280 (1280 x 960), 1024 (1024 x 768), 640 (640 x 480) ( Picture Quality: FINE (fine) and STANDARD (standard) pg.
- Page 10 GETTING STARTED During Video Playback Mode Indicator ( pg. 19) Play List Playback Indicator (Appears when play list is played back. Refer to the advanced operation manual. pg. 32) Picture Quality: [U] (ultra fine), [F] (fine), [N] (normal), [E] (economy) ( pg.
-
Page 11: Provided Accessories
Provided Accessories GETTING STARTED AC Adapter AP-V14E or AP-V14AC Power Cord Battery Pack BN-VM200U S-Video/Audio/Video Cable USB Cable Removable Hard Disk (4 GB) Protective Case for Removable Hard Disk Hand Strap (See page 12 for attachment) Lens Cap (See page 12 for attachment) CD-ROM Audio Extension Cable (for optional headphone, see page 13 for attachment) - Page 12 GETTING STARTED Attaching the Hand Strap Thread the end of the strap through the eyelet. Pass the other end through the loop. NOTE: When carrying the camera, pass your arm through the strap to prevent dropping the camera. Tighten the strap at your wrist by sliding the buckle.
- Page 13 Attaching the Core Filter Attach the core filters to the cables. The core filter reduces interference. Release the stoppers on both ends of the core filter. Stopper Run the cable through the core filter, leaving approx. 3 cm of cable between the cable plug and the core filter. S-Video/Audio/Video cable Wind the cable once around the outside of the core filter as shown in the illustration.
- Page 14 GETTING STARTED Power This camera’s 2-way power supply system lets you choose the most appropriate source of power. Do not use provided power supply units with other equipment. Charging the Battery Pack Battery Cover Open the cover. Battery Pack Protrusion Power/Charge Lamp Lock Button...
-
Page 15: About Batteries
NOTES: It is recommended that only genuine JVC batteries are used in this camera. Using generic non-JVC batteries can cause damage to the internal charging circuitry. If the protective cap is attached to the battery pack, remove it first. When charging the battery pack for the first time or after a long storage period, the power/charge lamp may not light. -
Page 16: Inserting/Removing A Cf Card
GETTING STARTED Inserting/Removing a CF Card You can use a CF card (CompactFlash card) as a recording medium in the CF slot. The removable hard disk (provided) or Microdrive is a type of CF cards. See page 42 for the recommended media. -
Page 17: Selecting Recording Medium
To insert a SD card, firmly insert it with its clipped edge first. To remove a SD card, push it once. After the SD card comes out of the camera, pull it out. Do not touch the terminal on the reverse side of the label. Close the rear panel firmly until it locks. -
Page 18: Lcd Monitor Adjustment
GETTING STARTED Date/Time Settings The date/time is recorded on the picture at all times, but its display can be turned on or off during playback. pg. 26, 27) Open the LCD monitor fully. Set the power switch to the lock button located on the switch. Press MENU. -
Page 19: Operation Mode
Operation Mode To turn on the camera, set the power switch to while pressing down the lock button located on the switch. The power/charge lamp turns on. To turn off the camera, set the power switch to OFF. Power Switch MODE Mode Lamp Lock Button... -
Page 20: Video Recording
BASIC OPERATIONS Video Recording Power Switch MODE Recording Start/Stop Button Zoom Lever Lock Button Set the power switch to while pressing down the lock button located on the switch. Press MODE to select The camera is programmed to record videos on the medium in the CF slot by the factory preset. -
Page 21: Video Playback
Video Playback INFO Set the power switch to while pressing down the lock button located on the switch. Press MODE to select The index screen for videos appears. The image appears on the index screen shows the first part of the shooting. To switch the medium to be played back, see pages 26 and Press rt w e to select the video file you want to play back. -
Page 22: Still Image Recording
BASIC OPERATIONS Still Image Recording Power Switch MODE Recording Start/Stop Button Lock Button When shooting with the flash, be carefull not to cover it. Set the power switch to while pressing down the lock button located on the switch. Press MODE to select The camera is programmed to record still images on the medium in the SD slot by the factory preset. -
Page 23: Still Image Playback
Still Image Playback INFO Set the power switch to while pressing down the lock button located on the switch. Press MODE to select A still image is displayed. To switch the medium to be played back, see pages 26 and Press to display the previous file. -
Page 24: Voice Recording
BASIC OPERATIONS Voice Recording Set the power switch to while pressing down the lock button located on the switch. Press MODE to select The camera is programmed to record voice on the medium in the SD slot by the factory preset. To switch the recording medium, see pages 26 and 27. -
Page 25: Connecting To A Tv Or Vcr
Connecting to a TV or VCR Open the cover. To AV connector S-Video/Audio/Video Cable (provided) Black to S-VIDEO IN (Connect when your TV/VCR has S-VIDEO IN and A/V input connectors. In this case, it is not necessary to connect the yellow video cable.) Yellow to VIDEO IN (Connect when your TV/VCR has only A/V input connectors.) Red to AUDIO R IN*... -
Page 26: Menu Settings
MENU SETTINGS Changing the Menu Settings You can change the menu settings to customize your camera. Access the desired menu screen by following the steps below, then change the various settings. INFO Select the operation mode. For Recording Menus: Set the power switch to while pressing down the lock button located on the switch. -
Page 27: Memory Card Setting
MEMORY CARD SETTING VIDEO MODE Media selection can be set for each recording and playback [CF SLOT] / SD SLOT mode: video ( IMAGE MODE ) or voice ( CF SLOT / [SD SLOT] CF SLOT: The CF card is selected as a recording VOICE MODE medium. -
Page 28: Camera Setting
MENU SETTINGS Video Recording Menus [ ] = Factory-preset QUALITY Select the desired picture quality. Mode Size (pixels) Bit rate (In order of the quality) [ULTRA FINE] 720 x 576 FINE 720 x 576 NORMAL 720 x 576 ECONOMY 352 x 288 WIDE MODE [OFF]: Disables the function. - Page 29 Video Playback Menus For the actual operations and details, refer to the advanced operation manual. [ ] = Factory-preset PLAY LIST PLAY LIST CONTENTS / EDIT / RENAME / DELETE You can create a play list and view your original video clips.
-
Page 30: Direct Print
MENU SETTINGS Still Image Playback Menus [ ] = Factory-preset DPOF Advanced operation manual DIRECT PRINT Advanced operation manual EFFECT [OFF] / SEPIA / MONOTONE You can view still images with special image effects. NOTE: The menu items of PROTECT and DELETE are the same as in the description on page 29. - Page 31 Menus for Manual Recording (MSET Menu) SET) e ( Set the power switch to while pressing down the lock button located on the switch. Press MODE to select Press e ( ) so that is displayed. Press t ( SET). The menu screen appears. Press w e to select the desired sub menu.
-
Page 32: References
REFERENCES For Advanced Operations Read the advanced operation manual provided as HTML format in the CD-ROM for more information. To access to the HTML files, follow the procedure below. Load the provided CD-ROM onto your PC. Right-click on the CD-ROM icon in the [My Computer] window, then click [Open]. -
Page 33: Troubleshooting
Troubleshooting If the problem still exists after following the instructions below, please consult your nearest JVC dealer. The camera is a microcomputer-controlled device. External noise and interference (from a TV, a radio, etc.) might prevent it from functioning properly. In such cases, first disconnect its power supply unit (battery pack, AC adapter, etc.) and wait a few minutes;... - Page 34 When the LCD monitor's fluorescent light reaches the end pg. 31) of its service life, images on the LCD monitor become dark. HConsult your nearest JVC dealer. Coloured bright spots appear all over the LCD monitor. The LCD monitor is made with high precision technology.
-
Page 35: Warning Indications
Warning Indications The following indications appear on the screen. (Battery indicator) Displays the battery remaining power. Remaining power level High As the battery power comes close to nil, the battery indicator blinks. When the battery power is exhausted, power turns off automatically. SET DATE/TIME! Appears when the date/time is not set. - Page 36 REFERENCES NUMBER OF FOLDERS OVERFLOW Appears when the number of folders exceeds the limit for file copy/move operation. MEMORY CARD ERROR! REINSERT CARD OR CHANGE CARD Appears when the camera does not recognise the loaded recording medium. Remove the medium once and insert it again or replace with another medium.
-
Page 37: Battery Packs
... remove from charger or powered unit when not in use, as some machines use current even when switched off. NOTES: It is recommended that only genuine JVC batteries are used in this camera. Using generic non-JVC batteries can cause damage to the internal charging circuitry. -
Page 38: Recording Medium
• Do not touch the metal parts. Copy the recorded files to your PC. JVC shall not be responsible for any lost data. (It is recommended that you copy the data from your PC to DVD or other media for storage.) - Page 39 Keep it away from direct sunlight. Serious malfunctioning If malfunctioning occurs, stop using the unit immediately and consult your local JVC dealer. The camera is a microcomputer-controlled device. External noise and interference (from a TV, a radio, etc.) might prevent it from functioning properly. In such cases, first disconnect its power supply unit (battery pack, AC adapter, etc.) and wait a few minutes and then...
-
Page 40: Specifications
REFERENCES Specifications Camera For general Power supply DC 11 V (Using AC adapter) DC 7.2 V (Using battery pack) Power consumption Approx. 4.9 W Approx. 7.7 W (Maximum; when charging a battery) Dimensions (W x H x D) 41 mm x 103 mm x 71 mm Weight Approx. - Page 41 REFERENCES For connectors S-Video output: Y: 1.0 V (p-p), 75 Ω, analogue C: 0.29 V (p-p), 75 Ω, analogue Video output: 1.0 V (p-p), 75 Ω, analogue Audio output: 300 mV (rms), 1 kΩ, analogue, stereo Headphone output ø2.5 mm, stereo Mini USB-B type, USB 1.1/2.0 compliant AC Adapter Power requirement...
- Page 42 REFERENCES Recording Time and Number of Images The tables below show the approximate recording time and number of storable images. The number increases or decreases depending on the image size, picture quality and other conditions pg. 28, 29, 30). The first column in the table indicates the conditions.
- Page 43 CompactFlash Card Image size/quality 64 MB 128 MB 256 MB 640 x 480/FINE 640 x 480/STANDARD 1024 x 768/FINE 1024 x 768/STANDARD 1280 x 960/FINE 1280 x 960/STANDARD 1600 x 1200/FINE 1600 x 1200/STANDARD • Recommended CompactFlash cards are products of Lexar, SanDisk or Hagiwara Sys-Com.
- Page 44 Printed in Japan © 2004 Victor Company of Japan, Limited AA/AC/AG/AH 1004HOH-AL-VP...
Need help?
Do you have a question about the Everio GZ-MC100 and is the answer not in the manual?
Questions and answers