Table of Contents
Advertisement
installation and
servicing
excel
Your Ideal installation and servicing guide
excel
See reverse for
For details of document amendments, refer to page 3
HE C24, C28, C32
When replacing any part on this appliance use only spare parts that you can be
assured conform to the safety and performance specification that we require. Do not
use reconditioned or copy parts that have not been clearly authorised by Ideal Boilers.
November 2007
UIN 201279 A06
For the very latest copy of literature for specification purposes please visit our website
www.idealboilers.com where you will be able to download the relevant information in pdf format.
users guide
Advertisement
Table of Contents

Summary of Contents for Excel HE C24
- Page 1 For details of document amendments, refer to page 3 HE C24, C28, C32 When replacing any part on this appliance use only spare parts that you can be assured conform to the safety and performance specification that we require. Do not use reconditioned or copy parts that have not been clearly authorised by Ideal Boilers.
- Page 2 the nation’s favourite PLUMBING & HEATING SUPPLIES FREE SHIPPING SECURE PAYMENTS on all orders over £100 to mainland UK shop online with confidence FINANCE AVAILABLE PRICE MATCH spread the cost with low interest rates always get the best deals available we have H U G E R E D U C T I O N S...
- Page 3 HE - Installation and Servicing...
- Page 4 New photograph added showing correct orientation of air pressure switch. • Users Guide - Page 2, Important Notes Additon of two new bullets into important notes. Ideal Stelrad Group reserve the right to vary specification without notice excel HE - Installation and Servicing...
- Page 5 The test data from which it has been calculated have been certified by a notified body. Table 3 - Performance Data - Domestic Hot Water HE C24 Max HE C24 Min HE C28 Max HE C28 Min HE C32 Max HE C32 Min Max.
- Page 6 For all boilers: complete, sign & hand over to customer For assistance see Technical Helpline on the back page NOTE TO THE INSTALLER: COMPLETE THE BENCHMARK COMMISSIONING CHECKLIST AND LEAVE THESE INSTRUCTIONS WITH APPLIANCE excel HE - Installation and Servicing...
-
Page 7: Safe Handling
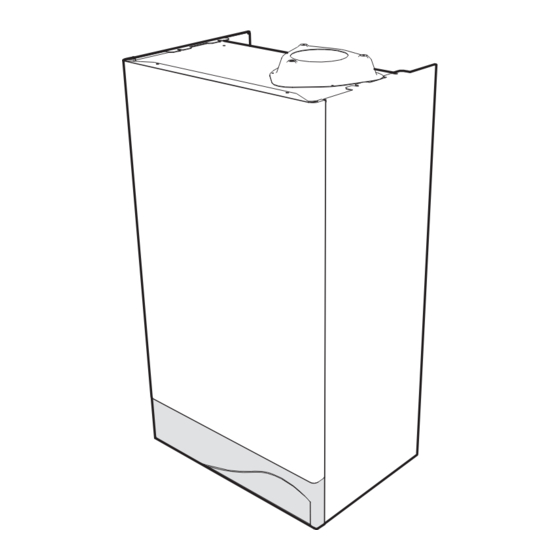
Caution should be exercised during these operations. Operatives should be knowledgeable in handling techniques The excel HE range of boilers are wall mounted, full sequence, when performing these tasks and the following precautions automatic spark ignition, low water content, fanned flue, high should be considered: efficiency, condensing, combination gas boilers. -
Page 8: Location Of Boiler
Registered Installer, or in IE a competent person. It must be carried out in accordance with the relevant requirements of the: Bathroom Installations This appliance is rated IP20. • Gas Safety (Installation and Use) Regulations. excel HE - Installation and Servicing... -
Page 9: Gas Supply
2. It is important that the position of the terminal allows the free passage of air across it at all times. 3. Minimum acceptable spacing from the terminal to obstructions and ventilation openings are specified in Table 4. excel HE - Installation and Servicing... - Page 10 Bottom clearance REAR FLUE ONLY ** Bottom clearance after installation can be reduced to 5mm. MIN. Top clearance required = 200 mm (8") However, 100mm must be available for servicing. excel HE - Installation and Servicing...
-
Page 11: Air Supply
Pressure gauge, covering a range of 0 to 4 bar. A 7-litre expansion vessel, with an initial charge continued ..pressure of 0.75 bar. excel HE - Installation and Servicing... -
Page 12: Domestic Hot Water
3. Adjust the room thermostat and programmer to Turn up the room thermostat and adjust these lockshield NORMAL settings. valves to give boiler flow and return temperatures not more than 20 C apart. These valves should now be left as set. excel HE - Installation and Servicing... -
Page 13: Water Treatment
WATER TREATMENT CENTRAL HEATING DOMESTIC HOT WATER The excel HE range of boilers have a copper main heat In hard water areas where main water can exceed 200ppm exchanger and a stainless steel high efficiency heat Total Hardness (as defined by BS 7593:1993 Table 2) a exchanger. - Page 14 INSTALLATION BOILER ASSEMBLY - Exploded View Flue gas sampling point Data Plate User Data Plate excel HE - Installation and Servicing...
- Page 15 Gas cock - 1 off Pressure relief valve discharge pipe 15mm olive - 1 off Gas cock washer - 1 off Wallplug - 2 off Pack B Contents A Flue turret B Flue terminal ix7408 excel HE - Installation and Servicing...
- Page 16 Up to 3000 mm Pack D - 3 off 25 (1") 177 (7") 25 (1") 119 (4 ") 331 (13") Side Rear Side ") ") Side flue length Rear flue length Side flue length excel HE - Installation and Servicing...
- Page 17 Note. If wall thickness is greater than 305mm then 4. Remove the template from the wall. dimension "H" must be reduced by the same amount and the offset may be adjusted accordingly. excel HE - Installation and Servicing...
- Page 18 ") to dimension R and, measuring from the ring, cut both outer and inner tube. Ensure support spring clip is in position to facilitate cutting. 3. To ensure the tube is cut square, mark the flue all the way around. excel HE - Installation and Servicing...
- Page 19 (Refer to RING this Frames 11 and 16 for the detail of flue length calculation.) mxhe7843 5. To ensure a square cut, mark the flue all the way around. 6. De-burr the cut edges. excel HE - Installation and Servicing...
- Page 20 G . Adaptor (60/100 to 80/125) H. Roof flue extension duct kit (80/125) elbow kit (80/125) J. 45 elbow kit (80/125) ix7467 Note. Items D, E, G, H, I and J are not supplied with the roof flue kit. excel HE - Installation and Servicing...
-
Page 21: Flue Terminal Position
Elbow kit (80/125) 201 184 Vertical Connector 201 549 Adaptor (60/100 - 80/125) Note. The equivalent flue length resistance of the 90 elbow kit (80/125) is 1.5m and the 45 elbow kit (80/125) is 1.0m. excel HE - Installation and Servicing... - Page 22 D and secure it with the 3 Ø screws C to the flue assembly A. 8. Finally ensure the roof flashing plate D is correctly sealed to the roof. ix7472 ix7474 ix7473 excel HE - Installation and Servicing...
- Page 23 4. Fit turret to boiler (see Frame 30) and to the flue pipe assembly. 5. Fit outer wall sealing plate over outer wall seal and retain with the 4 screws and wall plugs provided. ix7475 excel HE - Installation and Servicing...
-
Page 24: Condensate Drain
No other materials may be used. 25 mm Condensate The drain outlet on the boiler is standard 21.5mm drain overflow pipe. This size must not be reduced in any part of its length. excel HE - Installation and Servicing... -
Page 25: Mounting The Boiler
2 studs and fixing it in the middle with the single M5 x 10mm pozi-hex screw provided. 6. Flues over 1 metre long. Fix the flue support bracket to the wall, using the 2 wall plugs and wood screws. excel HE - Installation and Servicing... -
Page 26: Pressure Relief Valve Drain Pipe
1. Close all hot water draw off taps. 2. Open the cold water inlet valve. 3. Slowly open each draw off tap and close only when clear and air bubble free water flows out. excel HE - Installation and Servicing... - Page 27 Note. Ensure that the lengths of the current conductors are shorter than the earth conductor so that if the cable slips in its anchorage the current carrying conductors become taut before the earth conductor. excel HE - Installation and Servicing...
-
Page 28: External Electrical Controls
This should be wired as shown in diagram A. with integral programmer kit. Frost Protection excel HE appliances are provided with a built in anti-freeze system that operates the boiler when the temperature is below 5 C. Internal frost... - Page 29 INSTALLATION Interference suppressor Fan 1 AC Fan, Single speed Detection Ignition Ignition Pressure Electrode Condensate Overheat Electrode Electrode Switch Flow Stat Blockage Earth Thermistor Thermistor Ignitor/Gas Valve I/F NAC1 Flow Thermistor 4 6 7 8 Pump Proving Divertor Valve Burner Switch Earth 1 3 4 5...
-
Page 30: Commissioning And Testing
1. Check the integrity of the flue outlet and air inlet system to the boiler ensuring no leaks are evident from piping joints or flue/air sampling points. WARNING. Whilst effecting the required gas soundness test and purging air from the gas installation, open all windows and doors, extinguish naked lights and DO NOT SMOKE. excel HE - Installation and Servicing... -
Page 31: Initial Lighting
2 seconds then set the main switch (B) back to the connect a gas pressure gauge via a flexible tube. desired position. 9. Slacken the screw in the burner pressure test point (J) and connect a gas pressure gauge via a flexible tube. continued....excel HE - Installation and Servicing... - Page 32 Fully open all DHW taps in turn and ensure that water flows freely from them. 13.4 (5.3) mbar (in. w.g.) for the model excel HE C24 Close all taps except the furthest one from the boiler 10.5 (4.2) mbar (in. w.g.) for the model excel HE C28 and check that the boiler is firing at maximum rate.
-
Page 33: Handing Over
5. Clean the heat exchanger. 12. Complete the service section of the Benchmark 6. Check the condition of the combustion chamber insulation. Commissioning Checklist. Any cracked or damaged pieces should be replaced. excel HE - Installation and Servicing... - Page 34 3. Remove the sealing panel by pulling forward to disengage rear clips. 4. Remove the fixing screws retaining the inner sealing panel and remove the panel taking care not to damage the front insulation panel. excel HE - Installation and Servicing...
- Page 35 Check the gasket for damage and replace if necessary. 3. Disconnect the electrical leads from the fan. 4. Disconnect APS sensing tube. 5. Inspect venturi and fan and clean as necessary. 6. Reassemble in reverse order. excel HE - Installation and Servicing...
-
Page 36: Burner Removal And Cleaning
9. Turn on the gas supply at the gas service cock. 5. Refit the boiler sealing panel. 10. Reconnect the electrical supply. IMPORTANT Ensure that the boiler sealing panel is correctly fitted and that a good seal is made. excel HE - Installation and Servicing... -
Page 37: Replacement Of Components
8. Re-assemble the boiler in reverse order. 9. Check the operation of the boiler. Refer to Frame 50 and 51. Fan Suppressor 1. As 1-5 above. 2. Pull off fan suppressor. excel HE - Installation and Servicing... - Page 38 4. UNDER NO CIRCUMSTANCES REFIT THE OVERHEAT THERMOSTAT ONTO THE COLD RECUPERATOR RETURN PIPE. 5. Check the operation of the boiler. Refer to Frame 50 and 51. excel HE - Installation and Servicing...
- Page 39 7. Remove the fixing screw from the LH electrode and carefully withdraw the detection electrode. 8. Fit new detection electrode. 9. Re-assemble in reverse order. 10. Check the operation of the boiler. Refer to Frame 50 and 51. excel HE - Installation and Servicing...
- Page 40 5. Carefully remove the actuator. Brown 6. Fit new actuator and re-assemble in reverse order ensuring the 3 wires are correctly replaced as shown. 7. Check the operation of the boiler. Refer to Frame 50 and 51. excel HE - Installation and Servicing...
- Page 41 3. Carefully remove all push on connectors and earth 6. Reassemble in reverse order. connections (main PCB only) from the printed circuit board. 7. Check the operation of the boiler. Refer to Frame 56 and 51. excel HE - Installation and Servicing...
- Page 42 4. Lift plastic retention clip and remove electrical connection. 5. Fit electrical connection to new microswitch and refit to diaphragm. 6. Re-assemble in reverse order. 7. Check the operation of the boiler. Refer to Frame 50 and 51. microswitch microswitch excel HE - Installation and Servicing...
-
Page 43: Draining The Boiler
Note. Some residual water may be experienced isolating valves (re-pressurise as appropriate) during the replacement of components. before proceeding to check operation of the boiler. 6. Check the operation of the boiler. Refer to Frame 50 and 51. excel HE - Installation and Servicing... - Page 44 5. Fit the new pressure gauge and reconnect the sensing head to the pressure relief valve. 6. Re-assemble in reverse order. 7. Check the operation of the boiler. Refer to Frame 50 and 51. excel HE - Installation and Servicing...
- Page 45 4. Drain the boiler water circuit. Refer to Frame 67. 5. Remove automatic air vent valve. 6. Fit new automatic air vent valve. 7. Re-assemble in reverse order. 8. Check the operation of the boiler. Refer to Frame 50 and 51. excel HE - Installation and Servicing...
- Page 46 5. Fit new diverter valve mechanism and retain with "U" shaped clip. 6. Re-assemble in reverse order. 7. Refill the boiler. Refer to Frame 32. 8. Check the operation of the boiler. Refer to Frame 50 and 51. excel HE - Installation and Servicing...
- Page 47 6. Remove the pump head. 7. Fit the new pump head. 8. Re-assemble in reverse order. 9. Refill the boiler. Refer to Frame 32. 10. Check the operation of the boiler. Refer to Frame 50 and 51. excel HE - Installation and Servicing...
- Page 48 8. Remove the top support bracket. 13. Refill the boiler. Refer to Frame 32. 9. Lift the expansion vessel from its side retaining brackets. 14. Check the operation of the boiler. Refer to Frame 50 and 51. excel HE - Installation and Servicing...
- Page 49 16. Check the operation of the boiler. Refer to Frame 50 to clear the copper pipe. and 51. 9. Remove the condensate drain point from the top of the recuperator. excel HE - Installation and Servicing...
- Page 50 CH THERMISTOR FAULT ERROR CODE 6 - GO TO FRAME 85 DHW THERMISTOR FAULT ERROR CODE 7 - GO TO FRAME 86 FLUE OVERHEAT ERROR CODE 8 - GO TO FRAME 87 CONDENSATE BLOCKAGE excel HE - Installation and Servicing...
-
Page 51: Fault Finding
Fill and vent system and temperature. If the OH trips open all isolation valves again measure flow temp: Over 90 C - check flow thermistor (Frame 72 & 84) Replace pump Under 90 C - replace O/H stat. excel HE - Installation and Servicing... - Page 52 Fit and retest Stop the fan. Is the Replace harness Is harness continuity OK? voltage across the APS contacts approx 30V DC? Is harness continuity OK? Replace PCB Replace harness Refit Hose excel HE - Installation and Servicing...
- Page 53 Is resistance Is it 3.75V DC nominal? approx. 10K OHMS at 25 Is PCB connector fitted Fit and re-test correctly? Drain waterset and replace thermistor Is harness continuity OK? Replace PCB Replace harness excel HE - Installation and Servicing...
- Page 54 Replace thermistor Is the wiring harness Re-connect and measure continuity OK? voltage across thermistor. Replace PCB Is it 3.75V DC nominal? Replace Replace Is the connector fitted Refit and re-test harness correctly to the PCB? excel HE - Installation and Servicing...
-
Page 55: Short List Of Parts
Thermistor - Waterset CH & DHW 173 932 H07 781 DHW plate heat exchanger 173 544 E69 408 170 995 H07 782 173 545 Gasket Kit (servicing) 173 936 Fixings Kit (servicing) 173 937 Fan Suppressor 174 051 excel HE - Installation and Servicing... - Page 56 SHORT LIST OF PARTS 88 SHORT LIST ex7466 excel HE - Installation and Servicing...
- Page 57 NOTES excel HE - Installation and Servicing...
- Page 58 IT IS A CONDITION OF THE MANUFACTURERS WARRANTY THAT THE BENCHMARK CORGI will record the data and COMMISSIONING CHECKLIST IS will send a certificate of compliance to the property FULLY COMPLETED AND LEFT WITH THE APPLIANCE excel HE - Installation and Servicing...
- Page 59 BENCHMARK No. GAS BOILER COMMISSIONING CHECKLIST C O L L E C T I V E M A R K BOILER SERIAL No. NOTIFICATION No. CONTROLS To comply with the Building Regulations, each section must have a tick in one or other of the boxes TIME &...
-
Page 60: Service Interval Record
SERVICE INTERVAL RECORD It is recommended that your heating system is serviced regularly and that you complete the appropriate Service Interval Record Below. Service Provider. Before completing the appropriate Service Interval Record below, please ensure you have carried out the service as described in the boiler manufacturer's instructions. - Page 61 Technical Training The Ideal Boilers Technical Training Centre offers a series of first class training courses for domestic, commercial and industrial heating installers, engineers and system specifiers. For details of courses please ring: ..... 01482 498 432 The code of practice for the installation, CERTIFIED PRODUCT commissioning &...
- Page 62 See reverse for installation & servicing instructions HE C24, C28, C32 When replacing any part on this appliance use only spare parts that you can be assured conform to the safety and performance specification that we require. Do not...
-
Page 63: To Light The Boiler
In cases of repeated or continuous shutdown a CORGI registered installer or in Ireland a competent person should be called to The excel HE is a wall mounted, room sealed, condensing investigate and rectify the condition causing this and carry out an combination boiler, featuring full sequence automatic spark operational test. -
Page 64: Frost Protection
Repeat the procedure detailed in 'To Light The Boiler'. Frost protection excel HE appliances are provided with a built in anti-freeze system that operates the boiler when the temperature is below C. Internal frost protection operates regardless of the position... - Page 65 Hot water but no heating (winter setting) F a u l t s No heating or hot water Check that the programmer and room thermostat (if fitted) are both calling for heat. Check that gas and electricity are available at the boiler and that all switches are on.
Need help?
Do you have a question about the HE C24 and is the answer not in the manual?
Questions and answers