Table of Contents
Advertisement
PRELIMINARY – For Toro Distributor and Toro Company use only.
Preface
The purpose of this publication is to provide the service
technician with information for troubleshooting, testing
and repair of major systems and components on the
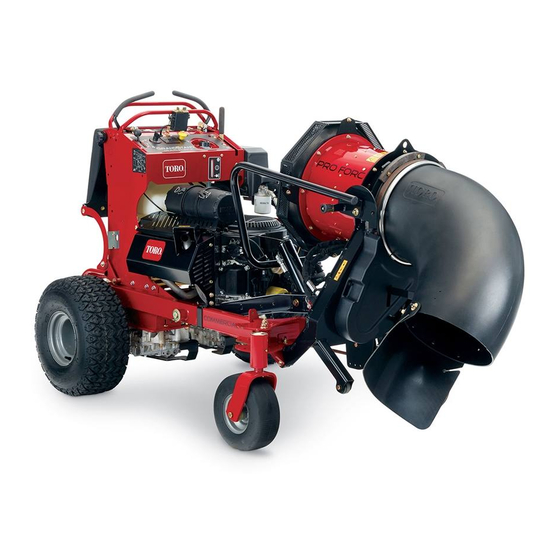
ProForce Debris Blower.
REFER TO THE OPERATOR'S MANUALS FOR OP-
ERATING,
MAINTENANCE
INSTRUCTIONS. Space is provided in Chapter 2 of this
book to insert the Operator's Manuals and Parts Cata-
logs for your machine. Replacement Operator's Manu-
als are available on the internet at www.toro.com or by
sending complete Model and Serial Number to:
The Toro Company
Attn. Technical Publications
8111 Lyndale Avenue South
Minneapolis, MN 55420
The Toro Company reserves the right to change product
specifications or this publication without notice.
ProForce
AND
ADJUSTMENT
E The Toro Company − 2008
Service Manual
Debris Blower
R
This safety symbol means DANGER, WARNING,
or CAUTION, PERSONAL SAFETY INSTRUC-
TION. When you see this symbol, carefully read
the instructions that follow. Failure to obey the
instructions may result in personal injury.
NOTE: A NOTE will give general information about the
correct operation, maintenance, service, testing or re-
pair of the machine.
IMPORTANT: The IMPORTANT notice will give im-
portant instructions which must be followed to pre-
vent damage to systems or components on the
machine.
Part No.
Advertisement
Chapters
Table of Contents

Subscribe to Our Youtube Channel
Related Manuals for Toro ProForce Debris


Summary of Contents for Toro ProForce Debris
- Page 1 Part No. PRELIMINARY – For Toro Distributor and Toro Company use only. Service Manual ProForce Debris Blower Preface The purpose of this publication is to provide the service technician with information for troubleshooting, testing and repair of major systems and components on the ProForce Debris Blower.
- Page 2 PRELIMINARY – For Toro Distributor and Toro Company use only. This page is intentionally blank. ProForce Debris Blower...
- Page 3 PRELIMINARY – For Toro Distributor and Toro Company use only. Table Of Contents Chapter 1 − Safety Safety Instructions ......
- Page 4 PRELIMINARY – For Toro Distributor and Toro Company use only. This page is intentionally blank. ProForce Debris Blower...
-
Page 5: Table Of Contents
PRELIMINARY – For Toro Distributor and Toro Company use only. Chapter 1 Safety Table of Contents SAFETY INSTRUCTIONS ..... . -
Page 6: Safety Instructions
5. Tighten any loose nuts, bolts, screws or other fasten- ers to ensure machine is in safe operating condition. The Toro Company Attn. Technical Publications 6. Make sure that the ProForce Debris Blower is prop- 8111 Lyndale Avenue South erly attached to tow vehicle. Bloomington, Minnesota 55420−1196 2. -
Page 7: While Operating
8. Before leaving the operator’s position of the tow ve- hicle: 3. Do not run engine of ProForce Debris Blower or tow vehicle in a confined area without adequate ventilation. A. Park on level surface and stop ProForce Debris Exhaust fumes are hazardous and could possibly be Blower engine. -
Page 8: Maintenance And Service
PRELIMINARY – For Toro Distributor and Toro Company use only. Maintenance and Service 1. Before servicing or making adjustments to ProForce 9. Shut Debris Blower engine off before checking or Debris Blower, position ProForce Debris Blower on a adding oil to the crankcase. -
Page 9: Securing Proforce Debris Blower To Tow Vehicle
PRELIMINARY – For Toro Distributor and Toro Company use only. Securing ProForce Debris Blower to Tow Vehicle While operating or servicing the ProForce Debris Blow- er, make sure that blower is properly secured to tow ve- hicle (Fig. 1). Refer to your Operator’s Manual for the correct procedure for attaching blower to tow vehicle. -
Page 10: Safety And Instruction Decals
PRELIMINARY – For Toro Distributor and Toro Company use only. Safety and Instruction Decals Numerous safety and instruction decals are affixed to the ProForce Debris Blower. If any decal becomes illeg- ible or damaged, install a new decal. Part numbers for replacement decals are listed in your Parts Catalog. - Page 11 ......Product Records Insert Operator’s Manual and Parts Catalog for your ProForce Debris Blower at the end of this chapter. Addi- tionally, if any optional equipment or accessories have been installed to your blower, insert the Installation In- structions, Operator’s Manuals and Parts Catalogs for...
- Page 12 PRELIMINARY – For Toro Distributor and Toro Company use only. Equivalents and Conversions 0.09375 Product Records and Maintenance Page 2 − 2 ProForce Debris Blower...
-
Page 13: Product Records
PRELIMINARY – For Toro Distributor and Toro Company use only. Torque Specifications Recommended fastener torque values are listed in the As noted in the following tables, torque values should be following tables. For critical applications, as determined reduced by 25% for lubricated fasteners to achieve by Toro, either the recommended torque or a torque that the similar stress as a dry fastener. - Page 14 PRELIMINARY – For Toro Distributor and Toro Company use only. Standard Torque for Dry, Zinc Plated and Steel Fasteners (Inch Series) Grade 1, 5 & SAE Grade 1 Bolts, Screws, Studs & SAE Grade 5 Bolts, Screws, Studs & SAE Grade 8 Bolts, Screws, Studs &...
-
Page 15: Standard Torque For Dry, Zinc Plated And Steel Fasteners (Metric Fasteners)
PRELIMINARY – For Toro Distributor and Toro Company use only. Standard Torque for Dry, Zinc Plated and Steel Fasteners (Metric Fasteners) Class 8.8 Bolts, Screws and Studs with Class 10.9 Bolts, Screws and Studs with Thread Size Thread Size Regular Height Nuts... -
Page 16: Other Torque Specifications
PRELIMINARY – For Toro Distributor and Toro Company use only. Other Torque Specifications SAE Grade 8 Steel Set Screws Wheel Bolts and Lug Nuts Recommended Torque Thread Size Recommended Torque** Thread Size Thread Size Square Head Hex Socket 7/16 − 20 UNF 65 + 10 ft−lb... - Page 17 PRELIMINARY – For Toro Distributor and Toro Company use only. Chapter 3 Engine Table of Contents SPECIFICATIONS ......
-
Page 18: Specifications
PRELIMINARY – For Toro Distributor and Toro Company use only. Specifications Item Description Make / Designation Kohler, 4−cycle, V−Twin cylinder, OHV, air cooled, Model CH740S Bore x Stroke 3.27 in x 2.64 in (83 mm x 67 mm) Total Displacement... -
Page 19: General Information
PRELIMINARY – For Toro Distributor and Toro Company use only. General Information This Chapter gives information about specifications, However, the cost of the test equipment and the special- maintenance, troubleshooting, testing and repair of the ized nature of some repairs may dictate that the work be gasoline engine used in the ProForce Debris Blower. - Page 20 PRELIMINARY – For Toro Distributor and Toro Company use only. This page is intentionally blank. Engine Page 3 − 4 ProForce Debris Blower...
-
Page 21: Service And Repairs
PRELIMINARY – For Toro Distributor and Toro Company use only. Service and Repairs Cooling System To ensure proper engine cooling, make sure the grass screen, cooling fins and other external surfaces of the engine are kept clean at all times. -
Page 22: Fuel Tank
PRELIMINARY – For Toro Distributor and Toro Company use only. Fuel Tank RIGHT FRONT Figure 4 1. Frame 4. Felt strip (2 used) 7. Fuel cap and gauge 2. Foam strip (2 used) 5. Flange nut (4 used) 8. Worm clamp 3. - Page 23 PRELIMINARY – For Toro Distributor and Toro Company use only. Check Fuel Lines and Connections Fuel Tank Installation (Fig. 4) Check fuel lines and connections periodically as recom- 1. Position foam strips, fuel tank and tank straps to ma- mended in the Operator’s Manual. Check fuel lines for chine frame.
-
Page 24: Engine
PRELIMINARY – For Toro Distributor and Toro Company use only. Engine RIGHT FRONT Figure 6 1. Frame 3. Fuel tank 5. Flange head screw (4 used) 2. Engine 4. Flange nut (4 used) 6. Blower coupler assembly Engine Page 3 − 8... -
Page 25: Engine Removal
PRELIMINARY – For Toro Distributor and Toro Company use only. Engine Removal (Fig. 6) CAUTION 1. Park machine on a level surface with the engine not running and the ignition key removed from the key switch. Chock wheels to prevent machine from moving. -
Page 26: Engine Installation
PRELIMINARY – For Toro Distributor and Toro Company use only. Engine Installation (Fig. 6) 9. Connect wire harness connectors to engine. 1. Position machine on a level surface. A. Connect positive battery cable and fusible link to the starter motor B+ stud. - Page 27 PRELIMINARY – For Toro Distributor and Toro Company use only. Chapter 4 Electrical System Table of Contents GENERAL INFORMATION .....
-
Page 28: General Information
Torque nut from from 10 to 15 ft−lb (14 to 20 N−m). Electrical Diagrams The electrical schematic and wire harness drawings for the ProForce Debris Blower are located in Chapter 7 − Electrical Diagrams. Page 4 − 2 Electrical System... -
Page 29: Special Tools
PRELIMINARY – For Toro Distributor and Toro Company use only. Special Tools Order special tools from your Toro Distributor. Some tools may also be available from a local supplier. Multimeter The multimeter can test electrical components and cir- cuits for current (amps), resistance (ohms) or voltage. - Page 30 PRELIMINARY – For Toro Distributor and Toro Company use only. Battery Hydrometer Use the Battery Hydrometer when measuring specific gravity of battery electrolyte. Obtain this tool locally. Figure 4 Page 4 − 4 Electrical System ProForce Debris Blower...
-
Page 31: Troubleshooting
PRELIMINARY – For Toro Distributor and Toro Company use only. Troubleshooting For effective troubleshooting and repairs, there must be CAUTION a good understanding of the electrical circuits (see Chapter 7 − Electrical Diagrams) and components used on this machine. Remove all jewelry, especially rings and watches, before doing any electrical trouble- shooting or testing. - Page 32 PRELIMINARY – For Toro Distributor and Toro Company use only. Starting Problems (Continued) Problem Possible Causes Engine cranks, but does not start. Ignition switch is faulty. Magneto relay or circuit wiring is faulty. Fuel relay or circuit wiring is faulty.
-
Page 33: General Run Problems
PRELIMINARY – For Toro Distributor and Toro Company use only. General Run Problems Problem Possible Causes Battery does not charge. Wiring to charging circuit components is loose, corroded or damaged (see Electrical Schematic in Chapter 7 − Electrical Diagrams). Voltage regulator is not properly grounded to engine. -
Page 34: Electrical System Quick Checks
PRELIMINARY – For Toro Distributor and Toro Company use only. Electrical System Quick Checks Battery Test (Open Circuit Test) Use a digital multimeter to measure the battery voltage. Voltage Measured Battery Charge Level 12.68 volts Fully charged (100%) Set the multimeter to the DC volts setting. The battery... -
Page 35: Component Testing
PRELIMINARY – For Toro Distributor and Toro Company use only. Component Testing For accurate resistance and/or continuity checks, elec- trically disconnect the component being tested from the CAUTION circuit (e.g. unplug the switch connector before doing a continuity check on switch). -
Page 36: Hour Meter
PRELIMINARY – For Toro Distributor and Toro Company use only. Hour Meter The hour meter used on the ProForce Debris Blower re- cords the amount of time that the engine is running. Hobbs QUARTZ Testing 0 0 0 0 1. Make sure that ignition switch is OFF. -
Page 37: Fuse
PRELIMINARY – For Toro Distributor and Toro Company use only. Fuse The ProForce Debris Blower uses a 15 amp fuse for cir- cuit protection. The fuse holder for this fuse is located next to the engine (Fig. 8). Testing 1. Make sure that ignition switch is OFF. -
Page 38: Fusible Link
PRELIMINARY – For Toro Distributor and Toro Company use only. Fusible Link The ProForce Debris Blower uses a fusible link for circuit protection. This fusible link connects the main wire har- ness to the starter B+ terminal and positive battery cable (Fig. -
Page 39: Diode Assembly
PRELIMINARY – For Toro Distributor and Toro Company use only. Diode Assembly A diode assembly (Fig. 11) is used in the ProForce De- bris Blower wire harness (see wire harness drawings in Chapter 7 − Electrical Diagrams). The diode provides the initial current flow to energize or “wake up”... -
Page 40: Fuel, Magneto And Power Relays
PRELIMINARY – For Toro Distributor and Toro Company use only. Fuel, Magneto and Power Relays The ProForce Debris Blower electrical system includes 6. Disconnect voltage from terminal 85 and multimeter three (3) identical relays. The fuel, magneto and power lead from terminal 87. - Page 41 PRELIMINARY – For Toro Distributor and Toro Company use only. Remote Transmitter The remote transmitter is a solid state electrical device 2. Lift rear cover from remote transmitter. that sends radio frequency (RF) signal inputs to the ma- 3. Remove batteries from remote transmitter and re- chine control module for control of machine electrical place with three (3) new AAA alkaline batteries.
- Page 42 PRELIMINARY – For Toro Distributor and Toro Company use only. Control Module The control module is a solid state electrical device that Because of the solid state circuitry built into the control receives signal inputs from the remote transmitter and module, there is no reliable method to test it.
- Page 43 PRELIMINARY – For Toro Distributor and Toro Company use only. This page is intentionally blank. ProForce Debris Blower Page 4 − 17 Electrical System...
-
Page 44: Service And Repairs
PRELIMINARY – For Toro Distributor and Toro Company use only. Service and Repairs NOTE: See the Kohler Engine Service Manual (in- cluded at the end of Chapter 3 − Engine) for engine elec- trical component repair information. Nozzle Motor FRONT... - Page 45 PRELIMINARY – For Toro Distributor and Toro Company use only. Removal (Fig. 19) 3. Slide drive pulley onto motor shaft and secure with flange nut. 1. Position machine on a firm, level surface. Make sure engine is stopped and remove key from the ignition 4.
-
Page 46: Battery Storage
PRELIMINARY – For Toro Distributor and Toro Company use only. Battery Storage If the machine will be stored for more than 30 days: 4. Store battery in a cool atmosphere to avoid quick de- terioration of the battery charge. 1. Remove the battery from the machine and charge it fully (see Battery Service). -
Page 47: Battery Service
PRELIMINARY – For Toro Distributor and Toro Company use only. Battery Service The battery is the heart of the electrical system. With regular and proper service, battery life can be extended. RIGHT Additionally, battery and electrical component failure can be prevented. - Page 48 PRELIMINARY – For Toro Distributor and Toro Company use only. 2. Conduct a hydrometer test of the battery electrolyte. A. Check the voltage across the battery terminals prior to testing the battery. If the voltage is less than IMPORTANT: Make sure the area around the cells is 12.4 VDC, recharge the battery.
- Page 49 PRELIMINARY – For Toro Distributor and Toro Company use only. Charging CAUTION To minimize possible damage to the battery and allow the battery to be fully charged, the slow charging meth- od is presented here. This charging method can be ac-...
- Page 50 PRELIMINARY – For Toro Distributor and Toro Company use only. This page is intentionally blank. Page 4 − 24 Electrical System ProForce Debris Blower...
- Page 51 PRELIMINARY – For Toro Distributor and Toro Company use only. Chapter 5 Blower Assembly Table of Contents GENERAL INFORMATION .....
- Page 52 PRELIMINARY – For Toro Distributor and Toro Company use only. This page is intentionally blank. Blower Assembly Page 5 − 2 ProForce Debris Blower...
-
Page 53: General Information
PRELIMINARY – For Toro Distributor and Toro Company use only. General Information Operator’s Manual The Operator’s Manual provides information regarding the operation, general maintenance and maintenance intervals for your ProForce Debris Blower machine. Re- fer to the Operator’s Manual for additional information when servicing the machine. -
Page 54: Service And Repairs
PRELIMINARY – For Toro Distributor and Toro Company use only. Service and Repairs Blower Drive Shaft RIGHT FRONT Loctite #242 300 to 330 in−lb (34 to 37 N−m) 300 to 330 in−lb (34 to 37 N−m) Figure 1 1. Flange nut 6. - Page 55 PRELIMINARY – For Toro Distributor and Toro Company use only. Removal (Fig. 1) 6. Install top grill to machine (Fig. 3). 1. Position machine on a firm, level surface. Make sure 7. Connect negative battery cable to negative battery engine is stopped and remove key from the ignition terminal.
-
Page 56: Rotor Assembly
PRELIMINARY – For Toro Distributor and Toro Company use only. Rotor Assembly Loctite #242 50 to 60 ft−lb (68 to 81 N−m) RIGHT FRONT Figure 4 1. Inlet bell 6. Spacer 10. Outer housing 2. Retaining ring 7. Rotor assembly 11. - Page 57 PRELIMINARY – For Toro Distributor and Toro Company use only. Removal (Fig. 4) NOTE: When installing nuts that secure rotor assembly to shaft, use a 1 1/4” wrench in flats on shaft to prevent 1. Position machine on a firm, level surface. Make sure the shaft from turning.
-
Page 58: Rotor Shaft
PRELIMINARY – For Toro Distributor and Toro Company use only. Rotor Shaft RIGHT FRONT 180 to 210 in−lb (21 to 23 N−m) Loctite Product 641 Figure 6 1. Cap screw (4 used) 4. Retaining ring (4 used) 7. Flange head screw (4 used) 2. - Page 59 PRELIMINARY – For Toro Distributor and Toro Company use only. 8. Remove four (4) cap screws that secure bearing 5. Install rotor shaft assembly into inner housing mak- holder to inner housing. ing sure that bearing is fully seated in housing bearing bore.
-
Page 60: Inner Housing Assembly
PRELIMINARY – For Toro Distributor and Toro Company use only. Inner Housing Assembly 90 to 100 in−lb (10.2 to 11.2 N−m) 10 to 20 in−lb (1.2 to 2.2 N−m) RIGHT FRONT Loctite #242 50 to 60 ft−lb (68 to 81 N−m) Figure 8 1. - Page 61 PRELIMINARY – For Toro Distributor and Toro Company use only. Removal (Fig. 8) 1. Position machine on a firm, level surface. Make sure engine is stopped and remove key from the ignition switch. Chock wheels to prevent machine from moving.
- Page 62 PRELIMINARY – For Toro Distributor and Toro Company use only. Installation (Fig. 8) B. Use nutdriver to hand tighten the twenty−four (24) flange head screws that secure the stator vanes 1. If rotor shaft was removed from inner housing, as- to outer housing.
- Page 63 PRELIMINARY – For Toro Distributor and Toro Company use only. This page is intentionally blank. ProForce Debris Blower Page 5 − 13 Blower Assembly...
-
Page 64: Nozzle Assembly
PRELIMINARY – For Toro Distributor and Toro Company use only. Nozzle Assembly FRONT RIGHT 45 to 50 in−lb (5.1 to 5.6 N−m) Figure 11 1. Nozzle 11. Lock nut 20. Bearing 2. Nozzle clamp 12. Cap screw (2 used) 21. Cap screw (2 used) 3. - Page 65 PRELIMINARY – For Toro Distributor and Toro Company use only. Removal (Fig. 11) 6. Fit nozzle and nozzle clamp to pulley. Tighten socket head screw and lock nut to secure nozzle to pulley. 1. Position machine on a firm, level surface. Make sure Torque fasteners from 45 to 50 in−lb (5.1 to 5.6 N−m).
- Page 66 PRELIMINARY – For Toro Distributor and Toro Company use only. This page is intentionally blank. Blower Assembly Page 5 − 16 ProForce Debris Blower...
- Page 67 PRELIMINARY – For Toro Distributor and Toro Company use only. Chapter 6 Chassis Table of Contents SPECIFICATIONS ......
-
Page 68: Specifications
PRELIMINARY – For Toro Distributor and Toro Company use only. Specifications Item Description Tires Size 20 x 10 − 8, 4 Ply, Tubeless Pressure 14 PSI (0.97 Bar) Wheel Lug Nut Torque 60 to 65 ft−lb (81 to 88 N−m) Chassis Page 6 −... -
Page 69: General Information
PRELIMINARY – For Toro Distributor and Toro Company use only. General Information Operator’s Manual The Operator’s Manual provides information regarding the operation, general maintenance and maintenance intervals for your ProForce Debris Blower. Refer to the Operator’s Manual for additional information when ser- vicing the machine. -
Page 70: Service And Repairs
PRELIMINARY – For Toro Distributor and Toro Company use only. Service and Repairs Wheels RIGHT FRONT 60 to 65 ft−lb (81 to 88 N−m) Figure 2 1. Main frame 3. Wheel hub assembly 5. Lug nut (4 used per wheel) 2. -
Page 71: Jacking Instructions
PRELIMINARY – For Toro Distributor and Toro Company use only. Wheel Removal (Fig. 2) Wheel Installation (Fig. 2) 1. Have ProForce Debris Blower attached to tow ve- 1. Position wheel to wheel hub on raised machine. hicle and park machines on a level surface. Engage ve- 2. -
Page 72: Wheel Hubs And Bearings
PRELIMINARY – For Toro Distributor and Toro Company use only. Wheel Hubs and Bearings See text for tightening procedure RIGHT FRONT Figure 3 1. Axle (2 used) 6. Lug screw (4 used per hub) 10. Cotter pin 2. Grease seal 7. - Page 73 PRELIMINARY – For Toro Distributor and Toro Company use only. Removal (Fig. 3) C. Pack both bearing cones with grease. Install greased inner bearing cone into the cup on inboard 1. Have ProCore Processor attached to tow vehicle side of the wheel hub.
- Page 74 PRELIMINARY – For Toro Distributor and Toro Company use only. This page is intentionally blank. Chassis Page 6 − 8 ProForce Debris Blower...
- Page 75 PRELIMINARY – For Toro Distributor and Toro Company use only. Chapter 7 Electrical Diagrams Table of Contents ELECTRICAL SCHEMATIC Electrical Schematic ......
- Page 76 PRELIMINARY – For Toro Distributor and Toro Company use only. This page is intentionally blank. Electrical Diagrams Page 7 − 2 ProForce Debris Blower...
- Page 77 PRELIMINARY – For Toro Distributor and Toro Company use only. WHITE START BLUE WHITE FUEL SOLENOID OUT (RED) RED/WHITE BLACK FUEL SOLENOID (RED/WHITE) GREEN GRAY MAGNETO (WHITE) WHITE RED/WHITE OIL PRESSURE SWITCH (GREEN) GREEN GREEN GRAY GOVERNOR CONTROL RED/YELLOW ENGINE...
- Page 78 PRELIMINARY – For Toro Distributor and Toro Company use only. ProForce Debris Blower Wire Harness Drawing Page 7 − 4...
- Page 79 PRELIMINARY – For Toro Distributor and Toro Company use only. GREEN WHITE BLACK ORANGE/BLACK GREEN/BLACK RED/YELLOW BLUE BLUE GREEN PINK BLACK WHITE GRAY YELLOW/BLACK BLACK ProForce Debris Blower Wire Harness Diagram Page 7 − 5...
- Page 80 PRELIMINARY – For Toro Distributor and Toro Company use only.
Need help?
Do you have a question about the ProForce Debris and is the answer not in the manual?
Questions and answers