Table of Contents
Advertisement
Quick Links
Download this manual
See also:
User Manual
Advertisement
Table of Contents

Related Manuals for Interlogix NS4750-24S-4T-4X


Summary of Contents for Interlogix NS4750-24S-4T-4X
-
Page 1: Quick Start Guide
NS4750-24S-4T-4X Quick Start Guide P/N 1072828 • REV 00.01 • ISS 14JUL14... - Page 2 © 2014 United Technologies Corporation Copyright Interlogix is part of UTC Building & Industrial Systems, Inc. a unit of United Technologies Corporation. All rights reserved. The NS4750-24S-4T-4X name and logo are trademarks of United Trademarks and Technologies. patents Other trade names used in this document may be trademarks or registered trademarks of the manufacturers or vendors of the respective products.
-
Page 3: Table Of Contents
Table of Contents 1. PACKAGE CONTENTS ..............................4 2. REQUIREMENTS................................5 3. WIRING DC POWER INPUTS ............................6 4. TERMINAL SETUP ................................ 7 5. LOGON TO THE CONSOLE ............................8 6. CONFIGURING IP ADDRESS ............................9 ... -
Page 4: Package Contents
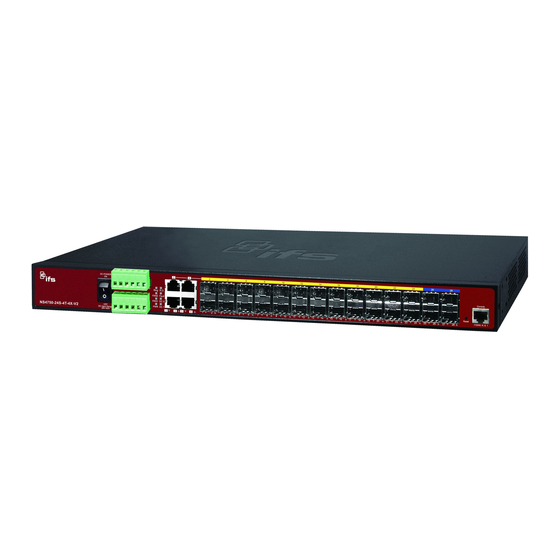
1. Package Contents Thank you for purchasing Interlogix Managed Metro Ethernet Switch, NS4750-24S-4T-4X. The term “ Managed Switch” mentioned in this Quick Installation Guide refers to the NS4750-24S-4T-4X. Open the box of the Managed Switch and carefully unpack it. The box should contain the following items: ... -
Page 5: Requirements
2. Requirements Workstation should be running Windows XP/Vista/7/8, Windows 2003/2008, MAC OS X or later, Linux, UNIX or other platforms compatible with TCP/IP protocols. Workstation should be installed with Ethernet NIC (Network Interface Card) Serial Port Connection (Terminal) ... -
Page 6: Wiring Dc Power Inputs
3. Wiring DC Power Inputs The 6-contact terminal block connector on the rear panel of the NS4750-24S-4T-4X is used for two DC redundant power inputs. Please follow the steps below to insert the power wire. Insert positive / negative DC power wires into contacts 1 and 2 for DC POWER 1, or 5 and 6 for DC POWER 2. -
Page 7: Terminal Setup
4. Terminal Setup To configure the system, connect a serial cable to a COM port on a PC or notebook computer and to serial (console) port of the Managed Switch. The console port of the Managed Switch is DCE already so that you can connect the console port directly through the PC without the need of Null Modem. -
Page 8: Logon To The Console
Figure 5-1 appears. Username: admin Password: admin Figure 5-1: NS4750-24S-4T-4X Managed Switch Console Login Screen 1. For security reason, please change and memorize the new password after this first setup. 2. Only accept command in lowercase letter under console interface. -
Page 9: Configuring Ip Address
Show the current IP address 1. On “NS4750-24S-4T-4X#” prompt, enter “show ip interface brief”. The screen displays the current IP address, Subnet Mask and Gateway as shown in Figure 6-1. Figure 6-1: Show IP Information Screen - 9 -... - Page 10 Configuring IP address 3. On “NS4750-24S-4T-4X# ” prompt, enter the following command and press <Enter> as shown in Figure 6-2. The previous command would apply the following settings for the Switch. IP Address: 192.168.0.101 Subnet Mask: 255.255.255.0 Figure 6-2: Set IP Address Screen...
- Page 11 “help” anytime in console to get the help description. User needs to save configuration when all configurations have been finished or the configuration will be reset after system rebooted. The configuration saving command has shown following. NS4750-24S-4T-4X # copy running-config startup-config - 11 -...
-
Page 12: Starting Web Management
7. Starting Web Management The following shows how to start up the Web Management of the Managed Switch. Note the Managed Switch is configured through an Ethernet connection. Please make sure the manager PC must be set on the same IP subnet address. For example, the default IP address of the Managed Switch is 192.168.0.100, then the manager PC should be set at 192.168.0.x (where x is a number between 1 and 254, except 100), and the default subnet mask is 255.255.255.0. - Page 13 Login the Managed Switch Use Internet E xplorer 8.0 or above Web browser and enter IP address http://192.168.0.100 (the factory-default IP address or that you have just changed in console) to access the Web interface. When the following dialog box appears, please enter the default username and password “admin” (or the password you have changed via console).
- Page 14 If you are not familiar with Switch functions or the related parameter, press “Help“ button anytime on the left of the Web page to get the help description. Now, you can use the Web management interface to continue the Switch management or manage the Switch by console interface.
-
Page 15: Customer Support
8. Customer Support Thank you for purchasing INTERLOGIX products. You can browse our online FAQ resource on the INTERLOGIX website first to check if it could solve your issue. If you need more support information, please contact INTERLOGIX.com/support for the support team.
Need help?
Do you have a question about the NS4750-24S-4T-4X and is the answer not in the manual?
Questions and answers