Table of Contents
Advertisement
Quick Links
Advertisement
Table of Contents

Related Manuals for Elation Trio-1248


Summary of Contents for Elation Trio-1248
- Page 1 Trio-1248 Rev. 4/10...
-
Page 2: Table Of Contents
4.4.2 Menu........................20 -Patching Moving Light fixtures................20 -Using Groups.....................22 -Control Fixtures....................24 -Preset Palette.....................24 -Shape.........................25 -Playback......................26 -Pan/Tilt Invert.....................27 4.5 LED Mode...........................28 4.5.1 FIX Patch.......................28 4.5.2 Channel Set Up.....................28 4.5.3 Using Groups......................29 4.5.4 Delete........................29 4.5.5 Listfix........................30 Elation Professional® www.elationlighting.com - Trio-1248 - Page 1... - Page 3 4.8 VGA Card Installation Tips....................45 5. DMX Setup............................46 5.1 Data Cable(DMX Cable) Requirements................46 5.2 5-pin XLR DMX Connectors....................47 6. Service..............................48 6.1 Maintenance........................48 6.1.1 General Inspection....................48 6.1.2 Basic Cleaning.......................48 6.2 Trouble Shooting.........................48 Elation Support.............................49 Warranty...............................50 Elation Professional® www.elationlighting.com - Trio-1248 - Page 2...
-
Page 4: General Introduction
Support: support@elationlighting.com Forum: http://forums.elationlighting.com This manual is Copyright © 2008 Elation Professional. All rights reserved. No part of the manual included with this product can be reproduced or transmitted in any form, by any means, for any pur- pose without prior written authorized permission. -
Page 5: General Information
Indicates potential damage to equipment. Indicates items may be recycled. The following safety information relates to the Trio-1248 Lighting Console. Please read each item carefully to ensure you fully understand them. To prevent the risk of electrical shock, do not open this unit. There are no user serviceable parts inside this unit. -
Page 6: Introduction
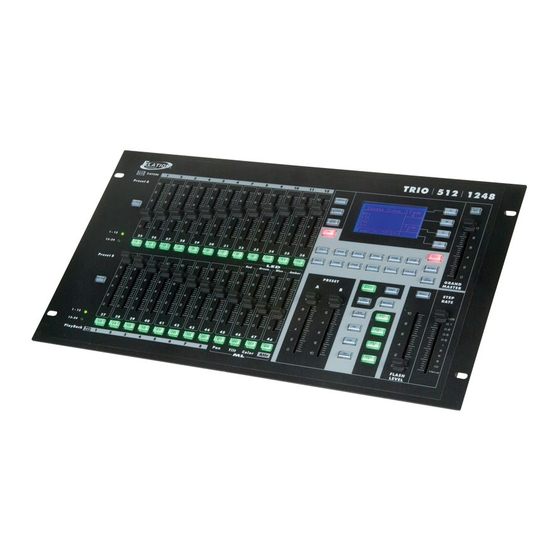
3. introduction 3.1 About the Trio-1248 Lighting Console: The Elation Trio-1248 is a three in one lighting console which was designed to control Conventional dimmers, LED’s and Moving Lights. We are sure you’ll find your Trio to be extremely powerful and easy to use. -
Page 7: Main Features
7. DMX OUT’s A & B send data, via 3 & 5 pin XLR’s, to compatible fixtures/devices. DMX Output A should only be used to send data to DMX Base fixtures/devices. DMX Output B should be used to send data to all fixtures/devices which are patched into your TRIO-1248. 8. Buttons change color depending on their current function. - Page 8 Trio-1248 CoNTroLS & FuNCTioNS Elation Professional® www.elationlighting.com - Trio-1248 - Page 7...
-
Page 9: Controls & Functions
22. Flash Level: Represents the max bump output value for all Conventional Par channels. 23. Step Rate: Used to set hold and fade times for all programs during record process and during playback. 24. Grandmaster: Controls output of entire console at all times. Elation Professional® www.elationlighting.com - Trio-1248 - Page 8... -
Page 10: Connection Ports
-Port A: Outputs DMX signal for DMX Base Playback only (Recorded programs from an external con- trol source). -Port B: Outputs DMX signal for all data patched and programmed in your TRIO. Elation Professional® www.elationlighting.com - Trio-1248 - Page 9... -
Page 11: Manual Conventions
For example, this text is highlighted. Text may be highlighted by clicking and dragging the cursor across the portion desired. This manual is Copyright © 2010 Elation Professional. All rights reserved. No part of the manual included with this product can be reproduced or transmitted in any form, by any means, for any pur- pose without prior written authorized permission. -
Page 12: Single Scene Mode
Faders bottom to top, the indicator will now be green and the user will not be working in Single Scene Mode. 2.2 Shortcut -This method allows the user to transition quickly from the current working mode into Elation Professional® www.elationlighting.com - Trio-1248 - Page 11... -
Page 13: Fade A And B Settings
2. If it is desired to switch into Two Scene Mode from another work mode, the user may do so in the same fashion as Single Scene Mode. 2.1. CrossFade 2.2. Shortcut -Refer to the details in Single Scene Mode. Elation Professional® www.elationlighting.com - Trio-1248 - Page 12... -
Page 14: Submaster Mode
3.1 Press the A Key to highlight the Assign Fade Function. 3.2 Hold down the Bump Button of the desired recorded Submaster and adjust the StepRate Fader to modify the Fade Time. Elation Professional® www.elationlighting.com - Trio-1248 - Page 13... -
Page 15: Crossfade In Submaster
5 are up, the crossfade will start from scene 6.) 4. The LCD will show the fader percentage values for both the fade in and fade out as the fade is occurring. Elation Professional® www.elationlighting.com - Trio-1248 - Page 14... -
Page 16: Record Function
Press A to confirm or C to exit. To Delete all of the Submaster and Pages, press the C key to choose “Del All” as the LCD screen shows you below. Press A to confirm or C to exit. Elation Professional® www.elationlighting.com - Trio-1248 - Page 15... - Page 17 2.6 To insert a Scene before a Step, use the C (Next) or D (Back) buttons to select the step desired to have the scene precede. Push the Step key to insert the Scene. Elation Professional® www.elationlighting.com - Trio-1248 - Page 16...
-
Page 18: How To Edit A Scene
In Record Fx mode, Press the B key to choose Del FxBase. Choose the Fx you wish to Delete by pressing the corresponding Fx key. Press the A key to confirm or the C key to cancel. Elation Professional® www.elationlighting.com - Trio-1248 - Page 17... -
Page 19: How To Set Ext Keys
The user only needs to use the BBT Record function if using an external console to record a Chase into the Trio-1248. The user must make sure to insert a blackout at the beginning and the end of the Chase. -
Page 20: Concept
4.4 mL mode (moving Light) 4.4.1 Concept A maximum of 12 Moving Lights can be controlled by the Trio-1248. A maximum of 40 attributes for each moving light and a maximum of 512 channels of DMX output can be assigned. - Page 21 -Repeat the above steps to patch any additional Handles. 1.2 Editing and recording various Scenes for a patched moving Light. The Trio-1248 allows you to edit and record various scenes for a patched moving light. You may set the Pan, Tilt, Speed, Color and Attribute for it.
-
Page 22: Using Groups
If you have several units of one fixture type, you often want to select them all at the same time. To avoid excessive Bump button use, the Trio-1248 allows you to put fixtures into groups which you can use to select all fixtures by typing the group Bump. - Page 23 2.3.1 delete Fix -In ML Mode, Press the Menu key. Choose Next and then Delete -To choose Delete Fix, the Trio-1248 gives you the option to delete a single Fixture or All Fixtures. -Choose Delete One to delete a single fixture. The LCD shows “Press a Preset <Bump> to Delete.”...
-
Page 24: Preset Palette
Select the fixture to be changed. Shared palettes can be set to all fixture of the same type. -In ML Mode, press the Bump button in which you have allocated the ML fixture to. -Press the A key to choose Preset Pallet. The LCD display will show: Elation Professional® www.elationlighting.com - Trio-1248 - Page 23... -
Page 25: Shape
“Center Tilt”: the center value of Tilt when the Moving Light runs its shape. CW” and “CCW”: the direction of the shape. CW=Clockwise, CCW=Counter Clockwise “Speed”: the speed that the moving light runs its shape. “Run”: to start the shape. Elation Professional® www.elationlighting.com - Trio-1248 - Page 24... -
Page 26: Playback
-Press ClearBuffer when you have finished saving the Chase. Otherwise, when you try to play back, the programmer will include previously set values and you won’t see the chase properly. -There are up to 99 Steps in a Chase. Elation Professional® www.elationlighting.com - Trio-1248 - Page 25... -
Page 27: Pan/Tilt Invert
-Press Menu to return to the previous menu. Once you complete the settings for Pan/Tilt Invert, push the Pan/Tilt fader up or down, the Moving Light will react as you set it. Elation Professional® www.elationlighting.com - Trio-1248 - Page 26... -
Page 28: Led Mode
Repeat the above steps to patch additional fixtures. 4.5.2 Channel Set up The Channel Set Up option allows the user to softpatch the start and end DMX address for Dim (dimmer channels), LED and Moving Lights fixtures. Elation Professional® www.elationlighting.com - Trio-1248 - Page 27... -
Page 29: Using Groups
-Press the related bump button which contains the group that you want selected. 4.5.4 delete The console allows the user to delete the collocated LED fixture and Recorded chases. delete Fix -In LED Menu Mode, choose Next and then choose Delete. Elation Professional® www.elationlighting.com - Trio-1248 - Page 28... -
Page 30: Listfix
-Choose “No” to exit. 4.5.7 using Shape In LED Mode, press C to choose “shape”, the LCD screen shows you: Rain Led Shape MENU Knight CLEAR BUFFER Rider Chase BASE Exit Master: xxx Elation Professional® www.elationlighting.com - Trio-1248 - Page 29... - Page 31 -Also, if you are not satisfied with the configuration of RGB, you can push the Red, Green and Blue faders to set your desired color. -Press FX1-FX10 to select ColorLib 1-10. -The selected color will output to your LED fixture. -Press D to select “Enter” and confirm your settings. Elation Professional® www.elationlighting.com - Trio-1248 - Page 30...
-
Page 32: Memory Playback Mode
The LCD will prompt “Exit Playback? and Into..” as indicated below. Press A to choose “Yes”, the unit will go into the selected work mode. Press C to choose “No”, the unit will continue to function in Mem Playback Mode. Elation Professional® www.elationlighting.com - Trio-1248 - Page 31... - Page 33 2. Hold down the button of the recorded Submaster you want to configure, then adjust the StepRate Fader to modify the FadeTime for it. In this mode, the “Page Up” and “Page Down” are used to set the “Submaster Page”. Elation Professional® www.elationlighting.com - Trio-1248 - Page 32...
-
Page 34: Menu
Trio-1248 mENu 4.7 menu The main Menu options can be accessed when in Single Scene, Two Scene or Submaster Modes. Press “D” to view “Next” set of options. Elation Professional® www.elationlighting.com - Trio-1248 - Page 33... -
Page 35: Channel Set Up
-Press A to increase the value. -Press B to decrease the value. -Press C to move “>” (cursor) to next option. -Press D “enter” to confirm and save set up. -Press Menu to cancel or exit. Elation Professional® www.elationlighting.com - Trio-1248 - Page 34... -
Page 36: Dmxpatch
-Press A to increase the value. -Press B to decrease the value. -Press C to move “>” (cursor) to next option. -Press D “enter” to confirm and save set up. -Press Menu to cancel or exit. Elation Professional® www.elationlighting.com - Trio-1248 - Page 35... -
Page 37: Memory Lock
3. Input password: 168168 (press keys FX1, FX6, FX8...) or user password if it was changed. 4. Press D key to Enter and confirm. Once update is complete, LCD will return to the home screen. 4.7.6 update vgA: Used to update VGA firmware and display images. Elation Professional® www.elationlighting.com - Trio-1248 - Page 36... -
Page 38: Update Dmx-Bs
Choose Enter to complete the Update of the DMX Base. In this function, a conversion software (Trio Flash Convert) is adopted to convert your flash files, then you can easily record the converted flash files to your console accordingly. Elation Professional® www.elationlighting.com - Trio-1248 - Page 37... - Page 39 Files may also be opened using the [Open Flash] button. The [Play], [Pause], and [Stop] buttons allow manual control of the playback. To select a file, click and “Open” to preview it. Elation Professional® www.elationlighting.com - Trio-1248 - Page 38...
- Page 40 Flash files may be converted to DMX scene files (.scn) and loaded to the Trio. With the desired file loaded in Preview Screen, select [File Convert]. Enter Flash file playback speed in frames per sec- ond. Select [OK]. Elation Professional® www.elationlighting.com - Trio-1248 - Page 39...
- Page 41 If you’ve purchased the optional VGA card for your Trio, you will have to Enable it for it to start func- tioning. The VGA option gives you the ability to view, in realtime, status information of playbacks, effects, submaster contents and preset data. See main display below. Elation Professional® www.elationlighting.com - Trio-1248 - Page 40...
-
Page 42: Artnet Set
4. Press D to “Disabled” Artnet. Press Menu to Exit. 4.7.10 upload LiB The Upload LIB option allows you to upload your entire system fixture library or a single fixture from the console to a USB drive. Elation Professional® www.elationlighting.com - Trio-1248 - Page 41... -
Page 43: Lib Set
1. Make sure you have inserted your USB drive. 2. Enter password 1,6,8,1,6,8 by pressing FX1, Fx6, FX8, FX1, FX6, FX8 in orderly fashion. 3. Press D to Enter. The LCD will show you as follows: Elation Professional® www.elationlighting.com - Trio-1248 - Page 42... -
Page 44: Change Password
Input a new 6 digit password, and press Enter. The console will request you to input the new pass- word a second time. Once the new password is successfully entered, the LCD will display: Elation Professional® www.elationlighting.com - Trio-1248 - Page 43... -
Page 45: Rev1.02
Use the position control on your monitor to re-position the display if needed. Adjust the video display brightness and contrast as needed to obtain the best image. Elation Professional® www.elationlighting.com - Trio-1248 - Page 44... -
Page 46: Dmx Setup
XLR connector of the last unit in your daisy chain to terminate the line. Using a cable terminator (ADJ part number Z-DMX/T) will decrease the possibilities of erratic behavior. Elation Professional® www.elationlighting.com - Trio-1248 - Page 45... -
Page 47: 5-Pin Xlr Dmx Connectors
Data Compliment (- signal) Pin 2 Pin 2 Data True (+ signal) Pin 3 Pin 3 Not Used Pin 4 - Do Not Use Not Used Pin 5 - Do Not Use Elation Professional® www.elationlighting.com - Trio-1248 - Page 46... -
Page 48: Service
CLEANiNg 6. Service 6.1 maintenance The Trio-1248 Lighting Console should require minimal maintenance over its operational life. The fol- lowing basic maintenance practices will help keep the system performing well and looking good. 6.1.1 general inspection 1. Inspect the system components on a regular basis. Check each button and indicator for proper operation. - Page 49 Trio-1248 ProduCT rEgiSTrATioN The Trio-1248™ carries a two year limited warranty. Please fill out the enclosed warranty card to vali- date your purprogram. All returned service items whether under warranty or not, must be freight pre- paid and accompany a return authorization (R.A.) number. The R.A. number must be clearly written on the outside of the return package.
- Page 50 G. This warranty is the only written warranty applicable to Elation® Products and supersedes all prior warran- ties and written descriptions of warranty terms and conditions heretofore published. Elation Professional® www.elationlighting.com - Trio-1248 - Page 49...
-
Page 51: Warranty
10.4” (L) x 19” (W) x 2.75” (H) WEIGHT: 9Lbs./ 4.5Kgs. WARRANTY: 2 Year (730 Days) Please Note: Specifications and improvements in the design of this unit and this manual are subject to change without any prior written notice. Elation Professional® www.elationlighting.com - Trio-1248 - Page 50... - Page 52 ©Elation Professional® 6122 S. Eastern Ave., Los Angeles, CA 90040 USA Tel: 323-582-2650 Fax: 323-582-2610 Web: www.elationlighting.com E-mail: info@elationlighting.com...
Need help?
Do you have a question about the Trio-1248 and is the answer not in the manual?
Questions and answers