SportDOG TEK 2.0 Operating Manual
Tracking and training product
Hide thumbs
Also See for TEK 2.0:
- Quick start manual (69 pages) ,
- Operating manual (62 pages) ,
- Quick start manual (12 pages)
Table of Contents
Advertisement
Advertisement
Table of Contents

Subscribe to Our Youtube Channel
Related Manuals for SportDOG TEK 2.0


Summary of Contents for SportDOG TEK 2.0
- Page 1 OPERATING GUIDE PLEASE READ THIS ENTIRE GUIDE BEFORE BEGINNING...
- Page 2 IMPORTANT SAFETY INFORMATION EXPLANATION OF ATTENTION WORDS AND SYMBOLS USED IN THIS GUIDE This is the safety alert symbol. It is used to alert you to potential personal injury hazards. Obey all safety messages that follow this symbol to avoid possible injury or death. WARNING indicates a hazardous situation which, if not avoided, could result in death or serious injury.
- Page 3 • If the condition persists beyond 48 hours, see your veterinarian. For additional information on bed sores and pressure necrosis, please visit the Support section for Remote Trainers at www.sportdog.com. These steps will help keep your dog safe and comfortable. Millions of dogs are comfortable while they wear stainless steel contacts.
-
Page 4: Table Of Contents
Thank you for choosing SportDOG Brand® tracking and training products. Used properly, this product will help you track and/or train your dog efficiently and safely. To ensure your satisfaction, please review this operating guide thoroughly. If you have questions regarding this product’s operation, please see this manual’s Frequently Asked Questions or Troubleshooting sections, contact our Customer Care Center at 1-800-732-0144, visit our website at www.sportdog.com or view our support videos at www.youtube.com/sportdogbrand. -
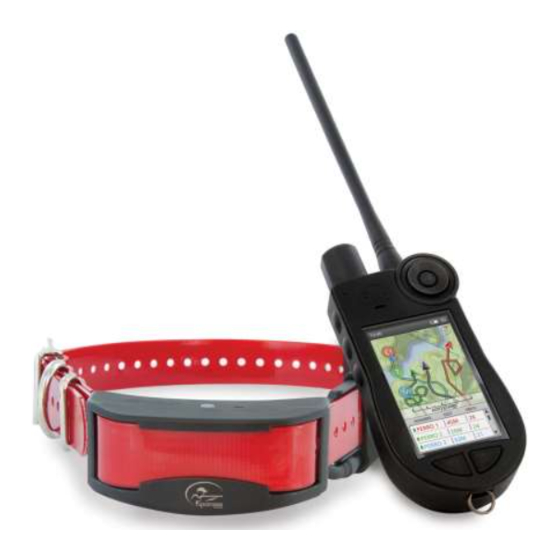
Page 5: Components
HOW THE SYSTEM WORKS The SportDOG Brand® TEK Series 2.0 Systems have been proven safe, comfortable, and effective for all dogs over 8 pounds. Consistent, correct use of this product allows you to track your dog, reinforce commands, and correct misbehavior from up to 10 miles line of sight. -
Page 6: Key Definitions
KEY DEFINITIONS HANDHELD DEVICE: Receives and displays location updates from the GPS Collar. It sends the radio signal to the E-Collar Module. It is waterproof and can be submerged in water to a depth of 5 feet. ON/OFF BUTTON: Pressing and releasing this button will cause the unit to vibrate and the Start-up Screen will display. - Page 7 GPS COLLAR: Receives location from GPS and GLONASS constellations and transmits location updates to the Handheld Device. It is waterproof and can be submerged in water to a depth of 25 feet. ON/OFF BUTTON: Pressing this button and releasing when the GPS Indicator Light comes on green will turn the unit on.
-
Page 8: Icon Definitions
ICON DEFINITIONS The following icons are used throughout the TEK Series 2.0 software interface. ICON FUNCTION GENERAL ICONS TIME INDICATOR: Displays the current local time. BATTERY GAUGE: Displays the battery charge status. UP / DOWN INDICATORS: Indicate menu choices available. Use the arrow pad keys to view additional menu items. - Page 9 TRAINING ICONS Available only with the TEK-V2LT system or the TEK-2T E-Collar Module accessory. CONTINOUS STATIC STIMULATION: You control both when and how long static stimulation is delivered, up to a maximum of 10 seconds. After 10 seconds, the static stimulation will “time out”...
-
Page 10: Operate The Tek Series 2.0 Handheld Device
OPERATE THE TEK SERIES 2.0 HANDHELD DEVICE The following terms are used throughout this Operating Guide: Select: Use the Up/Down/Left/Right Arrow Keys to scroll through and highlight menu items or areas of the screen. A selected item is highlighted in orange. Home: The main screen that displays the icons. -
Page 11: Prepare The Gps Collar/E-Collar Module
TO CHARGE THE GPS COLLAR/E-COLLAR MODULE 1. Attach the supplied Charge Cradle so that the SportDOG Brand ® logo on the Charge Cradle covers the SportDOG Brand logo on the GPS Collar. 2. Connect the appropriate charger connector to the charging jack. - Page 12 GPS COLLAR INDICATOR LIGHT OPERATIONAL MODE LIGHT COLOR LIGHT FUNCTION BATTERY STATUS SPEAKER FUNCTION Unit is turned on via Green Light is solid Good Beeps 1-5 times On/Off Button in color during depending on beep sequence GPS code Unit is turned off via Light is solid On/Off Button in color during...
- Page 13 ABOUT RECHARGEABLE BATTERIES • The Handheld Device and GPS Collar contain Lithium-Ion (Li-Ion) batteries; never incinerate, puncture, deform, short-circuit, or charge with an inappropriate charger. Fire, explosion, property damage, or bodily harm may occur if this warning is not followed. •...
-
Page 14: Convert A Gps Collar To A Gps Collar With E-Collar Module
CONVERT A GPS COLLAR TO A GPS COLLAR WITH E-COLLAR MODULE 1. Remove the outer screws from the Location-Only Module with a 3/32 Allen wrench (A). 2. Separate the Location-Only Module from the GPS Collar’s front housing (B). 3. Thoroughly clean inside the front housing with a soft towel removing any debris. -
Page 15: Fit The Gps Collar Or Gps Collar With E-Collar Module
FIT THE GPS COLLAR OR GPS COLLAR WITH E-COLLAR MODULE To ensure the effectiveness of this product and the comfort and safety of your dog, check the fit of the collar frequently. If you notice that your dog is experiencing skin irritation, discontinue use of the collar for a few days. If the condition persists beyond 48 hours, see your veterinarian. -
Page 16: Prepare The Tek Series 2.0 Handheld Device
STEP :: 02 PREPARE THE TEK SERIES 2.0 HANDHELD DEVICE You must complete these steps prior to using this device for the first time. TO CHARGE THE HANDHELD DEVICE 1. Lift the rubber cover protecting the charging jack. 2. Connect the appropriate charger connector to the charging jack. -
Page 17: Tek 2.0 Setup Wizard
STEP :: 03 TEK 2.0 SETUP WIZARD The first time you turn on your TEK 2.0 Handheld Device, the Setup Wizard will walk you through setting up your device. The Setup Wizard has four sections: 1. Initial Device Settings 2. Adding Dogs 3. - Page 18 DOG NAME The Wizard will prompt you to enter your dog’s name. Press the Enter Button or Right Arrow Key to bring up the keyboard. Use the arrow keys or Wheel to select letters and spell out the name of your dog*. When complete, select the checkbox.
- Page 19 HANDHELD DEVICE NAME Now you will assign a name for your TEK 2.0 Handheld Device. This is the name you will use to share your Handheld Device information with other hunters. Press the Enter Button to bring up the keyboard. Use the arrow keys or the Wheel to enter the name.
-
Page 20: Home
CALIBRATE COMPASS To calibrate the Handheld Device’s Compass, rotate the Handheld Device in all three dimensions until the orange squares on the screen are as close as possible to the center of the bars. When you have successfully calibrated the Handheld Device, the screen will notify you by displaying Calibration Successful. -
Page 21: My Dogs
MY DOGS The My Dogs Screen displays a list of your dogs. You can add and remove dogs, assign each dog to a color-coded collar so it can be tracked, and manage settings for each dog from this screen. DOG LIST Active dog names (up to 21) appear next to their collar colors and inactive dog names appear in grey. - Page 22 Action The Handheld Device can alert you when your dog exhibits specific hunting actions: • On-Point – used for pointing dogs to detect when the dog is stationary, indicating it is on-point. • Treed – used for hunting with trailing dogs to indicate the dog is “on the tree” and holding an animal at bay. Select None, On-Point, or Treed and then select Next to move to the next screen.
- Page 23 Bark Indicator The Bark Indicator reports each time a selected dog barks (barks per minute). Press the Enter Button or the Right Arrow Key to select Yes or No. NOTE: The Bark Indicator options are a placeholder for future functionality. This feature will not currently operate.
-
Page 24: My Collars
MY COLLARS The My Collars Screen displays a list of your collars. You can add and remove collars and manage settings for all collars from this screen. COLLAR LIST Active collars appear next to their selected color and inactive collars appear in grey. You can have up to 21 collars in the list. - Page 25 Follow the instructions on the screen to pair the collar with your TEK 2.0 Handheld Device. Press and hold the collar On/Off Button until the Indicator Light turns amber to put the collar in Pairing Mode. When the collar Indicator Light flashes green 5 times, pairing is complete. Select Done to complete this collar’s setup.
-
Page 26: Hunters
HUNTERS The Hunters Screen displays a list of hunters who have shared their Handheld Devices with you, so you can track each other on the map. You can add, remove, and manage settings for all hunters from this screen. HUNTER LIST Active hunter names appear next to their assigned color and inactive hunter names appear in grey. - Page 27 HUNTER DETAILS To view a hunter’s details, highlight and select the hunter name in the list. To edit a specific detail, highlight the field and press the Enter Button or the Right Arrow Key. Press the Left Arrow Key at any time to return to the Hunters Screen. Change Name…...
-
Page 28: Training
TRAINING NOTE: If you own the TEK Series GPS Tracking System (TEK-V2L) you must purchase the TEK-2T E-Collar Module accessory to utilize the training functionality. The Training Screen displays the Stim Button settings for active dogs and lets you deliver stimulation from all 3 User-Defined Stim Buttons. The name and Intensity Level for the current dog is displayed and you can easily adjust the Intensity Level with the Up/Down Arrow Keys. - Page 29 INTENSITY LEVEL The number displayed in the center of the Training Screen is the Intensity Level setting for the current dog. Use the Up/Down Arrow Keys to adjust the level from 1-99.* * The default Intensity Level is 1. Each time you adjust the Intensity Level for a dog, that value is remembered between training sessions and recharge cycles.
-
Page 30: Tracking
TRACKING The Tracking Screen lets you easily view dog locations and deliver stimulation* to control dog movement. A map shows all of the items your Handheld Device is currently tracking, including you, your dogs, and any shared hunters or shared dogs. Below the map, the Name List shows all of the tracked items along with status details. - Page 31 SCALE BAR The scale bar below the map displays the current map scale* and notifies you if the map is set to Auto Scale. By default, the Tracking Screen will automatically scale to best fit all tracked items on the screen. You can override Auto Scale by using the Wheel to zoom in or out.
- Page 32 TRACKING MENU To display the “Tracking” Menu, press the Menu Button while viewing the Tracking Screen. You can exit the “Tracking” Menu at any time by pressing the Left Arrow Key. Home: Select Home to display the Home Screen. Stop Navigation: Select Stop Navigation to stop navigating to a route and clear the route content from the Tracking Screen (only visible when a route is active).
-
Page 33: Map
The Map Screen offers a full-screen view of any map data that is loaded on the Handheld Device. A black arrow icon displays your current location and additional GPS information can be found at the bottom of the map. Menu options allow you to customize the map and visible GPS information (Info Fields). - Page 34 Information about a Location Press the Enter Button while hovering over an object to display information about the object. If there are multiple objects under the cursor when you press the Enter Button, a list of all the available objects will appear.
- Page 35 Change Info Fields: Select Change Info Fields to choose different tracking information to display. On the Map Screen, use the arrow keys to highlight the Info Field you want to change. Press the Enter Button. A menu of all possible Info Fields will appear.
-
Page 36: Voice
VOICE When activated, the Voice feature provides audible alerts on all active tracked items and reports audible status updates on selected tracked items. Updates are given in the order that your tracked items appear in the Name List on the Tracking Screen and include all the information displayed on the Tracking Screen. -
Page 37: Compass
COMPASS The Compass looks and acts like a traditional floating needle compass. The cardinal letters rotate as the Handheld Device rotates, maintaining orientation to North. Directional arrows to tracked items are shown. Use the Left/Right Arrow Keys to scroll through the list of tracked items. Up to three are displayed at a time. The Compass Screen is used in two modes: General Tracking (when a route is not active): •... - Page 38 INFO FIELDS The Info Fields at the bottom of the Compass Screen display information about the current track or route. You can choose the tracking information each field displays through the “Compass” Menu. COMPASS MENU To display the “Compass” Menu, press the Menu Button while viewing the Compass Screen.
-
Page 39: Settings
SETTINGS Customize your Handheld Device on the Settings Screen. Each field in the Settings Screen list opens to display a menu of specific options. STANDARD SETTINGS OPTIONS Every Settings menu contains two standard options: Restore Defaults: Highlight Restore Defaults and press the Enter Button or the Right Arrow Key to restore that setting to the factory defaults. - Page 40 Stim Buttons...: Set the default Stim Button configuration for when a new dog is added. See “TRAINING” on page 28 for a detailed list of stimulation options for each field. Default: Button 1: (C) Continuous / Button 2: (M) Momentary / Button 3: (T) Tone Alert: Choose how you are notified of an alert.
- Page 41 Datum: Choose preferred Datum. Select from: • Guam 1963 • Nahrwan Masirah • Adindan • GUX 1 Astro • Nahrwan UArabEm • Afgooye • AIN EL ABD ‘70 • Hjorsey 1955 • Namibia • Naparima BWI • Anna 1 Ast ‘65 •...
- Page 42 TIME Highlight and press the Enter Button to select preferred time settings. Time Format: Choose either local 12 hour (Default) or local 24 hour. Auto Time Zone: Control the auto time zone settings. Select from: Enabled: Allows the Handheld Device to update the time zone automatically based on the GPS location and the internal time zone table (Default).
- Page 43 Fence/Lost Dog Alert: Choose the sound made when a dog has exited a Geofence boundary or the Handheld Device has lost communication with a dog’s GPS Collar. • Off • Tone • Long Ring • Beep • Alarm • Long Tone •...
- Page 44 RESET Highlight and press the Enter Button. A warning message Resetting to factory defaults will delete all saved information. Are you sure you want to reset to factory defaults? will appear. Select Reset to revert back to the original factory settings or Cancel to exit the menu.
-
Page 45: Trip Computer
TRIP COMPUTER The Trip Computer Screen is designed to give you as much information as possible about the current GPS tracking session, including details about movement and GPS Collar settings. The first screen is the Trip Computer statistics for the owner. Press the Left/Right Arrow Keys to show the Trip Computer for a different tracked item. - Page 46 TRIP COMPUTER MENU To see the “Trip Computer” Menu, press the Menu Button while viewing the Trip Computer Screen. You can exit the “Trip Computer” Menu at any time by pressing the Left Arrow Key. Home: Select Home to display the Home Screen. Go To: Select Go To to open a menu of saved Waypoints and tracked items.
-
Page 47: Journal
JOURNAL Journals save and store the notes, Waypoints, and breadcrumbs that you create. You have access to all Journals in a single, easy to manage collection. ACTIVE JOURNAL The active Journal is automatically started when the Handheld Device is powered on. It is named the date and time it was started. - Page 48 SAVED JOURNALS MENU To display the “Saved Journals” Menu, press the Menu Button while viewing a saved Journal. Press the Left Arrow Key at any time to return to the saved Journal. Home: Select Home to display the Home Screen. Breadcrumbs…: Displays an additional menu for choosing breadcrumb options.
-
Page 49: Geofences
Geofences and manage settings for all Geofences from this screen. Geofences can be synchronized with the TEK 2.0 Companion Application for easier management. Geofences are a boundary line drawn on the map. When active, you will be alerted if a dog crosses a Geofence line. - Page 50 • When complete, press the Menu Button and select Finish Geofence. If another Geofence is already active, a message will ask you if you want to activate the new Geofence instead. Highlight Yes or No and press the Enter Button. NOTE: Complex polygons are not supported.
-
Page 51: Waypoints
WAYPOINTS The Waypoints Screen displays a list of existing Waypoints. You can view and edit details of each Waypoint, view each Waypoint on the map, and create a route to a Waypoint. You can have up to 1,000 saved Waypoints. WAYPOINT LIST The bearing and distance to a Waypoint (from the current GPS location) is available on the Waypoint List Screen. - Page 52 Elevation Waypoint elevation is determined by the GPS signal. To change the reported elevation, highlight the number and press the Enter Button to bring up a keypad. Use the arrow keys to enter a new number. When complete, select the checkbox. Time/Date Waypoint time and date are determined by the GPS signal when the Waypoint was created.
-
Page 53: Sun/Moon/Hunt
SUN/MOON/HUNT The Sun/Moon/Hunt Screen displays valuable information about the rising and setting times for the sun and moon, as well as predictions for hunting conditions. You can change the date in order to view information about future solar and lunar cycles and hunting activity. -
Page 54: Connect To A Computer
Register your TEK Series 2.0 System to receive e-mail alerts for product updates. ACCESSORIES To purchase additional accessories for your SportDOG Brand TEK Series 2.0 System, contact the Customer Care Center at 1-800-732-0144 or visit our website at www.sportdog.com. Component... -
Page 55: Frequently Asked Questions
Contact Points. Can I program my TEK Series 2.0 System No. The TEK Series 2.0 Systems are not compatible with other to work with my other SportDog Brand® SportDOG Brand®products. Systems, including TEK Series 1.0? Can I organize the way my dogs are Yes. -
Page 56: Troubleshooting
The answers to these questions should help you solve any problem you have with this system. If they do not, please contact the Customer Care Center at 1-800-732-0144, visit our website at www.sportdog.com, or view our support videos at www.youtube.com/sportdogbrand. - Page 57 • If you notice your operating time dropping to about half the original time, the GPS Collar with E-Collar Module battery needs to be replaced. Contact the Customer Care Center or visit sportdog.com to order a replacement. S P O R T D O G . C O M...
-
Page 58: Terms Of Use And Limitation Of Liability
TERMS OF USE AND LIMITATION OF LIABILITY 1. TERMS OF USE This Product is offered to you conditioned upon your acceptance without modification of the terms, conditions, and notices contained herein. Usage of this Product implies acceptance of all such terms, conditions, and notices. 2. -
Page 59: Battery Disposal
BATTERY DISPOSAL See Important Safety Information related to the battery on page 2. This system operates on two Li-Ion battery packs (2000mAh capacity for the GPS Collar and 4400mAh capacity for the Handheld Device). Call the Customer Care Center if your battery needs to be replaced. Separate collection of spent batteries is required in many regions;... -
Page 60: Tek Series 2.0 Add-A-Dog® Collars
TEK::2L ADD-A-DOG TEK::2T ADD-A-DOG TEK 2.0 GPS TRACKING + E-COLLAR TEK::2AD ADD-A-DOG NOT COMPATIBLE WITH TEK SERIES 1.0 OR OTHER SPORTDOG BRAND SYSTEMS. *PINK AND GREEN ID BANDS ALSO INCLUDED. GEAR THE WAY YOU’D DESIGN IT® ©2014 RADIO SYSTEMS® CORPORATION Radio Systems Corporation •...
Need help?
Do you have a question about the TEK 2.0 and is the answer not in the manual?
Questions and answers