Table of Contents
Advertisement
Quick Links
Advertisement
Table of Contents

Related Manuals for Samson Auro X12D


Summary of Contents for Samson Auro X12D
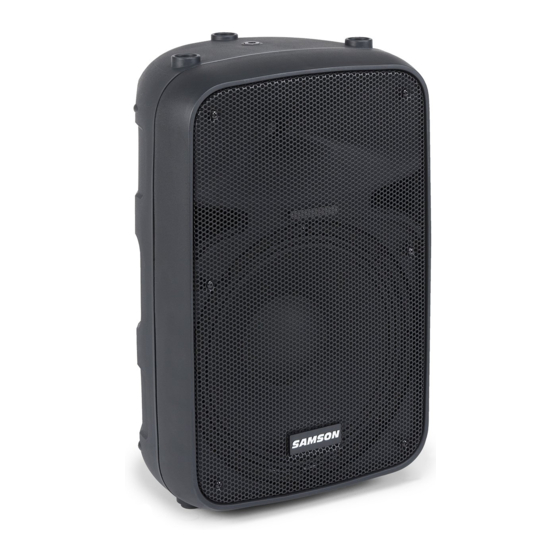
- Page 1 auro 1,000 WATT ACTIVE LOUDSPEAKER X12D • X15D OWNER'S MANUAL...
- Page 2 Copyright 2014 - Samson Technologies Corp. Samson Technologies Corp. 45 Gilpin Avenue Hauppauge, New York 11788-8816 Phone: 1-800-3-SAMSON (1-800-372-6766) Fax: 631-784-2201 www.samsontech.com...
-
Page 3: Important Safety Information
15. This appliance shall not be exposed to dripping or splashing water and that no object filled with liquid such as vases shall be placed on the apparatus. 16. Caution-to prevent electrical shock, match wide blade plug wide slot fully insert. 17. Please keep a good ventilation environment around the entire unit. Auro X12D/X15D... - Page 4 Important Safety Information FCC Notice 1. This device complies with Part 15 of the FCC Rules. Operation is subject to the following two conditions: (1) This device may not cause harmful interference. (2) This device must accept any interference received, including interference that may cause undesired operation.
-
Page 5: Table Of Contents
Specifications ..... . 14 Dimensions ..... . . 15 Auro X12D/X15D... -
Page 6: Introduction
Samson products in the future. Also, be sure to check out our website (www. samsontech.com) for complete information about our full product line. -
Page 7: Features
Custom-designed, heavy-duty, 12”/15” long throw low frequency drivers provide enhanced bass response • 1.34” titanium diaphragm compression driver with 1” throat for smooth high-end reproduction • Samson’s R.A.M.P. DSP technology • Master Volume control with peak indicator • Two XLR-1/4” combo input channels with independent •... -
Page 8: Quick Start
(or other audio source) or a microphone to the Input 1 jack or a line level signal to the Input 2 jack on the Auro X12D/X15D rear panel (figure 2). If using a microphone, set the Mic/Line Switch to the microphone position. -
Page 9: Rear Panel Layout
The BOOST setting provides a high frequency lift for vocal clarity. This is useful when plugging a microphone directly into the speaker. The DEEP setting enhances low frequencies to add punch and high frequencies to add vocal clarity. Auro X12D/X15D... - Page 10 Rear Panel Layout 10. HPF Switch - This switch adjust the High Pass Filter frequency of the cabinet. When using the Auro speaker with a subwoofer, set the switch to 80Hz or 120Hz depending on the specification of the subwoofer. It is also recommended to set the HPF to 120Hz when using the Auro speaker as a floor monitor to limit the low frequency build up on the stage.
-
Page 11: Making Connections
Making Connections Using a Microphone • Be sure that the Auro X12D/X15D Power switch is set to the off position. • Turn the LEVEL control fully counterclockwise to the off position. • Connect the power cable to an AC socket. - Page 12 Using the Auro X12D/X15D as a Floor Monitor The Auro X12D/X15D is an ideal solution for stage monitoring and thanks to its unique design, two wedge monitor positions are possible. When placed on its side, with the high frequency...
-
Page 13: Cables And Connectors
Cables and Connectors The Auro X12D/X15D features balanced inputs and outputs, so connecting balanced and unbalanced signals is acceptable. Whenever possible, use balanced connections to other equipment to suppress interference. Unbalanced 1/4” Connector Balanced TRS 1/4” Connector XLR to XLR Balanced Unbalanced 1/4”... -
Page 14: Specifications
450 mm L x 342 mm W x 698 mm H Weight 28.5 41.5 12.8 Mounting Mounting Method Integral 1 3/8” Pole Mount Receptacle Fly Point 1 x M10 At Samson, we are continually improving our products, therefore specifications and images are subject to change without notice. -
Page 15: Dimensions
Dimensions 13.5 in/ 10.8 in/ 342 mm 275 mm 17.75 in/ 14 in/ 450 mm 356 mm 27.5 in/ 21.5 in/ 698 mm 546 mm Auro X12D/X15D... - Page 16 Samson Technologies Corp. 45 Gilpin Avenue Hauppauge, New York 11788-8816 Phone: 1-800-3-SAMSON (1-800-372-6766) Fax: 631-784-2201 samsontech.com...
Need help?
Do you have a question about the Auro X12D and is the answer not in the manual?
Questions and answers