
Related Manuals for Smarthome SwitchLinc Timer V2

Summary of Contents for Smarthome SwitchLinc Timer V2
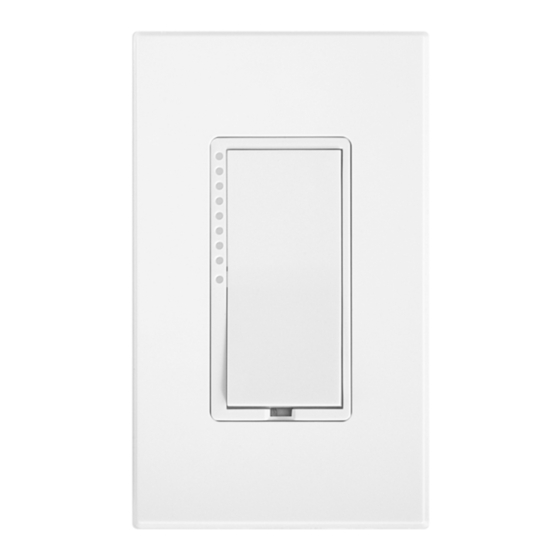
- Page 1 ™ INSTEON ™ SwitchLinc Timer V2 INSTEON On/Off Timer Switch For models: #2476ST SwitchLinc Timer V2...
-
Page 2: Table Of Contents
Installing SwitchLinc Timer ........................6 Installing SwitchLinc Timer in a Multi-Way Circuit..................7 HOW TO SET UP SWITCHLINC TIMER TO REMOTELY CONTROL AN INSTEON DEVICE ....13 Linking SwitchLinc Timer to a Controlled INSTEON Device ..............13 Unlinking a Controlled INSTEON Device from SwitchLinc Timer ............14 Creating an INSTEON Scene........................ -
Page 3: About Insteon Switchlinc Timer
INSTEON is a simple, reliable, and affordable breakthrough in home control. Simple, because Plug-n- Tap™ setup is a breeze, and there are no wires to add – INSTEON uses existing powerline wiring as well as radio-frequency for communication. Reliable, because every INSTEON device is a two-way repeater. -
Page 4: How To Install Switchlinc Timer
SwitchLinc Timer. It is recommended that a qualified electrician perform this installation. Proper installation of at least two SignaLinc™ RF Signal Enhancers is required prior to installing and using other INSTEON devices. ools You Will Need •... -
Page 5: Preparing To Install Switchlinc Timer
INSTEON SwitchLinc Timer V2 User’s Guide Preparing to Install SwitchLinc Timer IMPORTANT! If you are not knowledgeable about and comfortable with electrical circuitry, you should have a qualified electrician install SwitchLinc Timer for you. If you have any questions, please consult an... -
Page 6: Installing Switchlinc Timer
INSTEON SwitchLinc Timer V2 User’s Guide Installing SwitchLinc Timer 1. For best INSTEON Network performance, be sure you have properly installed at least two SignaLinc RF Signal Enhancers. 2. At the circuit breaker or fuse panel, disconnect the power for all of the circuits in the switch junction box. -
Page 7: Installing Switchlinc Timer In A Multi-Way Circuit
INSTEON SwitchLinc Timer V2 User’s Guide Installing SwitchLinc Timer in a Multi-Way Circuit Understanding Multi-Way Circuits If more than one switch controls a single set of lights (called a LOAD), the switches are part of a multi-way circuit. A 3-way circuit uses two switches to control a LOAD, a 4-way circuit uses three switches, and so forth. - Page 8 (see HOW TO SET UP SWITCHLINC TIMER TO REMOTELY CONTROL AN INSTEON DEVICE, below). To use the timer functions, the SwitchLinc Timer V2 must be connected as the SwitchLinc Primary. The diagram below shows how you convert a wired-in three-way circuit into a virtual three-way circuit using two SwitchLinc Timers.
- Page 9 INSTEON SwitchLinc Timer V2 User’s Guide INSTEON SwitchLinc Timer V2 User’s Guide Step-by-Step Instructions for Installing Multi-Way SwitchLinc Timers When replacing a three-way mechanical switch, each switch will have three wires connected to it from the wall box. Four-way or greater circuits will have four wires connected to the switches in the center of the circuit.
- Page 10 INSTEON SwitchLinc Timer V2 User’s Guide 3. Cap the other TRAVELER wire. The other TRAVELER wire, usually red, will not be used, so put a wire nut on the end of it. 4. Cap the red LOAD wire from the SwitchLinc Secondary.
- Page 11 TRAVELER wire, usually black, that you identified as connected to the LINE wire to the SwitchLinc Primary’s black LINE wire. To use the timer functions, use your SwitchLinc Timer V2 as the Primary. Page 11 of 28...
- Page 12 INSTEON SwitchLinc Timer V2 User’s Guide 10. Cap the other TRAVELER wire. The other TRAVELER wire, usually red, will not be used, so put a wire nut on the end of it. 11. Connect the SwitchLinc Primary’s LOAD Wire. Use a wire nut to connect the LOAD wire, usually red, to the SwitchLinc Primary’s red LOAD wire.
-
Page 13: How To Set Up Switchlinc Timer To Remotely Control An Insteon Device
Any paddle press will exit Linking Mode early. . Select your INSTEON Device from the list below and follow the linking method for that Device. You have about 4 minutes to perform this step before SwitchLinc Timer’s Linking Mode times out automatically. -
Page 14: Unlinking A Controlled Insteon Device From Switchlinc Timer
INSTEON SwitchLinc Timer V2 User’s Guide Unlinking a Controlled INSTEON Device from SwitchLinc Timer If you are no longer going to use an INSTEON Device that has previously been linked to SwitchLin Timer, it is very important th at you unlink it, because otherwise SwitchLinc Timer will retry any commands intended for the unused INSTEON Device , thus slowing down your system. -
Page 15: How To Set Up Switchlinc Timer To Be Remotely Controlled By An Insteon Controller
SwitchLinc Timer. The following will work for the most common INSTEON Controllers. Select your INSTEON Controller from the list below and follow the method shown to put it into Linking Mode. A. A SwitchLinc V2 Relay – Press and hold the SwitchLinc Relay’s Paddle Top... -
Page 16: Unlinking Switchlinc Timer From An Insteon Controller
INSTEON SwitchLinc Timer V2 User’s Guide Unlinking SwitchLinc Timer from an INSTEON Controller If you are no longer going to control a SwitchLinc Timer with an INSTEON Controller, it is very importa that you unlink it, because otherwise the controller will retry any com mands intended for the unused SwitchLinc Timer, thus slowing down your system. -
Page 17: Restoring Power To Switchlinc Timer
Primary Address or X10 Sc ene Addresses. 1. Before resetting a SwitchLinc Timer that has been linked to an INSTEON Controller, be sure to unlink it from the Controlle r first. See Unlinking SwitchLinc Timer from an INSTEON Controller, above. -
Page 18: X10 Programming Options
INSTEON SwitchLinc Timer V2 User’s Guide X10 PROGRAMMING OPTIONS SwitchLinc Timer is backward-compatible with X10, meaning that it can respond to X10 commands from an X10 Controller and it can send X10 commands to X10 devices. However, to operate SwitchLinc Timer in X10 mode, you must first set up an X10 Primary Address. -
Page 19: How To Use Switchlinc Timer
4. Press and hold the paddle top for about 2 seconds to use the SwitchLinc V2 Timer like a standard switch - it will stay on until you turn it off. Note: When you use another Insteon device to control the switch, or use the SwitchLinc v2 Timer to control another INSTEON device, the timer function does not apply. -
Page 20: Color Options For Switchlinc Timer
INSTEON SwitchLinc Timer V2 User’s Guide COLOR OPTIONS FOR SWITCHLINC TIMER Paddle and LED Colors are Changeable You can change the color of SwitchLinc Timer’s LEDs and also its paddle and trim frame to match the décor of any room. - Page 21 INSTEON SwitchLinc Timer V2 User’s Guide 5. Orient the new small light pipe with its protrusion facing toward the center of the frame and snap it into place. If placed backwards or reversed, it will not click into place. Refer to t diagram.
-
Page 22: About Insteon
(RF). As the messages make their way to STEON devices being controlled, they are picked up and retransmitted by all other INSTEON devices along the wa y. This method of communicating, called a mesh network, is very reliable because each dditional INSTEON device helps to support the overall network. -
Page 23: About Insteon And X10
INSTEON’s Effect on X10 If your existing X10 devices seem to be working less reliably after installing INSTEON devices, remember that INSTEON devices can absorb X10 signals just as X10 devices do, and that INSTEON devices do not repeat X10 signals. -
Page 24: Troubleshooting
Other modules are loading Move the other modules or the Controller to another down the signal. outlet. Add new INSTEON devices or move around existing INSTEON devices. All INST EON devices act My SwitchLinc Timer is INSTEON Network repeaters. - Page 25 INSTEON SwitchLinc Timer V2 User’s Guide If the INSTEON Device is still available, unlink it from When I press a button on You may have removed an SwitchLinc Timer by following the directions in the my SwitchLinc Timer, it INSTEON Device that your...
-
Page 26: Specifications
INSTEON SwitchLinc Timer V2 User’s Guide SPECIFICATIONS SwitchLinc Timer V2 Specifications General Smarthome Product Number 2476S, INSTEON SwitchLinc Timer V 2 Switch Warranty 2 years Operation 8 White LEDs, LED Bar Brightness Indicator Optional Green, Blue, Amber, or Red with #2401L kit... - Page 27 INSTEON SwitchLinc Timer V2 User’s Guide Mechanical Paddle Type True rocker action White installed, I vory included; Paddle and Trim Frame Color Optional A lmond, Black, Brown, or Gray with #2400xx kits Wire Nuts 5 included Mounts in single or multiple-ganged junction box.
-
Page 28: Certification
You may also have other legal rights that may vary from state to state. INSTEON, Plug-n-Tap, ControLinc, TesterLinc, SignaLinc, LampLinc, ToggleLinc, BoosterLinc, ApplianceLinc, KeypadLinc, FilterLinc, ProbeLinc, SwitchLinc, TempLinc, IR Linc and SmarthomeLive are trademarks of Smarthome, Inc.
Need help?
Do you have a question about the SwitchLinc Timer V2 and is the answer not in the manual?
Questions and answers