Table of Contents
Advertisement
Quick Links
Invisible Technologies, Inc.
800-826-5527
www.Innotek.net
Quick Start Guide
Step 1
Design your fence
Have the local utility companies mark your under-
ground lines. On a sheet of paper, draw your house
and yard. Draw a line around your property that rep-
resents the containment area for your dog.
Step 2
Install the wall-mount transmitter
Most people find that the inside of an exterior wall of
a garage or basement is ideal. From the sample lay-
outs included, you can see the twisted wire running
from the house attaches directly to the transmitter.
Step 3
Layout the fence wire
Run the containment wire around the property as
outlined in your plan.
Step 4
Final connections
Splice the containment loop wires to the twisted
wire using the supplied waterproof splices.
Connect the other end of the twisted wire to the
wall-mount transmitter. Plug the AC adapter,
connect it to the transmitter and turn it on. The
red light should illuminate on the transmitter
indicating a successful loop.
Step 5
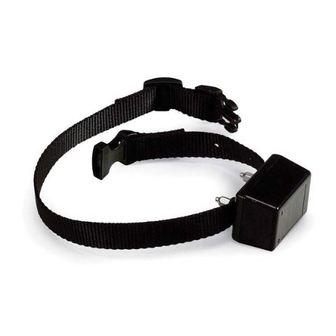
Power Up
For all systems, install batteries positive side out as shown. For Contain 'N'Train
systems, please refer to the "Match Receiver" section on page 9 of this guide.
2100252-1
Models SD-2000, SD-2050, SD-3000, SD-3100
Boundary
Wire
10'
90˚
10'
Boundary Wire
Splice
To wall-mount transmitter
1
Advertisement
Table of Contents

Related Manuals for Innotek SD-2000


Summary of Contents for Innotek SD-2000
-
Page 1: Quick Start Guide
Quick Start Guide Models SD-2000, SD-2050, SD-3000, SD-3100 Step 1 Design your fence Boundary Wire 10’ Have the local utility companies mark your under- ground lines. On a sheet of paper, draw your house 90˚ and yard. Draw a line around your property that rep- resents the containment area for your dog. - Page 2 3. Never perform set-up procedures while the collar is Invisible Technologies, Inc., warrants to the original retail on your dog. purchaser, that Innotek brand products will be free from 4. Any collar worn for extended periods can cause a defects in material and workmanship, under normal use,...
- Page 3 • Keep in mind that you will want to place the wire where Battery Life of 3-Volt Lithium Battery in Collar Receiver ning protection is available for all Innotek containment there is room for an 8’-12’ containment field. Important Notes:...
- Page 4 Hourglass Loop Customized Loops Step 3 Step 2 Allows your dog to be contained in either the front or back You can create off limit areas, such as pools and gardens Install wall Transmitter Layout fence wire yard but not around the side of the house. When the wire by encircling the area with wire.
- Page 5 Step 4 Step 5 Final connections Power up To set tone option on SD-3100 with two dogs, you must 1. Install batteries. (All Systems) 1. Splicing to the boundary wire. IMPORTANT TIPS! repeat the following instructions for dog one and two. Unscrew collar battery cap turning counter clockwise.
- Page 6 If you do encounter this phenomenon, your boundary wire is probably too close to these outside lines and will need to be moved or modified. Containment collars should not be worn inside the house. Invisible Technologies, Inc. 800-826-5527 www.innotek.net...
Need help?
Do you have a question about the SD-2000 and is the answer not in the manual?
Questions and answers
I'm getting a weak signal from my innotek 2000 system. Good batteries are in the collar. I do have it hooked up to 2000 ft of wire. Is that too great a distance for this system ? If it is what is the maximum range ?