Table of Contents
Advertisement
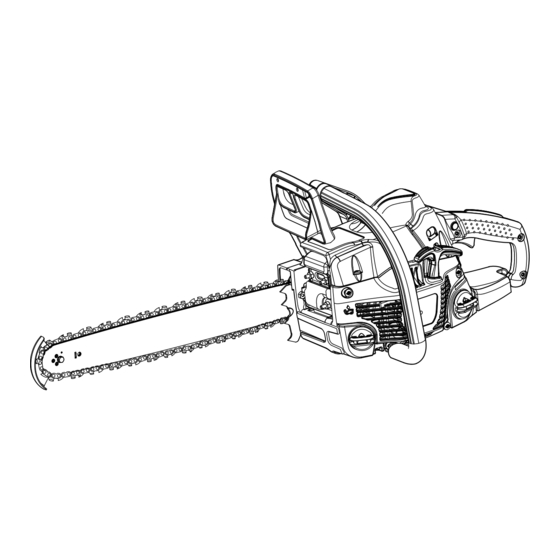
RY10520 / 20 in. 46cc Chain Saw
RY10518 / 18 in. 46cc Chain Saw
(ALL VERSIONS)
ENGINE/EVAP. FAMILY: *HCPS.0464AC
Your chain saw has been engineered and manufactured to Ryobi's high standard for dependability, ease of operation, and
operator safety. When properly cared for, it will give you years of rugged, trouble-free performance.
WARNING:
this product.
Thank you for buying a Ryobi product.
SAVE THIS MANUAL FOR FUTURE REFERENCE
Cette scie à chaîne a été conçue et fabriquée conformément aux
strictes normes de fiabilité, simplicité d'emploi et sécurité d'utilisation
de Ryobi. Correctement entretenue, elle vous donnera des années
de fonctionnement robuste et sans problème.
AVERTISSEMENT :
blessures, l'utilisateur doit lire et veiller à bien comprendre le
manuel d'utilisation avant d'employer ce produit.
Merci d'avoir acheté un produit
CONSERVER CE MANUEL POUR
FUTURE RÉFÉRENCE
To reduce the risk of injury, the user must read and understand the operator's manual before using
Pour réduire les risques de
Ryobi
.
OPERATOR'S MANUAL
Su motosierra ha sido diseñada y fabricada de conformidad con las
estrictas normas de Ryobi para brindar fiabilidad, facilidad de uso
y seguridad para el operador. Con el debido cuidado, le brindará
muchos años de sólido y eficiente funcionamiento.
ADVERTENCIA:
el usuario debe leer y comprender el manual del operador antes
de usar este producto.
Le agradecemos la compra de un producto
GUARDE ESTE MANUAL PARA
FUTURAS CONSULTAS
Para reducir el riesgo de lesiones,
Ryobi
.
Advertisement
Table of Contents

Related Manuals for Ryobi RY10520


Summary of Contents for Ryobi RY10520
- Page 1 RY10518 / 18 in. 46cc Chain Saw (ALL VERSIONS) ENGINE/EVAP. FAMILY: *HCPS.0464AC Your chain saw has been engineered and manufactured to Ryobi’s high standard for dependability, ease of operation, and operator safety. When properly cared for, it will give you years of rugged, trouble-free performance. WARNING: To reduce the risk of injury, the user must read and understand the operator’s manual before using...
-
Page 2: Table Of Contents
TABLE OF CONTENTS TABLE DES MATIÈRES / ÍNDICE DE CONTENIDO Introduction ............................2 Introduction / Introducción General Safety Rules ........................3-4 Règles de sécurité générales / Reglas de seguridad generales Specific Safety Rules ........................4-5 Règles de sécurité particulières / Reglas de seguridad específicas Symbols ............................ -
Page 3: General Safety Rules
GENERAL SAFETY RULES squeeze the throttle trigger and maintain a WARNING: steady cutting speed. Read and understand all instructions. Failure • Do not overreach or cut above chest height. to follow all instructions listed below, may result • Follow the manufacturer’s sharpening and in electric shock, fire and/or serious personal maintenance instructions for the saw chain. -
Page 4: Specific Safety Rules
GENERAL SAFETY RULES guide bar and saw chain to the rear, and the All chain saw service, other than the items listed muffler away from your body. When transporting in the instruction manual and all maintenance, the chain saw, use the appropriate guide bar should be performed by competent chain saw scabbard. - Page 5 SPECIFIC SAFETY RULES Before you start the engine, make sure the Refer to Adjusting the Carburetor in the saw chain is not contacting any object. Maintenance section of this manual. If the saw chain still moves at idle speed after adjustment Wear snug-fitting clothing.
-
Page 6: Symbols
SYMBOLS Some of the following symbols may be used on this product. Please study them and learn their mean- ing. Proper interpretation of these symbols will allow you to operate the product better and safer. SYMBOL NAME DESIGNATION/EXPLANATION Safety Alert Indicates a potential personal injury hazard. - Page 7 If you do not understand the warnings and identical replacement parts. instructions in the operator’s manual, do not use this product. Call Ryobi customer service for assistance. WARNING: The operation of any power tool can result in foreign objects being thrown into your eyes, which can result in severe eye damage.
-
Page 8: Glossary Of Terms
GLOSSARY OF TERMS Bucking Kickback (Rotational) The process of cross cutting a felled tree or log The rapid upward and backward motion of the into lengths. saw which can occur when the moving saw chain near the upper portion of the tip of the guide bar Chain Brake contacts an object, such as a log or branch. -
Page 9: Features
FEATURES PRODUCT SPECIFICATIONS Bar length: Engine displacement ........46cc RY10520 ..........20 in. Engine power ........2.5 HP min. RY10518 ..........18 in. Idle engine speed ..2,600-3,400 r/min. (RPM) Chain pitch ..........325 in. Fuel tank capacity ........19.4 oz. - Page 10 FEATURES STARTER GRIP REAR HANDLE STARTER/FAN HOUSING IGNITION THROTTLE FUEL CAP SWITCH TRIGGER Fig. 1b KNOW YOUR CHAIN SAW LOW KICKBACK SAW CHAIN See Figures 1a - 1b. The low kickback saw chain helps minimize the The safe use of this product requires an force of a kickback reaction by preventing the understanding of the information on the product cutters from digging in too deeply at the kickback...
-
Page 11: Assembly
ASSEMBLY UNPACKING PACKING LIST This product has been shipped completely as- Chain Saw sembled. Scabbard Carefully remove the product and any acces- Combination Wrench sories from the box. Make sure that all items 2-Cycle Engine Lubricant listed in the packing list are included. Case Operator’s Manual WARNING:... - Page 12 OPERATION Do not use any type of pre-mixed gasoline/lubri- WARNING: cant from fuel service stations, this includes the pre-mixed gasoline/lubricant intended for use Always shut off engine before fueling. Never add in mopeds, motorcycles, etc. fuel to a machine with a running or hot engine. Use a high quality 2-cycle self-mixing lubricant Move at least 30 ft.
-
Page 13: Filling The Fuel Tank
ADDING BAR AND CHAIN LUBRICANT See Figure 2. See Figure 3. Use RYOBI Bar and Chain Lubricant. It is designed Clean the surface around the fuel cap to prevent for chains and chain oilers, and is formulated to contamination. -
Page 14: Starting The Engine
OPERATION OPERATING THE CHAIN BRAKE BRAKE See Figures 4 - 5. POSITION Check the operating condition of the chain brake prior to each use. Engage the chain brake by rotating your left hand around the front handle, allowing the back of your hand to push the chain brake lever/hand guard toward the bar while the chain is rotating rapidly. - Page 15 OPERATION below 50°F, pull the starter grip until the engine attempts to start, but no more than 5 times. Push choke lever to RUN position. POSITION Pull starter grip until engine runs. NOTE: Allow the saw to run in this position 15-30 seconds, depending upon the tempera- ture.
-
Page 16: Stopping The Engine
OPERATION STOPPING THE ENGINE IGNITION See Figures 12 - 13. SWITCH IN THE STOP POSITION Release the throttle trigger and let the engine return to idle. To stop the engine, move the ignition switch to the STOP ( O ) position. Do not put the chain saw on the ground when the chain is still moving. - Page 17 OPERATION WARNING: THE SAW CHAIN SHOULD NEVER TURN AT IDLE. Turn the idle speed screw “T” counter- clockwise to reduce the idle RPM and stop the chain, or contact an authorized service center for adjustment and discontinue use until the repair is made.
- Page 18 OPERATION KICKBACK PRECAUTIONS KICKBACK See Figures 16 - 17. DANGER ZONE Rotational kickback occurs when the moving chain contacts an object at the Kickback Danger Zone of the guide bar. The result is a lightning-fast reverse reaction, which kicks the guide bar up and back Fig. 16 towards the operator. This reaction can cause loss of control, which can result in serious injury.
-
Page 19: Basic Operating/Cutting Procedures
OPERATION PROPER CUTTING STANCE STRAIGHT See Figure 19. THUMB ON CHAIN LINE UNDERSIDE OF HANDLE BAR WARNING: Alway use the proper cutting stance described in this section. Never kneel when using the chain saw except when felling a tree as shown in figure 24. Kneeling could result in loss of sta- bility and control of the saw resulting in serious personal injury. -
Page 20: Felling Trees
OPERATION the saw at full throttle without a cutting load can result in unnecessary wear to the chain, bar, and PLANNED LINE engine. OF FALL Do not put pressure on the saw at the end of the cut. FELLING TREES HAZARDOUS CONDITIONS WARNING: 90°... - Page 21 OPERATION Cut a notch about 1/3 the diameter of the trunk in the side of the tree. Make the notch cuts so they intersect at a right angle to the line of fall. This notch should be cleaned out to leave a straight line.
- Page 22 OPERATION work area. Follow the correct tree felling procedure KICKBACK as stated in Proper Procedure For Tree Felling after you have removed the large buttress roots. BUCKING See Figure 26. Bucking is the term used for cutting a fallen tree to the desired log length.
- Page 23 OPERATION BUCKING LOGS UNDER STRESS LOG SUPPORTED AT ONE END See Figure 28. LOAD Make the first bucking cut 1/3 of the way through FINISHING CUT the log and finish with a 2/3 cut on the opposite side. As you cut the log, it will tend to bend. The saw can become pinched or hung in the log if you make the first cut deeper than 1/3 of the diameter of the log.
-
Page 24: Limbing And Pruning
OPERATION LIMBING AND PRUNING See Figures 31 - 32. SECOND CUT LOAD Work slowly, keeping both hands on the saw with a firm grip. Maintain secure footing and balance. Keep the tree between you and the chain while limbing. Do not cut from a ladder. This is extremely dan- FIRST CUT gerous. -
Page 25: Maintenance
MAINTENANCE WARNING: When servicing, use only identical replacement POSITION parts. Use of any other parts may create a haz- ard or cause product damage. WARNING: Always wear eye protection with side shields Fig. 34 marked to comply with ANSI Z87.1, along with hearing and head protection. - Page 26 MAINTENANCE Always place the switch in the STOP “ O ” posi- tion before you work on the saw. CUTTERS Make sure the chain brake is not set by pulling CHAIN ROTATION the chain brake lever/hand guard towards the front handle to the run position.
- Page 27 MAINTENANCE Replace the clutch cover and bar mounting nuts. BAR STUDS Fingertighten the bar mounting nuts. The bar must be free to move for tension adjustment. Remove all slack from the chain by turning the chain tensioning screw clockwise until the chain seats snugly against the bar with the drive links in the bar groove.
- Page 28 MAINTENANCE ADJUSTING THE CHAIN TENSION See Figures 44 - 46. WARNING: Never touch or adjust the chain while the engine is running. The saw chain is very sharp. Always wear protective gloves when performing main- tenance on the chain. Fig. 41 Stop the engine before setting the chain tension.
-
Page 29: Chain Maintenance
MAINTENANCE CHAIN MAINTENANCE See Figures 47 - 48. CAUTION: Check that the switch is in the STOP “ O ” posi- tion before you work on the saw. ≈ Use only a low-kickback chain on this saw. This .050 in. Fig. - Page 30 MAINTENANCE SHARPENING THE CUTTERS CUTTING See Figures 49 - 52. CORNER Be careful to file all cutters to the specified angles SIDE PLATE TOP PLATE and to the same length, as fast cutting can only be DEPTH GAUGE obtained when all cutters are uniform. RIVET HOLE WARNING: HEEL...
- Page 31 MAINTENANCE TOP PLATE FILING ANGLE chain. Results from using a file with a diameter too large or file held too high. See Figure 53. CORRECT 30° – file holders are marked with MAINTAINING DEPTH GAUGE guide marks to align file properly to produce CLEARANCE correct top plate angle.
- Page 32 MAINTENANCE MAINTAINING THE GUIDE BAR See Figure 58. CAUTION: LUBRICATING HOLE Make sure the chain has stopped before you do any work on the saw. Every week of use, reverse the guide bar on the Fig. 58 saw to distribute the wear for maximum bar life. The bar should be cleaned every day of use and MOUNTING checked for wear and damage.
-
Page 33: Cleaning The Air Filter
MAINTENANCE Use the following instructions to tighten the mount- ing screw of the nose guard. These are specially CYLINDER hardened screws. If you cannot install the screw COVER tightly, replace both the screw and the SAFE-T-TIP ® SCREW before further operation. NOTE: Do not replace the screw with an ordinary screw. -
Page 34: Adjusting The Carburetor
MAINTENANCE Clean the pre-filter every 5 hours of use or sooner, if required. Remove the cylinder cover, AIR FILTER starter assembly, and the fan housing baffle for access to the pre-filter in the engine housing. NOTE: If you use an air hose for drying, blow through both sides of filter. - Page 35 MAINTENANCE CLEANING THE ENGINE See Figures 67 - 68. Clean the cylinder fins and flywheel fins with compressed air or a brush periodically. Danger- ous overheating of the engine may occur due to CLEAN impurities on the cylinder. CYLINDER FINS WARNING Never run the saw without all the parts, including the clutch cover and starter housing, securely...
-
Page 36: Spark Arrestor
MAINTENANCE SPARK ARRESTOR The spark arrestor must be cleaned or replaced every 50 hours or yearly to ensure proper per- CHAIN CATCHER formance of your product. Spark arrestors may be in different locations depending on the model purchased. Please contact your nearest service dealer for the location of the spark arrestor for your model. - Page 37 IGNITION ASSY includes: Spark Plug ................................X CALL US FIRST For any questions about operating or maintaining your product, call the Ryobi Help Line! ® Your product has been fully tested prior to shipment to ensure your complete satisfaction. Page 37 — English...
-
Page 38: Bar And Chain Combinations
BAR AND CHAIN COMBINATIONS Chain specifications: 0.0325 pitch, .05 in. chain gauge Length of Bar Guide Bar Part Number Chain Part Number Drive Links 20 in. 310629001 900920027 78 link 18 in. 310628001 901430001 72 link TROUBLESHOOTING Problem Possible Cause Solution Engine will not No spark. -
Page 39: Troubleshooting
TROUBLESHOOTING Problem Possible Cause Solution Turn idle speed screw “T” clockwise to increase idle Engine starts, runs, Carburetor requires and accelerates adjustment to idle speed. Refer to Adjusting the Carburetor in the but will not idle. speed. Maintenance section of this manual. C h a i n t u r n s a t Carburetor requires Turn idle speed screw “T”... -
Page 40: Warranty
Straps, Guide Bars, Saw Chains purchase. Techtronic Industries North America, Inc., reserves the Three years if the product is used for personal, family right to change or improve the design of any RYOBI brand ® or household use;... - Page 41 Techtronic Industries North America, Inc., will provide any documents that sis, parts, and labor performed at an authorized service center for RYOBI brand describe its warranty procedures or policies within five days upon request by the ®...
Need help?
Do you have a question about the RY10520 and is the answer not in the manual?
Questions and answers