Table of Contents
Advertisement
Quick Links
Advertisement
Table of Contents

Related Manuals for Albrecht AE 230 H


Summary of Contents for Albrecht AE 230 H
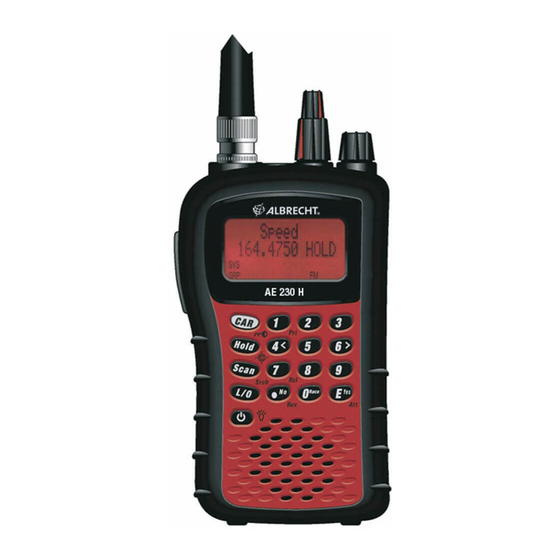
- Page 1 AE 230 H Racing Multiband Scanning Receiver...
-
Page 2: Table Of Contents
Contents Precautions ................5 Introduction ................5 Band Plan 1 ................6 Feature Highlights ..............8 General ..................8 About This Manual ............... 11 How the Scanner’s Controls Are ........11 Represented in This Manual ..........11 Entering Text .................12 Understanding Scanning ............12 Understanding the Scanner’s Memory ......12 What is Scanning? ...............13... - Page 3 Viewing Memory Used ............31 Viewing the Firmware Version ...........31 Adjusting the Key Beep ............31 Locking/Unlocking the Keypad ..........31 Turning Power Save On or Off ..........31 Priority Scan .................31 Using the Backlight ..............32 Initializing the Scanner’s Memory ........32 Using the PC Control and ..........32 Cloning Options ..............32...
- Page 4 Service Search (Air Band) ..........55 Changing the step of Air Band ..........55 Quick Search ................55 CTCSS/DCS Search ............56 Custom Search ..............56 Preset Custom Search Ranges ........57 BAND PLAN 1 ..............57 BAND PLAN 2 (specially for Germany) ......58 BAND PLAN 3 ..............58 Editing a Custom Search Range ........58...
-
Page 5: Precautions
Precautions Before you use this scanner, please read and observe the following. EARPHONE WARNING! Be sure to use the supplied mono headphone. Use of an incorrect earphone or stereo headset with lower impedance might be potentially hazardous to your hearing, when tuned to high volume settings. -
Page 6: Band Plan 1
se your scanner to monitor: • Automobile races • Public safety systems • Police and fire departments, including rescue and Paramedics (please follow the national laws for monitoring such radio services!) • Business/Industrial radio • Utilities • Marine and amateur (ham radio) bands •... - Page 7 Band Plan 2 (this Band Plan is specially designed for Germany) Frequency Range (MHz) Mode Step (kHz) 25.0000 - 49.9950 50.0000 - 84.0100 84.0150 - 87.2950 20 with 15kHz Offset 108.0000 - 136.9875 12.5 / 8.33 108.0000 - 136.9916 Selectable 137.0000 - 143.9950 144.0000 - 145.9875 12.5...
-
Page 8: Feature Highlights
Band Plan 3 Frequency Rage (MHz) Mode Step (kHz) 25.0000 - 29.9950 30.0000 - 79.9937 6.25 80.0000 - 82.9937 6.25 83.0000 - 87.2937 6.25 108.0000 - 136.9875 12.5 / 8.33 108.0000 - 136.9916 Selectable 137.0000 - 137.9950 138.0000 - 157.9937 6.25 158.0000 - 160.5937 6.25... - Page 9 or groups you don’t want to scan. Quick Car Select – You can set the scanner so you can select and listen to a car by pressing a single key. Lockout – You can lock out any system, group, frequency, or channel while scanning.
- Page 10 range using up to 16 characters per name. Unique Data Skip – Allows your scanner to skip unwanted data transmissions and reduces birdies. Duplicate Frequency Alert – Alerts you if you try to enter a duplicate name or frequency already stored in the scanner. Memory Backup –...
-
Page 11: About This Manual
Battery Save – You can set the scanner so it reduces the amount of power it needs if there are no transmissions. Key Controls Key Lock – You can deactivate the scanner’s keys to help prevent accidentally changing the scanner’s programming. Key Beep –... -
Page 12: Entering Text
To get the most from this manual, review the contents to become familiar with the basic functions available. If you are new to scanning, be sure to read the chapter “Understanding Scanning” for a quick background on the technology. The first thing you’ll need to do is install batteries in the scanner. -
Page 13: What Is Scanning
What is Scanning? Unlike standard AM or FM radio stations, most two-way communications do not transmit continuously. Your AE230H scans programmed channels until it finds an active frequency, then stops on that frequency and remains on that channel as long as the transmission continues. When the transmission ends, the scanning cycle resumes until the scanner receives another transmission. -
Page 14: Ctcss Frequencies (Hz)
stations. A scanner equipped with CTCSS and DCS (like your scanner) can code each received frequency with a specific CTCSS or DCS frequency. Then, when you receive multiple signals, you only hear the transmission with the CTCSS or DCS tone you programmed. If you do not receive the correct tone with a signal, the scanner’s squelch remains closed and you hear nothing. -
Page 15: Using The Scanner At The Racetrack
Using the Scanner at the Racetrack Keeping up with the action at the racetrack is easy and fun. You can hear drivers communicating with their pit crews, officials communicating with drivers and crews, and track workers communicating with everybody. Each user at the racetrack transmits and receives on one or more frequencies. -
Page 16: Repeater Operation
frequently used at construction job sites, and with inexpensive consumer radios such as LPD/PMR radios. The range is typically 1-5 km, depending upon the terrain and many other factors. Repeater Operation Repeater systems use two frequencies: one transmits from the radio to a central repeater; the other transmits from the repeater to other radios in the system. -
Page 17: Included With Your Scanner
Included With Your Scanner If any of these items are missing or damaged, immediately contact your place of purchase. • Scanner • PC Connection Cable • AC Adapter • Wrist Strap • Belt Clip • Batteries • Antennas • Owners Manual •... -
Page 18: Using Batteries
Using Batteries You can power your scanner using supplied rechargeable AA batteries or other non rechargeable batteries of AA size, which are everywhere available. Using Rechargeable Batteries Before you use Ni-MH (or the older Ni-Cd battery types, you must charge them. The scanner has a built-in circuit that lets you recharge Ni-MH or Ni-Cd batteries while they are in the scanner. -
Page 19: Using Non-Rechargeable Batteries
Using Non-rechargeable Batteries You can also use two alkaline batteries to power your scanner. Before you use alkaline batteries, you must remove the sticker in the compartment and move the switch to REG. ALK. BATT position. Cautions: • Use only fresh batteries of the required size and recommended type. -
Page 20: Using Ac Power
Using AC Power You can power the scanner using the supplied 6V, 500 mA AC adapter. To use the scanner on AC power, plug the AC adapter into the DC 6V socket on the side of the scanner then plug the other end into a standard 230 V AC outlet. If rechargeable batteries are installed without removing the sticker, or, after removing, REG. -
Page 21: Attaching The Belt Clip
WARNING! If you connect an external speaker to the scanner's headphone jack, never connect one of the two audio output wires to any power supply or ground terminal. Doing this might damage the scanner, because it has a “floating ground” audio amplifier system. Attaching the Belt Clip To make your scanner easier to carry when you are on the go, use the supplied belt clip. -
Page 22: A Look At The Keypad
A Look At The Keypad Your scanner's keys have various functions labeled on the key tops and below the keys. To select the function labeled on a key, simply press the key. To select the function labeled below a key, hold down on the left side of the scanner then press the key. - Page 23 Key Name Description L/O – Lets you lock out a selected channel or skip a specified frequency. + L/O – Press quickly to lock and unlock a selected system in Scan or Scan Hold mode and review search lockout frequencies in Search or Search Hold mode.
-
Page 24: A Look At The Display
Key Name Description /Rev – Enters a decimal point or dash in a frequency. At a prompt, answers “No.” + Rev – Monitors the currently-tuned frequency’s reverse frequency. E/Yes/Att E – Press to select input and menu items, to quickly edit a channel in Scan Hold Mode, and store a frequency into... -
Page 25: Using Menu
appears when you lock the keypad (see “Locking/Unlocking the Keypad” alerts you when the battery power gets low. shows the currently activated group, appears with numbers . The currently active group indicator flashes. AM/FM appears to show the type of transmission. appears when you manually select a channel you locked out or a skip frequency. -
Page 26: Using The Scroll Control
scanner, hold down on the left side of the scanner, then press that key. To hold on a system while scanning or temporarily stop on a channel while searching, press To select a system in Scan or Scan Hold mode, hold down and rotate the scroll control. -
Page 27: Scanning Preprogrammed Races
systems according to the assigned quick key. • Then the race assigned to the next quick key (1, 2, 3, 4, etc.) is scanned. Systems not assigned to a quick key are scanned last. • Within a quick key, systems are scanned in the order they were assigned. -
Page 28: Holding On A Car
• Press Hold to set the selection. Holding on a Car Follow these steps to hold on a car within the currently-selected racing system. • Press 0 in Scan mode, rotate the scroll control to select the race, then press E. •... -
Page 29: Selecting System Channel Groups
Selecting System Channel Groups Within a system, you can assign groups of channels to a group quick key (see “Setting the Group Quick Key”) Follow these steps to activate or deactivate a channel group within a system while scanning. • Press to hold on the system (or hold and rotate the scroll control to select the... -
Page 30: Holding On A Channel
Holding On a Channel To hold on a channel, press Hold while the channel is active. To select a different channel, rotate the scroll control. If you scroll past the beginning or end of the current system, the scanner selects channels in the previous or next system. To resume scanning, press Scan. -
Page 31: Other Settings
Other Settings Displaying System Information Viewing Memory Used SEE SCANNER INFO % MEMORY USED A bar showing the percent of memory used appears. Press any key to return to the previous menu. Viewing the Firmware Version SEE SCANNER INFO FIRMWARE VERSION Press any key to return to the previous menu. -
Page 32: Using The Backlight
have highest priority. PRI appears when you select this mode. • PLUS ON: The scanner only scans priority channels in unlocked systems. PRI flashes when you select this mode. Using the Backlight SET BACKLIGHT • 10 SEC The backlight stays on for 10 seconds after you press •... -
Page 33: Connecting Your Scanner To A Personal Computer
• PC CONTROL Lets you set the baud rate your scanner uses to communicate with a personal computer. See “Connecting Your Scanner to a Personal Computer”. • WIRED CLONE Lets you set your scanner as a master or a slave, letting you transfer programming to or from another AE230H scanner. -
Page 34: Cloning The Scanner
Cloning the Scanner To clone (copy) data from one AE230H scanner to another AE230H scanner, you must first connect the scanners to each other using the included connection cables and a 9 pin null modem adapter cable + 9 pin gender changer adapter (neither included), available at most computer stores. -
Page 35: Using The Menu
CLONE SLAVE PRESS SCAN KEY When you are ready to clone the scanner, press Scan on the slave scanner first, then on the master scanner. The master scanner checks the connection between the two scanners, then transfers its data to the slave scanner. When the transfer is complete, Complete appears on both scanners. - Page 36 Set up Setting Close scanner’s Call Options Close Call operation Set up Priority priority Scan options. Set up Using the backlight Backlight options. Set up Adjusting key beep options. Key Beep Set up Turning battery Power Save save On or Off options.
-
Page 37: Programming Radio Systems
Transfer Installing informati Demo between Software it and your personal Using the computer Control and Cloning Options Programming Radio Systems To edit an existing system, use the menu to navigate to the system setting you want to change. This section assumes you are programming a new system. -
Page 38: Quickly Programming Racing Systems
Quickly Programming Racing Systems You can use the menu system to program a racing system (see “Manually Programming Racing Systems”). Or you can follow the onscreen prompts as described in this section to quickly program your scanner. These prompts are designed to help you quickly enter a new race from a frequency list purchased at the track (if the system is not already preprogrammed into your scanner). - Page 39 7. Press E to enter advanced options (Steps 8-11) or press to skip to Step 12. 8. Set the modulation type (AUTO is almost always the correct choice), then press E. 9. Set the attenuator (turn it on to eliminate interference from other sources), then press E.
-
Page 40: Manually Programming Racing Systems
13. To enter another car in this race, press E then repeat from Step 3. Otherwise, press No. 14. When you finish, press Scan to begin scanning the race. Manually Programming Racing Systems PROGRAM SYSTEM NEW SYSTEM RACING CONFIRM? The scanner creates an empty racing system, with a default name of SYSTEM INN R. -
Page 41: Entering/Editing A Car Number
options. Then refer to the appropriate section to set or change a car setting. • See “Entering/Editing a Car Number” (below) • See “Editing a Driver” (below) • See “Setting a Car’s Quick Key” (next page) • See “Editing a Car’s Channel” (next page) •... -
Page 42: Setting A Car's Quick Key
Setting a Car’s Quick Key PROGRAM SYSTEM Select the system EDIT CAR Select the car SET QUICK KEY After selecting this option, press 0-9 or rotate the scroll control to assign the car to a quick key or press No to assign the car to no quick key, then press E. -
Page 43: Programming Conventional Systems
This setting determines whether the scanner will scan this car when it is enabled. Select your setting, then press E. LOCKOUT - the car is not scanned. UNLOCKED - the car is scanned. Note: The default setting is Unlocked. Programming Conventional Systems PROGRAM SYSTEM NEW SYSTEM CONVENTIONAL... -
Page 44: Entering/Editing Conventional Channels
• See “Entering/Editing the Group Name” (p.48) • See “Setting the Group Quick Key” (p.48) • See “Deleting Groups” (p.49) • See “Setting Group Lockout” (p.49) • See “Entering/Editing Conventional Channels” Entering/Editing Conventional Channels EDIT CHANNEL NEW CHANNEL INPUT FREQUENCY Enter the frequency for the channel, then press E. -
Page 45: Editing The System Quick Key (Conventional Systems Only)
control once to select the next letter. 3. Repeat Steps 1 and 2 until you have entered the system name. Then press E or press down on the scroll control to accept the setting. Hints: • Each system name can be up to 16 characters. Abbreviate as necessary to fit. -
Page 46: Setting The System Hold Time
UNLOCKED - the system is scanned Note: You can also lock or unlock a system by pressing , selecting the system, then pressing + L/O. Setting the System Hold Time PROGRAM SYSTEM Select the system EDIT SYS OPTION SET HOLD TIME This setting controls how many seconds the scanner scans a system before moving to the next unlocked system. -
Page 47: Deleting Systems
Select the system EDIT SYS OPTION SET DATA SKIP This setting controls how the scanner behaves when it stops on a channel that has a data signal. ON - the scanner stops briefly on the channel, but then immediately resumes scanning automatically. Press E to select. -
Page 48: Group-Level Settings
Group-Level Settings The settings in this section apply to all of the channels stored in the current group. Entering/Editing the Group Name PROGRAM SYSTEM Select the system EDIT GROUP Select the group EDIT NAME Follow these steps to enter/edit the group name: 1. -
Page 49: Setting Group Lockout
Setting Group Lockout PROGRAM SYSTEM Select the system EDIT GROUP Select the group SET LOCKOUT This setting determines whether the scanner will scan this group when it is enabled. Select your setting, then press E. LOCKOUT - the group is not scanned. UNLOCKED - the group is scanned. -
Page 50: Setting Channel Priority
EDIT NAME Follow these steps to enter/edit the channel name. 1. Rotate the scroll control to select the first letter. 2. Press and hold down then rotate the scroll control once to select the next letter. 3. Repeat Steps 1 and 2 until you have entered the channel name. -
Page 51: Setting Channel Alert
Setting Channel Alert PROGRAM SYSTEM Select the system EDIT GROUP Select the group EDIT CHANNEL Select the channel SET ALERT This setting controls whether the scanner will alert you when the channel becomes active. Select your setting, then press ON - the scanner beeps when the channel becomes active. OFF - no alert sounds. -
Page 52: Setting Channel Modulation
with the signal. The scanner then prompts you to scroll to the desired tone. SET LOCKOUT the scanner does not stop on the channel if the tone you select is present. The scanner prompts you to select a CTCSS or DCS tone. Notes: •... -
Page 53: Setting The Frequency Step
SET ATTENUATOR This setting controls whether the scanner attenuates signals on this channel. Select your setting, then press E. ON - the channel is attenuated by about 18 dB. OFF - the channel is not attenuated. Notes: The default setting is OFF. •... -
Page 54: Deleting Channels
LOCKOUT - the channel is not scanned. UNLOCKED - the channel is scanned. Notes: • The default setting is Unlocked. • You can also lock or unlock a channel by selecting it while scanning or holding, then pressing L/O. • See also in the chapter “Basic Operation”... -
Page 55: Searching And Storing
EDIT CHANNEL PASTE CHANNEL Then, if necessary, edit the channel you copied to give it a unique name and other settings. Note: The paste option appears only if you have previously copied a channel from a system of the same type you are currently editing. -
Page 56: Ctcss/Dcs Search
• the search menu. CTCSS/DCS Search CTCSS/DCS Search lets you search for CTCSS or DCS tones when it finds an active frequency in Search and Close Call modes. You can identify up to 50 CTCSS tones and 104 DCS codes. Turning this option on lets the scanner search for CTCSS/ DCS tones. -
Page 57: Preset Custom Search Ranges
• To turn search ranges on or off, press 0 and 1-9. • To hold searching, press Hold. • To resume searching, press then press Scan/Srch or Hold again. • To lock out a frequency found while searching, press L/O. SEARCH LOCKOUT? appears. •... -
Page 58: Band Plan 2 (Specially For Germany)
BAND PLAN 2 (specially for Germany) Custom Frequency (MHz) Custom 1 25.0000 87.2950 Custom 2 108.0000 136.9875 Custom 3 137.0000 173.9875 Custom 4 216.0000 224.9950 Custom 5 400.0000 405.9875 Custom 6 406.0000 439.9937 Custom 7 440.0000 469.9900 Custom 8 470.0000 512.0000 Custom 9 806.0000... -
Page 59: Auto Search And Store
3. Turn the scroll control until the name of the custom search range you want to edit appears, then press E to select it. The following options appear as you turn the scroll control. EDIT NAME lets you edit the custom search range’s name EDIT SRCH LIMIT lets you view and select the... -
Page 60: Storing A System
3. Turn the scroll control until the system where you want to store the frequencies appears, then press E to select it. Note: You cannot select a racing system. If no systems are programmed, or all systems are locked out, NO SYSTEM STORED appears. Storing a System You can store frequencies into the system you selected in “Selecting a System”. -
Page 61: Setting Close Call Options
• To turn Close Call detection on (CC DND, CC PRI) or Off, press then • When the feature is on, appears on the display and normal operation is briefly interrupted about every 2 seconds. Notes: • CC DND (Do Not Disturb) - The scanner checks for a Close Call hit every 2 seconds only if the scanner is not currently stopped on a transmission. - Page 62 • CLOSE CALL ONLY: Lets you set the scanner only for Close Call searching. The scanner does not scan frequencies or channels when this option is turned on. To select this option, press E. • CC AUTO STORE: Lets you select whether the scanner automatically stores Close Call hits into channels.
-
Page 63: Close Call Hits
• LIGHT (the backlight turns on when it receives a Close Call signal) • BEEP (the scanner beeps when it receives a Close Call signal) • NONE (the scanner does not alert) • Turn the scroll control to display an option, then press E. -
Page 64: Unlocking All Frequencies
that contains that frequency. Unlocking All Frequencies SRCH/CLOCALL OPT FREQ LOCKOUTS UNLOCK ALL The scanner prompts you to confirm deletion. To confirm and delete all locked-out frequencies, press E. Otherwise, to cancel, press No. Reviewing Locked Out Frequencies SRCH/CLOCALL OPT FREQ LOCKOUTS RVW SEARCH L/O The scanner displays the first locked-out frequency and... -
Page 65: Setting The Modulation Type
you set, it stops the auto-store operation. Setting the Modulation Type SRCH/CLOCALL OPT SET MODULATION This setting controls the modulation type used for quick search and Close Call operations. • Select your setting, then press E. AUTO Uses the default setting for the current frequency Uses AM (amplitude modulation) Uses FM (frequency modulation) Uses narrow band FM... -
Page 66: Setting The Delay Time
• If you are trying to test the Close Call feature with a nearby transmitter and you do not talk into the transmitter, the scanner will detect this as data and will skip the frequency when Data Skip is on. •... - Page 67 • entry tone for that key entry. Location • Do not use the scanner in high-moisture environments such as the kitchen or bathroom. • Avoid placing the unit in direct sunlight or near heating elements or vents. • If the scanner receives strong interference or electrical noise, move it or its antenna away from the source of the noise.
-
Page 68: Troubleshooting
Troubleshooting If your AE230H is not performing properly, try these steps. Problem Possible Cause Suggestion The scanner The scanner Make sure the AC doesn’t work. might not be adapter is receiving any connected to an power. AC outlet and the scanner. -
Page 69: Specifications
Problem Possible Cause Suggestion Scan won’t The channel Wait for a start. might not be transmission on the active. channel. You must press Press Scan. Scan to scan. The squelch Adjust the squelch might need to be threshold to the adjusted. -
Page 70: Optional Accessories
Features, specifications, availability optional accessories are all subject to change without notice. Optional Accessories Order-No. Accessory Item 6158 Scanner Antenna Albrecht Miniscan 6156 Scanner Antenna Albrecht Maxiscan 61700 Station Antenna Albrecht Allband 71450 Earphone Scanner Frequency Planning Collecting Information Getting your scanner programmed and scanning takes a few steps. - Page 71 http://www.racescanner.eu This website offers race frequency information, programming software and accessories. • Before you start to program your scanner, decide how you want to organize the frequencies you want to scan. For example, some areas are best organized by geographic location (east, north, south, west, central, etc), while others are best organized by agency (police, sheriff, ambulance, fire, etc.).
-
Page 72: Filling Out The Racing System Worksheet
Filling Out The Racing System Worksheet Race Name Fill in the name of the race you want to scan. For example, you can enter "Formula 1" here. Car #/Driver-Frequency-Priority-CTCSS/DCS Fill in the details for each car number and driver, frequency, whether the car number/driver is a priority car number/driver, and information about the car number/ driver’s CTCSS/DCS information (if any) you want to store for this race. -
Page 73: Filling Out The Conventional System Worksheet
Filling Out The Conventional System Worksheet System Name and Quick Key Fill in a name that describes the system you want to create. For example, you can enter "Race Control" or "Amateur Radio" here. If you want to store more than one type of frequency, you can enter "Mixed."... -
Page 74: Conventional System Worksheet (Template)
Conventional System Worksheet (Template) Conventional System Worksheet System Name Group Name System Quick Key Group Quick Key Frequency Alpha Tag Priority CTCSS/DCS... -
Page 75: Preprogrammed Systems
Preprogrammed Systems Your scanner is preprogrammed with frequencies used at races within the Formula 1. By default, one of the racing systems are unlocked, and your scanner begins to scan them when you turn it on. To speed up scanning, you can lock out systems that are beyond your reception area (typically no more than a few kilometers using the supplied stub antenna). -
Page 76: Declaration Of Conformity
We, Alan Electronics GmbH Daimlerstr. 1 k D- 63303 Dreieich / Germany declare, under our sole responsibility, that this equipment “Albrecht Scanner AE 230 H” is in compliance with the essential requirements and other relevant provisions of the EMC, R&TTE and LVD Council Directives of the EU.
Need help?
Do you have a question about the AE 230 H and is the answer not in the manual?
Questions and answers