Table of Contents
Advertisement
Advertisement
Table of Contents

Subscribe to Our Youtube Channel
Related Manuals for Albrecht AE 92 H


Summary of Contents for Albrecht AE 92 H
- Page 1 AE 92 H Scanning Receiver ALAN Electronics GmbH...
-
Page 2: Ae92H Controls And Display
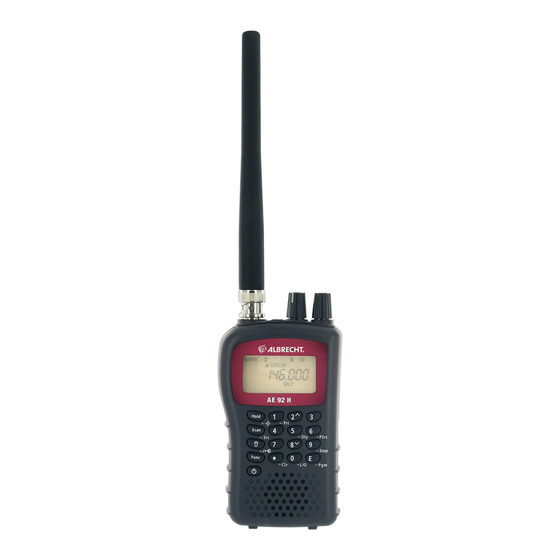
AE92H Controls and Display Antenna (See “Connecting the Antenna” on Page 11-12) Headphone Jack Squelch Volume Display Keypad DC 6V Jack Power... -
Page 3: Table Of Contents
Contents AE92H Controls and Display ......2 Introduction ............4 Precautions ............4 Earphone Warning ..........4 Safety Warning ............4 Legal notes: ............4 Feature Highlights ..........6 About this Manual ..........7 Understanding Scanning ........ -
Page 4: Introduction
Turn down volume before connecting the earphone and then adjust volume to suit. Safety Warning Albrecht does not declare this unit to be waterproof. To reduce the risk of fire or electrical shock, do not expose this unit to rain or moisture. - Page 5 This table lists the frequency ranges, default frequency step, default mode (AM or FM), and type of transmissions you can hear for each range. The scanner has 2 Band Plans, which are useful for major regions in Europe. Band Plan 2 is optimized for Germany.
-
Page 6: Feature Highlights
Note: Please carry out a memory initialization (Reset, see page 27 ) after band plan was changed. Feature Highlights Chain Search - lets you enter personal search bands in 10 locations and search all locations in a chain of frequency bands. Triple-Conversion Circuitry virtually... -
Page 7: About This Manual
About this Manual The screen displays used in this manual are representations of what might appear when you use your scanner. Since what you see depends on the frequencies for your area and the settings you select, you might notice some differences between what is in this manual and what appears on your scanner. -
Page 8: Simplex Operation
Aircraft Amateur radio PMR users Broadcast AM/FM/TV stations Many other business radio users When you want to store a conventional system, all you need to know is the frequencies they operate on. When you are scanning a conventional system, the scanner stops very briefly on each channel to see if there is activity. -
Page 9: Included With Your Scanner
Included with Your Scanner ・ Owner’s Manual ・ Scanner and Antenna ・ Belt Clip (with 2 screws) ・ Adapter ・ Battery set ( 2 pcs NiMH ) Note: If any of these items are missing or damaged, contact your place of purchase. Setting Up Your Scanner These guidelines will help you install and use your new scanner: If your scanner receives interference or electric al noise,... -
Page 10: Using Non-Rechargeable Batteries
The switch is factory preset to NiMH battery and covered by a sticker. Remove the sticker if You want to use alkaline batteries 4. Replace the cover. 5. Connect the supplied AC adaptor to the scanner’s DC 6 V socket to charge the batteries at least for some hours before first time use. -
Page 11: Using Ac Power
WARNING! Do not connect any AC/DC power adapter to the scanner if non rechargeable batteries (such as alkaline batteries) are installed in the scanner and the battery switch is set to NI-MH BATT position (this is the default setting with the sticker) , or if you are not sure about the actual switch position. -
Page 12: Connecting An Optional Antenna
To attach the supplied flexible antenna to the connector on the top of your scanner, align the slots around the antenna's connector with the tabs on the scanner's BNC connector. Then slide the antenna's connector down over the scanner's connector and rotate the antenna connector's outer ring clockwise until it locks into place. -
Page 13: Attaching The Belt Clip
Attaching the Belt Clip To make your scanner easier to carry when you are on the go, use the supplied belt clip. Use a Phillips screwdriver and the supplied screws to attach the clip to the scanner. About Your Scanner We use a few simple terms in this manual to explain the features of the scanner. -
Page 14: A Look At The Keypad
A Look at the Keypad Your scanner's keys have various functions labeled on the key tops and below the keys. To select the function labeled on a key, simply press the key. To select the function labeled below a key: First press Func then release it. - Page 15 Func Lets you use various functions by pressing this key in combination with other keys. Press and hold for more than 2 seconds to turn the scanner on or off. 1/Pri 1 – Enters “1”. Func + Pri – Sets and turns the priority function on or off.
-
Page 16: A Look At The Display
A Look at the Display The display has indicators that show the scanner's current operating status. display information helps understand how your scanner operates. BANK appears with numbers (1-10). appears when you lock the keypad. appears only when the function mode is on. appears while you store a frequency into a channel. -
Page 17: Understanding Banks
Understanding Banks Service Banks The scanner is preprogrammed with all the frequencies allocated to the aircraft band and FM CB. Channel-Storage Banks To make it easier to identify and select the channels you want to listen to, the 200 channels are divided into 10 channel-storage banks. -
Page 18: Searching For Active Frequencies
When you enter a frequency into a channel, the scanner automatically turns on the delay function and DLY appears. When delay is turned on, the scanner automatically pauses scanning 2 seconds after the end of a transmission before scanning proceeds to the next channel. To turn the function off or on, press Func + Dly. -
Page 19: Scanning The Stored Channels
mistake, press Clr then enter the correct frequency. To enter the frequency anyway, press E to accept. Scanning the Stored Channels To begin scanning channels, press Scan. The scanner scans through all non-locked channels in the activated banks (see also page 23 and “Turning Channel-Storage Banks On and Off”... -
Page 20: Chain Search Mode
10 Search Bands Band Plan 2 Frequency Range MHz Steps 25.0000 - 84.0100 5 kHz 84.0150 - 87.2550 20 kHz 3 old 108.0000 - 136.9875 12.5 kHz 3 new 108.0000 - 136.9916 8.33 kHz 137.0000 - 143.9950 5 kHz 144.0000 - 145.9875 12.5 kHz 146.0000 - 173.9900 10, 12.5 kHz... -
Page 21: Setting The Search Range
Press Func + Pgm in chain search mode or chain search hold mode. The lowest blank channel and bank appear. Press E / Pgm to store the frequency into the blank channel. To select another channel, press Func + or Func + before you press E / Pgm. -
Page 22: Direct Entry Search Hold Mode
Press Func + or Func + . The scanner searches, starting from the frequency you entered in the step before. If you enter a frequency that is out of range, the scanner sounds an error tone and Error appears. Press Func + to change the search direction downward or Func + to change the search direction... -
Page 23: Search Skip Memory
If you entered the frequency by mistake, press ●/Clr. To enter the frequency anyway, press E to accept. The scanner moves to program mode after you stored the frequency. Search Skip Memory You can skip up to 50 specified frequencies during a search. This lets you avoid unwanted frequencies or those already stored in a channel. -
Page 24: Turning Channel-Storage Banks On And Off
If the scanner is scanning and stops on an active channel where you want to store a delay, quickly press Func + Dly before it continues scanning again. DLY appears. If the desired channel is not selected, manually select the channel, then press Func + Dly. -
Page 25: Using Keylock
Follow these steps to select a different channel in a bank as the priority channel. Manually select the channel you want to select as the priority channel. Press Func + Pgm, then press Func + Pri. P appears to the left of the selected channel number. Repeat these steps for the channel in each bank you want to program as a priority channel. - Page 26 Problem Possible Suggestion Cause The scanner Check the batteries or make sure scanner might not get the AC adapter is connected to doesn’t any AC/DC an AC outlet and the scanner. work. power. If there is a wall switch that controls power to the AC outlet where you connected the AC adapter, make sure it is on.
- Page 27 Resetting the Scanner If the scanner's display locks up or stops operating properly, you might need to reset the scanner. Caution: This procedure clears all the information you have stored in the scanner. Before you reset the scanner, try turning it off and on to see if it begins working properly. Reset the scanner only when you are sure it is not working properly.
- Page 28 Repairs Do not attempt any repair. The scanner contains no user serviceable parts. Contact the ALAN Customer Service Center phone (+49) (0)6103 9481 30, send an e-mail to service@alan-germany.de or take the scanner to a qualified and authorized repair technician. Birdies All radios can receive “birdies”...
- Page 29 Specifications Channels:...............200 Banks: ........10 (20 channels each) Frequency Range (in MHz): 25.0-27.995 ...........Citizens Band 28.0–69.995 ....10 to 6 Meter Amateur Band 137.0–147.995 .commercial & 2 Meter Amateur Band 70.0–88.0 ........4 Meter Utility Band 108.0–136.9875 ........Aircraft Band 148.0–174.0 ........
- Page 30 Please contact the dealer or person where you have purchased your Albrecht Scanner. Where to find service hints and documentation The complete technical documentation is updated regularly. You can download the latest versions of user manuals, technical documents and conformity declaration, as well as service hints or FAQ’s any time from our server under...
- Page 31 Optional Accessories Albrecht recommends to use following accessories. These are only examples, You will find our whole range of accessory items in our catalogue. Order No. Accessory item 6158 Scanner Antenna Albrecht Miniscan 6156 Scanner Antenna Albrecht Maxiscan 61700 Station Antenna Albrecht Allband...
- Page 32 ........(Unterschrift/ signature) Wolfgang Schnorrenberg ALAN Electronics GmbH © ALAN Electronics 2005 Daimlerstr. 1 k Dovenkamp 11 D- 63303 Dreieich D-22952 Lütjensee www.albrecht-online.de www.alan-germany.de service-hotline: phone (+49) 6103 9481 30 (+49) 6103 9481 60 e-mail service@alan-germany.de download server www.hobbyradio.de...
Need help?
Do you have a question about the AE 92 H and is the answer not in the manual?
Questions and answers