Table of Contents
Advertisement
Before returning this product call
1-800-4-D
INSTRUCTION MANUAL
GUIDE D'UTILISATION
MANUAL DE INSTRUCCIONES
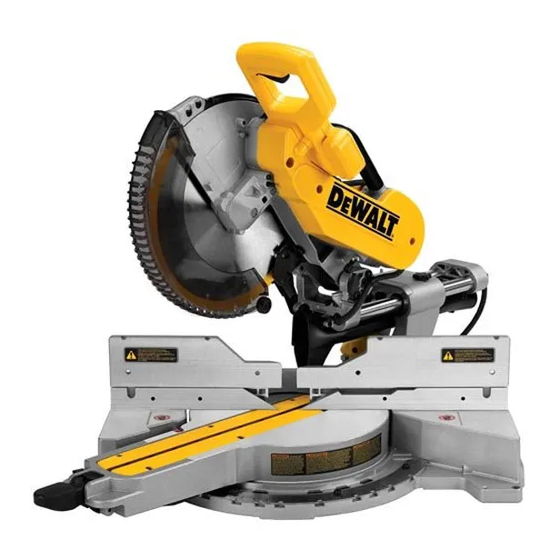
DWS782
12" (305 mm) Double Bevel Sliding Compound Miter Saw
Scie coulissante à onglet mixte 305 mm (12 po)
Sierra ingletadora compuesta deslizante de doble bisel de
305 mm (12 pulg.)
IF YOU SHOULD EXPERIENCE A PROBLEM WITH YOUR D
WALT
E
Questions? Visit us at www.dewalt.com
Des questions ? Rendez nous visite à www.dewalt.com
¿Tiene preguntas? Visítenos en www.dewalt.com
CALL 1-800-4-D
IN MOST CASES, A D
WALT REPRESENTATIVE CAN RESOLVE
E
YOUR PROBLEM OVER THE PHONE.
IF YOU HAVE A SUGGESTION OR COMMENT, GIVE US A CALL.
YOUR FEEDBACK IS VITAL TO THE SUCCESS OF D
QUALITY IMPROVEMENT PROGRAM.
INSTRUCTIVO DE OPERACIÓN, CENTROS DE SERVICIO Y PÓLIZA DE
GARANTÍA. ADVERTENCIA: LÉASE ESTE INSTRUCTIVO ANTES DE
USAR EL PRODUCTO.
WALT PURCHASE,
E
WALT
E
WALT'S
E
Advertisement
Table of Contents

Related Manuals for DeWalt DWS782


Summary of Contents for DeWalt DWS782
- Page 1 YOUR FEEDBACK IS VITAL TO THE SUCCESS OF D WALT’S QUALITY IMPROVEMENT PROGRAM. Questions? Visit us at www.dewalt.com Des questions ? Rendez nous visite à www.dewalt.com ¿Tiene preguntas? Visítenos en www.dewalt.com INSTRUCTION MANUAL INSTRUCTIVO DE OPERACIÓN, CENTROS DE SERVICIO Y PÓLIZA DE GUIDE D’UTILISATION...
- Page 2 • DO NOT USE THE MACHINE IN A DANGEROUS ENVIRONMENT. The use of power Definitions: Safety Guidelines tools in damp or wet locations or in rain can cause shock or electrocution. Keep your work area well-lit to avoid tripping or placing arms, hands, and fingers in danger. The definitions below describe the level of severity for each signal word.
- Page 3 • CHECK FOR DAMAGED PARTS. Before further use of the tool, a guard or other part • NEVER CUT FERROUS METALS (those with any iron or steel content) or masonry. Either of these can cause the carbide tips to fly off the blade at high speeds causing serious that is damaged should be carefully checked to determine that it will operate properly and perform its intended function—check for alignment of moving parts, binding of moving injury.
- Page 4 D WALT Industrial Tool Co., 701 East Joppa Road, Baltimore, MD 21286, ON MOTOR HOUSING: call 1-800-4-D WALT (1-800-433-9258) or visit our website: www.dewalt.com. WARNING: FOR YOUR OWN SAFETY, READ INSTRUCTION MANUAL BEFORE Optional Accessories (Fig. 1) OPERATING MITER SAW.
-
Page 5: Fig. 1
Check the contents of your miter saw carton to make sure that you have received all parts. KNOBS In addition to this instruction manual, the carton should contain: END PLATE 1 DWS782 miter saw WALT 12" (305 mm) diameter saw blade In bag: 1 Blade wrench... - Page 6 • Do not cut ferrous metal (containing iron or steel) or masonry or fiber cement product DRIVE with this miter saw. 120 V motor Removing the Blade (Fig. 3) 1600 watts in 15 amp motor 1. Unplug the saw. 3800 RPM Cut helical gears 2.
- Page 7 MITER CONTROL (FIG. 5) 22.5° BEVEL PAWLS (FIG. 6) FIG. 3 The miter lock handle and miter latch button allow you to Your saw is equipped to rapidly and accurately set a 22.5° miter your saw to 60° right and 50° left. To miter the saw, bevel, left or right.
- Page 8 FIG. 4 OPERATING LIFTING TRIGGER RAIL LOCK HANDLE HANDLE SWITCH KNOB MOTOR HOUSING DEPTH RAIL SET ADJUSTMENT LOWER SCREW SCREW GUARD MOTOR ADJUSTMENT BELT COVER WING NUT ENDCAP DEPTH STOP RAILS KERF PLATE 0° BEVEL BEVEL SCALE FENCE STOP MITER ADJUSTMENT LATCH KNOB...
-
Page 9: Cutting With Your Saw
NOTE: To provide greater crosscut capacity with reduced stroke, the blade on the DWS782 extends deeper into the table. As a result, a greater lifting force on the workpiece may be experienced during the cut. - Page 10 BEVEL CUTS and removing accessories, before adjusting or when If you cannot secure the workpiece on the table and against A bevel cut is a crosscut made with the saw blade leaning making repairs. An accidental start-up can cause injury. the fence by hand (irregular shape, etc.), or your hand would be less than 6"...
- Page 11 MITER POINTER ADJUSTMENT (FIG. 5) right, if the bevel pointer does not indicate exactly 22.5°, turn the crown adjustment screw contacting the pawl with a 7/16" (10 mm) wrench until the bevel pointer indicates exactly Unlock the miter lock handle to move the miter arm to the zero position. With the miter lock 22.5°.
-
Page 12: Support For Long Pieces
counterclockwise one turn. To ensure the miter lock is functioning properly, re-lock the miter – EXAMPLES – lock to a non-detented measurement on the miter scale – for example, 34º – and make sure NUMBER OF SIDES MITER OR BEVEL ANGLE the table will not rotate. -
Page 13: Table Of Contents
INSIDE CORNER OUTSIDE CORNER INSIDE CORNER OUTSIDE CORNER Miter left 45° Miter right 45° Bevel left 33.9° Bevel right 33.9° Left side Save left side of cut Save left side of cut Left side Miter table set at right 31.62° Miter table set at left 31.62°... -
Page 14: Fig
Special Cuts NEVER MAKE ANY CUT UNLESS THE MATERIAL IS SECURED ON THE TABLE AND FIG. 20 FIG. 19 AGAINST THE FENCE. ALUMINUM CUTTING (FIG. 19, 20) ALWAYS USE THE APPROPRIATE SAW BLADE MADE ESPECIALLY FOR CUTTING ALUMINUM. These are available at your local D WALT retailer or D WALT service center. - Page 15 WALT Industrial Tool Co., 701 East Joppa Road, Baltimore, MD 21286, call cause the belt to fail. 1-800-4-D WALT (1-800-433-9258) or visit our website: www.dewalt.com. If the blade does not turn when the motor is running, the belt has failed. To inspect...
- Page 16 2. Replace fuse or reset circuit breaker. wear or tool abuse. For further detail of warranty coverage and warranty repair information, breaker tripped visit www.dewalt.com or call 1-800-4-D WALT (1-800-433-9258). This warranty does not 3. Cord damaged 3. Have cord replaced by authorized apply to accessories or damage caused where repairs have been made or attempted by service center.
- Page 17 TABLE 1: COMPOUND MITER CUT (POSITION WOOD WITH BROAD FLAT SIDE ON THE TABLE AND THE NARROW EDGE AGAINST THE FENCE) SET THIS BEVEL ANGLE ON SAW...
Need help?
Do you have a question about the DWS782 and is the answer not in the manual?
Questions and answers