Table of Contents
Advertisement
Quick Links
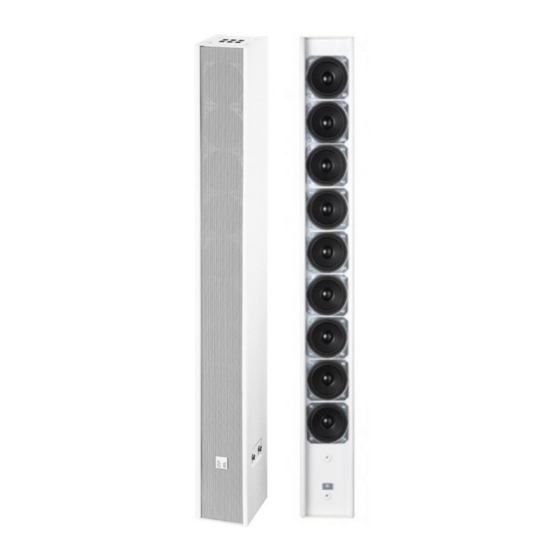
SLIM ARRAY
SLIM
SLIM
SLIM
ARRAY SPEAKER
ARRAY
ARRAY
Thank you for your confidence in our product.
Please follow the instructions stated in the manual carefully to ensure proper installation and to prevent any
damage to the equipment. This is important for longer duration of your equipment.
SPEAKER
SPEAKER
SPEAKER
TOA Corporation
TOA Corporation
TOA Corporation
TOA Corporation
INSTRUCTION MANUAL
INSTRUCTION MANUAL
INSTRUCTION MANUAL
INSTRUCTION MANUAL
T T T T Z Z Z Z - - - - S60
S60W W W W AS
S60
S60
AS
AS
AS
Advertisement
Table of Contents

Subscribe to Our Youtube Channel
Summary of Contents for Toa TZ-S60W AS
- Page 1 Thank you for your confidence in our product. Please follow the instructions stated in the manual carefully to ensure proper installation and to prevent any damage to the equipment. This is important for longer duration of your equipment. TOA Corporation TOA Corporation TOA Corporation...
-
Page 2: Table Of Contents
TABLE OF CONTENT TABLE OF CONTENTS S S S TABLE OF CONTENT TABLE OF CONTENT 1. 1. 1. 1. SAFETY PRECAUTIONS SAFETY PRECAUTIONS SAFETY PRECAUTIONS SAFETY PRECAUTIONS ..............2. 2. 2. 2. GENERAL DESCRIPTION GENERAL DESCRIPTION GENERAL DESCRIPTION GENERAL DESCRIPTION .............. -
Page 3: Safety Precautions Safety Precautions
1. 1. 1. 1. SAFETY PRECAUTIONS SAFETY PRECAUTIONS SAFETY PRECAUTIONS SAFETY PRECAUTIONS ● Prior to installation or use of the speaker unit, please read carefully the instruction manuals. ● You must thoroughly understand the safety precautions and important safety warnings stated in the Instruction manual. -
Page 4: General Description General Description
When Speaker Unit is in use (turned on) When Speaker Unit is in use (turned on) When Speaker Unit is in use (turned on) When Speaker Unit is in use (turned on) • • Do not place any heavy object on the speaker Do not operate the speaker for an extended which may cause the speaker to fall, resulting in period of time with distorted sound. -
Page 5: Speaker Dimensional Diagram Speaker Dimensional Diagram
3. SPEAKER DIMENSIONAL DIAGRAM 3. SPEAKER DIMENSIONAL DIAGRAM 3. SPEAKER DIMENSIONAL DIAGRAM 3. SPEAKER DIMENSIONAL DIAGRAM Bracket for attaching the product on the wall Impedance selector Input terminal If two Hole for screw speakers are M5X15 (for joined, use installation of bracket HY-S60W AS accessory) side stack... -
Page 6: How To Adjust Impedance How To Adjust Impedance
4 4 4 4 ..HOW HOW TO ADJUST IMPEDANCE TO ADJUST IMPEDANCE TO ADJUST IMPEDANCE TO ADJUST IMPEDANCE To adjust impedance, use a standard screwdriver to turn the rotary switch located at the back of the speaker to the desired input power. -
Page 7: Speaker Cable Connection
ACCESSORY ACCESSORY ACCESSORY ACCESSORY ( ( ( ( Brackets are not yet installed on the speaker) ) ) ) 30 ° 30 ° [Speaker bracket] [Speaker bracket] [Speaker bracket] [Speaker bracket] [Joint bracket] [Joint bracket] [Joint bracket] [Joint bracket] [Wall bracket] [Wall bracket] [Wall bracket] [Wall bracket]... -
Page 8: Using Accessory Bracket
Step 3. Step 3. Step 3. Step 3. Place the speaker onto the wall through the 4 holes in the 2 pieces of wall brackets (on the back of speaker) on the 4 pieces of screws that had been paired on the surface of the wall (see step 2). Step 2 Step 3 Mounting Hole... - Page 9 [Sample installation] Hex. Bolt M6X12 3-SEMS BH Screw M5X15 3-SEMS Wall Bracket Joint Bracket Speaker Bracket BH Screw M5X60 Fe SUS SW+W Distance of the hole in the wall bracket...
-
Page 10: Using Optional Bracket(Hy-S60W As)
Step 1..Step 1 Mount Wall Bracket onto the wall, Use screws that are compatible with the composition and Step 1 Step 1 structure of the wall, and strong enough to support the weight of the unit. Step 2. - Page 11 Step Step 5 5 5 5 Step Step Side Stack Bracket Step Step Step Step 4 4 4 4 Rear Stack Bracket Step Step Step Step 3 3 3 3 BH-Screw M5X30 Fe NI 3-SEMS BH Screw M5X15 SUS 3-SEMS Step Step 2 2 2 2 Step...
-
Page 12: Spe Ifications
Optional HY-S60W AS : Side stack bracket ...2 Pcs, Rear stack bracket ...1 Pc Note : The design and specifications are subject to change without notice for improvement. Printed in Indonesia TOA Corporation TOA Corporation TOA Corporation TOA Corporation 533-06-249-80...


Need help?
Do you have a question about the TZ-S60W AS and is the answer not in the manual?
Questions and answers