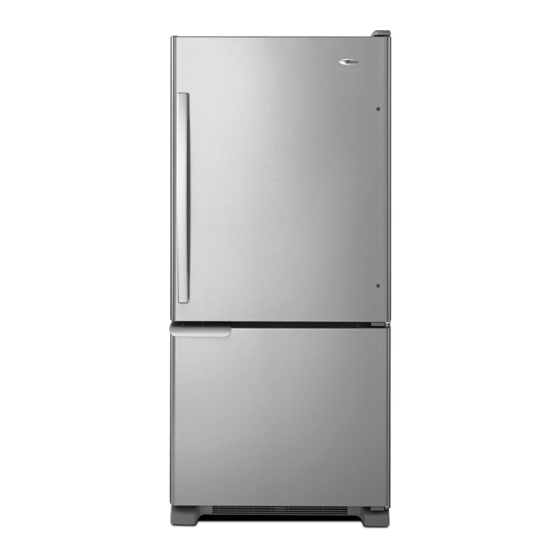
Amana 19 Service Manual

Amana 19 Service Manual

19, 20 & 22 cu. ft. bottom mount refrigerators
Hide thumbs Also See for 19:
Table of Contents

Advertisement

Service
19, 20 & 22 Cu. Ft.
Bottom Mount
Refrigerators
Service Manual for Amana
This manual is to be used by qualified appliance
technicians only. Maytag does not assume any
responsibility for property damage or personal
injury for improper service procedures done by
an unqualified person.
and Maytag
models
®
®
This Base Manual covers 19,20,22 Cu. Ft.
Bottom Mount Refrigerators
Refer to individual Technical Sheet for
information on specific models.
16021484
Revision 1
July 2002

Advertisement

Table of Contents
loading

Summary of Contents for Amana 19

  • Page 1 This Base Manual covers 19,20,22 Cu. Ft. Bottom Mount Refrigerators Refer to individual Technical Sheet for information on specific models. Service 19, 20 & 22 Cu. Ft. Bottom Mount Refrigerators Service Manual for Amana and Maytag models ® ® This manual is to be used by qualified appliance technicians only.
  • Page 2 Important Information Pride and workmanship go into every product to provide our customers with quality products. It is possible, however, that during its lifetime a product may require service. Products should be serviced only by a qualified service technician who is familiar with the safety procedures required in the repair and who is equipped with the proper tools, parts, testing instruments and the appropriate service manual.
  • Page 3: Table Of Contents

    Condensate Drain Pan ........... 35 20 cu. ft Machine Compartment Air Flow Diagram ..20 Condensate Drain Tube .......... 35 19, 22 cu. ft Machine Compartment Air Flow Diagram .. 21 Condenser Removal ..........35 Water Dispenser Flow ..........22 Appendix A Typical External Sweat Pattern........23...
  • Page 4: Product Design

    Product Design WARNING To avoid risk of electrical shock, personal injury, or death, disconnect electrical power source to unit, unless test procedures require power to be connected. Discharge capacitor through a resistor before attempting to service. Ensure all ground wires are connected before certifying unit as repaired and/or operational. Refrigeration System Defrost System Compressor forces high temperature vapor into fan...
  • Page 5: Component Testing

    Component Testing WARNING To avoid risk of electrical shock, personal injury, or death, disconnect electrical power source to unit, unless test procedures require power to be connected. Discharge capacitor through a resistor before attempting to service. Ensure all ground wires are connected before certifying unit as repaired and/or operational. Component Description Test Procedures...
  • Page 6 Component Testing WARNING To avoid risk of electrical shock, personal injury, or death, disconnect electrical power source to unit, unless test procedures require power to be connected. Discharge capacitor through a resistor before attempting to service. Ensure all ground wires are connected before certifying unit as repaired and/or operational. Component Description Test Procedures...
  • Page 7 Component Testing WARNING To avoid risk of electrical shock, personal injury, or death, disconnect electrical power source to unit, unless test procedures require power to be connected. Discharge capacitor through a resistor before attempting to service. Ensure all ground wires are connected before certifying unit as repaired and/or operational. Component Description Test Procedures...
  • Page 8 NOTE: Drier used in R12 sealed system is not interchangeable with drier used in R134a sealed system. Always replace drier in R134a Desiccant (20) 8 x 12 4AXH - 7 M>S> - system with Amana part number B2150504. Grams Before opening refrigeration system, recover HFC134a refrigerant for safe disposal.
  • Page 9 Component Testing WARNING To avoid risk of electrical shock, personal injury, or death, disconnect electrical power source to unit, unless test procedures require power to be connected. Discharge capacitor through a resistor before attempting to service. Ensure all ground wires are connected before certifying unit as repaired and/or operational. Component Description Test Procedures...
  • Page 10: Service Procedures

    Service Procedures WARNING To avoid risk of electrical shock, personal injury, or death, disconnect electrical power source to unit, unless test procedures require power to be connected. Discharge capacitor through a 10,000 ohm resistor before attempting to service. Ensure all ground wires are connected before certifying unit as repaired and/or operational. Service Equipment Drier Replacement Listed below is equipment needed for proper...
  • Page 11: Refrigerant Precautions

    Service Procedures WARNING To avoid risk of electrical shock, personal injury, or death, disconnect electrical power source to unit, unless test procedures require power to be connected. Discharge capacitor through a 10,000 ohm resistor before attempting to service. Ensure all ground wires are connected before certifying unit as repaired and/or operational. Refrigerant Precautions To AC supply WARNING...
  • Page 12: Dehydrating Sealed Refrigeration System

    Service Procedures WARNING To avoid risk of electrical shock, personal injury, or death, disconnect electrical power source to unit, unless test procedures require power to be connected. Discharge capacitor through a 10,000 ohm resistor before attempting to service. Ensure all ground wires are connected before certifying unit as repaired and/or operational. Dehydrating Sealed Refrigeration System Testing Systems Containing No Refrigerant Charge 1.
  • Page 13: Restrictions

    Service Procedures WARNING To avoid risk of electrical shock, personal injury, or death, disconnect electrical power source to unit, unless test procedures require power to be connected. Discharge capacitor through a 10,000 ohm resistor before attempting to service. Ensure all ground wires are connected before certifying unit as repaired and/or operational. Restrictions 3.
  • Page 14: Evacuation And Charging

    Service Procedures WARNING To avoid risk of electrical shock, personal injury, or death, disconnect electrical power source to unit, unless test procedures require power to be connected. Discharge capacitor through a 10,000 ohm resistor before attempting to service. Ensure all ground wires are connected before certifying unit as repaired and/or operational. Evacuation and Charging High Side Gauge Low Side Gauge...
  • Page 15: Charging

    Service Procedures WARNING To avoid risk of electrical shock, personal injury, or death, disconnect electrical power source to unit, unless test procedures require power to be connected. Discharge capacitor through a 10,000 ohm resistor before attempting to service. Ensure all ground wires are connected before certifying unit as repaired and/or operational. Refrigerant Charge Charging NOTE: Do not use captured or recycled refrigerant in...
  • Page 16: Hfc134A Service Information

    Service Procedures WARNING To avoid risk of electrical shock, personal injury, or death, disconnect electrical power source to unit, unless test procedures require power to be connected. Discharge capacitor through a 10,000 ohm resistor before attempting to service. Ensure all ground wires are connected before certifying unit as repaired and/or operational. HFC134a Service Information CAUTION HFC134a is alternative refrigerant for CFC12.
  • Page 17: Replacement Service Compressor

    Service Procedures WARNING To avoid risk of electrical shock, personal injury, or death, disconnect electrical power source to unit, unless test procedures require power to be connected. Discharge capacitor through a 10,000 ohm resistor before attempting to service. Ensure all ground wires are connected before certifying unit as repaired and/or operational. Replacement Service Compressor Brazing HFC134a service compressors will be charged with...
  • Page 18: Refrigerant Flow 19, 20, 22 Cu. Ft

    TUBE Note: Capillary Tube and Suction Tube are located under Fresh Food floor. SUCTION TUBE CONDENSER EVAPORATOR POST CONDENSER TUBE COMPRESSOR DISCHARGE DRYER TUBE PRO CESS TUBE 19, 20, 22 cu. ft. Bottom Mount Refrigerant Flow Diagram 16021484 Rev. 1...
  • Page 19: Cabinet Air Flow 19, 20, 22 Cu. Ft

    SUPPLY PORT REFRIGERATOR RETURN AIR EVAPORATOR FAN TUNNELS ASSEMBLY EVAPORATOR FREEZER AIR SUPPLY GRILLE EVAPORATOR COVER FREEZER RETURN AIR THOUGH LOUVERS AT BOTTOM OF EVAPORATOR COVER 19, 20, 22 cu. ft. Bottom Mount Cabinet Air Flow Diagram 16021484 Rev. 1...
  • Page 20: Cu. Ft Machine Compartment Air Flow Diagram

    Machine Compartment Air Flow Compressor Condenser Fan Assembly Condenser 20 cu. ft. Bottom Mount Machine Compartment Air Flow Diagram 16021484 Rev. 1...
  • Page 21 Machine Compartment Air Flow COMPRESSOR DRIP PAN CONDENSER CONDENSER FAN ASSEMBLY 19, 22 cu. ft. Model Bottom Mount Machine Compartment Air Flow Diagram 16021484 Rev. 1...
  • Page 22: Water Dispenser Flow

    Water Dispenser 5/16" OD x 5/16" OD COMPRESSION UNION 5/16" O.D. PLASTIC TUBING FILTER ROUTED THRU A FOAMED-IN CONDUIT THIS AREA WATER RESERVOIR WATER DISPENSER REMOVE WATER TUBING FROM CONDUIT FROM DISPENSER END 5/16" O.D. PLASTIC TUBING MAKER 1/4" O.D. PLASTIC TUBING WATER DISPENSING FLOW 16021484 Rev.
  • Page 23: Typical External Sweat Pattern

    Typical External Sweat Pattern CLASSIFICATION OF CONDENSATION 1 = Haze or fog 2 = Beading 3 = Beads or small drops 4 = Drops running together Refrigerator door bottom No sweat on side when compressor is running Center mullion Freezer Conditions after 4 hour door top Laboratory Sweat Test.
  • Page 24: Troubleshooting Chart

    Troubleshooting Chart WARNING To avoid risk of electrical shock, personal injury, or death, disconnect electrical power source to unit, unless test procedures require power to be connected. Discharge capacitor through a resistor before attempting to service. Ensure all ground wires are connected before certifying unit as repaired and/or operational. Troubleshooting chart on following pages contains symptoms that may be seen in malfunctioning units.
  • Page 25 Troubleshooting Chart WARNING To avoid risk of electrical shock, personal injury, or death, disconnect electrical power source to unit, unless test procedures require power to be connected. Discharge capacitor through a resistor before attempting to service. Ensure all ground wires are connected before certifying unit as repaired and/or operational. Symptom Possible Causes Corrective Action...
  • Page 26 Troubleshooting Chart WARNING To avoid risk of electrical shock, personal injury, or death, disconnect electrical power source to unit, unless test procedures require power to be connected. Discharge capacitor through a resistor before attempting to service. Ensure all ground wires are connected before certifying unit as repaired and/or operational. Symptom Possible Causes Corrective Action...
  • Page 27: System Diagnosis

    System Diagnosis SUCTION HEAD T1 INLET T2 OUTLET T3 SUCTION WATTAGE PRESSURE PRESSURE TEMPERATURE TEMPERATURE TEMPERATURE VARIATION CONDITION VARIATION VARIATION VARIATION VARIATION VARIATION FROM FROM FROM FROM NORMAL FROM NORMAL FROM NORMAL NORMAL NORMAL NORMAL Refrigerant Increase Increase Warmer Warmer Colder Increase Overcharge...
  • Page 28 System Diagnosis the high side (condenser) of the system. To diagnose for a restriction versus a refrigerant • Only partial frosting of evaporator instead of even shortage, discharge the system, replace the drier-filter, evacuate and recharge with the specified refrigerant frosting of entire coil.
  • Page 29 System Diagnosis Symptoms of Low or High Ambient Temperature Installation Lower ambient air temperature reduces the condensing temperature and therefore reduces the temperature of the liquid entering the evaporator. The increase in refrigeration effect due to operation in a lower ambient results in a decrease in power consumption and run time.
  • Page 30: Disassembly Procedures

    Disassembly Procedures WARNING To avoid risk of electrical shock, personal injury, or death, disconnect electrical power source to unit, unless test procedures require power to be connected. Discharge capacitor through a resistor before attempting to service. Ensure all ground wires are connected before certifying unit as repaired and/or operational. Door Removal Fresh Food Door 1.
  • Page 31: Light Bulb Sockets

    Disassembly Procedures WARNING To avoid risk of electrical shock, personal injury, or death, disconnect electrical power source to unit, unless test procedures require power to be connected. Discharge capacitor through a resistor before attempting to service. Ensure all ground wires are connected before certifying unit as repaired and/or operational. Light Bulb Sockets Temp- Assure Damper Control...
  • Page 32: Water Dispenser

    Disassembly Procedures WARNING To avoid risk of electrical shock, personal injury, or death, disconnect electrical power source to unit, unless test procedures require power to be connected. Discharge capacitor through a resistor before attempting to service. Ensure all ground wires are connected before certifying unit as repaired and/or operational. Water Dispenser (some models) Light Socket 1.
  • Page 33: Defrost Terminator (Thermostat)

    Disassembly Procedures WARNING To avoid risk of electrical shock, personal injury, or death, disconnect electrical power source to unit, unless test procedures require power to be connected. Discharge capacitor through a resistor before attempting to service. Ensure all ground wires are connected before certifying unit as repaired and/or operational. DEFROST CONNECTOR PLUGS Defrost Terminator (Thermostat) 1.
  • Page 34: Drawer Assembly

    Disassembly Procedures WARNING To avoid risk of electrical shock, personal injury, or death, disconnect electrical power source to unit, unless test procedures require power to be connected. Discharge capacitor through a resistor before attempting to service. Ensure all ground wires are connected before certifying unit as repaired and/or operational. Machine Compartment Condenser Fan &...
  • Page 35: Condensate Drain Pan

    Disassembly Procedures WARNING To avoid risk of electrical shock, personal injury, or death, disconnect electrical power source to unit, unless test procedures require power to be connected. Discharge capacitor through a resistor before attempting to service. Ensure all ground wires are connected before certifying unit as repaired and/or operational. Condensate Drain Pan NOTE: Condensate drip pan may spill when steps 1 thru 4 are performed.
  • Page 36 A - 1...
  • Page 37: Keep Instructions For Future Reference

    Hints and Care ........... 15 Amana Appliances 2800 - 220th Trail How to Clean Your Unit ........15 Amana, Iowa 52204 How to Remove and Replace Light Bulbs ..16 Ph# 1(800)843-0304 in U.S.A. Trouble Shooting ..........17 1(866)587-2002 au Canada Warranty ..............
  • Page 38: Before Calling Service

    Amana offers long-term service call the Consumer Affairs Department. protection for this new refrigerator. Warranty service must be performed by an authorized servicer. Amana also Asure™ Extended Service Plan is recommends contacting an authorized servicer if service is required after warranty specially designed to supplement expires.
  • Page 39: Important Safety Information

    Important Safety Information What You Need to Know Recognize Safety Symbols, Words, Labels about Safety Instructions DANGER Warning and Important Safety DANGER—Immediate hazards which WILL result in severe personal injury or Instructions appearing in this manual death. are not meant to cover all possible conditions and situations that may WARNING occur.
  • Page 40: Installing Your Refrigerator

    Installing Your Refrigerator These instructions were provided to aid you in the installation of your unit. Amana cannot be responsible for improper installation. How to Transport Your Unit How do I measure an Follow these tips when moving the unit to final location: opening to insure •...
  • Page 41: How To Reverse The Doors

    Installing Your Refrigerator How to Reverse the Doors IMPORTANT: When working directly on doors, place doors on a nonabrasive surface protected by towels or rugs to Perform all steps listed in How to avoid damage to door finish. Remove the Doors and Hinges. Transfer door stops from bottom edge of fresh food and freezer door to...
  • Page 42: How To Replace The Doors And Hinges

    Installing Your Refrigerator How to Install and Remove Handles continued Installing Fresh Food Side-Mounted Handles Removing Fresh Food Side-Mounted Handles If installing handles for the first time, the fresh food handles Removing handles may be necessary when transporting unit can be located on the back of the refrigerator. through tight spaces, or when reversing the door.
  • Page 43: How To Remove And Install The Pullout Drawer

    Installing Your Refrigerator How to Remove and Install the Pullout Drawer WARNING To avoid electrical shock which can cause severe personal injury or death, disconnect power to refrigerator before removing doors. After replacing doors, connect power. CAUTION To avoid possible injury, product, or property damage, you will need two people to perform the following instructions. Removing Pullout Drawer Installing Pullout Drawer Pull drawer open to full...
  • Page 44: How To Connect The Water Supply

    Installing Your Refrigerator How to Connect the Water Supply WARNING To reduce the risk of injury or death, follow basic precautions, including the following: • Read all instructions before installing device. • DO NOT attempt installation if instructions are not understood or if they are beyond personal skill level. •...
  • Page 45: How To Level Your Refrigerator

    Installing Your Refrigerator How to Level Your Refrigerator If your refrigerator requires an ice maker water supply connection, proceed to How to connect the water supply section before leveling your refrigerator. CAUTION To protect personal property or unit from damage, observe the following: •...
  • Page 46: Fresh Food Features

    Fresh Food Features Interior Shelves Door Storage Dairy Center CAUTION The dairy center provides convenient To avoid personal injury or property damage, observe the storage for items such as butter, following: yogurt, cheese, etc. This compartment • Confirm shelf is secure before placing items on shelf. is an adjustable feature located in the •...
  • Page 47: Climate-Controlled Drawers

    Fresh Food Features Climate-Controlled Drawers Humidity-Controlled Crisper Drawers The crisper drawer keeps produce fresh longer by providing an environment with adjustable humidity. Controls The crisper controls regulate the amount of humidity in the crisper drawer. Use the low setting for produce with outer skins. Use the high setting for leafy produce. Temperature-Controlled Drawer Chef's Pantry™...
  • Page 48: Freezer Features

    Freezer Features CAUTION Primary Features To avoid property damage, observe the following: • Do not force ice maker arm down or up. Automatic Ice Maker (some models) • Do not place or store anything in ice storage bin. Using Ice Maker for the First Time Drawers •...
  • Page 49: Accessories

    Freezer Features Accessories Ice Cube Tray (some models) The ice cube tray provides an area to freeze cubes for manual dispensing of ice. To release ice cubes from tray, hold tray upside down over a storage container and twist both ends of tray until cubes release.
  • Page 50: Hints And Care

    Amana recommend for my stainless steel product? WARNING Amana has a cleaner available for To avoid electrical shock which can cause severe personal injury or death, purchase (Part # 31960801) through our disconnect power to refrigerator before cleaning. After cleaning, connect power.
  • Page 51: How To Remove And Replace Light Bulbs

    Hints and Care How to Remove and Replace Light Bulbs How to Get the WARNING Most Out of Your Energy To avoid electrical shock which can cause severe personal injury or death, disconnect power to refrigerator before replacing light bulb. After replacing light Dollar bulb, connect power.
  • Page 52: Trouble Shooting

    Trouble Shooting Today’s refrigerators have new features and are more energy efficient. Foam insulation is very energy efficient and has excellent insulating capabilities, however, foam insulation is not as sound absorbent. As a result, certain sounds may be NOISE unfamiliar. In time, these sounds will become familiar. Please refer to this information before calling service. TOPIC POSSIBLE CAUSE SOLUTION...
  • Page 53 Trouble Shooting OPERATION TOPIC POSSIBLE CAUSE SOLUTION Food temperature Door is not closing properly. Refrigerator is not level. See How to Level Your Refrigerator for appears too warm details on how to level your unit. Check gaskets for proper seal. Clean, if necessary, according to cleaning instructions in owner’s manual.
  • Page 54 Check water connection procedure in your Installation maker Instructions. Self-piercing and ” saddle valves cause low water pressure and may clog the line over time. Amana is not responsible for property damage due to improper installation or water connection. Water pressure is low.
  • Page 55: Warranty Limitations

    Amana Refrigerator Warranty First Year Amana will replace, free of charge, any part which is defective due to workmanship or materials. Second through Fifth Year Amana will replace free of charge, any sealed system component (compressor, condenser, evaporator, drier and interconnecting tubing) and repair any food compartment liner (exclusive of door liner) which is defective due to workmanship or materials.
  • Page 56 Appendix B B - 1...
  • Page 57 Please contact us with your model and serial number: How to Connect the Water Supply ..... 8 Consumer Affairs Department Amana Appliances Trouble Shooting ........... 8 2800 - 220th Trail Warranty ............... 10 Amana, Iowa 52204 Ph# 1(800)843-0304 1(319)622-5511 outside U.S.A. Internet: http:// www.amana.com B - 2...
  • Page 58: Important Safety Information

    WARNING—Hazards or unsafe practices which COULD result in severe personal injury or death. • If unable to solve a problem during installation, contact an authorized Amana CAUTION technician. Locate a factory Service Center or independent authorized technician by CAUTION—Hazards or unsafe practices which COULD result in minor personal...
  • Page 59: About Your Ice Maker

    If a water filter is desired, a water filter may be • Discard ice created within first 12 hours of operation to verify system is flushed of ordered for some models. Contact Amana Consumer Affairs impurities. for more information on your particular model.
  • Page 60: Installing Your Ice Maker

    Installing Your Ice Maker WARNING To reduce the risk of injury or death, follow basic precautions, including the following: • Read all instructions before installing device. • DO NOT attempt installation if instructions are not understood or if they are beyond personal skill level. •...
  • Page 61: How To Prepare The Freezer Compartment

    Installing Your Ice Maker How to Prepare the Freezer Compartment Remove freezer accessories, including all From back, push gently on the water fill baskets and shelves. tube while twisting it slightly. Make sure flange(E) is firmly seated in the hole •...
  • Page 62: How To Mount The Ice Maker Kit

    Installing Your Ice Maker How to Mount the Ice Maker Kit How to Connect the Water Supply Screw / " ice maker mounting screws into Create service loop with tubing and attach to unit holes provided in left wall of freezer section. with "P"...
  • Page 63: How To Connect The Water Supply

    Amana recommends using a saddle valve. Contact 1-800-843-0304 or an Amana dealer for availability. Do not use self-piercing valve. Amana is not responsible for property damage due to improper installation or water connection. Water pressure is too low.
  • Page 64 Plastic tubing was used to complete Amana recommends using copper tubing for installation. water connection. Plastic is less durable and can cause leakage. Amana is not responsible for property damage due to imporper installation or water connection. Water pressure is too low.
  • Page 65: Warranty

    Warranty Ice Maker Full One Year Warranty First Year Amana Appliances will repair or replace, free of charge, any part which is defective due to workmanship or materials. Owner’s Responsibilities Warranty Limitations • Provide proof of purchase (sales receipt). •...

This manual is also suitable for:

2022

Table of Contents