
Related Manuals for Phase Linear Phase Linear MP1311


Summary of Contents for Phase Linear Phase Linear MP1311
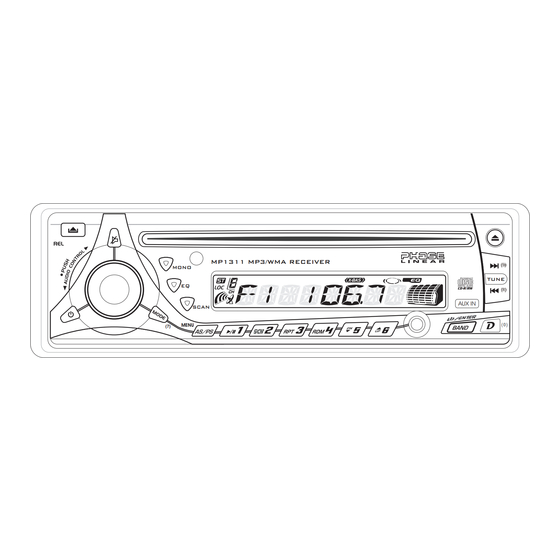
- Page 1 MP1311 Owner's Manual AM/FM/CD/MP3/WMA Receiver MP1311 MP3/WMA RECEIVER MONO TUNE AUX IN SCAN MENU...
-
Page 2: Table Of Contents
PREPARATION Getting Started Congratulations on your purchase of the Phase Linear MP1311 Mobile AM/FM/CD/MP3/WMA Receiver. It’s a good idea to read all of the instructions before beginning the installation. We recommend having your Phase Linear MP1311 installed by a reputable installation shop. -
Page 3: Installation Instructions
MP1311 INSTALLATION INSTRUCTIONS This unit is designed for installation in cars, trucks and vans with an existing radio opening. In many cases, a special installation kit will be required to mount the radio to the dashboard. These kits are available at electronics supply stores and car stereo specialty shops. -
Page 4: Kit Installation
Attach one end of the perforated support strap (supplied) to the screw stud on the rear of the chassis using the hex nut provided. Fasten the other end of the perforated strap to a secure part of the dashboard, either above or below the radio, using the screw and hex nut provided. - Page 5 MP1311 Remove Radio To remove the radio after installation, remove the trim ring by lifting in the center and pulling it off from either side. Insert the removal keys straight back until they lock, and then pull the radio out. If removal keys are inserted at an angle, they will not lock properly to release the unit.
-
Page 6: Wiring
WIRING Power Antenna (dark blue wire) - Connect to power antenna or amplifier. If not used, tape bare end of wire. Accessory/Ignition (red wire) - Connect to existing radio wire or radio fuse. Ground (black wire) - Connect to ground terminal or clean, unpainted part of chassis. -
Page 7: Operating Instructions
MP1311 OPERATING INSTRUCTIONS Power Press the power button (1) or any other button on the face of the receiver to turn the unit on when the ignition switch is on. Press the power button again to turn the receiver off. If the radio was left on when the ignition was last turned off, the receiver will turn on automatically when the ignition switch is again turned on. -
Page 8: Beep Tone
Balance Press the AUDIO CONTROL button (4) four times until “BAL” appears in the display. Within five seconds, turn the AUDIO CONTROL (3) clockwise (or counter clockwise) to adjust Balance between the right and left speakers from “BAL 10R” (full right) to “BAL 10L” (full left). -
Page 9: Front Panel Release
MP1311 Display (D) When the unit is off, the LCD displays the time of day. When the unit is on, the LCD automatically shows the tuner or CD display, depending on which mode of operation is currently activated. Display Clock During tuner or CD operation, press D (9) to display the time of day. -
Page 10: Tuner Operation
TUNER OPERATION AM/FM Band Selector (BAND) Press BAND (5) during radio play to switch between three FM bands and one AM band. “F1”, “F2”, “F3” or “AM” will appear in the display to indicate the band currently selected. Tuning Automatic Tuning Press the Up Tuning (14) button to tune upward in frequency and the Down Tuning (13) button to tune downward in frequency. - Page 11 MP1311 Repeat for the remaining five presets on the current band and for all presets on the other three bands. Automatically Store / Preset Scan (AS/PS) Automatically Store Select six strong stations and store them in the current band using the Automatic Store feature. To enable this feature, press and hold AS/PS (17) for more than two seconds.
-
Page 12: Cd Player Operation
CD PLAYER OPERATION Insert CD With the label surface facing up, gently insert the disc into the CD slot (21) until the soft- loading mechanism engages and pulls the disc in. Disc play begins, “CDP PLAY” will appear in the display, and the CD icon will become animated. -
Page 13: Cd Player Error Codes
MP1311 Disc Repeat (RPT) Press RPT (25) during disc play to continuously repeat the selected track. “S--RPT” will appear in the display. Press RPT again to stop repeating. “S--RPT” will disappear from the display, and regular play will resume. The repeat function will also be canceled when activating the scan or shuffle functions. -
Page 14: Mp3/Wma Operation
MP3/WMA OPERATION MP3 and WMA (Windows Media Audio) music files are digital audio files that are compressed to allow more files on a single CD. This unit can play MP3/WMA directly from files contained on a CD-R/RW using the buttons on the receiver (or optional remote) as described below. - Page 15 MP1311 Entering ID3 Tag This unit supports ID3 tag versions 1.0 and 1.1. For the character codes, refer to the table below. Entering File and Folder Names Names using the code list characters are the only file names and folder names that can be entered and displayed.
-
Page 16: Track Select
You may be able to set the order in which MP3/ WMA are to be played by writing them onto a disc such as a CD-R with their file names beginning with play sequence numbers such as "01" to "99". For example, a disc with the following folder/file hierarchy is subject to Folder Search, File Search or Folder Select as shown below. -
Page 17: Display Information
MP1311 button (5) to begin the search, or wait a few seconds for the search to begin automatically. You can also turn the rotary to access and file numbers sequentially. After locating the desired file, press the BAND/ENTER button (5) or AUDIO CONTROL button (4) to begin playback. -
Page 18: Remote Control
REMOTE CONTROL The remote control will allow you to control the basic functions of the MP1311. The remote control sensor is located on the left side of the front panel to the right of the MONO button (18). AMS = AS/PS PEQ = EQ MOD = MODE LOC = Local/Distant... -
Page 19: Care And Maintenance
MP1311 CARE AND MAINTENANCE CD Player The following guidelines will help you extend the life of your CD player: When cleaning the vehicle interior, do not get water or cleaning fluids on the unit. The CD player will not operate properly in extreme hot/cold or under damp conditions. -
Page 20: Troubleshooting
TROUBLESHOOTING Problem Does not operate (display does not No power to yellow wire; no power to red wire light) No power to unit Not all speakers operate Speaker wires shorting to chassis ground or to Blows fuses CD skips too much Receiver mount is not solid or backstrap is not Cause Check connection with test light;... -
Page 21: Specifications
MP1311 SPECIFICATIONS CEA Power Ratings Power output: 13 watts RMS X 4 channels into 4-ohms @ < 1% THD+N Signal to noise ratio: 70dBA below reference. (Reference: 1 watt, 4-ohms) Frequency response: 20Hz to 20kHz (-3dB), Auxiliary input used as source reference Reference supply voltage: 14.4VDC CD Player Signal-to-noise ratio: >90dBA... -
Page 22: Limited Warranty
CD or Multimedia Radios/Headunits Audiovox Electronics Corporation (“the Company”) is committed to quality and customer service, and are pleased to offer you this Warranty. Please read it thoroughly and contact the Company at 1-800- 323-4815 with any questions. Who is covered? The Company extends this warranty to the original retail purchaser of products purchased through an authorized Audiovox retailer in the U.S.A., Puerto Rico or Canada. - Page 24 Audiovox Electronics Corporation 150 Marcus Boulevard Hauppauge, NY 11788 1-800-323-4815 www.audiovox.com ©2007 Audiovox v.083107...
Need help?
Do you have a question about the Phase Linear MP1311 and is the answer not in the manual?
Questions and answers