Table of Contents
Advertisement
Quick Links
Advertisement
Table of Contents

Related Manuals for Phase Linear UV8020


Summary of Contents for Phase Linear UV8020
- Page 1 Installation and Operation Manual...
-
Page 2: Table Of Contents
CONTENTS Thank you for choosing a Phase Linear product. We hope you will find the instructions in this owner's manual clear and easy to follow. If you take a few minutes to look through it, you'll learn how to use all the features of your new Phase Linear UV8020 Mobile Multimedia Receiver for maximum enjoyment. -
Page 3: Preparation
Disconnecting the Battery ID3 Tag Compatible Directory Search (MP3 / WMA Only) You will need these tools and supplies to install your UV8020: To prevent a short circuit, be sure to turn off the ignition and Direct Track Access via Remote Control Torx type, flat-head and Philips screwdrivers remove the negative (-) battery cable prior to installation. -
Page 4: Installation
UV8020 INSTALLATION ISO DIN Installation CAUTION: For proper operation of the CD player, the This unit is designed to fit into a 2.0 DIN dashboard opening, chassis must be mounted within 30° of horizontal. Make found in many imported cars. The unit has threaded holes in sure the unit is mounted within this limitation. - Page 5 Using the Cosmetic Trim Ring Two cosmetic trim rings are packaged with the UV8020 for installation flexibility. The UV8020 will fit into most import dashes with little or no modification to the dash board/caVity.
- Page 6 ~L!J GREENIBLACK(-) Z:rt: '¥G~EEN'(:) WHITEIBLACK(-) " )(!n) DIiil " ; :c '" '" ..§~ BLACK ,;§0 .l>- GREENlWHITE (+) !REVERSE[ BLUE l~& ··_···_·" "~. i~ ~ ", WHITE WHITE v' = w "'''",00' RearVideo2 YELLOW 1OlI_ ~ = W <...
-
Page 7: Controls And Indicators
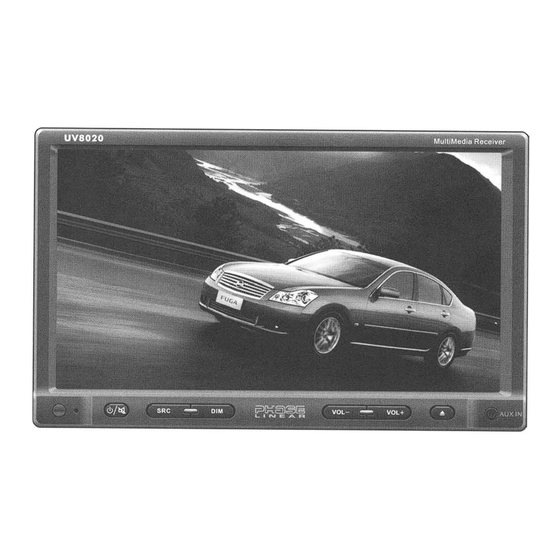
UV8020 CONTROLS AND INDICATORS 1. POWERIMUTE Press to turn the unit on. Press and hold to turn the unit off. UV8020 MultiMedia Receiver When on, press to silence the receiver. Press again to resume the previous volume level. 2.SRC Press to select playing mode (SO, AV IN, DISC, Tuner). -
Page 8: Remote Control
UV8020 REMOTE CONTROL Table 1: Remote Control Functions Button Function Name Ref# TUNER CD/MP3 MENU Enters the main menu of the disc TITLE Enters the title menu of the disc MUTE Toggles audio output on/off Toggles audio output on/off Toggles audio output on/off... - Page 9 UV8020 Table 1: Remote Control Functions Button Function Name Ref# TUNER CD/MP3 Decreases monitor tilt Decreases monitor tilt Decreases monitor tilt Decreases monitor tilt angle angle angle angle Increases monitor tilt angle Increases monitor tilt angle Increases monitor tilt angle...
-
Page 10: Using The Tft Monitor
UV8020 USING THE TFT MONITOR Open/ Close TFT Monitor Image Setting Open Monitor Table 2 shows the video output mode for each playing source. Press the EJECT button on the front panel (5) or remote control (23) to slide the monitor panel down and reveal the Table 2: Video Output Modes disc and SD card slots. -
Page 11: Operating Instructions
UV8020 OPERATING INSTRUCTIONS Power On / Off Volume Adjustment The Audio menu will automatically exit after a few seconds of inactivity. To exit quickly, touch the bottom left corner of the To increase or decrease the volume level, press the VOL-I+ <!>/hil... - Page 12 UV8020 NOTE: If the unit is reset while DVD is playing, the DVD resumes play once the reset is complete.
-
Page 13: Dvd Setup Menu
UV8020 DVD SETUP MENU Table 4: System Setup Menu During disc play, press the DVD SETUP button (29) on the Table 4: System Setup Menu remote control to access the SYSTEM SETUP menu. ASPECT RATIO 4: 3 PS With 16:9 display,... -
Page 14: Tuner Operation
UV8020 TUNER OPERATION Tuner TFT Display Recalling Station Seek Tuning Select a band (if needed). To seek the next higher station: Touch an on-screen preset button (4) to select the »1 Touch the button on screen. corresponding stored station. »1 Press the button (18) on remote control. -
Page 15: Dvdivcd Video Operation
UV8020 DVDIVCD VIDEO OPERATION also change the source by touching the top left corner to Stopping Playback NOTE: When properly installed, DVD video cannot be display the "SOURCE" menu. Select "DISC" to access DVD Touch the. button on screen or on the remote control (14) to displayed on the main TFT screen unless the parking mode. - Page 16 UV8020 TITLE: Press to display the title or chapter list. Use the To delete the list, highlight "CLEAR" and then press OK. 1/4 ENG - English is the selected subtitle language Press PROG to exit the programmed playback screen .
- Page 17 UV8020 Table 6: Disc Symbols Symbol Meaning Number of voice languages recorded. The number inside the icon indicates the number languages on the disc (maximum of 8). Number of subtitle languages available on c.~.J the disc (maximum of 32). Number of angles provided (maximum of 9).
-
Page 18: Dvd/Cd Audio Operation
Press the PROG button (34) on the remote control to Operation section for information about these topics. playback. access the programmed playback screen: The UV8020 will play music or other audio files from the Controlling Playback following disc media: Stopping Playback CD-DA Touch the. - Page 19 UV8020 CD Playback Information The following information is displayed at the top of the screen during CD playback: '<1ft 1/18 00 :03 :26 TRK ##/## - "1/18" indicates the first of 18 tracks on the CD is currently playing. - "X" indicates repeat play is OFF, "1" indicates repeat track, and "A"...
-
Page 20: Mp3/Wma Operation
Level 3 Level 2 Level 4 The UV8020 player will only recognize three folder levels and does not display folders containing only other folders. In the example above, the unit will display folders 3, 4, 6, and 8, but not 2 and 7 since they do not contain any tracks directly. - Page 21 UV8020 Controlling Playback Programmed Playback MP3 Player User Interface Press the PROG button (34) on the remote control to The on-screen indicators and touch key areas for MP3 Playing MP3IWMA Flies access the programmed playback screen: playback are outlined below.
- Page 22 UV8020 MP3 Playback Information The following information is displayed at the top of the screen during CD playback: CDram TRK 9/150 00:03:26 TRK ##/## - "9/150" indicates the ninth of 150 tracks on the disc is currently playing. c:x - "X"...
-
Page 23: Troubleshooting
UV8020 TROUBLESHOOTING Table 7: Troubleshooting Corrective Action Problem Cause GENERAL Install new fuse with correct rating Unit will not power on Radio Fuse blown Car battery fuse blown Install new fuse with correct rating Press the RESET button located in the bottom right corner of the front panel... - Page 24 UV8020 Table 7: Troubleshooting Problem Cause Corrective Action Disc does not play back Disc is warped or scratched Use disc in good condition Disc is dirty or wet Clean disc with soft cloth Laser pickup is dirty Clean laser pickup with cleaning disc...
-
Page 25: Specifications
UV8020 SPECIFICATIONS DVDICD Player CEA Power Ratings Compatible Disc Media: DVD + R / RW (Single and Dual Layer) and CD-R / RW Compatible Media Formats: CD-DA, MP3, WMA, VCD, SVCD, AVI, MPEG1 /2, XviD, and Kodak picture CD (JPEG). - Page 26 UV8020...
- Page 27 Limited Warranty DO NOT RETURN THIS PRODUCT TO THE STORE CD or Multimedia RadioslHeadunits Audiovox Electronics Corporation (''the Company") is committed to Limitations quality and customer service, and are pleased to offer you this THE EXTENT OF THE COMPANY'S LIABILITY UNDER THIS WARRANTY Warranty.
- Page 28 Audiovox Electronics Corporation Hauppauge, NY 11788 Technical Assistance: 1-800-323-4815 www.audiovox.com © 2007 Audiovox Ver.121207 Printed in China 127075001515...
- Page 29 UV8020 Mobile Multimedia Receiver Quick Start Guide 1M ORTANT: Incorrect wiring connections can damage the unit. Follow the wi ing instructions carefully, or have the installation handled by an experienced technician. « « § => 0::: « « > ...!..- ::>...
- Page 30 Vic(orv Tcch !.!.ics 110/0 INSTALLATION """ excellellce Three easy steps! Visit www.jensen.com. Click on the Victory Technology Installation Excellence Logo as shown above. Enter your product serial number (example: xxxx_xxxxxxx_xx). 'low the on-screen steps to . ' , nload the Installation Excellence program!
Need help?
Do you have a question about the UV8020 and is the answer not in the manual?
Questions and answers